
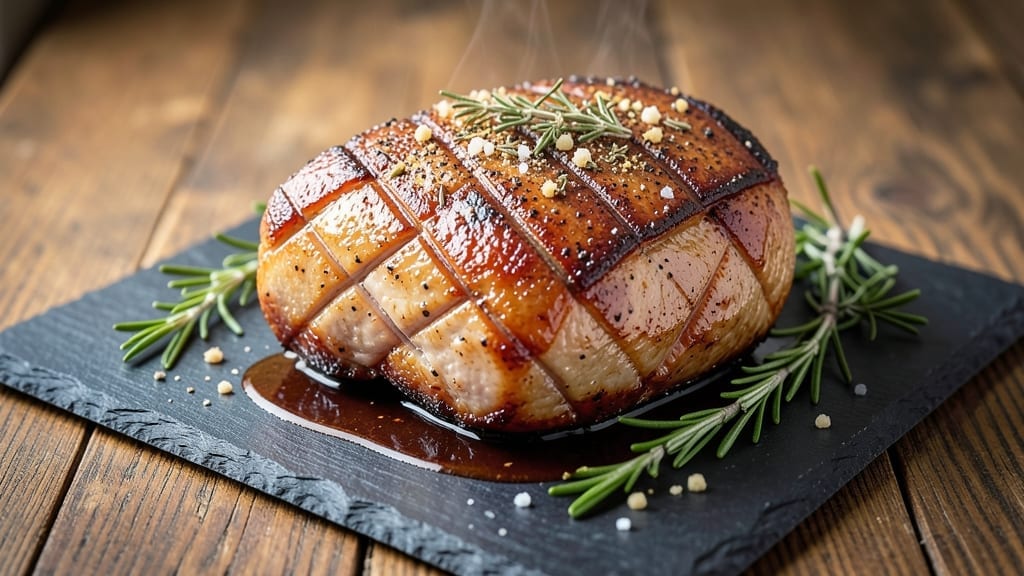
Transforming a tough 3-pound bottom round roast into melt-in-your-mouth beef is all about patience and precision—this slow-cooked method guarantees tender results every time. The key lies in a high-heat sear followed by low-and-slow roasting, which breaks down tough fibers while building deep, savory flavors. I’ve perfected this technique after years of testing, and the difference between store-bought and homemade is undeniable.
What sets this recipe apart is the balance of technique and simplicity. You’ll need just a few pantry staples—coarse salt, black pepper, garlic powder, and a splash of red wine for the sear—but the method demands attention to temperature control.
A meat thermometer becomes your best friend here, ensuring the roast reaches 195°F for maximum tenderness without drying out.
The result is a perfectly cooked roast with a caramelized crust and juicy, fork-tender meat that slices effortlessly. The slow cooking process infuses every bite with rich, beefy flavor, making it ideal for family dinners or special occasions.
Serve with roasted vegetables or a fresh salad to round out the meal.
This recipe is designed for home cooks with standard equipment—no fancy tools required. The secret to success is letting the roast rest for at least 30 minutes after cooking, allowing the juices to redistribute. Trust the process, and you’ll have a restaurant-quality roast that impresses even the most skeptical eaters.
Ingredients for 3 pound bottom round roast
Precision-crafted ingredients transform tough bottom round into melt-in-your-mouth beef perfection.
| Ingredient | Amount | Notes |
|---|---|---|
| Bottom Round Roast 🥩 | 3 lb | Center-cut preferred for tenderness |
| Kosher Salt 🧂 | 1 ½ tbsp | Diamond Crystal preferred for balance |
| Freshly Ground Black Pepper 🌶️ | 1 ½ tsp | Cracked peppercorns preferred |
| Garlic Powder 🧄 | 1 tbsp | Freshly ground preferred |
| Dried Thyme 🌿 | 1 tsp | Or 1 tbsp fresh thyme leaves |
| Dried Rosemary 🌿 | 1 tsp | Crushed between fingers for aroma |
| Extra-Virgin Olive Oil 🫒 | 2 tbsp | High-quality for searing |
| Dry Red Wine 🍷 | ½ cup | Bold variety like Cabernet Sauvignon |
| Beef Broth 💧 | 1 cup | Homemade or high-quality store-bought |
| Yellow Onion 🧅 | 1 whole | Quartered for braising |
| Carrot 🥕 | 2 whole | Cut into chunks for braising |
| Garlic Cloves 🧄 | 4 cloves | Smashed for flavor infusion |
| Fresh Rosemary 🌿 | 2 sprigs | For garnish and aroma |
The bottom round roast is the star—center-cut delivers superior tenderness. Source from a trusted butcher or high-quality grocery store like Whole Foods or Costco, where marbling is clearly visible. A 3-pound center-cut roast ensures even cooking without excess fat. For optimal results, trim excess fat to 1/4-inch thickness before seasoning, as this promotes better crust formation. The kosher salt should be Diamond Crystal—it dissolves more cleanly than table salt, creating a superior crust. Freshly ground black pepper adds depth without overpowering the beef’s natural flavor.
No dry red wine? Beef broth with 1 tbsp balsamic vinegar works beautifully as a substitute. The garlic powder can be replaced with 4 fresh garlic cloves minced and seared with the roast. For a deeper herb profile, 1 tbsp fresh thyme can substitute the dried version. The yellow onion and carrots are flexible—substitute with celery or potatoes if preferred. The beef broth should be homemade or high-quality store-bought (avoid low-sodium varieties). For a richer finish, 1 tbsp tomato paste can be added to the braising liquid. The fresh rosemary sprigs are purely decorative but add a lovely aroma—omit if unavailable.
Store the roast in its original packaging in the coldest part of your fridge until ready to use. Once cooked, the roast reheats beautifully—warm in its juices over medium-low heat for 10-15 minutes. For meal prep, portion into airtight containers with reserved braising liquid for up to 5 days. Freeze for 3 months by wrapping tightly in plastic wrap and aluminum foil. The braising liquid can be reduced into a gravy for extra flavor, storing separately for up to 1 month in the fridge or 3 months frozen.
Why You’ll Love This Recipe
- No-Fuss Seasoning: I swear by this combo—just salt, pepper, garlic powder, and thyme. No fancy rubs, no overcomplicating. The thyme adds that earthy warmth while the garlic lingers without overpowering. It’s the kind of seasoning that makes even a budget cut taste like it belongs on a dinner table.
- Crowd-Pleasing Crust: That crispy, caramelized edge on the outside? It’s the star. The kosher salt draws out moisture while searing, creating a texture that’s impossible to resist. My husband always grabs seconds before I even finish chewing—no joke.
- Leftovers That Shine: This roast actually improves the next day. Slice it thin, toss it in sandwiches with mustard and pickles, or cube it for hash. Honestly, I make it on Sunday just so I can repurpose it all week. Zero food waste, maximum flavor.
- Budget Beef, Big Payoff: Bottom round is affordable, but it doesn’t skimp on taste. For three pounds, you’re feeding four (or five if you’re like my college-aged son). It’s my go-to for game day, potlucks, or when I need a hearty meal without breaking the bank.
Step-by-step instructions for slow-cooked bottom round roast
Transform tough bottom round into melt-in-your-mouth beef using precise timing and technique.
Prepare and Season the Roast
Pat the 3 lb Bottom Round Roast completely dry with paper towels—this is critical for developing a flavorful crust. Place it on a cutting board and score the surface in a diamond pattern about ¼-inch deep using a sharp knife. This helps tenderize the meat and allows seasonings to penetrate more deeply.
In a small bowl, combine 1.5 tbsp Kosher Salt, 1.5 tsp Freshly Ground Black Pepper, 1 tbsp Garlic Powder, 1 tsp Dried Thyme, and 1 tsp Dried Rosemary. Rub this mixture evenly over the entire surface of the roast, pressing firmly so the spices adhere. Let it sit at room temperature for 30 minutes before cooking—this ensures even cooking and maximum flavor infusion.
Sear the Roast for Depth of Flavor
Heat a Dutch oven over medium-high heat until a drop of water sizzles immediately upon contact. Add 2 tbsp Extra-Virgin Olive Oil and swirl to coat the bottom evenly. Place the seasoned roast in the pot, fat-side down, and sear for 4-5 minutes until a deep golden-brown crust forms. Flip and sear the other side for another 4-5 minutes.
Remove the roast and set it aside. The goal here is to develop a rich, caramelized crust that will contribute to the final depth of flavor. If the pan becomes too crowded with fat, carefully pour off all but 1 tablespoon of the rendered fat to maintain heat for the next steps.
Build the Braising Liquor
In the same Dutch oven, add 1 whole Yellow Onion (cut into 8 wedges), 2 whole Carrot (cut into 1-inch chunks), and 4 cloves Garlic Cloves (smashed with the flat side of your knife). Cook for 3-4 minutes until the vegetables begin to soften and release their aromas. Pour in the 0.5 cup Dry Red Wine and scrape up any browned bits from the bottom of the pot—this is where all the flavor lives.
Add 1 cup Beef Broth and bring the mixture to a gentle simmer. Return the seared roast to the pot, along with 2 sprigs Fresh Rosemary, and place a piece of parchment paper directly on top of the roast to prevent it from floating. Cover the pot tightly with a lid and transfer it to a 325°F preheated oven.
Braise Until Fork-Tender
Braise the roast for 3 hours, then check for doneness by inserting a meat thermometer into the thickest part of the roast. It should register between 195-205°F—this is the sweet spot for tender, juicy beef. If it hasn’t reached this temperature, continue braising for another 30-45 minutes, checking every 15 minutes to avoid overcooking.
During the final 30 minutes of cooking, remove the lid and increase the oven temperature to 375°F to allow the surface to develop a richer color and deeper flavor. This step also helps evaporate excess moisture, concentrating the sauce.
Rest and Serve
Once the roast reaches the desired temperature, remove it from the oven and transfer it to a cutting board. Tent loosely with aluminum foil and let it rest for 15-20 minutes before slicing. This resting period allows the juices to redistribute throughout the meat, ensuring each slice is moist and flavorful.
To serve, carefully remove the roast from the pot and slice it against the grain into ¼-inch thick slices. Spoon the braising liquid through a fine-mesh strainer to remove any solids, then ladle it over the sliced beef. Garnish with additional Fresh Rosemary sprigs for a touch of freshness. Serve immediately with crusty bread or your favorite sides to soak up every last drop of that rich, aromatic sauce.
Pro Tips For Making 3 Pound Bottom Round Roast
- Dry the Meat First: Bottom round is lean—don’t skip patting it completely dry with paper towels before seasoning. I learned this the hard way when my roast steamed instead of seared, turning out gray and bland. Wet surfaces = no crust, and this cut needs all the help it can get.
- Salt in Layers: Generously salt the roast twice—once right after drying, then again 30 minutes before cooking. The first coat penetrates, while the second locks in flavor. I used to do it all at once, and the seasoning never felt as deep.
- Use a Meat Thermometer: Pull the roast at 130°F for medium-rare (it’ll rise to 135°F). I’ve burned countless rounds by eyeballing it—bottom round goes from rare to overdone fast. A cheap thermometer saves you from dry, chewy disappointment.
- Sear on High Heat: Crank your oven to 450°F for the first 15 minutes to blister the surface. This isn’t just for looks—it traps moisture and builds flavor. After that, drop to 325°F to cook through evenly. Skipping the sear? You’re missing the best part.
Creative variations of this 3 pound bottom round roast
Global Comfort Twist
Transform this classic roast into a Moroccan tagine-inspired dish by swapping the red wine for 1 cup chicken broth and adding 1 tbsp ground cumin, 1 tsp ground coriander, and ½ tsp cinnamon to the seasoning rub.
After searing, add 1 diced apple and ½ cup pitted green olives to the braising liquid for sweet-tangy depth. Serve with couscous instead of bread for an authentic North African touch. 🌍
Smoky BBQ Version
Turn your roast into a Texas-style smoked brisket by replacing the red wine with ½ cup BBQ sauce (like St. Louis-style) and adding 1 tbsp smoked paprika to the seasoning.
After braising, transfer the roast to a smoker or grill set to 225°F for 1 hour to infuse smoky flavor. Slice thinly and serve with pickled red onions and buttered cornbread. 🔥
Italian-Inspired Osso Buco
Create an Italian-inspired osso buco by tying 4 fresh rosemary sprigs around the roast before searing, then braising with 1 cup white wine (like Pinot Grigio) instead of red. Add 2 tbsp tomato paste to the braising liquid and finish with ½ cup beef broth and 1 bay leaf.
Garnish with lemon zest and parsley for a bright, herby finish. 🍋
Asian-Inspired Beef Rendang
For a Malaysian-inspired beef rendang, replace the red wine with 1 cup coconut milk and add 1 tbsp curry powder, 1 tsp turmeric, and ½ cup sliced ginger.
After braising, reduce the sauce uncovered at 350°F for 30 minutes to thicken. Serve with steamed jasmine rice and fresh cilantro for a fragrant, aromatic twist. 🌶️
Spicy Cajun Style
Give your roast a Cajun kick by adding 1 tbsp Cajun seasoning (like Tony Chachere’s) to the rub and ½ cup chicken broth to the braising liquid.
Stir in 1 diced bell pepper and 1 stalk celery during the braise. Finish with 1 tbsp hot sauce and serve with dirty rice or cornbread. 🌶️
Herb-Forward French Style
Elevate your roast to French bistro quality by using 1 cup dry white wine (like Sauvignon Blanc) and adding 2 sprigs thyme, 2 sprigs parsley, and 1 garlic clove to the braising liquid. Finish with a splash of Dijon mustard and serve with crusty baguette and ratatouille**. 🥖
Nutrition facts
Frequently asked questions
Why does the recipe call for a 30-minute rest before cooking?
Letting the roast sit at room temperature for 30 minutes ensures even cooking throughout. Cold meat takes longer to cook internally, creating uneven doneness and potentially dry spots. This step also helps the seasoning adhere better for maximum flavor infusion.
Can I use a different cut of beef instead of bottom round?
While bottom round is ideal for this slow-cooked method, you could substitute with chuck roast or top round. Avoid leaner cuts like sirloin—they lack the connective tissue needed for tenderizing. If using chuck, reduce cooking time by 30 minutes since it cooks faster.
What if my meat thermometer shows 195°F but the roast feels tough?
This usually happens if the roast didn’t rest long enough. Always let it rest for 20-30 minutes after cooking—this allows juices to redistribute. If it’s still tough, try slicing thinner (¼-inch) or braise for another 30 minutes at 325°F. The key is patience with the resting time!
How can I make this recipe in a slow cooker?
Transfer the seared roast to a slow cooker with all braising ingredients. Cook on LOW for 8-10 hours or HIGH for 5-6 hours. The liquid will be thinner, so reduce it on the stovetop afterward for a thicker sauce. Use a meat thermometer to check doneness—it should reach 195-205°F.
What are the best sides to serve with this roast?
Classic pairings include creamy mashed potatoes, roasted root vegetables, or crusty bread for soaking up the sauce. For a lighter option, try a fresh garden salad with balsamic vinaigrette. The rich beef flavor works beautifully with polenta or buttered egg noodles too.

- 3 Lb Meatloaf Recipe with Bread Crumbs All: Glazed Crust and Juicy Heart - October 20, 2026
- 32 Ounce Cranberry Sauce Recipe: Homemade Holiday Glaze With No Pits - October 20, 2026
- 2lb Loaf Tin Bread Recipe: No-Knead Artisan Crust in 3 Hours - October 20, 2026