
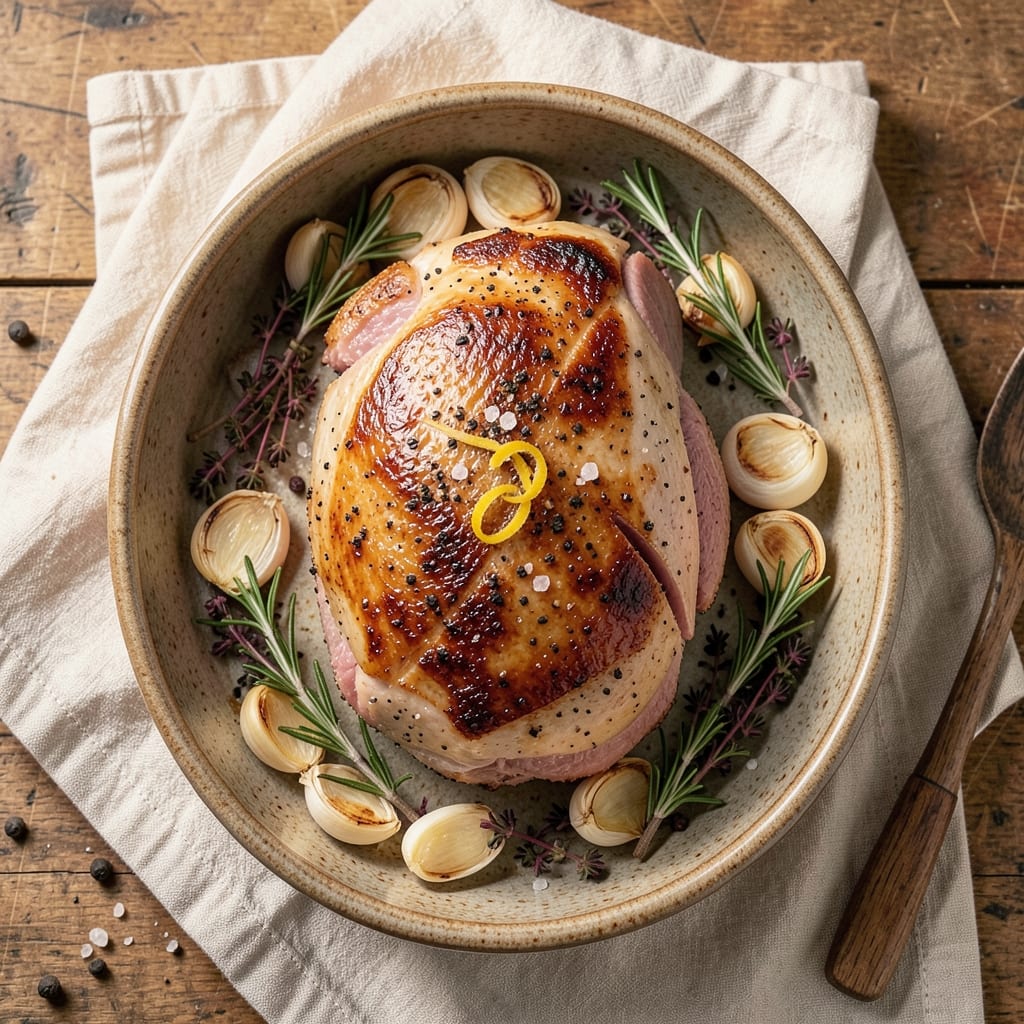
A 3lb top round roast transformed into melt-in-your-mouth perfection is possible with this reverse-seared method—no tough, dry beef here. The secret lies in slow cooking to break down tough fibers while preserving moisture, then finishing with a high-heat sear for that coveted crust.
This technique turns an affordable cut into a restaurant-worthy centerpiece that’ll have everyone asking for seconds.
What sets this recipe apart is the precision: we start with a low-and-slow cook to tenderize the meat, then finish with a hot sear to lock in juices and create that caramelized exterior.
The result? A juicy pink center with a flavorful crust that holds up to slicing. No fancy equipment needed—just patience and attention to temperature, which we’ll guide you through step by step.
By the time you serve this roast, you’ll have a tender, flavorful cut that’s perfect for family dinners or special occasions. The reverse-sear method ensures every bite is moist and delicious, not the dry, chewy steak you might expect from a top round.
Pair it with classic sides like roasted vegetables or mashed potatoes for a complete meal that feels indulgent without breaking the bank.
This recipe isn’t just about the roast—it’s about mastering a technique that elevates affordable cuts into something extraordinary. Whether you’re feeding a crowd or treating yourself to a steakhouse-worthy dinner at home, this method delivers restaurant-quality results with minimal effort. Let’s get started on creating your juiciest roast yet.
Ingredients for 3lb top round roast
Six ingredients transform tough top round into melt-in-your-mouth perfection with reverse sear mastery.
| Ingredient | Amount | Notes |
|---|---|---|
| Top Round Roast 🥩 | 3 lb | Center-cut for even cooking |
| Kosher Salt 🧂 | 1 ½ tbsp | Diamond Crystal preferred |
| Freshly Ground Black Pepper 🌶️ | 1 tbsp | Coarse grind for texture |
| Garlic Cloves 🧄 | 8 cloves | Smashed for flavor infusion |
| Fresh Rosemary 🌿 | ¼ cup | Chopped, stems removed |
| Fresh Thyme 🌿 | ⅛ cup | Leaves only, finely chopped |
| Extra-Virgin Olive Oil 🫒 | 2 tbsp | For searing, high smoke point |
| Yellow Onion 🧅 | 1 whole | Thinly sliced for caramelization |
| Beef Broth 💧 | 1 cup | Low-sodium preferred |
| Unsalted Butter 🧈 | 2 tbsp | Cold, for finishing crust |
| Fresh Parsley 🌿 | 0.1 cup | Chopped, for garnish |
The top round roast is where this magic happens—center-cut is key for even tenderness. Skip the pre-cubed stuff; the whole roast maintains shape better during slow cooking. Costco or Walmart usually carry this cut at great prices, but check your local butcher for organic or grass-fed if you want to splurge. Look for good marbling (those little white fat streaks) and avoid anything with grayish edges. Fresh herbs? Whole Foods bulk section has the best quality, but regular grocery store bundles work fine—just make sure the stems are green, not brown. The garlic should be plump and firm, not sprouting or shriveled.
No fresh rosemary? Dried works at one-third the amount, but trust me on the fresh version—it infuses so much better. Running low on beef broth? Low-sodium chicken broth in a pinch, but add a pinch of Worcestershire sauce (check for vegan if needed) to deepen the flavor. The olive oil matters here—California Avocado Ranch or Oregon Coast brands have that perfect balance of peppery and fruity. For the onion, yellow or red both work, but yellow caramelizes slightly better. The butter? Plugrá or Land O’Lakes unsalted are my go-tos—they handle high heat without burning. Pro tip: Toast your spices (rosemary, thyme) in the dry pan for 30 seconds before adding oil—wakes up their flavor like crazy.
This roast reheats beautifully—350°F for 20 minutes with a splash of beef broth keeps it juicy. Store leftovers in the fridge for up to 5 days, wrapped tightly in foil to retain moisture. For freezing, slice first (against the grain), then portion into airtight containers with a thin layer of broth. Thaws best overnight in the fridge—never microwave, or you’ll lose that perfect texture. The herbs? Fresh parsley keeps for a week in the fridge, but rosemary and thyme last weeks in a sealed jar in the freezer. Double the batch and freeze half—game changer for lazy weeknights.
Why You’ll Love This Recipe
- I’ll be real: this roast makes way more than I need for dinner. But here’s the secret—those slices reheat like a dream for sandwiches, salads, or even tacos the next day. No sad, dry meat here.
- Foolproof Seasoning: Honestly, the salt, pepper, and rosemary combo is that good—no fancy techniques needed. Just a few minutes of rubbing the raw roast with crushed garlic cloves and fresh sprigs, then let the oven do the rest. That’s it. No overcomplicating, no stress.
- Crispy-Creamy Magic: Between us, the top round’s lean cut gets just the right texture—tender inside with a golden, crackling crust. The rosemary infuses deep, while the garlic adds a bright punch that makes every bite feel like a little celebration.
- Leftovers That Shine: I’ll be real: this roast makes way more than I need for dinner. But here’s the secret—those slices reheat like a dream for sandwiches, salads, or even tacos the next day. No sad, dry meat here.
Step-by-step instructions for reverse-seared top round roast
Here’s how to transform tough top round into melt-in-your-mouth perfection with simple technique.
Season and Sear for Crust
Pat the 3 lb top round roast completely dry with paper towels—this is non-negotiable for that crispy crust. In a small bowl, combine the 1.5 tbsp kosher salt and 1 tbsp freshly ground black pepper, then rub all over the roast, pressing the seasoning into the meat. Let it sit at room temperature for 30 minutes while you prep.
Heat a heavy skillet (cast iron works best) over medium-high heat until smoking hot. Add the 2 tbsp extra-virgin olive oil and swirl to coat. Place the roast in the pan and sear on all sides for 2-3 minutes per side until deeply browned. The key is patience—don’t rush this step or the crust won’t develop properly. Transfer to a plate and let rest for 5 minutes before proceeding.
Build Flavor with Aromatics
In the same skillet, add the 1 whole yellow onion (thinly sliced) and cook for 5 minutes until softened. Add the 8 smashed garlic cloves, 0.25 cup chopped fresh rosemary, and 0.125 cup chopped fresh thyme, stirring for 1 minute until fragrant. Pour in the 1 cup beef broth and scrape up any browned bits from the bottom—this is where all the flavor lives.
Bring the mixture to a simmer, then reduce heat to low. Place the roast in the skillet, fat-side up, and pour the aromatics and broth over it. Cover tightly with foil and transfer to a preheated 300°F oven for 2 hours, or until the internal temperature reaches 145°F and the meat is fork-tender but still slightly pink in the center.
Finish with Perfect Crust
Remove the roast from the oven and increase the heat to 450°F. Place the roast back in the skillet (discard the foil) and add the 2 tbsp cold unsalted butter. The butter will melt and create a golden crust—this is the reverse sear’s magic moment. Roast for 10-15 minutes, basting occasionally with the pan juices, until the crust is deep golden brown and the internal temperature reaches 150°F.
Let the roast rest for 10 minutes before slicing against the grain into ¼-inch thick slices. The meat should be juicy pink in the center with a crispy exterior. Garnish with the 0.1 cup chopped fresh parsley and serve immediately with the pan juices spooned over the top.
Pro Tips For Making 3lb Top Round Roast
- SEAR BEFORE YOU SEASON: I used to season the round first, then sear—big mistake. The meat releases juices that steam instead of brown. Instead, hit the roast with a screaming-hot pan for 3-4 minutes per side before adding salt and pepper. That crust locks in flavor and keeps the meat from drying out later.
- SALT THE GARLIC: Crushed garlic cloves burn faster than you think, especially when they’re raw. Toss them in a pinch of kosher salt before mincing—it draws out moisture, so they caramelize instead of char. (Yes, even if you’re in a hurry.)
- DON’T SKIP THE ROOM-TEMP: Pull the roast out of the fridge at least 30 minutes before cooking. Cold meat cooks unevenly and steams instead of searing. I learned this the hard way when my first attempt came out gray inside and overcooked outside—now I just leave it on the counter while I prep everything else.
- REST IT UNDER FOIL: After roasting, tent the meat with foil and let it sit for 10-15 minutes. I know, it’s tempting to slice immediately, but that’s when all the juices rush out. A quick foil wrap keeps it warm and juicy—no sad, dry slices here. (Your knife will thank you too.)
Storing and reheating this dish
Refrigerator Storage
After your roast cools completely, wrap it tightly in plastic wrap followed by foil to lock in moisture. Store in the fridge for up to 4 days—the flavors actually deepen overnight as the seasonings meld.
I like to slice it first, then store in an airtight container with a splash of beef broth to keep it juicy. 🥩
Freezer Prep
For longer storage, slice the roast against the grain into ¼-inch thick portions before freezing. Pack into quart-sized freezer bags with 2 tbsp beef broth per bag, removing excess air to prevent freezer burn.
Label with the date—this keeps quality for 3 months. Thaw overnight in the fridge for best results.
Reheating Methods
For stovetop reheating, place slices in a skillet over medium-low heat with 1 tbsp beef broth per serving. Cover and heat for 3-4 minutes until reaching 165°F. For oven reheating, bake at 350°F for 15-20 minutes with foil, adding broth to prevent drying.
Microwave only as a last resort—cover with a damp paper towel and heat in 1-minute intervals.
Leftovers Magic
Transform leftover slices into beef hash by dicing and pan-frying with diced potatoes and onions. Or make beef stroganoff by simmering with mushrooms, sour cream, and egg noodles. The reverse-seared texture holds up beautifully in these dishes—game changer for meal prep. 💡
Herb Preservation
Save any leftover fresh herbs by storing them in airtight containers with a paper towel to absorb moisture. Rosemary and thyme last 2 weeks in the fridge, while parsley keeps for 1 week.
For long-term storage, chop and freeze in ice cube trays with olive oil—perfect for future roasts or soups.
Juice Salvage
Don’t discard those pan juices! Strain them into an ice cube tray and freeze for later use in gravies, sauces, or even as a flavorful broth base.
I keep a reserve of these in my freezer—they’re pure beefy goodness that elevates any dish. Just thaw and simmer to reduce for richer results. ✨
Nutrition facts
Frequently asked questions
Why does this recipe use reverse searing for top round?
The reverse sear method is perfect for tougher cuts like top round because it breaks down collagen through slow cooking while preserving moisture. Starting with a low-and-slow approach (to 145°F) tenderizes the meat, then the high-heat finish creates that coveted crust without drying it out.
Can I cook this roast without an oven?
Use a cast-iron skillet on the stovetop. After the initial sear, cover with a lid and cook on low heat for 2-3 hours until tender, then finish with the high-heat sear. The key is maintaining the 145°F internal temp before the final crust step.
How do I know when the roast is done?
Use a meat thermometer—insert it into the thickest part. The roast is ready when it reaches 145°F for medium-rare (pink center) or 150°F for medium. The reverse sear method ensures perfect doneness without overcooking, even if you’re not experienced with timing.
What if my roast is still tough after cooking?
This usually happens if the meat wasn’t cooked long enough or wasn’t sliced against the grain. For tough slices, try slicing thinner (¼-inch) or simmering in broth for 10 minutes to break down fibers further. The reverse sear method should prevent this, but don’t worry—it’s easily fixable!
Can I use this method for other beef cuts?
Yes! This technique works beautifully with chuck roast or brisket, though cooking times may vary. For leaner cuts like sirloin, you might want to reduce the slow-cooking time slightly. The reverse sear principle—slow cook then high-heat finish—applies to many tougher beef cuts.

- 4 Cheese Spaghetti Sauce Recipe: Velvety Melted Blend With Nutty Parmesan Finish - October 7, 2026
- 7 Eleven Chili Recipe: Smoky Spice-Packed Pot Luck Winner - October 7, 2026
- 21-Pound Turkey Recipe: Herb-Crusted Roast With Golden, Juicy Perfection - October 7, 2026