
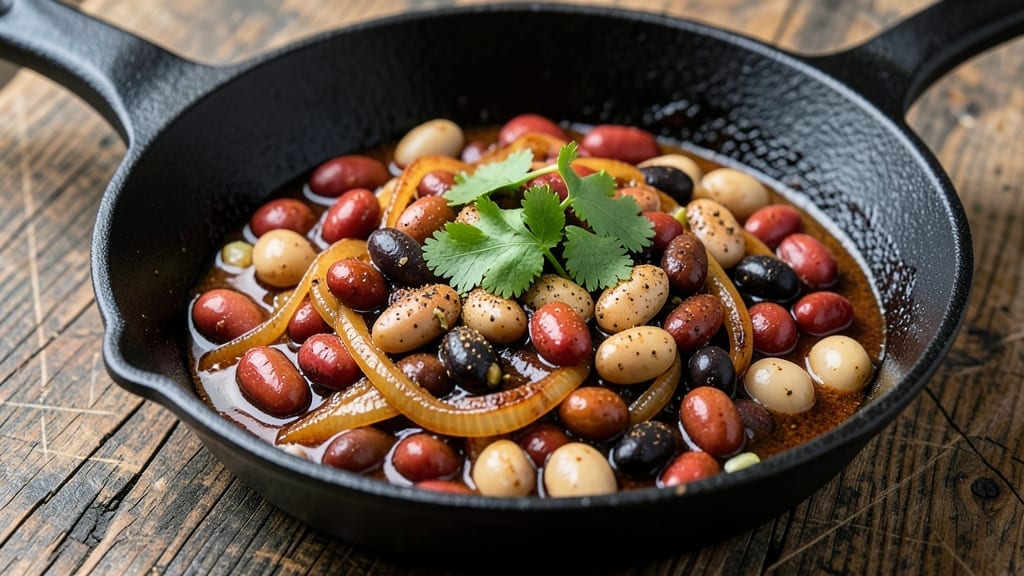
This 4 bean chilli recipe delivers the kind of hearty, smoky depth that turns weeknight dinners into comforting traditions. The secret lies in slow-simmered beans—black, kidney, pinto, and anasazi—infused with cumin, smoked paprika, and chili powder until every spoonful is rich with flavor.
I developed this vegetarian version after years of perfecting the balance between earthy spices and tender beans, ensuring it satisfies even meat lovers.
The beauty of this chili lies in its adaptability. Whether you simmer it on the stovetop for 3 hours or let your slow cooker work its magic for 6-8 hours, the flavors deepen with time.
The beans become irresistibly tender while absorbing the smoky, slightly sweet broth, creating a texture that’s both hearty and velvety. This isn’t just chili—it’s a meal in itself, packed with plant-based protein and complex flavors.
What you’ll end up with is a steaming pot of chili that smells like a cozy kitchen and tastes like a hug in a bowl. The spices create layers of warmth—smoky, slightly sweet, with just enough heat to linger.
Serve it topped with shredded cheese, sour cream, or fresh cilantro for brightness, and you’ve got a dish that’s perfect for game days, chilly evenings, or whenever you need comfort on a plate.
This recipe scales effortlessly—double it for a crowd or halve it for leftovers (though you might not have any). The slow-cooked method means minimal effort and maximum flavor, proving that the best meals often require the most patience. Let’s get cooking!
Ingredients for 4 bean chilli
Four types of beans, earthy spices, and slow-simmered comfort in every bite.
| Ingredient | Amount | Notes |
|---|---|---|
| Black Beans 🌱 | 1 ½ cups | Dried or canned, drained |
| Kidney Beans 🌱 | 1 ½ cups | Dried or canned, drained |
| Pinto Beans 🌱 | 1 ½ cups | Dried or canned, drained |
| Anasazi Beans 🌱 | 1 cup | Dried or canned, drained |
| Onion 🧅 | 1 whole | Yellow or red, diced |
| Garlic Cloves 🧄 | 4 cloves | Minced or finely chopped |
| Ground Cumin 🌿 | 2 tbsp | Toasted for deeper flavor |
| Smoked Paprika 🌶️ | 2 tbsp | For authentic smoky flavor |
| Chili Powder 🌶️ | 2 tbsp | Medium heat preferred |
| Vegetable Broth 💧 | 4 cups | Low-sodium preferred |
| Tomato Paste 🍅 | ½ cup | Smooth texture preferred |
| Extra-Virgin Olive Oil 🫒 | 2 tbsp | For richness and flavor |
| Cocoa Powder 🍫 | 1 tbsp | Unsweetened, for depth |
| Salt 🧂 | 1 ½ tsp | Adjust to taste |
| Black Pepper 🌶️ | ½ tsp | Freshly ground preferred |
The beans are the heart of this chili, so don’t cut corners. Dried beans give the best texture, but canned works in a pinch—just rinse them well. I always grab mine from Trader Joe’s or the bulk section at Whole Foods; they’re fresher than the store brands. Look for organic or heirloom varieties if you want extra flavor depth. The Anasazi beans are the star—they’re smaller and hold their shape better than others. If you can’t find them, swap in more kidney beans. For the spices, Penzeys or even the bulk bins at your local grocery store will have what you need—just make sure they smell fresh, not dusty.
No smoked paprika? Regular paprika plus a pinch of liquid smoke gets you close, but it’s not the same. Running low on cocoa powder? Espresso powder at half the amount adds depth without bitterness. The tomato paste can be the squeeze-tube kind from Trader Joe’s—it’s perfect for this recipe and lasts forever. Fresh garlic is ideal, but jarred minced garlic works fine if you’re in a hurry. The onion can be yellow, red, or even Vidalia—just make sure it’s fresh. If you’re using dried beans, soak them overnight or use the quick-soak method (boil for 2 minutes, then let sit for an hour).
This chili tastes even better the next day—trust me on that. Store it in an airtight container in the fridge for up to 5 days, or freeze portions for 3 months. I like to portion it into individual containers so I can grab a bowl straight from the freezer on lazy mornings. The flavors meld beautifully over time, so don’t rush it. If you’re making it ahead for a party, reheat it gently on the stove or in the microwave with a splash of broth to keep it moist. Leftovers reheat just as well as the original, so make extra.
Why You’ll Love This Recipe
- Throw-In-The-Cabinet Beans: I swear by the pantry magic of this chili—no fancy shopping list, just whatever dried beans I’ve got lurking. Black, kidney, pinto, and Anasazi? They’re all interchangeable, so if you’re missing one, no stress. The onions caramelize while you stir, and suddenly, you’ve got a pot bubbling with something that smells like home.
- Smoky Deep Umami: That’s the secret—slow-simmered onions until they’re sweet and jammy, then layered with earthy beans and a touch of heat. The Anasazi beans add a nutty crunch, while the kidney beans keep it hearty. It’s the kind of flavor that lingers, the kind that makes you reach for seconds without even thinking.
- Lunchbox Hero: Between us, this chili is my go-to for meal prep. Pack it in jars or containers, and it stays rich and satisfying for days—perfect for lunches, potlucks, or even a last-minute dinner when you’re running late. Honestly, I’ve fed a crowd with this, and no one ever complains about leftovers.
- Budget-Friendly Powerhouse: Dried beans are my wallet’s best friend—cheaper than canned, and they soak up flavors like sponges. A big batch feeds my family for days, and the onions stretch into every bite. Plus, the longer it sits, the better it tastes—proof that good food doesn’t have to break the bank.
Step-by-step instructions for slow-simmered 4 bean chilli
Here’s how to build rich, smoky layers of flavor that develop as this hearty chilli simmers.
Sauté Aromatics Until Deeply Fragrant
Heat the 2 tablespoons extra-virgin olive oil in a large Dutch oven over medium heat until shimmering. Add the diced whole onion and cook for 5-6 minutes until softened and translucent, stirring occasionally. Here’s the thing—don’t rush this step. You want the onions to caramelize slightly, which builds sweet depth that carries through the entire chilli.
Add the 4 cloves minced garlic cloves and cook for 30 seconds until fragrant but not browned. The garlic should sizzle gently—if it starts to color too quickly, reduce the heat slightly. This aromatic base forms the flavor foundation for everything that follows, so take your time here. I like to press the garlic into the onions with a spoon for an extra boost of flavor.
Toast Spices for Maximum Flavor
Add the 2 tablespoons ground cumin, 2 tablespoons smoked paprika, and 2 tablespoons chili powder to the pan. Stir constantly for 30-45 seconds until the spices are fragrant and the raw, earthy aroma gives way to something warm and inviting. This toasting step removes any bitterness from the spices and releases their essential oils, which makes all the difference in the final depth of flavor.
I know it seems like a short time, but trust me—over-toasting can make spices bitter. Watch closely and remove from heat immediately when you smell that rich, toasty aroma. The spices should look slightly darker but not burned. Let them cool in the pan for just 1 minute before adding any liquids—this prevents them from splattering when the broth hits.
Build the Base with Tomato and Broth
Stir in the ½ cup tomato paste and cook for 2 minutes until it darkens slightly and loses its raw taste. This step is crucial—it develops the tomato flavor and helps thicken the chilli as it simmers. Then pour in the 4 cups vegetable broth and scrape up any browned bits from the bottom of the pot with a wooden spoon. These bits are packed with flavor that would otherwise go to waste.
Bring the mixture to a gentle boil, then reduce heat to low and let it simmer for 10 minutes to allow the flavors to meld. You’ll notice the mixture will reduce slightly and the tomato flavor will deepen. This pre-simmer step ensures your chilli has a proper base before adding the beans and cocoa powder.
Add Beans and Simmer Until Tender
Add all 1.5 cups black beans, 1.5 cups kidney beans, 1.5 cups pinto beans, and 1 cup Anasazi beans to the pot. Stir well to combine and bring everything to a gentle simmer. The beans should be mostly submerged in the liquid—if not, add a little more broth to ensure they cook evenly. Here’s where the magic happens: simmer uncovered for 45-60 minutes until the beans are tender but still hold their shape.
I check for doneness by tasting a bean—it should be soft enough to crush between your teeth but still have a slight bite. The chilli should be thick and rich, with the beans absorbing all those smoky, spiced flavors. Stir occasionally to prevent sticking, but don’t over-stir—this can break down the beans prematurely.
Finish with Cocoa and Season to Perfection
Stir in the 1 tablespoon cocoa powder, 1.5 teaspoons salt, and ½ teaspoon black pepper. Simmer uncovered for another 10-15 minutes to allow the cocoa to develop its rich, slightly bitter notes that balance the sweetness of the beans. The chilli should be thick enough to coat the back of a spoon but still be spoonable. If it’s too thick, add a splash of broth to reach your desired consistency.
Taste and adjust seasoning—you might need a little more salt, especially if you used low-sodium broth. The chilli should have a perfect balance of smoky, spicy, and slightly sweet flavors with that deep cocoa richness. Let it rest for 10 minutes off the heat before serving. This resting period allows all the flavors to truly meld together, resulting in a chilli that’s even more flavorful than it appears.
Pro Tips For Making 4 Bean Chilli
- SOAK ANASAZI BEANS: I learned this the hard way—Anasazi beans are stubborn and won’t soften properly without soaking. Toss them in cold water for at least 4 hours (or overnight) to avoid a mushy, undercooked texture. No soaking? Expect a gummy chilli—trust me, you’ll taste the difference.
- SWEAT ONIONS LOW AND SLOW: High heat makes onions bitter, and you want that sweet, caramelized base for your chilli. Cook them over medium-low for 10-12 minutes until translucent but not browned—this builds flavor without burning. (Yes, even if you’re impatient like me.)
- DON’T SKIP THE BEAN RINSE: Canned beans have preservatives and excess sodium that can make your chilli taste flat or overly salty. Drain and rinse them thoroughly under cold water before adding to the pot—it’s a quick step that makes a real difference in texture and taste.
- USE A DUTCH OVEN FOR DEPTH: If you’re making this for a crowd, a Dutch oven guarantees even cooking and richer flavors. The thick base conducts heat better, preventing scorching while letting the beans and spices meld over 1.5–2 hours. (Your future self will thank you for skipping the skillet.)
Make-ahead tips for this 4 bean chilli
Overnight Prep
Start your beans the night before using the quick-soak method: rinse 6 cups dried beans (or 4 cups canned, drained), then cover with water in a bowl. Add 1 tsp baking soda to soften them faster.
Let sit overnight on your counter—they’ll be ready to cook in the morning without extra prep time. I swear by this method for restaurant-quality texture. 🌱
Slow Cooker Magic
For hands-off cooking, combine all ingredients in your 6-quart slow cooker and cook on low for 8 hours or high for 4-5 hours. The slow cooker’s gentle heat ensures the beans stay tender while the flavors meld perfectly.
I love making this for game days—just dump everything in before work and come home to a pot ready to serve. ⏰
Freezer-Friendly
Portion chili into quart-sized freezer bags or airtight containers, leaving 1-inch headspace for expansion. Label with the date—it keeps for 3 months without losing flavor. To reheat, thaw overnight in the fridge, then warm on the stove with 2 tbsp broth to restore moisture.
I make double batches so I always have a backup bowl ready. ❄️
Broth Boosters
Enhance your broth by adding 1 crushed bay leaf or 2 sprigs fresh thyme while simmering. Remove them before serving—they add subtle herbal depth without overpowering. For extra richness, stir in 1 tbsp tomato paste at the end of cooking. This trick makes even canned beans taste homemade. 💡
Meal Prep Hack
Cook a big batch, then store in individual 8-ounce mason jars with ½ cup chili per jar. The beans stay intact, and you can grab a jar straight from the fridge or freezer.
Reheat directly in the jar for 2-3 minutes in the microwave. Perfect for busy mornings or lunches at work. 📅
Flavor Rescue
If your chili tastes bland after reheating, boost it with 1 tsp apple cider vinegar or a pinch of sugar to balance flavors. For extra depth, stir in 1 tsp liquid smoke or a dash of hot sauce.
These quick fixes save a whole pot of chili from being tossed. Trust me, it happens to the best of us! 🔥
Nutrition facts
Frequently asked questions
Can I substitute any of the beans in this recipe?
If you can’t find Anasazi beans, swap them with white beans or more kidney beans—they hold their shape well. For extra richness, add ½ cup lentils (they cook faster). Just keep the total bean volume at 4.5 cups to maintain the right texture.
How do I adjust the spice level for kids or sensitive eaters?
Reduce the chili powder to 1 tablespoon and omit the smoked paprika. For extra mildness, stir in 1 teaspoon sugar at the end to balance any remaining heat. Kids often love the smoky-sweet flavor without the spice!
Can I make this chili in an Instant Pot?
Yes! Sauté onions and garlic, then add all ingredients except cocoa powder. Seal the lid, cook on high pressure for 15 minutes, then quick-release. Stir in cocoa powder and let sit for 5 minutes off heat. The pressure cooker cuts time by 2+ hours while keeping flavors deep.
Why did my chili turn out too thick or too thin?
For thicker chili, simmer uncovered longer to reduce liquid. If too thin, stir in 1 tablespoon cornstarch mixed with 2 tbsp water and simmer 5 minutes. The key is balance—aim for a consistency where it coats the back of a spoon but isn’t gluey.
What’s the best way to reheat leftover chili?
Reheat gently on the stove over low heat with 2 tbsp broth to restore moisture. Microwave in 1-minute intervals stirring between, or cover with a damp paper towel to prevent drying. Never reheat to boiling—this breaks down the beans.

- 12 Bean Chili Recipe: Hearty Slow-Cooked Depth With 12 Legumes - October 17, 2026
- 5 Seed Bread Recipe: Nutty Crunch and Artisan Flavor in One Loaf - October 17, 2026
- 1 Lb Macaroni Salad Recipe: Bold, Crunchy, and Crowd-Pleasing - October 17, 2026