
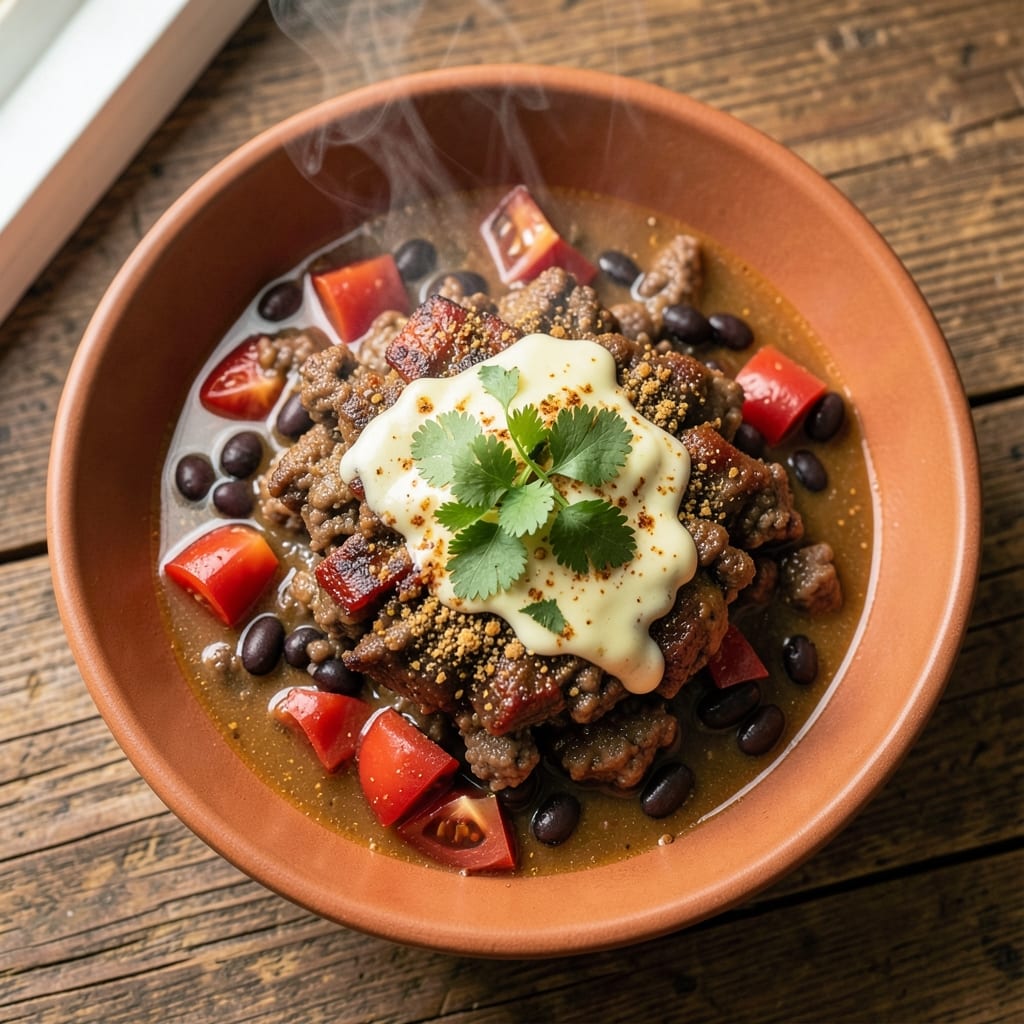
This 4-hour body chili recipe delivers the protein-packed, slow-cooked powerhouse that aligns perfectly with the 4-Hour Body philosophy—minimal prep, maximum nutrition, and bold flavors that satisfy both body and soul.
The secret lies in a high-protein blend of lean ground beef and black beans, simmered for hours to develop deep, smoky richness without sacrificing clean eating principles.
What sets this apart is the strategic balance of spices—cumin, chili powder, and cayenne—that wake up every bite while keeping the heat manageable yet invigorating.
The beauty of this chili is its foolproof simplicity: dump everything into a slow cooker, let it work its magic, and return to a thick, hearty stew that’s effortlessly adaptable.
Whether you’re meal prepping for the week or feeding a crowd, this recipe scales seamlessly while maintaining its high-protein integrity—a game-changer for those prioritizing muscle recovery or mindful eating. The key? A rich, flavorful broth that reduces naturally over time, intensifying the depth of each spoonful.
By the time you’re ready to serve, you’ll have a protein-dense, fiber-rich chili with a texture that’s velvety yet substantial—perfect for pairing with cauliflower rice, whole-grain bread, or a dollop of Greek yogurt to cool the heat.
The spices linger just enough to tantalize your palate, while the slow cook ensures tender, melt-in-your-mouth beef and beans that hold their shape. This isn’t just chili; it’s a nutritional powerhouse disguised as comfort food.
For those looking to adapt, swapping beef for lentils or turkey keeps the high-protein promise intact while catering to dietary preferences.
The recipe’s flexibility makes it a staple for weeknight dinners, meal prep, or even a satisfying solo meal—all while staying true to the 4-Hour Body ethos of efficiency and effectiveness. Let’s get cooking!
Ingredients for 4 hour body chili
Lean protein, bold spices, and slow-cooked magic—everything you need for this 4-hour body chili.
| Ingredient | Amount | Notes |
|---|---|---|
| Lean Ground Beef 🥩 | 1 ½ lb | 90% lean or higher for protein focus |
| Black Beans 🌱 | 2 cups | Drained and rinsed, or cooked |
| Diced Tomatoes 🍅 | 1 can | Fire-roasted, 15 oz can |
| Chicken Broth 💧 | 2 cups | Low-sodium preferred |
| Chili Powder 🌶️ | 2 tbsp | Smoked variety for depth |
| Ground Cumin 🌿 | 1 tbsp | Toasted for enhanced flavor |
| Cayenne Pepper 🔥 | ½ tsp | Adjust for heat preference |
| Garlic Cloves 🧄 | 4 cloves | Minced for aromatic punch |
| Yellow Onion 🧅 | 1 whole | Medium size, finely chopped |
| Bell Pepper (any color) 🍅 | 1 whole | Medium size, diced |
| Extra-Virgin Olive Oil 🫒 | 1 tbsp | For searing beef |
| Salt 🧂 | 1 tsp | Kosher or sea salt |
| Black Pepper 🌶️ | ½ tsp | Freshly ground |
| Lemon Juice 🍋 | 1 tbsp | Freshly squeezed |
The beef is your protein anchor here. 90% lean ground beef keeps it clean while delivering serious muscle-friendly protein. Grab the pre-ground chuck from the meat counter—it’s cheaper than pre-packaged and more flavorful. For the beans, black beans are non-negotiable—they hold their shape and pack fiber. If you’re prepping ahead, rinse them well to cut down on cooking time. The fire-roasted diced tomatoes add smoky depth without extra effort, and Trader Joe’s or Whole Foods carry the best quality cans—look for no added salt. Garlic and onion are the aromatic backbone, so don’t skimp: one medium yellow onion and one bell pepper (any color) give you the perfect balance of sweetness and crunch.
No chili powder? Mix 1 tbsp smoked paprika with 1 tsp cumin for a close substitute. Running low on cayenne? Aleppo pepper at half the amount gives you heat without overpowering. Fresh garlic and onion are ideal, but powdered versions work in a pinch—just double the amount. The black beans can be canned (rinsed) or cooked from dry—soak overnight for best texture. For the broth, low-sodium chicken broth keeps the sodium in check while building flavor. Want to boost protein further? Add 1 cup cooked quinoa at the end—it absorbs the broth beautifully. The lemon juice brightens everything, so fresh is key—bottled just won’t cut it.
This chili tastes even better the next day as flavors meld. Store in an airtight container in the fridge for up to 5 days, or freeze portions for 3 months. I double the batch and portion it into meal prep containers—perfect for lunches or post-workout fuel. To reheat, stir in a splash of broth or water if it’s too thick. The spices mellow slightly over time, so it’s a great make-ahead dish for busy weeks. Keep the leftovers covered to preserve that rich, smoky aroma—it’s half the battle when you’re craving a second helping.
Why You’ll Love This Recipe
- One-Pot Magic: I swear by this recipe because it’s literally dump-and-simmer. Brown the beef, toss in the black beans, tomatoes, broth, and chili powder—no chopping, no fuss. That’s it. (Yes, even on a Tuesday night when I’m too tired to think.)
- Deep, Smoky Richness: The lean beef stays tender while the chili powder and tomatoes build layers of flavor—earthy, slightly sweet, with just enough heat. Honestly, the first bite makes me pause. That’s the kind of chili that lingers.
- Meal Prep MVP: This chili tastes even better the next day, which is perfect because I make a double batch every Sunday. Divide it into containers, and you’ve got lunch or dinner covered for days—no sad leftovers here.
- Budget-Friendly Powerhouse: Lean beef and pantry staples like black beans and diced tomatoes stretch this recipe into a full week’s worth of meals. Between us, it’s the kind of dish that makes grocery day feel like a win. (And it’s cheaper than takeout.)
Step-by-step instructions for spice-infused protein chili
Here’s how to build a chili that’s packed with lean protein and bold flavors—perfect for your fitness goals.
Sear the Lean Ground Beef for Maximum Flavor
Heat the 1 tablespoon extra-virgin olive oil in a large, heavy-bottomed pot over medium-high heat. Add the 1.5 pounds lean ground beef and break it apart with a wooden spoon, ensuring even browning. Cook for 6-8 minutes until the beef loses its raw color and develops a deep caramelization—this step builds the foundation of your chili’s rich flavor.
Once the beef is fully browned, drain any excess fat (leave about 1 tablespoon for flavor) and transfer the meat to a plate. If you prefer a leaner chili, use paper towels to remove most of the fat. Here’s the thing—searing the beef first prevents the chili from becoming greasy while locking in deep, meaty flavors that simmer through the cooking process.
Sauté Aromatics Until Fragrant and Deeply Flavorful
In the same pot, add the 1 whole yellow onion and 1 whole bell pepper (any color), both finely chopped. Cook over medium heat for 5-6 minutes, stirring occasionally, until the onions soften and the peppers begin to caramelize slightly. This step is where the chili’s aromatic base develops—don’t rush it, as the onions need time to break down and release their sweetness.
Next, add the 4 cloves garlic cloves, minced, and cook for an additional 30 seconds until fragrant. Be careful not to let the garlic burn—it should smell sweet and inviting, not bitter. Stir in the 2 tablespoons chili powder, 1 tablespoon ground cumin, 0.5 teaspoon cayenne pepper, 1 teaspoon salt, and 0.5 teaspoon black pepper. Cook for 1 minute, stirring constantly, to toast the spices and deepen their flavors. This is the moment that matters: properly toasting the spices ensures they infuse the chili with their full, complex profiles.
Build the Chili Base with Beans and Tomatoes
Return the browned beef to the pot and stir to combine with the sautéed vegetables and spices. Add the 2 cups black beans (drained and rinsed if canned) and the 1 can diced tomatoes. Stir well to coat everything in the spice mixture, then pour in the 2 cups chicken broth. Bring the mixture to a gentle boil over medium-high heat, then reduce the heat to low and let it simmer uncovered for 3 hours. This long, slow cook allows the flavors to meld and the beans to absorb the rich, spicy broth.
Here’s where it gets fun—after 3 hours, taste the chili and adjust the seasoning if needed. You might need a little more salt or a pinch of cayenne for heat. The chili should be thick but still saucy, with the beans fully tender and the beef falling apart slightly. If it’s too thick, add a splash of water or broth to reach your desired consistency. Real talk: this is the step where patience pays off—the longer it simmers, the deeper the flavors.
Finish with a Bright, Tangy Twist
After the 3-hour simmer, stir in the 1 tablespoon freshly squeezed lemon juice. This final touch brightens the chili, cutting through the richness of the beef and spices while adding a refreshing contrast. Let the chili simmer for an additional 30 minutes to allow the lemon flavor to fully integrate. The lemon juice also helps balance the heat from the cayenne, making the chili more approachable without losing its spice.
Once finished, give the chili a final taste and adjust the seasoning one last time if necessary. Serve immediately while hot, garnished with a sprinkle of fresh cilantro or a dollop of Greek yogurt if you like. This chili is designed to keep well—it actually tastes better the next day as the flavors continue to develop. Store any leftovers in an airtight container in the refrigerator for up to 4 days, or freeze for up to 3 months. Your taste buds (and your muscles) will thank you!
Pro Tips For Making 4 Hour Body Chili
- CRANK THE HEAT FIRST: Lean beef loves a screaming-hot pan—no half-measures here. Get that skillet smoking for 2-3 minutes before adding the meat, or you’ll end up with gray, rubbery chunks instead of crisp edges that actually flavor the chili.
- DRAIN AND RINSE BEANS: I learned this the hard way: canned black beans taste like soup if you don’t rinse them first. Drain them, then give them a quick cold-water rinse—it cuts the excess starch and keeps your chili from turning into a gluey mess after 4 hours of simmering.
- SALT THE BROTH NOW: Add half your salt to the chicken broth before it hits the pot. Low-and-slow cooking dilutes seasoning, and if you wait until the end, your chili will taste flat no matter how much chili powder you dump in later.
- STIR THE TOMATOES IN LAST: Diced tomatoes break down into mush if simmered too long. Toss them in with the beans and broth during the final 30 minutes—this keeps their texture bright and prevents your chili from turning into a thick, tomatoey paste.
Storing and reheating this dish
Refrigerator Storage
Let your chili cool to room temperature for no more than 2 hours before transferring to airtight glass containers—I swear by Pyrex with snap-on lids for easy stacking.
Store in the fridge at 40°F or below for up to 5 days, where the flavors actually deepen as the spices meld together. The thick texture makes it perfect for meal prep—just portion into quart-sized containers for easy grab-and-go lunches. 💪
Freezer Prep Tips
For longer storage, freeze individual portions in quart-sized freezer bags—leave 1 inch of headspace to prevent expansion cracks. I like to flatten the bags to save space, and they’ll last up to 3 months without quality loss.
Label with the date so you can track freshness. Thaw overnight in the fridge for best texture—never microwave directly from frozen. ❄️
Stovetop Reheating
My preferred method is stovetop reheating over medium-low heat for 10-15 minutes, stirring occasionally. Add 2-3 tablespoons of water or broth if the chili thickens too much—this prevents sticking and restores the perfect saucy consistency.
Taste and adjust seasoning after reheating, as flavors often mellow slightly during storage. The slow heat preserves the tender beef and bean textures. 🔥
Microwave Shortcuts
For quick reheating, use 70% power in 2-minute intervals, stirring between each interval. Cover with a damp paper towel to retain moisture and prevent drying. I find this works best for single servings—just microwave until steaming hot (about 3-4 minutes total).
Add a splash of broth if it looks too thick. This method is great for post-workout meals when time is limited. ⚡
Slow Cooker Revival
Need to reheat a large batch? Transfer chili to a slow cooker on low heat for 2-3 hours, stirring occasionally. This gentle method keeps the spices vibrant and prevents overcooking.
It’s my go-to for feeding a crowd—just set it and forget it while you prep sides. The slow cooker also helps redistribute flavors evenly throughout the pot. 🌶️
Texture Preservation
If your chili separates after reheating, stir in 1 tablespoon of cornstarch mixed with 2 tablespoons of water and simmer for 2-3 minutes until thickened. For extra richness, top with a dollop of Greek yogurt or a sprinkle of fresh cilantro—both add freshness and help balance any reheating dryness.
The key is patience: never rush the reheating process! 💡
Nutrition facts
Frequently asked questions
Can I make this chili vegetarian?
Swap the beef for 1.5 pounds of lean ground turkey or 2 cups cooked lentils to keep the protein high. Use vegetable broth instead of chicken broth and add 1 extra cup of beans (black beans or pinto) for texture. The spices will still shine, and you’ll get the same satisfying, hearty result.
Why does the recipe call for slow cooking?
The 4-hour simmer is key for two reasons: it develops deep, complex flavors by letting the spices infuse fully, and it ensures the beef stays tender while absorbing the broth. Rushing the process can leave the meat tough or the chili bland. If you’re short on time, use a pressure cooker for 30 minutes instead.
How can I adjust the heat level?
For milder heat, reduce the cayenne to ¼ teaspoon or omit it entirely. For extra kick, add ½ teaspoon of crushed red pepper flakes or a pinch of chipotle powder. Taste as you go—you can always add more heat later, but you can’t take it out!
What’s the best way to serve this chili?
Top with Greek yogurt or sour cream to cool the heat, and add fresh cilantro or green onions for brightness. Serve with cauliflower rice (for low-carb) or whole-grain bread for a hearty meal. The high-protein balance makes it perfect for lunch or dinner—just avoid heavy sides to keep it clean.
Can I double the recipe for meal prep?
Yes! Just scale all ingredients by 2x and use a 6-quart slow cooker or large pot. Portion into airtight containers and store in the fridge for 5 days or freeze for 3 months**. Reheat gently to preserve texture—this chili tastes even better the next day!
