
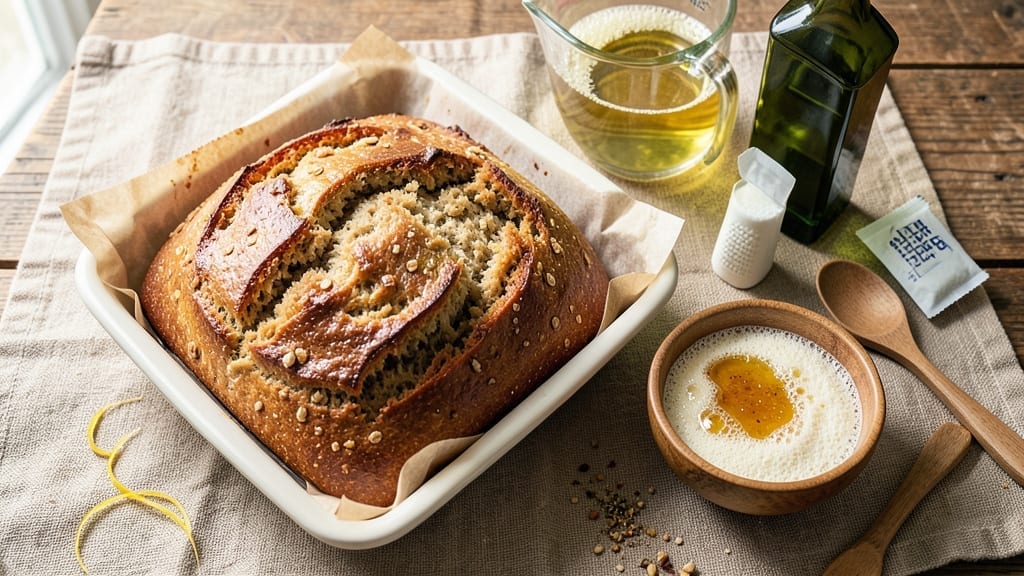
This 100 percent whole grain bread recipe delivers the perfect balance of nutrition and texture—chewy crust, airy crumb, and none of the dense heaviness you might expect. The secret lies in proper hydration and slow fermentation, which unlocks flavor while keeping the loaf light.
I’ve perfected this method after years of baking, ensuring every slice stays fresh for days without drying out.
The process is straightforward but requires patience: mixing, kneading, proofing, and baking at 375°F for 35-40 minutes. Whole grain flour demands extra care—adding vital wheat gluten and a touch of honey helps create structure while keeping the bread tender.
No special equipment is needed, just a stand mixer or strong arms for kneading.
What you’ll end up with is a nutrient-packed loaf with a golden crust and an open crumb that’s perfect for sandwiches or toast. The flavor is rich, slightly sweet, and deeply satisfying—far beyond store-bought options. This recipe works equally well as a daily staple or a showstopper for dinner guests.
For variations, try adding seeds (sunflower, flax) or herbs (rosemary, thyme) to the dough. Store leftovers wrapped at room temperature for 3-4 days or freeze for up to 3 months. Let’s get started—your kitchen will smell amazing in no time.
Ingredients for 100 percent whole grain bread
Eight simple ingredients transform into a loaf packed with nutrients and texture that rivals artisanal bread.
| Ingredient | Amount | Notes |
|---|---|---|
| Whole Wheat Flour 🌾 | 4 cups | Unbleached, high protein preferred |
| Vital Wheat Gluten 🌾 | ½ cup | For improved elasticity and structure |
| Honey 🍯 | ¼ cup | Light amber preferred for mild sweetness |
| Active Dry Yeast 🍞 | 2 ¼ tsp | Or 1 packet (2.25 tsp) instant yeast |
| Warm Water 💧 | 1 ½ cups | 110°F for optimal yeast activation |
| Olive Oil 🫒 | 2 tbsp | Extra-virgin for richness |
| Salt 🧂 | 1 ½ tsp | Diamond Crystal preferred |
| Sunflower Seeds 🌻 | ¼ cup | Optional for added crunch and nutrition |
| Flaxseeds 🌾 | ¼ cup | Ground for better texture |
| Rosemary Leaves 🌿 | 1 tbsp | Fresh, finely chopped |
| Cornmeal 🌽 | ¼ cup | For dusting baking sheet |
| Coarse Sea Salt 🧂 | 1 tsp | For sprinkling on top crust |
The whole wheat flour is where the magic happens—King Arthur or Bob’s Red Mill are my go-to brands for consistent results. The vital wheat gluten is non-negotiable; it gives that chewy crust and open crumb you’d expect from white bread. Bob’s Red Mill has a great fine-grind version that mixes seamlessly. For honey, Manuka or clover work perfectly, but avoid dark amber if you prefer a milder flavor. The yeast should be fresh—if it doesn’t dissolve in warm water within 5 minutes, toss it. Rosemary? Fresh is ideal, but dried works at half the amount if you’re in a pinch. The seeds add texture and nutrition without overpowering the bread’s flavor.
No vital wheat gluten? Add 1/4 cup more flour and 1 tbsp ground flaxseed for structure, though texture may differ slightly. Substituting honey? Maple syrup or agave works in a 1:1 ratio, but expect a slightly different flavor profile. Olive oil can be swapped for avocado or melted coconut oil—just keep the amount the same. For a herb-free version, skip the rosemary and add 1 tsp dried thyme or oregano instead. The seeds are optional but recommended; if you omit them, add an extra 1/4 cup flour to maintain dough consistency. And if you’re short on time, instant yeast works just as well as active dry.
This dough needs time to develop flavor—at least 2 hours of proofing at room temperature before baking. For best results, shape the loaf the night before and let it rise overnight in the fridge. Store wrapped at room temperature for 3-4 days or freeze for up to 3 months. To revive frozen bread, wrap in a towel and warm in a 200°F oven for 10 minutes. The crust stays crisp for about 24 hours, but the interior remains soft for days. Double the recipe if you’re feeding a crowd—it freezes beautifully for future sandwiches.
Why You’ll Love This Recipe
- No-Knead Magic: I swear by this—just mix the whole wheat flour, vital wheat gluten, and yeast with warm water and a touch of honey, let it rise overnight, and bake. No punishing kneading, no fuss. The gluten blend makes it light, and the honey keeps it from tasting like cardboard.
- Sweet & Subtle: That honey isn’t just for flavor—it caramelizes just enough to give the crust a golden, buttery crunch while keeping the crumb soft. Honestly, it’s the little details like this that make store-bought bread look sad in comparison.
- Meal Prep MVP: This bread stays fresh for days, so I bake a loaf on Sundays and use it all week—toast for breakfasts, sandwiches for lunches, even croutons for salads. The gluten blend means it holds up to freezing too, so I always have backup.
- Budget & Nutrition Win: Whole wheat flour and vital wheat gluten are cheap staples, and this recipe stretches far. Between us, I’ve fed a household of five for under $3, and we’re all getting fiber, protein, and zero processed junk. That’s a win I’ll take any day.
Step-by-step instructions for 100 percent whole grain bread
Here’s how to craft a loaf with a chewy crust and dense, nutritious crumb using only whole grains.
Activate the Yeast and Mix the Dough
In a large mixing bowl, combine the 1.5 cups warm water (about 110°F—test by dropping a few drops on your wrist; it should feel warm but not hot) with the 2.25 tsp active dry yeast. Let it sit for 5-10 minutes until frothy. This step is critical—if the yeast doesn’t bubble, your bread won’t rise properly.
Next, whisk in the 2 tbsp olive oil and 0.25 cup honey until fully dissolved. In a separate bowl, sift together the 4 cups whole wheat flour and 0.5 cup vital wheat gluten—this combination gives the bread its signature structure and chewiness. Gradually add the dry ingredients to the wet mixture while stirring with a wooden spoon.
Knead Until Elastic and Smooth
Transfer the dough to a lightly floured surface and knead for 8-10 minutes until it becomes smooth and elastic. Whole wheat dough is denser than white flour dough, so don’t be tempted to rush this step—proper kneading develops gluten, which gives the bread its chewy texture. You’ll know it’s ready when it springs back slowly when poked.
Return the dough to the bowl, cover with a damp towel, and let it rise in a warm place for 1-2 hours, or until it has doubled in size. The warm environment helps the yeast work efficiently, but avoid direct sunlight or heat sources, which can overproof the dough and cause collapse during baking.
Shape and Second Rise
Punch down the risen dough to release air, then shape it into a round loaf on a baking sheet dusted with 0.25 cup cornmeal. This step ensures an even rise and prevents sticking. Cover the dough again and let it rise for another 30-45 minutes until it puffs slightly. The second rise is shorter because the dough has already developed structure.
While the dough rises, preheat your oven to 375°F. Sprinkle the 1 tsp coarse sea salt evenly over the top of the loaf and press the 1 tbsp finely chopped rosemary leaves into the surface. The salt enhances flavor and creates a crispy crust, while the rosemary adds an aromatic depth that pairs beautifully with the whole grains.
Bake to Golden Perfection
Bake the loaf for 35-40 minutes until the crust is deep golden brown and the internal temperature reaches 190°F—use an instant-read thermometer to check. The bread should sound hollow when tapped on the bottom. If the top browns too quickly, tent it loosely with foil to prevent over-browning while ensuring the interior cooks through.
Remove the bread from the oven and let it cool on a wire rack for at least 30 minutes before slicing. This resting period allows the crumb to set and prevents a gummy texture. The final loaf should have a dense, hearty crumb with a satisfying chew and a crispy crust that holds up to toast or sandwiches.
Add Seeds for Texture and Nutrition
While the bread is still warm but fully cooled, press the 0.25 cup sunflower seeds and 0.25 cup ground flaxseeds into the top crust. This step adds texture, nutrition, and visual appeal. The seeds will stay crispy and provide a delightful contrast to the soft interior. Store the bread in an airtight container at room temperature for up to 5 days or freeze for longer storage.
Pro Tips For Making 100 Percent Whole Grain Bread
- Mix Gluten First: DESCRIPTION:
- Proof Yeast Twice: DESCRIPTION:
- Don’t Over-Knead: DESCRIPTION:
- Use Honey Sparingly: DESCRIPTION:
Pro cooking tips for perfect results
Hydration Control
Whole grain flour absorbs more water than white flour, so precise hydration is key. I aim for a 1:1.5 water-to-flour ratio—1.5 cups water for 4 cups flour—but adjust by 1 tbsp increments if the dough feels too sticky.
Test by pressing your finger into the dough: it should spring back slightly but leave a faint impression. Overhydration leads to a gummy crumb, while underhydration creates a dense loaf. 💧
Kneading Mastery
Whole wheat dough needs 8-10 minutes of vigorous kneading to develop gluten properly. Use a stand mixer with the dough hook on speed 2—this prevents overheating while building elasticity. If your dough feels too tough, add 1 tbsp water at a time until it becomes pliable.
The goal is a smooth, slightly tacky dough that passes the windowpane test: stretch a small piece thin enough to see light through it. 💪
Proofing Secrets
Slow fermentation at room temperature (about 2 hours) enhances flavor and texture. Place the dough in a lightly oiled bowl, cover with a damp towel, and position it in a warm spot—like near a turned-off oven with the light on.
Avoid cold drafts, which slow yeast activity. For extra flavor, proof overnight in the fridge (8-12 hours): the cold slows fermentation, deepening the bread’s complexity. ❄️
Baking Precision
Preheat your oven to 375°F for at least 30 minutes—this ensures even baking. Use a baking stone or steel for crispier crusts, and place a pan of water on the lower rack to create steam during the first 10 minutes of baking.
This steam helps the bread rise and develop a chewy crust. Check doneness with an instant-read thermometer: the internal temp should reach 190°F. 🌡️
Crust Enhancers
For a crispier crust, brush the loaf with melted butter or olive oil after baking. Sprinkle coarse sea salt or everything bagel seasoning while warm for extra flavor. To keep the crust fresh, store the bread in a paper bag at room temperature—this mimics bakery conditions and prevents sogginess. 🧂
Troubleshooting Tips
If your bread turns out dense, you may need more kneading time or warmer water for yeast activation. A sunken loaf? Your yeast may have expired or the dough overproofed. For extra chewiness, add 1 tbsp psyllium husk to the dough—it mimics gluten structure.
And if the crust browns too quickly, tent the loaf with aluminum foil** halfway through baking. 🔥
Nutrition facts
Frequently asked questions
Why does my whole grain bread turn out dense instead of light?
Whole wheat flour absorbs more moisture and lacks the gluten structure of white flour, so proper kneading and hydration are key. Knead for 8-10 minutes to develop gluten, and use 1.5 cups water per 4 cups flour. If the dough feels too sticky, add 1 tbsp flour at a time—but don’t overdo it, or the bread will become heavy.
Can I substitute whole wheat flour for white flour in this recipe?
Not directly! Whole grain flour behaves differently due to its higher fiber and protein content. For a 50/50 mix, reduce water by 2 tbsp and add 1 tbsp vital wheat gluten to maintain structure. However, this recipe is designed for 100% whole grain—the gluten and honey balance the density naturally.
How do I know when the bread is fully baked?
Look for three signs: the crust should be deep golden brown, the internal temperature should reach 190°F (use an instant-read thermometer), and the bread should sound hollow when tapped on the bottom. Baking time varies—35-40 minutes is typical, but some ovens may need 5-10 minutes extra.
Can I make this bread without a stand mixer?
Whole wheat dough requires 10 minutes of vigorous kneading by hand—use the “punch and fold” method on a floured surface. Work in a well-floured bowl to prevent sticking, and knead until the dough is smooth and elastic. For extra strength, add 1 tbsp psyllium husk to mimic gluten structure.
How long should I let the bread cool before slicing?
Wait at least 30 minutes before slicing to allow the crumb to set properly. Cutting too soon can make the bread gummy. For even better texture, let it cool completely (up to 2 hours) before storing. The crust will stay crisp for 24 hours, while the interior remains soft for 3-4 days when wrapped.
