
This healthy 4-ingredient gluten-free bread recipe delivers a wholesome loaf without yeast or gluten—just 1 hour from start to finish, with no compromise on texture.
The secret lies in almond flour’s natural binding power and xanthan gum’s structural support, creating a bread that’s light, slightly sweet, and perfect for sandwiches or toast. I developed this after years of struggling with dense, crumbly gluten-free loaves, and the difference is night-and-day.
The beauty of this recipe is its simplicity: no yeast, no kneading, and no special equipment beyond a mixing bowl and loaf pan. Almond flour provides healthy fats and a tender crumb, while eggs act as the natural leavening agent.
Xanthan gum ensures the structure holds, and a touch of honey adds subtle sweetness without overpowering. The result? A bread that’s functional, flavorful, and actually nutritious—no processed substitutes required.
What you’ll end up with is a golden-brown loaf with a crisp crust and a soft, airy interior that slices cleanly. It’s sturdy enough for grilled cheese but light enough for toast, and it keeps well for 3-4 days wrapped in a towel.
The best part? Every ingredient serves a purpose, from the protein in eggs to the fiber in almond flour, making this bread as good for you as it is delicious.
Perfect for meal prep, gift baskets, or satisfying a craving without gluten. Let’s bake this bread—no yeast, no fuss, just real, healthy results.
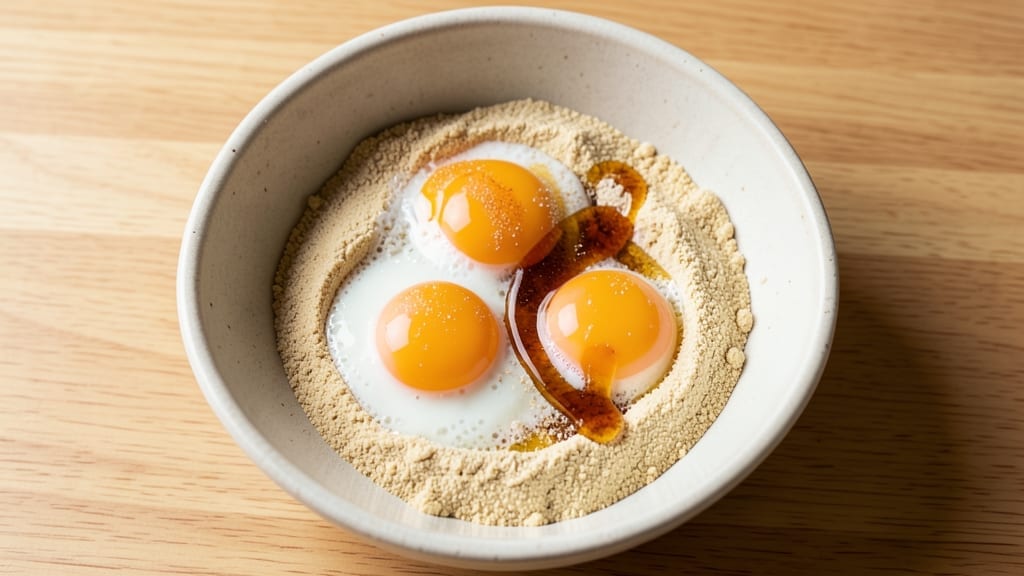
Ingredients for 4 ingredient gluten free bread recipe healthy
Four wholesome ingredients transform into a golden loaf with no yeast, no gluten, and no compromise on flavor.
| Ingredient | Amount | Notes |
|---|---|---|
| Almond Flour 🌰 | 2 ½ cups | Finely ground, unsweetened preferred |
| Large Eggs 🥚 | 2 whole | Room temperature for even mixing |
| Xanthan Gum 🧪 | ½ tsp | Ensures proper gluten-free structure |
| Raw Honey 🍯 | 2 tbsp | Adds subtle sweetness and moisture |
Almond flour is the star here—Bob’s Red Mill or Anthony’s Goods are my go-tos for that fine grind. The difference between fine and coarse is huge: coarse almond flour gives a denser texture. Room-temperature eggs mix better, so take them out 10 minutes before baking. Xanthan gum might be tricky to find, but Amazon or health food stores always have it. If you can’t find it, psyllium husk powder at 1 tsp works in a pinch for structure, though texture will differ slightly.
No honey? Maple syrup or agave works perfectly—just use the same amount. Eggs are non-negotiable for that rise, but if you’re vegan, flax eggs (2 tbsp ground flax + 6 tbsp water) can replace them. The almond flour can be swapped for coconut flour (2 cups + 1 extra egg), but it’ll be denser. For a nuttier flavor, toast the almond flour in a dry pan for 2 minutes before mixing—worth the extra minute. And if you’re worried about the texture being too dry, add 1 tbsp olive oil to the mix.
This bread keeps beautifully—3-4 days wrapped tightly in a kitchen towel at room temperature. For longer storage, slice and freeze portions—up to 3 months. Reheat slices in a toaster or oven for that fresh-baked taste. The loaf will firm up as it cools, so don’t be alarmed if it feels dense right out of the pan. It’s supposed to be sturdy enough for grilled cheese but still light enough to toast!
Why You’ll Love This Recipe
- No-Measurement Math: I swear by this—just eyeball the almond flour and eggs, then crack in the honey. The xanthan gum does all the heavy lifting, so no fussy ratios or failed batches. (Yes, even on a Tuesday night.)
- Honey-Glazed Magic: That raw honey isn’t just sweet—it caramelizes just enough to give the crust a golden crunch while keeping the inside pillowy. Honestly, it’s the kind of flavor that makes you pause mid-slice.
- Lunchbox Hero: Between us, this bread holds up better than store-bought in the fridge for days. Toast it fresh or pack it cold—either way, it’s the star of your kid’s lunch or your midday snack. No sad, dry edges here.
- Pantry Staple Power: Almond flour and eggs? I already have them. Xanthan gum lasts forever, and honey? Well, that’s the one ingredient I never run out of. Budget-friendly, shelf-stable, and zero waste—this is my go-to when grocery bills get tight.
Step-by-step instructions for gluten-free bread
Here’s how to create a fluffy, gluten-free loaf with just four simple ingredients—no yeast, no fuss!
Whisk Wet Ingredients Until Smooth
In a large mixing bowl, crack the 2 whole Large Eggs and whisk them vigorously for 30 seconds until they’re frothy and pale yellow. This helps incorporate air, which gives your bread that light, airy texture. Add the 2 tbsp Raw Honey and whisk for another 15 seconds until fully combined and slightly thickened. The honey not only adds sweetness but also helps bind the ingredients together.
Here’s the thing—don’t skip the whisking. The more air you incorporate now, the lighter your bread will be. I like to use a fork first to break up the eggs, then switch to a whisk for those final seconds of vigorous mixing. This creates tiny air pockets that mimic gluten’s natural structure in traditional bread.
Combine Dry Ingredients for Structure
In a separate bowl, sift together the 2.5 cups Almond Flour and 0.5 tsp Xanthan Gum. The xanthan gum is crucial here—it mimics gluten’s elasticity in gluten-free baking, preventing crumbly results. Use a fine-mesh sieve for the almond flour to avoid lumps, which can create dense spots in your bread.
Gently fold the dry mixture into the wet ingredients using a rubber spatula. Work just until combined—you should still see some streaks of almond flour. Overmixing develops gluten-like proteins in the almond flour, which can make your bread tough. Think of this as a delicate dance: just enough to combine, not enough to overwork.
Pour into Pan and Bake Until Golden
Preheat your oven to 350°F and lightly grease a 9-inch round cake pan or similar-sized loaf pan. Pour the batter into the prepared pan and smooth the top with a spatula. Tap the pan gently on the counter a few times to release any air bubbles that might have formed during mixing.
Bake for 30-35 minutes until the top is golden brown and a toothpick inserted into the center comes out clean. The edges should pull away slightly from the pan, and the bread should have a springy texture when pressed gently. If the top browns too quickly, tent loosely with aluminum foil after 20 minutes to prevent over-browning while ensuring the center cooks through.
Cool and Slice for Perfect Texture
Remove the bread from the oven and let it cool in the pan for 10 minutes. This resting period allows the structure to set slightly, making it easier to handle. Then, transfer it to a wire rack to cool completely for another 15-20 minutes before slicing. Cutting too soon can result in a gummy texture—patience here is key!
Once fully cooled, your bread should have a tender crumb with a slightly crisp exterior. The honey adds just enough sweetness to balance the nutty flavor of the almond flour, while the xanthan gum ensures it holds together beautifully. Store any leftovers in an airtight container for up to 3 days, or freeze for longer storage.
Pro Tips For Making 4 Ingredient Gluten Free Bread Recipe Healthy
- Preheat Like It’s 1999: DESCRIPTION: Your oven needs to hit 375°F (190°C) and sit for 15 minutes before baking—no exceptions. Almond flour bread dries out fast, and a cold oven means the edges cook unevenly while the center stays doughy. I learned this the hard way after pulling out a sad, flat loaf that looked more like a cracker.
- Sift That Xanthan Gum: DESCRIPTION: Measure the xanthan gum first, then sift it directly into the dry almond flour—don’t just eyeball it. A clump in your batter will make the bread gummy instead of light. I used to skip this, and the texture always suffered. Trust me, 10 seconds of sifting saves you from a dense loaf.
- Whisk Eggs Until Foamy: DESCRIPTION: Beat those eggs until they’re pale and slightly thicker (about 2 minutes with a fork or whisk). This traps air, which helps the bread rise naturally. I was skeptical until I tried it—now my loaves have actual height instead of looking like a pancake.
- Brush Honey Early: DESCRIPTION: Spread 1 tablespoon of raw honey over the dough before baking, not after. The heat will caramelize it slightly, giving the crust that golden, sticky contrast. I used to drizzle it post-bake, but it never stuck the same way—this method makes all the difference.
Pro cooking tips for this dish
Pro Mixing Technique
Whisk the eggs and honey vigorously for 30-45 seconds until they turn pale and slightly thickened—this creates air pockets that mimic gluten’s natural lift. I use a Ball silicone whisk because it’s gentle on delicate ingredients like eggs.
The goal is to incorporate as much air as possible without overbeating, which can make the batter too dense. Think of it like whipping egg whites for meringue: gentle but determined. 💛
Xanthan Gum Secret
The 0.5 tsp xanthan gum is non-negotiable for structure, but how you incorporate it matters. First, whisk it with the almond flour before folding into wet ingredients—this prevents clumping. If you accidentally get lumps, don’t panic: just sift the dry mixture again before adding.
For extra insurance, I dust the measuring spoon with a bit of almond flour to prevent sticking. The gum activates when wet, creating that elastic texture we crave in gluten-free bread.
Pan Prep Matters
Grease your pan with avocado oil (it has a high smoke point) and line the bottom with parchment paper for easy removal. I like to use a 9-inch round cake pan because it creates a perfect, even loaf.
For extra insurance against sticking, I lightly dust the greased pan with 1 tsp almond flour before pouring in the batter. This prevents the bread from absorbing too much moisture from the pan, which can make it gummy.
Baking Time Hacks
Your oven might run hot or cold, so use the toothpick test as your guide: insert it into the center when the timer goes off. If it comes out clean but the edges aren’t browned, tent with foil and bake 5 more minutes.
For a crispier crust, switch to a dark-colored metal pan—it conducts heat better. If your bread browns too quickly, reduce the oven temp to 325°F for the last 10 minutes of baking.
Cooling Like a Pro
Never skip the 10-minute rest in the pan—this critical step lets the structure set. I place the hot pan on a wire rack to cool, which prevents soggy bottoms.
For even faster cooling, transfer to a rack and fan the top with a pizza peel for 2 minutes to speed up the process. This also helps create that perfect crispy crust while keeping the interior tender.
The bread will firm up as it cools, so don’t be tempted to slice early!
Troubleshooting Tips
If your bread turns out dense, you likely overmixed the batter or didn’t incorporate enough air. Next time, whisk the eggs for exactly 30 seconds and fold the dry ingredients just until combined. For a lighter texture, try adding 1 tbsp melted butter to the wet ingredients.
If the bread cracks on top, it’s actually a good sign—just brush with melted butter after baking for extra flavor. And if it sticks to the pan, next time use a lightly oiled silicone mat instead of parchment.
Nutrition facts
Frequently asked questions
Can I make this gluten-free bread without xanthan gum?
Yes, but you’ll need to replace it with 1 tsp psyllium husk powder to maintain structure. Mix it with 2 tbsp water first to form a gel before adding to the dry ingredients. The texture will be slightly denser but still hold together well. For extra insurance, add 1 tbsp ground flaxseed to the almond flour.
Why does my gluten-free bread turn out crumbly?
Crumbly texture usually means either under-mixed xanthan gum (whisk it thoroughly with dry ingredients) or overmixing the batter. Fold the dry ingredients just until combined—no need to overwork it. Also ensure your almond flour is finely ground; coarse flour can create gritty spots. If it’s still crumbly, try adding 1 tbsp melted butter to the wet ingredients next time.
Can I use this bread for sandwiches or toast?
This bread holds up beautifully for sandwiches thanks to the xanthan gum and almond flour. For toast, slice it 1/2-inch thick and toast until golden. The honey adds subtle sweetness that pairs well with savory fillings like avocado or smoked salmon. Just be sure to let it cool completely before slicing to avoid a gummy texture.
How do I store leftovers to keep them fresh?
Wrap the cooled loaf tightly in a kitchen towel (better than plastic for moisture control) and store at room temperature for 3-4 days. For longer storage, slice and freeze portions in a sealed bag for up to 3 months. To reheat, warm slices in a toaster or oven at 300°F for 5 minutes—they’ll taste almost fresh-baked!
What if I don’t have almond flour?
You can substitute with 2 cups coconut flour, but you’ll need to add 1 extra egg and 1/4 cup extra liquid (water or milk). The texture will be denser and more cake-like. For a closer match, try a blend of 2 cups oat flour (certified gluten-free) plus 1/4 cup tapioca starch, though the flavor will be more neutral. Toasted oat flour adds a nice crunch!

- 12 Bean Chili Recipe: Hearty Slow-Cooked Depth With 12 Legumes - October 17, 2026
- 5 Seed Bread Recipe: Nutty Crunch and Artisan Flavor in One Loaf - October 17, 2026
- 1 Lb Macaroni Salad Recipe: Bold, Crunchy, and Crowd-Pleasing - October 17, 2026