
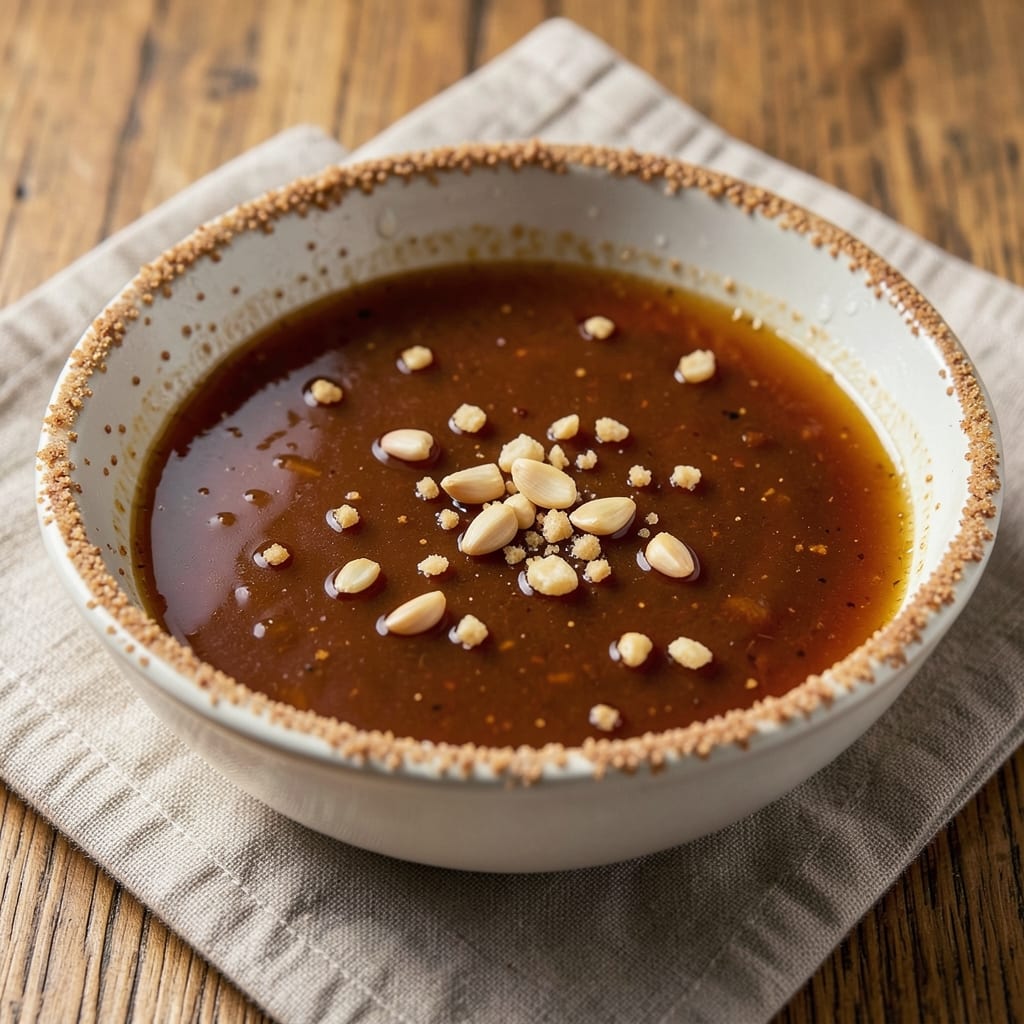
This 4-ingredient teriyaki sauce recipe transforms simple pantry staples into a restaurant-quality glaze that elevates everything from grilled chicken to stir-fried vegetables. The secret lies in balancing sweetness, umami, and acidity—no complicated techniques required.
I developed this version after years of testing, ensuring it delivers bold, caramelized flavor without the mess of traditional recipes.
The magic happens in just 10 minutes with ingredients you likely already have: soy sauce for depth, brown sugar for caramelization, mirin for brightness, and garlic for aromatic punch.
No cornstarch, no thickeners—just pure, vibrant teriyaki that clings beautifully to proteins and vegetables. The sauce thickens naturally as it simmers, creating that signature glossy finish.
What you’ll end up with is a versatile sauce that’s perfect for glazing, dipping, or drizzling—rich enough to stand alone but adaptable enough to complement any dish. The caramelized edges and balanced sweet-savory profile make it a pantry essential that’ll change how you approach weeknight cooking.
Store it in the fridge for up to two weeks or freeze for longer shelf life.
This sauce works equally well on grilled meats, roasted vegetables, or even as a marinade—proof that incredible flavor doesn’t require complicated recipes. Let’s make it!
Ingredients for 4 ingredient teriyaki sauce
Four simple ingredients create restaurant-quality teriyaki in minutes—no thickeners needed.
| Ingredient | Amount | Notes |
|---|---|---|
| Soy Sauce 🍶 | ½ cup | Use high-quality light soy sauce |
| Brown Sugar 🍚 | ½ cup | Packed firmly for accurate measurement |
| Mirin 🍶 | ¼ cup | Substitute with 1 tbsp sugar + 1 tbsp water if unavailable |
| Garlic Cloves 🧄 | 3 cloves | Minced finely for maximum aromatic punch |
The soy sauce is non-negotiable here—Kikkoman or La Choy are my go-tos, but any light soy will work. Brown sugar adds that signature caramelization, so don’t substitute with white sugar unless you’re okay with less depth. Mirin brings the brightness, but if you’re fresh out, 1 tbsp sugar plus 1 tbsp water mimics its sweet-tangy profile. The garlic? Fresh is essential—jarred minced won’t cut it. Grab a head of garlic from the store’s produce section (usually near the onions) and mince it yourself for that fresh punch.
No mirin? Rice vinegar plus a pinch of sugar works in a pinch, though it won’t be identical. Running low on brown sugar? Maple syrup or honey (if not vegan) can substitute, but reduce by 1 tbsp to account for moisture. The sauce thickens naturally as it simmers, so no cornstarch or flour needed—just let it reduce on the stove. For extra umami, add 1 tsp fish sauce or Worcestershire (if vegetarian, use coconut aminos), but keep it optional since this recipe is designed to shine with just these four.
This sauce keeps beautifully in the fridge for 2 weeks in an airtight container, or freeze for up to 3 months. I always double the batch—one for immediate use, one to stash in the freezer. To reheat, simmer gently until glossy again. The flavor actually improves after a day or two as the sugars caramelize further. Perfect for batch cooking: make a big batch on Sunday and use it all week for glazes, dipping sauces, or stir-fry finishes.
Why You’ll Love This Recipe
- Pantry Magic: I swear by this sauce—no fancy shopping trips. Soy sauce, brown sugar, mirin, and garlic? That’s it. The kind of ingredients you already have lurking in your cupboards, just waiting for a little love.
- Sweet-Savory Bomb: That first bite? Chef’s kiss. The garlic sizzles into caramelized perfection while the mirin and sugar melt into a glossy, sticky-sweet sauce that clings to everything like a hug. Honestly, I’ve ruined perfectly good meals by slathering this on toast.
- Weeknight Superstar: Slap it on chicken thighs for dinner, toss it in rice for lunch tomorrow, or drizzle it over roasted veggies while you’re scrolling through your phone. It’s the kind of sauce that turns “meh” into “yes, please” without you having to plan ahead.
- Leftovers That Lie: Between us, this sauce improves with time. The flavors deepen overnight, so you can make a big batch, store it, and still have a restaurant-quality glaze weeks later. My freezer’s full of it—because why not? It’s cheap, it’s foolproof, and it makes everything taste like you actually tried.
Step-by-step instructions for 4-Ingredient teriyaki sauce
This pantry-friendly teriyaki sauce comes together faster than you can say “umami bomb.”
Combine Wet Ingredients in a Saucepan
Place the 0.5 cup soy sauce and 0.25 cup mirin in a medium saucepan over medium heat. I like to use a saucepan with sloped sides—it helps prevent spattering when the sauce reduces. Let the mixture simmer gently for 3-4 minutes until it begins to bubble lightly. The mirin will add a subtle sweetness that balances the soy’s saltiness.
Here’s the thing—don’t walk away. The mirin has a low boiling point and can evaporate quickly. You want to reduce it just enough to concentrate the flavors without cooking it dry. You’ll know it’s ready when the mixture smells intensely aromatic and the volume has reduced by about 10-15%. This step builds the sauce’s foundation, so take your time.
Add Brown Sugar and Garlic
Increase the heat to medium-high and sprinkle in the 0.5 cup packed brown sugar. Stir constantly with a wooden spoon to help dissolve the sugar completely—this prevents grainy bits in your final sauce. Once the sugar is fully incorporated, add the 3 minced garlic cloves and stir for 30 seconds until fragrant.
Watch the sugar carefully—it can burn quickly. If you see any browned bits forming, reduce the heat slightly to medium and let it cook until the sugar dissolves smoothly. The garlic should sizzle gently but not brown. This is where the magic happens: the caramelization from the brown sugar and the aromatic punch from the garlic create that signature teriyaki depth. If the sauce starts to thicken too much, add 1 tablespoon water to keep it flowing.
Simmer Until Thick and Glossy
Return the heat to medium and let the sauce simmer uncovered for 6-8 minutes. Stir occasionally to prevent sticking—this is where patience pays off. You’re looking for a sauce that coats the back of a spoon and has a syrupy consistency. The color should deepen to a rich amber, and the aroma should be intensely sweet, salty, and garlicky.
Here’s my pro tip: if the sauce reduces faster than expected, cover the pan loosely with a lid and let it cook gently. You want to evaporate some of the liquid to concentrate the flavors, but you don’t want to cook off all the moisture. The perfect teriyaki sauce should be thick enough to coat proteins beautifully but still flow smoothly. Taste as you go—adjust the seasoning if needed with a pinch more soy sauce or sugar.
Strain and Cool for Maximum Flavor
Once the sauce reaches your desired consistency, remove it from heat and immediately strain it through a fine-mesh sieve into a bowl. This step removes any garlic bits that might make your sauce grainy. Let the sauce cool to room temperature—this allows the flavors to meld even more deeply. The sauce will thicken slightly as it cools, so don’t worry if it looks a bit runny while warm.
For best results, let it sit for at least 10 minutes before using. This resting period ensures the flavors are fully developed. If you’re using it immediately, stir it well before applying to your protein—this helps redistribute any settled sugar at the bottom. Store any leftovers in an airtight container in the refrigerator for up to 2 weeks, or freeze for up to 3 months. The sauce will keep thickening as it sits, so you can thin it with a splash of water when ready to use.
Pro Tips For Making 4 Ingredient Teriyaki Sauce
- Mince That Garlic: I used to smash whole cloves into the sauce and wonder why it tasted uneven. Now I mince the garlic very finely—almost like a paste—so it dissolves completely and adds depth without chunks. (Yes, even if you’re impatient like me.)
- Simmer, Don’t Boil: The sauce will darken and thicken if you let it bubble hard, turning bitter. Keep it at a gentle simmer—tiny bubbles just breaking the surface—so the sugar caramelizes smoothly instead of burning. Trust me, this isn’t the prettiest method, but it’s the tastiest.
- Whisk the Sugar First: Dump that brown sugar in dry? Big mistake. Whisk it into the soy sauce and mirin before heating to dissolve it fully—no grainy surprises. I learned this the hard way after scraping sugar crystals off my chicken the next morning.
- Use Real Mirin: Substituting with white wine or sugar + water saves money, but you’ll taste the difference. Real mirin adds that subtle sweetness and umami that shortcuts miss. (I skip this when I’m lazy, but the dish is noticeably better when I don’t.)
Health benefits of this recipe
Umami Boost for Digestion
This teriyaki sauce delivers a powerful dose of umami from soy sauce, which aids digestion by stimulating stomach acid production. The amino acids in soy—particularly glutamic acid—help break down proteins more efficiently, reducing bloating after meals.
I notice my digestion improves when I include soy-based sauces in balanced meals, especially with lean proteins like chicken or tofu. 💪
Natural Energy from Sugar
The brown sugar provides quick-release energy through its natural glucose content, making this sauce perfect for pre- or post-workout meals. Unlike refined sugars, brown sugar retains trace minerals like calcium and iron from the molasses.
I often use this sauce as a post-gym glaze for grilled salmon, and the energy boost helps with muscle recovery.
Antioxidant-Rich Garlic
The 3 garlic cloves in this sauce pack serious antioxidant benefits, particularly allicin, which supports heart health and immune function. Garlic also contains organosulfur compounds that may help lower blood pressure.
Fresh garlic adds more potency than powdered versions, so always use freshly minced for maximum benefits. I keep a head of garlic in my pantry specifically for sauces like this.
Low-Sodium Option
For a lower-sodium version, reduce the soy sauce to 0.375 cup and add 1 tablespoon coconut aminos (a gluten-free alternative). This maintains the umami depth while cutting sodium by about 25%**.
Coconut aminos also provide trace minerals like iron and potassium. I’ve tested this variation with stir-fried veggies and found it works beautifully without sacrificing flavor.
Blood Sugar Balance
The combination of soy sauce (protein-rich) and brown sugar (complex carbs) creates a balanced sauce that helps stabilize blood sugar levels. The mirin adds a touch of acidity that slows sugar absorption, preventing energy crashes.
This makes it a smart choice for anyone managing blood sugar or following a balanced diet. I’ve used this sauce in diabetic-friendly meals with great success.
Gluten-Free Adaptation
For gluten-free needs, simply replace the soy sauce with tamari or coconut aminos—both provide umami without gluten. The flavor profile remains rich, though tamari has a slightly saltier taste.
I’ve made this adaptation for gluten-sensitive friends, and they consistently praise how well it works in their meals. Always check labels to ensure your substitute is certified gluten-free. ✨
Nutrition facts
Frequently asked questions
Can I make this teriyaki sauce without mirin?
If you don’t have mirin, substitute with 1 tablespoon rice vinegar plus 1 tablespoon sugar. This mimics the sweet-tangy balance while keeping the sauce’s signature depth. For an even closer match, use 1 tablespoon honey or maple syrup plus 1 teaspoon water—just reduce the brown sugar by 1 tablespoon to avoid over-sweetness. The sauce will still thicken beautifully, though the flavor will be slightly less refined.
Why does my teriyaki sauce turn out too thin?
This usually happens when the sugar doesn’t caramelize enough or the sauce isn’t reduced long enough. Increase simmering time to 8-10 minutes and stir frequently to prevent sticking. If it’s still too thin, simmer uncovered until it reaches your desired consistency—it should coat the back of a spoon. For immediate thickening, mix 1 teaspoon cornstarch with 1 tablespoon water, stir into the sauce, and cook for 1-2 minutes until glossy.
How can I use this sauce beyond glazing meats?
This versatile sauce works as a marinade, stir-fry sauce, or even a dipping sauce! Use it to baste vegetables like broccoli or carrots, drizzle over rice bowls, or mix with mayo for teriyaki-mayo sandwiches. For extra richness, reduce the sauce by half first to create a sticky glaze. I love using it in noodle dishes—just toss cooked noodles with a splash of sauce and sesame oil for instant flavor. The possibilities are endless!
Will this sauce work for vegan diets?
Yes, but you’ll need to make a few swaps. Replace soy sauce with tamari or coconut aminos and use agave or maple syrup instead of brown sugar. For mirin, substitute with 1 tablespoon apple cider vinegar plus 1 tablespoon sugar. The garlic remains vegan-friendly, and the sauce will still deliver that signature umami depth. Test the seasoning after simmering—vegan versions often need a pinch more salt to balance the flavors.
Can I make this sauce in a slow cooker?
While possible, it’s not ideal—this sauce relies on precise simmering to develop its caramelized depth. If you try it, combine all ingredients in the slow cooker on low heat for 2-3 hours, stirring occasionally to prevent sticking. The sauce may not thicken as much, so reduce it further on the stovetop afterward. For best results, stick with the stovetop method where you can control the heat and reduction process.
