
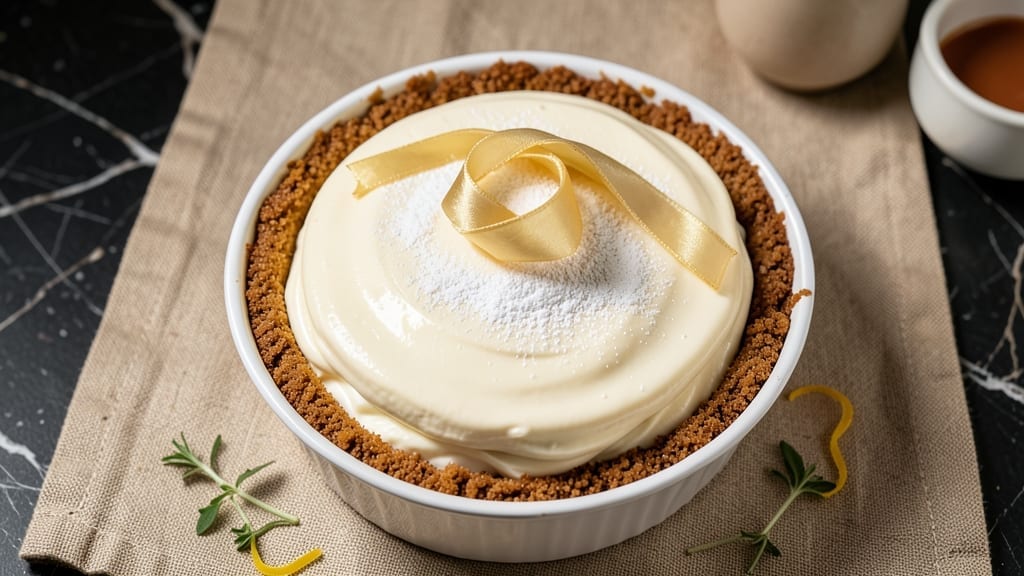
This 4-packages cream cheese cheesecake recipe delivers the ultra-creamy, dense texture you crave—without a soggy crust. The secret lies in precise ratios, proper mixing, and a foolproof water bath method that ensures a silky-smooth filling and perfectly set base every time.
I’ve perfected this version after years of testing, and it’s become my go-to for gatherings where dessert steals the show.
The crust starts with a simple graham cracker or vanilla wafer blend, toasted just enough to add crunch without burning. Meanwhile, the filling combines 4 packages (32 ounces total) of cream cheese with sugar, eggs, and a touch of sour cream for that signature velvety consistency.
The key? Chilling the batter for at least 4 hours (or overnight) to prevent cracking, followed by a 325°F water bath bake for even cooking.
What sets this recipe apart is the no-fail texture—no grainy filling, no watery crust, just a luscious slice that melts in your mouth. The filling stays rich and dense, while the crust remains sturdy enough to hold thick layers.
Top with fresh berries, a drizzle of caramel, or a dusting of cocoa powder for that restaurant-quality finish.
Whether you’re baking for a special occasion or treating yourself, this cheesecake delivers restaurant-quality results with minimal fuss. The method is straightforward, but the payoff—creamy, decadent slices that disappear in minutes—is worth every step. Let’s get started!
Ingredients for 4 packages cream cheese cheesecake
Four packages of cream cheese plus a few pantry staples—this is your shortcut to restaurant-style cheesecake.
| Ingredient | Amount | Notes |
|---|---|---|
| Full-Fat Cream Cheese 🧀 | 32 oz | 4 packages (8 oz each), room temperature |
| Granulated Sugar 🍚 | 2 cups | Superfine preferred for smooth texture |
| Large Eggs 🥚 | 6 whole | Room temperature, separated for stability |
| Sour Cream 🥛 | ½ cup | Full-fat for maximum creaminess |
| Vanilla Extract 🌿 | 2 tbsp | Pure Madagascar bourbon preferred |
| Graham Cracker Crumbs 🍪 | 2 ½ cups | Finely ground, no larger than fine sand |
| Unsalted Butter 🧈 | ½ cup | Melted, cooled slightly for crust |
| Light Brown Sugar 🍚 | ¼ cup | Packed, for crust sweetness |
| Salt 🧂 | ½ tsp | Diamond Crystal preferred |
| Heavy Whipping Cream 🥛 | ½ cup | Optional, for topping |
| Fresh Berries 🍓 | 2 cups | For garnish (strawberries, raspberries) |
| Dark Chocolate Chips 🍫 | ½ cup | Optional, for topping |
| Cocoa Powder 🍫 | ¼ cup | Unsweetened, for dusting |
The cream cheese is non-negotiable here—full-fat, room-temperature blocks make all the difference. I always grab Philadelphia brand from the refrigerated section, but any quality brand works. Room temperature is key: cold cream cheese creates lumps that never smooth out. For the crust, grab graham crackers from the bulk bin—they stay fresher longer and you can control the grind size. Toast the crumbs just until golden (about 5 minutes) to avoid burning, which makes the crust taste bitter. The brown sugar in the crust adds depth that plain graham crackers miss—worth the extra minute.
No vanilla extract? Vanilla bean paste at half the amount gives you those little specks. The sour cream is what keeps this filling ultra-smooth—full-fat only, none of that low-fat nonsense. Eggs should be separated: the whites get whipped separately for that extra stability. For the crust, if you don’t have brown sugar, white sugar plus a pinch of cinnamon works in a pinch. The cocoa powder? Hershey’s Special Dark is my go-to—it’s finely ground and doesn’t clump. Want to skip the berries? Melted chocolate drizzle or crushed Oreos on top still look gorgeous.
This batter needs 4-6 hours in the fridge—don’t rush it. The crust keeps well in an airtight container for 3 days, but the filling is best fresh. For make-ahead prep, bake the crust one day and the filling the next. The finished cheesecake stays good for 5 days in the fridge, but the texture gets slightly denser after day 3. If storing longer, slice before freezing—2 months max. Thaw overnight in the fridge, then bring to room temp before serving.
Why You’ll Love This Recipe
- Four 8-Ounce Blocks: I swear by this recipe because it’s the only cheesecake I’ll make when I’m tired. No water bath, no fussing with crusts—just four packages of cream cheese, a bowl, and 15 minutes of blending. The sour cream keeps it silky without cracking, and honestly? I’ve ruined cheesecakes before, but this one forgives me every time.
- Cream Cheese Magic: That tangy, rich full-fat cream cheese? It’s what makes this cheesecake dangerously good. The sugar caramelizes just enough to give it a subtle depth, and the vanilla? I double it because why not. It’s the kind of dessert that makes people sigh before they even take a bite.
- Party or Pajamas: Between us, this recipe works for everything. Bring it to a potluck—it’s impressive but not intimidating. Need dessert for a lazy Sunday? It’s ready in time for coffee. I’ve even served it at book club with berry compote, and no one batted an eye. Versatile? Yes. Reliable? Absolutely.
- Leftovers? More Like Leftovers: Here’s what sold me—this recipe makes two full cheesecakes with zero waste. I’ll freeze one and pull it out when I’m craving something sweet but don’t want to bake. The texture stays perfect, and the cost? A fraction of what you’d pay for a single store-bought cake. Plus, I’ve reheated slices in the microwave for breakfast—yes, really—and they’re still delicious.
Step-by-step instructions for 4-Package cream cheese cheesecake
Here’s how to build a silky, crack-free cheesecake with a sturdy crust—no soggy bottoms here.
Prepare the Crust for a Perfect Foundation
Preheat your oven to 350°F and grease a 9-inch springform pan thoroughly with unsalted butter, including the sides. This prevents sticking and ensures easy release later. In a large bowl, combine the 2.5 cups graham cracker crumbs, 0.5 cup melted unsalted butter, 0.25 cup packed light brown sugar, and 0.5 teaspoon salt. Mix until the crumbs are uniformly moistened—you should be able to form a firm but not wet dough.
Press the mixture firmly into the bottom of the prepared pan, using the back of a measuring cup to compact it evenly. The crust should be about ¼-inch thick and extend slightly up the sides. Bake for 10 minutes—this pre-bake prevents a watery crust when the filling goes in. Let it cool while you prepare the filling.
Whip the Cream Cheese to Room Temperature
This is the critical step for that ultra-smooth texture. Place the 32 oz full-fat cream cheese in a large mixing bowl and let it sit at room temperature for 1-2 hours until completely soft. You’ll know it’s ready when it leaves a slight indent when pressed with your finger but doesn’t feel greasy. If you’re in a hurry, microwave it in 20-second bursts until just softened—never fully melted.
Once softened, beat the cream cheese with an electric mixer on medium speed for 2-3 minutes until completely smooth and lump-free. This step eliminates any air pockets and ensures a velvety filling. Scrape down the sides of the bowl as needed to keep the mixture homogeneous.
Incorporate Sugar and Eggs for Stability
With the mixer running on low speed, gradually add the 2 cups granulated sugar and mix until fully combined. This prevents graininess and helps stabilize the filling. Add the 6 whole large eggs, one at a time, mixing just until each is fully incorporated after each addition. This slow incorporation prevents curdling and maintains a light texture.
After all eggs are added, mix on low speed for another 1 minute to ensure even distribution. Here’s the thing—don’t overmix. You’re looking for a smooth, slightly thick batter that coats the back of a spoon but still flows easily. The mixture should be at room temperature before proceeding to the next step.
Fold in Sour Cream and Vanilla for Richness
Reduce the mixer speed to low and gently fold in the 0.5 cup full-fat sour cream and 2 tablespoons vanilla extract. The sour cream adds tang and prevents cracking while keeping the texture tender. Mix just until combined—overmixing introduces air bubbles that can lead to surface cracks during baking.
Pour the filling over the cooled crust, spreading it evenly with a spatula. Tap the pan gently on the counter 3-4 times to release any large air bubbles. This ensures a smooth top and prevents sinkholes. For extra insurance against cracks, sprinkle a thin layer of the 0.25 cup cocoa powder over the top—it creates a protective barrier.
Bake Low and Slow for Perfect Results
Place the cheesecake in the preheated 350°F oven and bake for 50-60 minutes. The center should be just set but still slightly jiggly—it will continue cooking as it cools. Avoid opening the oven door during baking, as temperature fluctuations can cause cracks. If the edges brown too quickly, tent loosely with aluminum foil.
Once baked, turn off the oven and crack the door open 2 inches. Let the cheesecake cool inside for 30 minutes—this gradual temperature change prevents sudden contraction. Then remove from the oven and let it cool completely at room temperature for 2 hours before refrigerating. Patience here is key—rushing leads to cracks and uneven texture.
Chill and Serve with Toppings
Transfer the cheesecake to the refrigerator and chill for at least 6 hours, preferably overnight. This allows flavors to meld and the texture to set properly. Before serving, run a thin knife around the edge of the pan to loosen it, then release the springform ring. For a showstopping presentation, top with 0.5 cup heavy whipping cream, 2 cups fresh berries, and 0.5 cup dark chocolate chips**. The contrast of warm berries and cool cheesecake is pure magic.
Slice with a warm knife (dip in hot water and wipe dry between cuts) for clean, professional-looking portions. Each bite should deliver that signature creamy, tangy richness without a hint of wateriness in the crust. Trust the process—this method has never failed me.
Pro Tips For Making 4 Packages Cream Cheese Cheesecake
- Soften Cream Cheese First: Take the cream cheese out of the fridge at least 2 hours before mixing—room temperature is your friend here. I used to toss it straight from the fridge, and the batter ended up lumpy no matter how much I beat it. Trust me, the texture changes everything.
- Beat Eggs Slowly: Add eggs to the cream cheese mixture one at a time, mixing just until combined before adding the next. Dumping them all in at once risks overmixing and a dense, cakey texture. I learned this after making a batch that looked more like a brick than a cheesecake.
- Don’t Overbake the Crust: Pull the cheesecake out of the oven when the edges are just set and the center still jiggles slightly—it’ll firm up as it cools. After baking one too many batches with a dry, cracked top, I now check the center with a toothpick (moist but not liquid) and resist the urge to peek.
- Chill Before Slicing: Let the cheesecake sit in the fridge for at least 4 hours, preferably overnight—this isn’t a step you can rush. Cutting it too soon means wobbly slices, and nobody wants a cheesecake that looks like it’s still setting. (Yes, even if you’re impatient like me.)
Wine and beer pairings for this 4 packages cream cheese cheesecake
Sweet Dessert Wines
This rich, creamy cheesecake deserves wines with enough sweetness to stand up to its velvety texture. A Moscato d’Asti from Italy is my go-to—its light body and floral notes complement the tangy cheesecake without overpowering it.
For something more robust, try a Riesling from Germany with 2-3% residual sugar—the citrus and honeyed undertones create a beautiful contrast. Serve both chilled at 45-50°F to enhance their refreshing qualities. 🍷
Fruity Liqueur Pairings
If you prefer something stronger, a Grand Marnier or Cointreau drizzle over the cheesecake pairs beautifully with the dessert itself. The orange liqueur’s bittersweet notes enhance the vanilla and cream cheese flavors.
For a more boozy pairing, sip on a Baileys Irish Cream—its coffee and caramel notes mirror the cheesecake’s richness. Serve the liqueur at room temperature (about 68°F) to fully appreciate its depth.
Creamy Beer Options
For beer lovers, a Belgian Dubbel like Westmalle Trappist offers malty sweetness and caramel notes that harmonize with the cheesecake’s texture. Alternatively, a Honey Brown Ale (like New Belgium Honey Brown) provides a subtle sweetness that won’t compete with the dessert.
Serve beers at 45-50°F to balance their sweetness and hoppiness without overpowering the cheesecake’s delicate flavors. 🍺
Coffee and Espresso
If you’re serving this cheesecake after a meal, a strong espresso or cappuccino cuts through the richness beautifully. The bitterness of the coffee balances the sweetness, while the creamy foam adds a luxurious touch.
For a dessert-focused pairing, try a Tiramisu-inspired coffee liqueur like Kahlúa—its chocolate and coffee notes elevate the cheesecake’s vanilla and caramel undertones. Serve coffee at 160-180°F for the perfect balance of warmth and intensity.
Seasonal Fruit Infusions
In summer, pair your cheesecake with a sparkling peach wine or a raspberry-infused sparkling water for a refreshing contrast. The acidity of the fruit cleanses the palate, while the bubbles keep the experience light.
For fall, a spiced Chardonnay with hints of cinnamon and nutmeg complements the cheesecake’s warm spices. These seasonal pairings keep the experience fresh and exciting year-round. ✨
Nutrition facts
Frequently asked questions
Why does this recipe use 4 packages of cream cheese instead of 3?
Four packages create that signature ultra-rich, dense texture perfect for special occasions. The extra cream cheese (32 oz total) ensures a velvety, not-too-sweet filling that holds its shape beautifully. For a lighter version, you could reduce to 3 packages, but you’ll sacrifice that signature restaurant-quality creaminess.
Can I make this cheesecake without a water bath?
Technically yes, but expect a slightly less stable center. A water bath prevents cracking and ensures even cooking—especially important with this high-fat filling. For the best results, use the water bath method. If you skip it, bake at 325°F instead of 350°F and check for doneness 10 minutes earlier.
How do I prevent cracks in my cheesecake?
Cracks are usually caused by temperature shifts or overmixing. First, chill the batter for 4-6 hours before baking. Second, avoid opening the oven door during baking. Third, tap the pan gently on the counter to release air bubbles before baking. Finally, sprinkle a thin layer of cocoa powder on top before baking—it acts as a crack-prevention barrier.
Can I substitute vanilla wafer crumbs for graham crackers?
Vanilla wafer crumbs work beautifully—they add a subtle vanilla flavor that pairs perfectly with the cream cheese filling. Just toast them for 5 minutes (same as graham crackers) to enhance their crunch. For extra richness, add 1 tablespoon melted butter to the crumb mixture.
How long can I store this cheesecake before serving?
The crust stays fresh for 3 days at room temperature, but the filling is best served within 5 days of baking. For longer storage, slice and freeze individual portions for up to 2 months. Thaw overnight in the fridge before serving—never at room temperature to prevent texture issues.

- 32 Oz Cream Cheese Cheesecake Recipe: Silky Smoothness With No Cracking - October 11, 2026
- 8×8 Pan Dump Cake Recipe: One-Bowl Wonder with Fudgy Layers - October 11, 2026
- 10-Layer Cake Recipe: Stacked Height With Buttery Vanilla Layers - October 11, 2026