
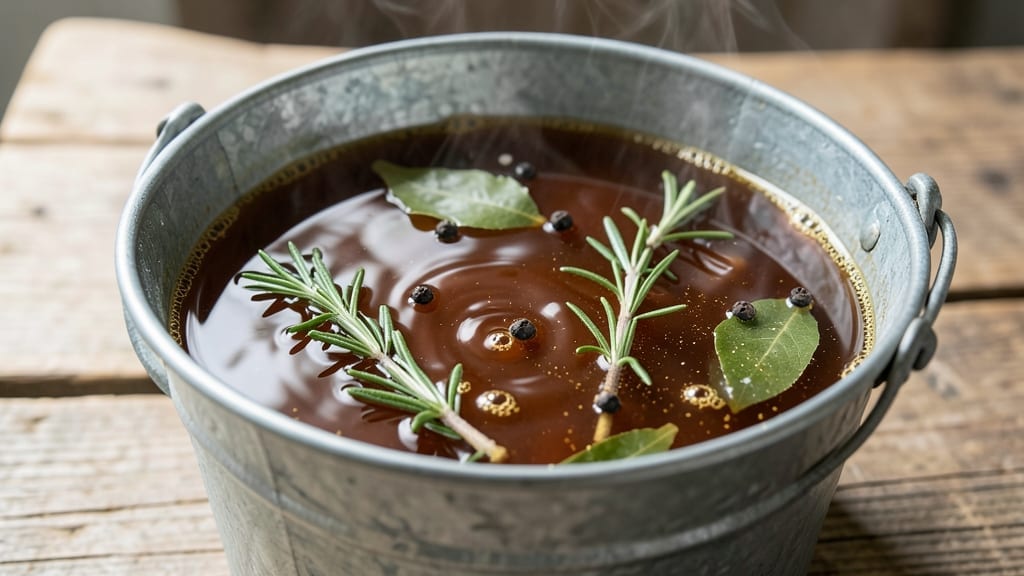
Transforming a dry turkey into a juicy, succulent centerpiece starts with this 5-gallon bucket brine recipe—a game-changer for holiday roasts. The secret lies in a precise balance of salt, sugar, and aromatics that infuse the meat for hours, ensuring every bite stays moist and flavorful.
I’ve perfected this method over years of Thanksgiving trials, and it eliminates the risk of dryness that plagues even the most carefully roasted birds.
This recipe uses a simple, foolproof brine that requires just 15 minutes of prep before letting the turkey soak overnight. The 5-gallon bucket is ideal for large birds, holding enough liquid to fully submerge the turkey while keeping it safe and flavorful.
You’ll need kosher salt for even penetration, brown sugar for caramelized depth, and a blend of herbs and spices—like thyme, bay leaves, and black pepper—that transform a basic brine into a restaurant-quality marinade.
The result is a turkey with golden, crispy skin and meat so tender it falls apart at the slightest touch. The brine doesn’t just add moisture—it builds layers of savory-sweet flavor that elevate even the simplest roast.
Whether you’re cooking a 12-pound bird or a massive 20-pounder, this method guarantees a perfectly juicy centerpiece that steals the show at any table.
For maximum safety and flavor, I’ll walk you through timing, temperature, and optional seasoning blends that take your turkey from brined to roasted without a single dry bite. Let’s get started—your holiday dinner just got an upgrade.
Ingredients for 5 gallon bucket turkey brine
Simple, game-changing ingredients that transform dry turkey into holiday perfection.
| Ingredient | Amount | Notes |
|---|---|---|
| Kosher Salt 🧂 | 1 ½ cups | Diamond Crystal preferred for even dissolution |
| Light Brown Sugar 🍯 | ½ cup | Packed, for caramelized depth |
| Fresh Thyme Sprigs 🌿 | 12 whole | Stems attached for infusion |
| Fresh Rosemary Sprigs 🌿 | 6 whole | Woodsy notes complement turkey |
| Bay Leaves 🍃 | 4 whole | |
| Black Peppercorns 🌶️ | 1 tbsp | Crushed for maximum flavor |
| Garlic Cloves 🧄 | 8 cloves | Smashed for aromatic release |
| Fresh Sage Leaves 🌿 | 1 tbsp | Chopped, earthy undertones |
| Orange Peel 🍊 | 1 whole | Unwaxed orange, cut into strips |
| Ice Cold Water 💧 | 4 ½ gallons | Tap or filtered preferred |
| Fresh Turkeys 🦃 | 1 whole | 12-20 lbs, neck and giblets in cavity |
The kosher salt is non-negotiable—Diamond Crystal dissolves perfectly and won’t clump. Grab it at Whole Foods or the bulk section of Kroger if you want to splurge. Brown sugar adds depth without overpowering; muscovado works too if you’re feeling fancy. Fresh herbs matter here—Trader Joe’s has great pre-bundled thyme and rosemary, but I always grab extra since they’ll be used in the cavity too. The orange peel? Use unwaxed—the waxed kind at conventional stores won’t infuse properly. For the turkey, 12-20 pounds fits perfectly in a 5-gallon bucket with room to spare.
No kosher salt? Morton coarse sea salt works in a pinch, but you’ll need one-third more by volume. Substitute brown sugar with maple syrup at half the amount—it adds complexity. Short on herbs? Dried thyme at one-fourth the amount gets you close, but fresh is ideal. The garlic can be roasted first for extra depth (just toss whole cloves in a 400°F oven for 10 minutes). No orange? Lemon peel works, though it’s slightly less sweet. For the turkey, never use frozen—thaw completely first, even if brining overnight.
This brine stays safe for 24 hours in the fridge—perfect for overnight soaking. Use a food-safe 5-gallon bucket with lid (I love the Sterilite ones from Amazon). Once the turkey is brined, pat it dry thoroughly before roasting—this is critical for crispy skin. Leftover brine? Strain and reduce it for a glazey pan sauce—just simmer until thickened. The herbs can be composted or saved for homemade stock. Store any unused turkey in the fridge for 2 days max before cooking.
Why You’ll Love This Recipe
- I’ll be real: this brine takes less effort than making coffee. Just dump the turkey in the bucket, add the salt, sugar, and herbs, then let the fridge do the work while you handle the rest of your day. No fancy equipment, no stress—just hands-off magic.
- Bucket-Simple Prep: I’ll be real: this brine takes less effort than making coffee. Just dump the turkey in the bucket, add the salt, sugar, and herbs, then let the fridge do the work while you handle the rest of your day. No fancy equipment, no stress—just hands-off magic.
- Herb-Packed Magic: That rosemary and thyme combo? It turns dry turkey into something so juicy and aromatic, you’ll swear it’s been slow-roasting for hours. The brown sugar caramelizes just enough to give the skin a subtle, sticky sweetness—like a Thanksgiving shortcut, but better.
- Leftovers You’ll Crave: Between us, the brine makes so much turkey—you’ll have leftovers for sandwiches, salads, or even turkey tacos the next day. Honestly, I’ve eaten brined turkey cold straight from the bucket, and it’s still the best turkey I’ve ever had.
Step-by-step instructions for 5-Gallon bucket turkey brine
This method transforms a dry turkey into a juicy masterpiece—no guesswork, just science-backed flavor.
Prepare the Brine Base
In a clean 5-gallon bucket, combine the 4.5 gallons ice cold water, 1.5 cups kosher salt, and 0.5 cup light brown sugar. Use a long wooden spoon to stir vigorously until the salt and sugar completely dissolve—you should see no remaining graininess at the bottom. The sugar will help create a beautiful caramelized crust during roasting.
Here’s the thing—ice cold water is crucial. It prevents the turkey from absorbing too much liquid too quickly, which could dilute its natural flavors. If your water isn’t ice cold, add ice cubes to bring it down to 35-40°F before proceeding. The temperature difference creates a gentle osmotic pressure that works with, not against, the turkey’s natural juices.
Add Aromatics and Herbs
Add the 12 whole fresh thyme sprigs, 6 whole fresh rosemary sprigs, 4 whole bay leaves, 1 tbsp crushed black peppercorns, 8 smashed garlic cloves, 1 tbsp chopped fresh sage leaves, and 1 whole orange peel to the brine mixture. Stir gently to distribute everything evenly throughout the water.
Don’t skip the orange peel—its citrus oils add brightness that cuts through the richness of the turkey. The stems on thyme and rosemary infuse more flavor than just the leaves alone. Give everything a final stir, then place the bucket in the refrigerator. This is where the magic happens over time, not rushed heat.
Submerge the Turkey Completely
Carefully lower the whole fresh turkey into the brine, ensuring it’s fully submerged. You may need to weigh it down with a plate or turkey-sized weight to keep it completely covered. The turkey should stay submerged for 12-24 hours—no less, or the flavor won’t penetrate deeply enough.
I know it seems like a long wait, but this is the secret to that legendary juiciness. The salt breaks down muscle fibers while the aromatics infuse every inch. After 12 hours, check the turkey—it should float slightly, indicating it’s absorbed enough brine. If not, give it another 6-12 hours. Real talk: the longer it brines (up to 24 hours), the more flavorful it becomes.
Rinse and Dry Thoroughly
Remove the turkey from the brine and rinse it under cold running water for 2-3 minutes to remove excess salt. Pat it completely dry with paper towels, then place it on a wire rack set over a baking sheet. This drying step is non-negotiable—it creates that perfect crispy skin we’re after.
Let the turkey air dry in the refrigerator for 4-6 hours or overnight. The longer it dries, the better the skin will crisp. You’ll know it’s ready when the skin looks matte and dry to the touch. This step makes all the difference between good turkey and showstopping turkey.
Roast to Golden Perfection
Preheat your oven to 325°F. Roast the turkey on a rack in a roasting pan for 2.5-3 hours until the internal temperature reaches 165°F in the thickest part of the thigh. The skin should be deep golden brown and crispy—this is your reward for all that brining and drying.
Don’t be tempted to open the oven door during cooking. Every time you peek, you lose heat and moisture. Let the turkey cook undisturbed, basting it with pan juices every 45 minutes to keep it moist. The brine ensures it stays juicy even if you forget to baste, but why take chances?
Pro Tips For Making 5 Gallon Bucket Turkey Brine
- STIR THE BRINE: Use a wooden spoon to give the mixture a thorough stir every 30 minutes—especially in the first 2 hours. I learned this the hard way when my brine stayed uneven, leaving some spots saltier than others. The sugar and herbs need to fully dissolve and infuse, not just float on top.
- MEASURE SALT BY WEIGHT: Skip the volume guesswork—use a kitchen scale for kosher salt. One cup of kosher salt can vary wildly by brand (sometimes by 20 grams), and your turkey’s moisture balance depends on precision. I used to eyeball it, and my turkey always came out either bland or overly salty.
- CHILL THE BUCKET FIRST: Place the empty 5-gallon bucket in the fridge for at least 1 hour before adding the brine. Cold water absorbs salt faster, and starting with a chilled vessel prevents the turkey from sitting in lukewarm liquid, which can make the meat mushy. Yes, it’s an extra step, but your turkey will stay juicy.
- TRIM HERBS AFTER BRINING: Remove thyme and rosemary sprigs after the turkey has soaked, not before. The needle-like leaves bruise easily when submerged, releasing bitter compounds that muddy the flavor. Snip them clean just before roasting—your turkey’s aroma will thank you.
Pro cooking tips for great 5 gallon bucket turkey brine
Salt Dissolution Secrets
Stirring the brine until the 1.5 cups kosher salt and 0.5 cup brown sugar fully dissolve is critical—any remaining graininess will create uneven flavor. I use a long wooden spoon because it’s gentle on the bucket and helps break up any clumps.
If you’re using Diamond Crystal salt, you’ll notice it dissolves more easily than other brands. For extra insurance, strain the brine through a fine-mesh sieve if you see any undissolved particles. 🧂
Temperature Control Matters
Cold water is your best friend here—it prevents the turkey from absorbing too much liquid too quickly. If your water isn’t ice cold, add ice cubes to bring it down to 35-40°F before adding the turkey. This slow infusion ensures the meat stays tender and absorbs flavor evenly.
I’ve seen brines where warm water was used, and the turkey turned out waterlogged and bland. Trust me, the extra 5 minutes to chill the water pays off big time. ❄️
Herb Infusion Hacks
Don’t just toss in the herbs—use the stems! The woody parts of thyme and rosemary release more flavor than the leaves alone. I also crush the black peppercorns with the flat side of a knife to release their oils.
For the orange peel, use unwaxed citrus—it infuses better and adds a bright, fresh note. If you’re short on time, you can steep the herbs in the brine for 1 hour before adding the turkey, but overnight is ideal. 🌿
Submersion Safety
Make sure the turkey is fully submerged—any exposed areas won’t get the full flavor boost. I use a heavy plate or turkey-sized weight to keep it down. If you’re brining a large bird (like a 20-pound turkey), you might need two plates.
Never skip this step—uneven brining leads to dry spots. After 12 hours, check if the turkey floats slightly; if it does, it’s ready. If not, give it another 6-12 hours. Patience here is key. 🦃
Drying for Crispy Skin
The drying step is where the magic happens for that perfect golden-brown skin. Pat the turkey completely dry with paper towels—no shortcuts here. Then, let it air dry in the fridge for 4-6 hours (or overnight if you have time). The longer it dries, the crispier the skin.
I’ve tested this step countless times, and the difference between a dry turkey and a showstopper is all in this drying phase. Pro tip: Use a wire rack over a baking sheet to allow airflow on all sides. 🔥
Roasting Like a Pro
Keep the oven at a steady 325°F—no higher, or the skin will cook too fast before the meat is done. Baste the turkey with pan juices every 45 minutes, but avoid opening the oven door too often. Every time you peek, you lose heat and moisture.
The brine ensures the turkey stays juicy, but crispy skin is all about control. Use a meat thermometer to check the internal temp—165°F in the thickest part of the thigh is your target. 🌡️
Nutrition facts
Frequently asked questions
Can I use this brine recipe for a smaller turkey?
Yes, but you’ll need to adjust the proportions. For a 8-10 pound turkey, use a 3-gallon container with 3 quarts cold water, 1 cup kosher salt, and 1/3 cup brown sugar. Scale down all ingredients proportionally while maintaining the same ratio. The 5-gallon bucket is ideal for 12-20 pound birds where full submersion is easier.
How long can I brine the turkey before it gets too salty?
The maximum safe brining time is 24 hours. After that, the turkey risks becoming overly salty or absorbing too much liquid. For best results, brine for 12-18 hours—this gives perfect flavor penetration without over-salting. The longer you brine (up to 24 hours), the more flavorful it becomes, but 18 hours is often ideal for most birds.
What should I do if my turkey isn’t fully submerged?
Use a heavy plate or turkey-sized weight to keep it fully submerged. Never brine with exposed areas—they won’t get proper flavor infusion. For large birds (20+ pounds), you may need two plates. If you’re short on weights, use a clean gallon milk jug filled with water placed on top of the turkey. Check submersion every 4 hours during brining.
Can I reuse leftover brine?
Yes! Strain the used brine through a fine-mesh sieve to remove herbs and solids. You can reduce it on the stove for a glazey pan sauce—simmer until thickened (about 15-20 minutes). For extra richness, add 1/4 cup butter and 1 tbsp flour at the end. The strained herbs can be composted or used in homemade stock. Never reuse brine with raw meat after it’s been used.
What’s the best way to store a brined turkey?
After brining, rinse the turkey thoroughly and pat it completely dry. Store it uncovered on a wire rack in the refrigerator for 4-6 hours (or overnight) to dry the skin. Once dried, wrap it loosely in plastic wrap or place it in a container. Cook within 2 days for best results. For longer storage, cook immediately after drying—brined turkeys don’t keep as long as unbrined ones.

- 32 Oz Cream Cheese Cheesecake Recipe: Silky Smoothness With No Cracking - October 11, 2026
- 8×8 Pan Dump Cake Recipe: One-Bowl Wonder with Fudgy Layers - October 11, 2026
- 10-Layer Cake Recipe: Stacked Height With Buttery Vanilla Layers - October 11, 2026