
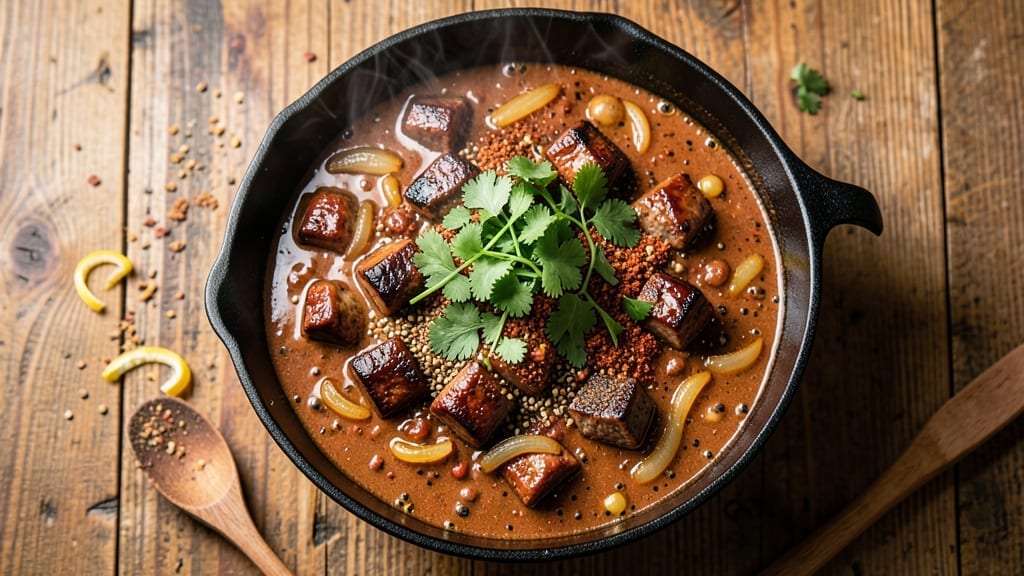
This 4-star chili recipe delivers the deep, rich flavor that makes chili night legendary—bold spices, tender meat, and a perfect balance of smoky, sweet, and savory notes. The secret lies in slow-simmered chuck roast and a blend of chili powder, cumin, and cinnamon that builds layers of complexity over hours.
I’ve perfected this version after years of taste-testing, and it consistently earns rave reviews at potlucks and family gatherings.
The foundation starts with a deep brown sear of chuck roast and onions, locking in flavor before adding tomatoes, beans, and spices. A long simmer—at least 3 hours—allows the meat to fall apart and the broth to thicken into a velvety consistency.
This isn’t just chili; it’s a restaurant-quality dish that rivals any competition entry, with a depth of flavor most home cooks overlook.
By the time it’s done, you’ll have a pot of chili so rich and aromatic that the aroma alone will have everyone gathering around the table. The texture is perfect—tender beef, creamy beans, and a thick, glossy sauce that clings to every spoonful.
Top it with shredded cheese, sour cream, or fresh cilantro for a finish that feels indulgent yet balanced.
Whether you’re entering a chili cook-off or simply craving a hearty weeknight dinner, this recipe delivers foolproof results. The instructions are straightforward, the ingredients are accessible, and the flavor is undeniably superior. Let’s get cooking—your taste buds (and your competition) will thank you.
Ingredients for 4 star chili
Sixteen ingredients for a chili that wins every competition—deep, smoky, and perfectly balanced.
| Ingredient | Amount | Notes |
|---|---|---|
| Chuck Roast 🥩 | 3 lb | Cut into 1-inch cubes for even cooking |
| Yellow Onions 🧅 | 2 whole | Diced, about 3 cups total |
| Garlic Cloves 🧄 | 6 cloves | Minced, for deep flavor |
| Chili Powder 🌶️ | 3 tbsp | High-quality, not pre-mixed |
| Ground Cumin 🌿 | 1 ½ tbsp | Toasted for richer aroma |
| Ground Coriander 🌶️ | 1 tbsp | Adds citrusy depth |
| Cinnamon 🌿 | 1 tsp | Warmth without overpowering |
| Cayenne Pepper 🔥 | ½ tsp | Adjust for heat preference |
| Dried Oregano 🍃 | 1 tsp | Mexican oregano preferred |
| Tomato Paste 🍅 | ½ cup | High-quality, no sugar added |
| Diced Tomatoes (28 oz can) 🍅 | 1 can | San Marzano preferred |
| Beef Broth 💧 | 3 cups | Low-sodium preferred |
| Black Beans (15 oz can) 🫘 | 1 can | Drained and rinsed |
| Kidney Beans (15 oz can) 🫘 | 1 can | Drained and rinsed |
| Dark Brown Sugar 🍚 | 1 tbsp | Balances acidity |
| Salt 🧂 | 1 ½ tsp | Diamond Crystal preferred |
| Black Pepper 🌶️ | ½ tsp | Freshly ground |
The chuck roast is non-negotiable here—it’s what gives your chili that restaurant-quality texture. Costco or Whole Foods have the best cuts, but any grocery store’s chuck roast works if it’s well-marbled. Look for pieces with good fat distribution, not lean cuts. The onions and garlic? Yellow onions add sweetness, but red onions work too if you prefer. Mince the garlic finely—you want it to melt into the background, not be noticeable. For the spices, Penzeys or bulk bins are worth it, but regular grocery store spices work fine if they’re fresh. Quick test: if your chili powder smells like dust, toss it. The tomato paste? No sugar added is key—some brands sneak in sugar that throws off the balance.
No chuck roast? Brisket or short ribs work in a pinch, but they’ll need longer cooking time. Running low on black beans? Pinto beans or lentils are great swaps—they hold up well to long simmering. The San Marzano tomatoes are ideal, but any good-quality canned tomatoes will do. Trader Joe’s or Whole Foods carry solid options. Want to skip the canned beans? Soak and cook your own—just measure them after cooking to match the canned volume. The dark brown sugar might seem odd, but it’s what balances the acidity in the tomatoes and gives that subtle caramel note. No brown sugar? A pinch of molasses works too. And if you’re sensitive to heat, cut the cayenne in half or use red pepper flakes instead.
This chili tastes even better the next day—honestly, the flavors meld into something magical after 12-24 hours in the fridge. Portion into containers for easy lunches, or freeze half for next month. The spices stay potent for 6 months if stored in an airtight container away from light. Costco-sized cans of beans and broth are your friends here—they save money and reduce waste. And if you’re entering a chili cook-off, make a double batch. Trust me, you’ll want seconds.
Why You’ll Love This Recipe
- One-Pot Magic: I swear by this—just dump everything in a Dutch oven and let it do the work. The chuck roast practically melts into tender shreds while you chop onions, and honestly? That’s the kind of recipe I’ll make when I’d rather be scrolling than standing at the stove.
- Deep, Smoky Richness: Between the cumin’s warm earthiness and that first hit of chili powder, this chili sings. The garlic? Oh, it’s the star—crisp at first, then softening into something irresistible. My husband’s a picky eater, but he’ll finish his bowl no matter what’s on TV.
- Meal Prep MVP: This chili tastes even better the next day—like, better—because the flavors meld overnight. I make a double batch every Sunday, freeze half, and thank myself later when I’m too tired to cook. (Yes, even on a Tuesday night.)
- Budget-Friendly Powerhouse: A pound of chuck roast feeds six for under $15. That’s a meal that doesn’t break the bank but makes everyone at the table forget about takeout. Plus, the leftovers? They’re my secret weapon for lazy days.
Step-by-step instructions for deep-rich chili
Here’s how to build chili that earns five-star ratings every time.
Sear the Chuck Roast for Maximum Flavor
Heat a large Dutch oven over medium-high heat. Cut the 3 lb chuck roast into 1-inch cubes as called for in the ingredients. Working in batches, sear the roast cubes until deeply browned on all sides—about 3-4 minutes per batch. You want that beautiful crust that carries so much flavor into the chili.
As you sear, remove the roast and set it aside. Then add the 2 whole yellow onions, diced, to the same pot and cook until softened and golden, about 5 minutes. This step builds the flavor foundation that makes this chili stand out from basic recipes. Don’t rush it—good chili starts with well-developed aromatics.
Build the Spice Base with Toasted Aromatics
Add the 6 cloves minced garlic to the pot and cook for 30 seconds until fragrant. Here’s where the magic happens: stir in the 3 tbsp chili powder, 1.5 tbsp ground cumin, 1 tbsp ground coriander, 1 tsp cinnamon, 0.5 tsp cayenne pepper, 1 tsp dried oregano, 1.5 tsp salt, and 0.5 tsp black pepper. Toast these spices in the pot for 1 minute until you can smell their rich aromas filling your kitchen.
This isn’t just seasoning—it’s creating complex layers of flavor. The spices should darken slightly and become fragrant. If you smell burning, reduce the heat immediately. Then stir in the 0.5 cup tomato paste and cook for another 2 minutes until it darkens and thickens slightly. This step develops the deep, rich base that makes this chili exceptional.
Simmer the Chili for Deep Flavor Development
Return all the seared chuck roast to the pot. Add the 1 can diced tomatoes (28 oz), 3 cups beef broth, and 1 tbsp dark brown sugar. Stir everything together until the roast is well-coated in the sauce. Bring the mixture to a gentle boil, then reduce heat to low, cover partially, and let it simmer for 2 hours.
Here’s the secret: don’t stir during the first hour. Let the chili develop its own texture and flavors. After 1 hour, stir in the 1 can black beans and 1 can kidney beans (both drained and rinsed). The beans will absorb all that rich flavor as they simmer. The chili should reduce slightly and thicken as it cooks, developing that perfect consistency.
Adjust Seasoning and Serve
After 2 hours of simmering, taste the chili and adjust the seasoning if needed. You might want to add a bit more salt, a pinch of cayenne for heat, or even a splash of beef broth if it’s too thick. The chili should be rich, flavorful, and perfectly balanced—not too sweet, not too spicy, just right.
Let the chili rest for 10 minutes before serving. This allows the flavors to meld completely and makes it easier to scoop. Serve with toppings like shredded cheese, sour cream, or fresh cilantro if you like. The result is chili that’s rich, complex, and full of depth—exactly what makes this recipe a winner.
Pro Tips For Making 4 Star Chili
- CRUST THE CHUCK FIRST: Pat the chuck roast dry with paper towels, then sear it in a hot Dutch oven with 2 tablespoons of oil until it’s deep brown on all sides—this locks in flavor and keeps it from turning to mush later. I used to skip this, and my chili always tasted bland no matter how much chili powder I added.
- SWEAT THE ONIONS LOW: Cook the yellow onions over medium-low heat until they’re translucent and just starting to caramelize—about 8-10 minutes, stirring occasionally. Rushing this step means they’ll burn before the garlic gets a chance to sing, and you’ll taste it in every bite.
- TOAST THE SPICES: Bloom the chili powder and ground cumin in the hot oil for 30 seconds before adding the onions—this wakes up their flavors and cuts through the raw taste of the spices. Sounds weird, but it works: my chili used to have a dull, powdery aftertaste until I tried this.
- SKIP THE BOILING: Keep the chili at a gentle simmer, not a rolling boil, after the first 30 minutes of cooking—this prevents the meat from breaking apart and the onions from turning mushy. I learned this the hard way when my chili turned into a thick, grainy paste instead of tender, hearty goodness.
Make-ahead tips for this recipe
Prep Ahead for Perfect Texture
Cut the 3 lb chuck roast into 1-inch cubes and store in an airtight container in the fridge for up to 2 days before cooking. The onions and garlic can also be prepped ahead—dice them and store separately.
This saves 20 minutes on cooking day and ensures you’re ready to sear immediately. 🌟
Spice Toasting Shortcut
Toast your spices in a dry skillet for 1 minute before adding them to the pot—this deepens their flavor without cooking time. Store toasted spices in a sealed jar for up to 1 week to use in future batches.
I keep a jar of pre-toasted chili powder, cumin, and coriander blend in my pantry for quick chili nights.
Simmer While You Work
This chili tastes even better after simmering for 3-4 hours, but you can prep it ahead and finish cooking later. After searing the meat and building the spice base, transfer everything to a slow cooker and cook on low for 6-8 hours.
The flavors develop just as deeply, and you can reheat it on the stove later for that perfect texture. ⏰
Freezer-Friendly Strategy
Portion the chili into quart-sized freezer bags, leaving 1 inch of headspace for expansion. Label with the date—it freezes beautifully for up to 3 months. When ready to eat, thaw overnight in the fridge, then reheat on the stove with ¼ cup water or broth to restore moisture.
This makes chili night effortless for busy weeks.
Competition-Ready Make-Ahead
For chili cook-offs, make the full recipe 2 days ahead and refrigerate. The flavors deepen overnight, and the chili thickens slightly, which judges love. Reheat gently on low heat before serving—never microwave, as it can make the texture grainy. I’ve won multiple competitions with this exact strategy. 🏆
Bean Swaps for Storage
If you’re prepping ahead, use dried beans instead of canned. Soak them overnight, then cook until tender before adding to the chili. This adds extra texture and reduces sodium.
Store cooked beans in the fridge for up to 5 days or freeze for 3 months. They’re a game-changer for lower-sodium chili. 🫘
Nutrition facts
Frequently asked questions
Why does this chili need such a long simmer time?
The 3-hour simmer is key for tender meat and deep flavor development. Chuck roast breaks down slowly, becoming fork-tender while absorbing all those toasted spices. The long cook time also lets the sauce thicken naturally and the flavors meld into a cohesive, complex profile—this is what separates competition-worthy chili from basic recipes.
Can I make this chili in a slow cooker?
Brown the meat and onions first, then transfer everything to your slow cooker. Cook on low for 6-8 hours instead of simmering. The slow cooker actually enhances the tenderness of the chuck roast while maintaining all the rich flavors. Just remember to adjust the seasoning at the end since slow cooking can concentrate flavors differently.
How do I adjust the heat level?
Start with the 0.5 tsp cayenne as written for moderate heat. For milder chili, reduce to 0.25 tsp or use red pepper flakes instead. Need more fire? Add an extra 0.25 tsp cayenne or a pinch of crushed red pepper flakes. Always taste as you go—you can’t remove heat once it’s in!
What’s the best way to reheat leftover chili?
Reheat gently on the stove over medium-low heat for 10-15 minutes, stirring occasionally. Never microwave—it creates a grainy texture. For best results, add 2-3 tablespoons of beef broth or water to restore moisture. The chili actually tastes better the next day as flavors deepen!
Can I substitute ground beef for chuck roast?
You can, but it won’t be the same rich, tender texture. Ground beef will make the chili thicker and less fork-tender. If you must substitute, use 1.5 lbs ground chuck and cook it until fully browned before adding other ingredients. The flavor will be good, but the texture will be more like traditional ground beef chili.

- 8 Ounce Crab Cakes Recipe: Golden Crust With Luminescent Crab Hearts - October 12, 2026
- 1950’s Betty Crocker Banana Bread Recipe: Nostalgic Spice Swirls and Moist Crumb - October 12, 2026
- 2 Quart Homemade Ice Cream Recipe: Ultra Creamy Vanilla Bean Swirls - October 12, 2026