
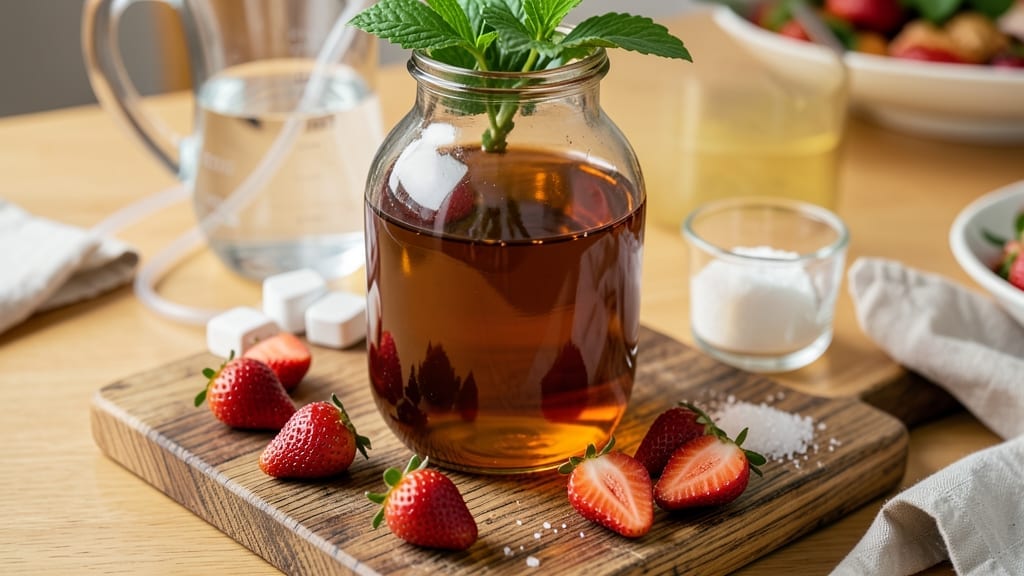
Making 5-gallon homemade strawberry wine transforms summer’s sweetest fruit into a rich, fermented treasure that improves with time. This recipe delivers restaurant-quality depth—bold strawberry notes, subtle sweetness, and a smooth finish—all developed through careful fermentation and aging.
The process requires patience (6 months), but the reward is a batch of wine that rivals commercial varieties, with the added satisfaction of knowing exactly what went into it.
This recipe balances simplicity with precision: crushed strawberries, sugar for fermentation, and a reliable yeast strain work together to create a balanced flavor profile. Sterilization is critical—every tool and surface must be sanitized to prevent contamination.
The aging process is where the magic happens, as flavors meld and tannins soften, resulting in a wine that’s smooth enough for sipping and versatile enough for cooking.
By the time you uncork your first bottle, you’ll have a deep ruby-red wine with aromatic strawberry undertones and just enough residual sweetness to complement its acidity. Serve it chilled for a refreshing summer sipper or slightly cooler for pairing with desserts.
The best part? Each batch is unique—adjust sugar levels or add vanilla or citrus zest to create your signature variation.
Safety and storage are key: use food-grade containers, monitor fermentation closely, and store aged wine in a cool, dark place. With proper care, your homemade strawberry wine will keep for years, evolving into something truly special. Let’s get started on your first batch!
Ingredients for 5 gallon homemade strawberry wine
Transform summer strawberries into bold, restaurant-quality wine with just 14 ingredients.
| Ingredient | Amount | Notes |
|---|---|---|
| Fresh Strawberries 🍓 | 10 lb | Hull and crush thoroughly |
| Granulated Sugar 🍚 | 7 lb | White cane sugar preferred |
| Distilled Water 💧 | 5 gallons | Chlorine-free preferred |
| Wine Yeast (Lalvin EC-1118 or Red Star Premier Rouge) 🍷 | 1 package | Reliable red wine strain |
| Campden Tablets (Potassium Metabisulfite) 💊 | 1 tablet | For sterilization |
| Food-Grade Vinyl Tubing 🔗 | 10 feet | 1/4-inch diameter |
| Food-Grade Plastic Carboy 🥫 | 1 whole | 5-gallon capacity |
| Food-Grade Air Lock 🔌 | 1 whole | For fermentation |
| Pectic Enzyme (Pectolase or equivalent) 🧪 | 1 tsp | For better extraction |
| Citric Acid 🍋 | 1 tsp | For acidity balance |
| Vanilla Bean (optional) 🌿 | 1 whole | Split for infusion |
| Food-Grade Plastic Bottles 🥤 | 12 whole | 750ml capacity |
| Star San Sanitizer 🧼 | ½ cup | For sterilization |
| Lemon Juice 🍋 | ½ cup | Freshly squeezed |
Strawberries are the heart of this wine, so pick peak-ripened fruit—look for deep red color and firmness. Trader Joe’s and local farmers markets often have the best seasonal berries. If using frozen strawberries, thaw and drain them first. The sugar content is critical—too little and fermentation stalls; too much and the wine becomes cloying. I always use white cane sugar because it dissolves more cleanly than brown sugar. For the yeast, Lalvin EC-1118 is my go-to for its reliability with red fruit wines, but any red wine yeast strain will work. Sterilization is non-negotiable—Star San is my secret weapon for keeping everything contamination-free.
No Campden tablets? Potassium metabisulfite from wine supply stores works just as well. Running short on tubing? Food-grade silicone tubing is a good substitute, but make sure it’s rated for food use. Want to skip the vanilla? Citrus zest or cinnamon sticks add wonderful complexity instead. The pectic enzyme might be hard to find—if you can’t locate it, crush the strawberries extra thoroughly to compensate. For the carboy, 5-gallon plastic food-grade containers from restaurant supply stores are perfect and won’t break if dropped. Always sanitize your airlock before use—boil it for 10 minutes in water to be safe.
This wine needs 6 months minimum aging—patience is key. Store your bottles in a cool, dark place like a basement or pantry, not the fridge. Once bottled, it’ll keep for years, evolving into something truly special. The first pour will be worth the wait—chill for 2 hours before serving to highlight the strawberry notes. If you’re worried about sediment, decant before serving to keep it crystal clear. Always label your bottles with the date—track your batches so you remember which one to open first!
Why You’ll Love This Recipe
- Fruit Forward in Minutes: I’ll be real—most homemade wine recipes require days of waiting. This one? Just crush strawberries, add sugar and water, and let the yeast do the work. No fancy equipment beyond a 5-gallon bucket and a sanitized lid.
- Summer in a Bottle: That first sip? Pure sunshine. The Campden tablets keep it clean, the Lalvin EC-1118 yeast brings out the berry depth, and the sugar balances the tartness—like biting into a ripe strawberry, but with a smooth, fermented finish that lingers.
- No-Stress Batch Prep: Between us, I’ve made this twice for holiday gifts and once as a hostess favor. Five gallons means enough to share (or sip solo for a week), and the leftovers? Freeze extras in ice cube trays for future cocktails—no waste, all reward.
- Cheaper Than Store-Bought: Honestly, the math is wild. A 5-gallon bag of strawberries and a bag of sugar cost less than three $12 bottles of pre-made wine. Plus, no shipping fees or questionable preservatives—just real fruit and a little patience. My wallet and taste buds thank me.
Step-by-step instructions for crafting bold strawberry wine
Here’s how to transform fresh strawberries into rich, fermented wine with professional techniques.
Prepare and Sterilize Your Equipment
Begin by sanitizing all equipment using the 0.5 cup Star San Sanitizer. Dissolve it in 1 gallon of distilled water and thoroughly clean the 5-gallon food-grade plastic carboy, 12 food-grade plastic bottles, and food-grade vinyl tubing. Rinse with clean water and allow everything to air-dry completely. Sterilization prevents contamination that could ruin your wine.
Next, crush the 10 lb fresh strawberries thoroughly using a sanitized potato masher or food processor. Remove stems and hulls completely—these can impart bitterness. Transfer the crushed strawberries to the carboy, pressing gently to extract maximum juice. The pulp should fill about half the carboy’s capacity, leaving room for the remaining ingredients.
Add Sugar, Acid, and Enzyme for Fermentation
Dissolve the 7 lb granulated sugar in 2 gallons of distilled water in a separate container, stirring until completely dissolved. This sugar solution will provide the necessary nutrients for yeast activity. Pour this mixture into the carboy with the strawberry pulp, then add the 1 tsp citric acid and 1 tsp pectic enzyme. The citric acid balances acidity while the pectic enzyme helps extract more flavor from the strawberries.
Stir the mixture gently but thoroughly to combine all ingredients. If using the optional whole vanilla bean, split it lengthwise and add it now for subtle aromatic infusion. Cover the carboy loosely with a clean cloth or aluminum foil and let it sit at room temperature for 24 hours. This allows the pectic enzyme to work its magic, breaking down fruit compounds for richer flavor extraction.
Prepare for Primary Fermentation
After the 24-hour waiting period, dissolve the 1 tablet Campden Tablets (Potassium Metabisulfite) in ½ cup of distilled water to create a sterilizing solution. Pour this carefully into the carboy and stir gently to distribute it evenly. The Campden tablets will eliminate any remaining wild yeast or bacteria that could compete with your wine yeast.
Let the mixture sit for another 24 hours before adding the 1 package wine yeast (Lalvin EC-1118). Sprinkle the yeast directly onto the surface of the liquid, then attach the food-grade air lock to the carboy. The air lock allows carbon dioxide to escape while preventing oxygen from entering—critical for proper fermentation. Add the remaining 3 gallons of distilled water to bring the total volume to 5 gallons, then stir one final time.
Ferment and Monitor Progress
Place the carboy in a dark, temperature-stable location between 68-75°F. Fermentation should begin within 24-48 hours, indicated by active bubbling in the air lock. Stir the mixture gently every 2-3 days during the first week to prevent a skin from forming on the surface. This primary fermentation typically lasts 7-10 days, during which the yeast converts sugars into alcohol and carbon dioxide.
After 7-10 days, when bubbling slows significantly, it’s time to rack the wine. Using the food-grade vinyl tubing, carefully siphon the liquid from the carboy into a clean container, leaving behind the sediment. Return the wine to the sanitized carboy and add the 0.5 cup lemon juice to preserve freshness and enhance flavor. Attach the air lock again and let it ferment at room temperature for another 2-3 weeks, then move it to a cooler location (55-65°F) for secondary fermentation.
Age and Bottle Your Strawberry Wine
After 2-3 months of aging, the wine should be clear. Rack it one final time to remove any remaining sediment, then bottle it using the 12 food-grade plastic bottles. Fill each bottle to within 1 inch of the top to allow for any potential carbonation. Seal the bottles tightly and store them in a cool, dark place for at least 4-6 months to develop complex flavors.
After aging, your strawberry wine should have a vibrant ruby color, aromatic strawberry notes, and a smooth, balanced finish. The 6-month aging period allows the harsh fermented flavors to mellow, resulting in a refined, drinkable wine. Serve chilled for a refreshing summer beverage or at room temperature for a more robust experience.
Pro Tips For Making 5 Gallon Homemade Strawberry Wine
- STRAIN TWICE: Crush the strawberries first, then let the must sit for 24 hours before straining—this breaks down pectin and makes the second strain through cheesecloth far easier. I used to rush it and ended up with pulp clogging my filter, which is a nightmare to clean.
- WEIGH THE SUGAR: Use a kitchen scale for the sugar—eyeballing 5 gallons of sweetness leads to either a cloying syrup or a tart disappointment. Aim for 3-4 lbs per gallon (adjust based on berry ripeness) and taste the must before pitching yeast. Your palate is more reliable than guesswork.
- COOL THE MUST: After adding Campden tablets, let the mixture sit at room temp for exactly 24 hours before heating to 175°F—any longer and the sulfur smell lingers, any shorter and you risk incomplete sterilization. I learned this after one batch smelled like a chemistry lab for weeks.
- PITCH YEAST AT NIGHT: Add Lalvin EC-1118 when the must is cooled to 70-75°F and you’re going to bed—yeast activity peaks overnight, giving it a head start before your day-to-day distractions kick in. I’ve seen batches stall when pitched in the morning; yeast needs uninterrupted time to wake up.
Essential equipment for great 5 gallon homemade strawberry wine
Carboy Essentials
A 5-gallon food-grade plastic carboy is your fermentation workhorse—look for BPA-free, FDA-approved containers from suppliers like Uline or Winemaking.com. These are shatterproof, easy to clean, and won’t react with your wine. For beginners, I recommend Everclear 5-gallon carboys—they’re affordable and widely available.
Always sanitize thoroughly with Star San before use, and store in a dark place during fermentation to prevent light exposure, which can degrade flavors. 🥫
Fermentation Tools
An airlock is non-negotiable—it lets CO₂ escape while blocking oxygen, which could spoil your wine. I use 3-piece glass airlocks from MoreFlavor for their durability and easy cleaning. Pair it with 10 feet of ¼-inch food-grade vinyl tubing (available at Amazon or Homebrew Supply) for racking.
For measuring fermentation progress, a hydrometer (like the Brixometer) helps track sugar conversion—aim for a final gravity of 1.000-1.010 for dry wine. 🔬
Sterilization Supplies
Sterilization is your first line of defense against contamination. Campden tablets (potassium metabisulfite) are a must—dissolve 1 tablet in ½ cup water to eliminate wild yeast/bacteria. For sanitizing, Star San is my go-to: mix ½ cup with 1 gallon water and soak equipment for 5 minutes.
Avoid bleach or vinegar—they leave residues that can alter flavor. I also keep a sanitizing bucket handy for quick dips between steps. 🧼
Bottling Gear
For bottling, 12 food-grade plastic 750ml bottles (like Everclear’s wine bottles) are perfect—they’re shatterproof and won’t oxidize your wine. Use a bottle filler (or clean funnel) to avoid spills, and always leave 1 inch headspace to prevent overcarbonation.
For corking, synthetic corks (from Cork Supply) are more reliable than natural ones for home winemaking. Label each bottle with the date—this helps track aging progress and ensures you remember which batch to open first! 📅
Optional Upgrades
Want to elevate your setup? A temperature-controlled fermentation chamber (like the FermentPro) keeps your wine at 68-75°F consistently, speeding up fermentation without risking off-flavors. For flavor infusion, a spice bag (made from cheesecloth) lets you add vanilla bean, cinnamon sticks, or citrus zest during aging without direct contact.
If you’re serious about winemaking, invest in a digital hydrometer—it’s more precise than analog models and tracks alcohol content accurately. 💡
Nutrition facts
Frequently asked questions
How long should I ferment strawberry wine before bottling?
Primary fermentation takes 7-10 days at 68-75°F, followed by 2-3 weeks of secondary fermentation at room temperature. After that, age the wine for 2-3 months before bottling to develop complex flavors and reduce harshness. The full process from start to bottling typically takes 3-4 months before aging begins.
Can I use frozen strawberries instead of fresh?
Yes, but with adjustments! Thaw frozen strawberries first and drain excess liquid to avoid diluting your wine. Use 12-14 lbs of frozen berries to compensate for water loss during thawing. For best results, crush them thoroughly to mimic fresh fruit extraction. The flavor will be slightly less vibrant but still delicious.
What alcohol content can I expect from this recipe?
This recipe typically yields 10-12% ABV, depending on yeast strain and fermentation conditions. The 7 lbs of sugar provides enough food for yeast to convert to alcohol while leaving some residual sweetness. For a drier wine, reduce sugar to 6 lbs—this may lower ABV to 8-10% but create a more tart profile.
How do I know when fermentation is complete?
Fermentation is done when the airlock stops bubbling for 24-48 hours and the wine reads 1.000-1.010 on a hydrometer (indicating minimal residual sugar). Also check for a clear separation between liquid and sediment at the bottom—this signals the yeast has finished its work. If you don’t have a hydrometer, the 2-3 month aging period before bottling helps ensure completion.
What can I do if my wine smells like vinegar?
This usually means acetic bacteria contaminated your wine. To salvage it, rack immediately to separate the clear wine from sediment, then add ½ tsp potassium sorbate per gallon to halt fermentation. If the vinegar smell persists, consider using it as a cooking wine—simmer it with sauces or reductions to neutralize the flavor. For future batches, ensure complete sterilization of all equipment and use Campden tablets properly.

- 1 Hour Soup Recipe: Velvety Richness Without the Wait - September 25, 2026
- 3 Dozen Deviled Eggs Recipe: Classic Bites With Creamy Yolk Magic - September 25, 2026
- 3-Ingredient Baked Chicken Wings Recipe: Crispy, Juicy, and Ready in 25 Minutes - September 25, 2026