
Mastering a 5-grain bread machine recipe with a whole-grain crust and nutty depth is simpler than you think—no kneading required. This recipe transforms five wholesome grains into a loaf with a crispy exterior and tender interior, perfect for sandwiches or toast.
The key lies in balancing hydration and yeast activation for ideal texture, regardless of your bread machine’s settings.
This recipe uses equal parts whole wheat, rye, barley, millet, and oats, each contributing unique flavors and textures. The bread machine handles the heavy lifting, but precise ingredient ratios ensure a loaf that rises properly and bakes evenly.
For extra richness, a touch of honey or olive oil enhances the nutty undertones without overpowering the grains.
By the time you remove the loaf from the pan, you’ll have a golden crust with a satisfying crunch and a soft, slightly dense crumb—ideal for hearty sandwiches or crusty toast.
The nutty depth comes from slow baking, allowing the grains to develop their full flavor profile. This method works in any standard bread machine, with adjustments for your specific model’s cycle.
Whether you’re a beginner or an experienced baker, this recipe delivers consistent results with minimal effort. The only tools you’ll need are your bread machine, a mixing bowl, and a little patience. Let’s get started on your first perfect loaf.
Ingredients for 5 grain bread machine
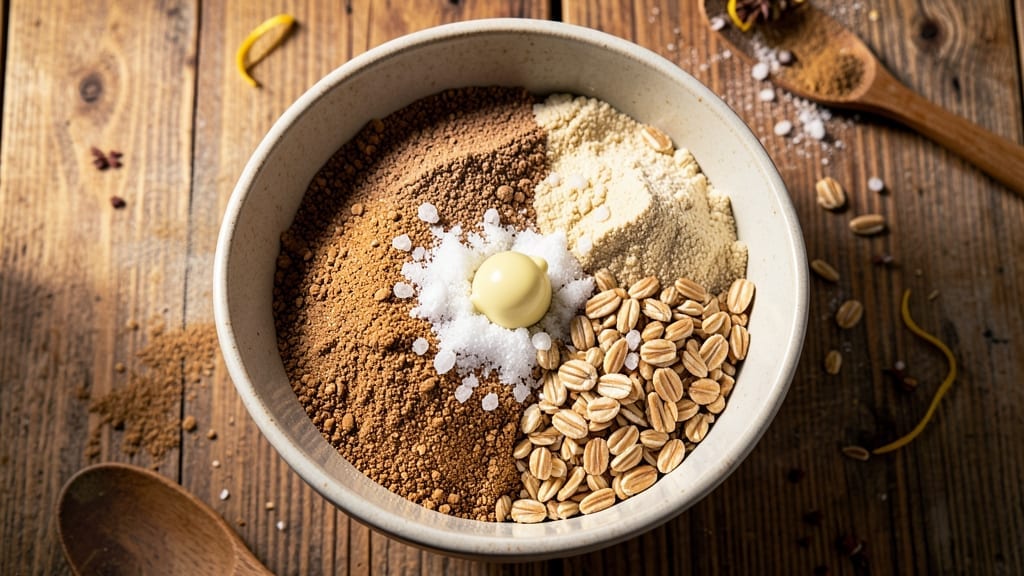
Five wholesome flours plus a touch of honey and olive oil create a nutty, hearty loaf.
| Ingredient | Amount | Notes |
|---|---|---|
| Whole Wheat Flour 🌾 | 1 cup | Unbleached preferred for nutty flavor |
| Rye Flour 🌾 | 1 cup | Dark rye for deeper flavor |
| Barley Flour 🌾 | 1 cup | Ground from pearled barley |
| Millet Flour 🌾 | 1 cup | Lightly toasted for nuttiness |
| Old-Fashioned Rolled Oats 🍚 | 1 cup | Not steel-cut, for texture |
| Active Dry Yeast 🍞 | 2 ¼ tsp | Fresh yeast if available |
| Granulated Sugar 🍚 | 1 tbsp | For yeast activation |
| Salt 🧂 | 1 ½ tsp | Kosher or sea salt |
| Extra-Virgin Olive Oil 🫒 | 2 tbsp | For richness and crust |
| Honey 🍯 | 1 tbsp | Light variety preferred |
| Warm Water 💧 | 1 ½ cups | 110°F for yeast activation |
The flours are the stars here. Bob’s Red Mill or King Arthur carry pre-ground grains if you don’t want to mill them yourself—just check the labels for 100% whole grain. The oats should be old-fashioned rolled, not quick oats (those turn mushy). If you’re using whole grains, toast them lightly in a dry pan first—5 minutes at medium heat brings out their nutty depth. The yeast matters too: if it’s old, it won’t activate properly. Toss it in warm water with sugar, wait 5 minutes, and if nothing bubbles, start over with fresh yeast.
No rye flour? Substitute with extra whole wheat—it’ll be slightly less tangy but still delicious. Short on millet? Buckwheat flour works in a pinch (same amount). The honey can be swapped for maple syrup if you prefer, but honey’s enzymes help with browning. Olive oil is non-negotiable for crust crispness—vegetable oil won’t give the same flavor. For extra richness, add 1 tbsp of melted butter to the oil (but don’t tell anyone I said that). The water temperature is critical: too hot kills yeast, too cold slows activation. Aim for 110°F—stick your pinky in, if it feels warm but not hot, you’re good.
Mix everything in your bread machine pan first—this prevents a mess when the machine starts kneading. The dough will be sticky, so wet your hands before handling. For best results, use the basic white bread setting and let it run its full cycle. If your machine has a crust setting, use it for the final 5 minutes. The loaf keeps well in a bread bag at room temp for 2 days or frozen for 3 months. To reheat, wrap in foil and warm in a 350°F oven for 10 minutes. The crust gets better the next day—worth the wait!
Why You’ll Love This Recipe
- No-Fuss Machine Magic: I swear by this bread—just toss the flours (whole wheat, rye, barley, millet) and oats into the bread machine, hit start, and walk away. The machine does all the kneading and rising while you make coffee or answer emails.
- Earthy Crunch Perfection: That nutty, slightly sweet bite from the millet and rye? It’s ridiculously good. The oats add texture, so every slice has a satisfying crunch—no sad, gummy loaves here.
- Weeknight Workhorse: I make a batch every Sunday because it’s my go-to for sandwiches, toast, or even French toast. Honestly, it’s the only bread my picky teenager won’t complain about—(yes, even on a Tuesday night).
- Budget-Friendly Staple: Using pantry staples like whole wheat and rolled oats keeps costs low, and a single loaf lasts us nearly a week. Freeze slices for quick toast later—no waste, all flavor.
Step-by-step instructions for 5 grain bread machine recipe
Here’s how to transform simple ingredients into a hearty, nutty loaf with a perfect crust.
Mix Dry Ingredients Thoroughly
In a large mixing bowl, combine all the dry ingredients: the 1 cup whole wheat flour, 1 cup rye flour, 1 cup barley flour, 1 cup millet flour, 1 cup old-fashioned rolled oats, 2.25 teaspoons active dry yeast, 1 tablespoon granulated sugar, and 1.5 teaspoons salt. I like to use a whisk for this step to ensure even distribution of the yeast and salt throughout the flours.
This blend creates the foundation for that distinctive nutty depth and texture. The combination of flours gives each bite a complex flavor profile—rye adds earthiness, barley contributes a malty note, and millet brings a subtle sweetness. Don’t skip the whisking; you’ll see how the dry ingredients clump together initially, but thorough mixing ensures consistent texture throughout the loaf.
Add Wet Ingredients and Create the Dough
To the dry mixture, add the 2 tablespoons extra-virgin olive oil, 1 tablespoon honey, and 1.5 cups warm water (about 110°F). Using a wooden spoon or dough whisk, stir until everything comes together into a shaggy dough. The honey and olive oil will help create a moist, flavorful crumb while the warm water activates the yeast.
At this stage, the dough will be sticky and wet—this is normal. I find it helpful to use a silicone spatula to scrape down any dough clinging to the sides of the bowl. Let the dough rest for 5 minutes while you prepare your bread machine. This short rest allows the flour to absorb the liquid more evenly, making the next steps easier.
Knead in the Bread Machine
Transfer the dough to your bread machine pan and select the “dough” setting. Most machines will knead for about 5-10 minutes until the dough is smooth and elastic. You’ll know it’s ready when it pulls away cleanly from the sides of the pan and springs back when poked gently.
If your machine doesn’t have a dough setting, use the basic bread setting but stop the cycle after the kneading phase (usually around 20-30 minutes). The dough should be soft but not sticky to the touch. This kneading develops gluten, which gives the bread its structure and chewiness. If the dough feels too wet after kneading, let it rest covered for 10 minutes before shaping.
Shape and Let Rise
Once kneaded, shape the dough into a smooth ball and place it back in the bread machine pan. Select the “basic white bread” setting with a 2-pound loaf size (adjust if needed for your machine). The machine will automatically let the dough rise for about 1-1.5 hours until it doubles in size and feels light and airy when pressed gently.
Here’s where the magic happens—the dough should rise until it reaches just above the top of the pan, creating that beautiful domed shape. If the dough doesn’t rise enough, it might be too cold. Make sure your kitchen is around 75°F for optimal yeast activity. The rise time can vary based on humidity and temperature, so keep an eye on it.
Bake to Golden Perfection
After rising, the bread machine will automatically bake the loaf for about 45-60 minutes at 350°F. The machine will signal when it’s done by beeping and stopping the cycle. You’ll know it’s perfect when the crust is deep golden brown with a crisp texture and the internal temperature reaches 190-210°F when tested with an instant-read thermometer.
Let the bread cool in the pan for 10 minutes before transferring it to a wire rack. This resting period allows the steam to escape and prevents a gummy crumb. The bread will continue to firm up as it cools, and the crust will develop even more depth of flavor. Slice while still slightly warm for the best texture—each bite should be tender with a satisfying chew and that wonderful nutty aroma from the grain blend.
Pro Tips For Making 5 Grain Bread Machine
- Pulse the Oats: Toss those rolled oats into the bread machine’s bowl before adding liquids—then pulse 2-3 times until they’re barely fine. I used to skip this and ended up with a bread that tasted like it had rocks in it. The oats break down better this way, and the texture stays smooth.
- Measure Flours by Weight: Scoop and level those whole wheat, rye, barley, and millet flours into the machine by weight, not volume. A cup of rye flour isn’t the same as a cup of all-purpose, and your bread will either be dense or gummy if you guess. Use a kitchen scale—it’s the only way to get consistent results.
- Don’t Overmix the Dough: Let the bread machine do the kneading—stop checking the dough after the first 5 minutes. I learned this after pulling mine out early and ending up with a tough, chewy loaf. The machine knows the rhythm; let it run its full cycle unless you’re troubleshooting a specific issue.
- Add Honey Last: Stir the honey (or maple syrup) into the warm water after the yeast and flour mix, just before dumping it into the machine. I used to add it earlier, and the yeast would go dormant before it even got started. A quick 30-second mix is all it takes—no need to overcomplicate it.
Storing and reheating your 5 grain bread machine
Room-Temp Storage
Keep your freshly baked 5-grain loaf in a bread bag or airtight container at room temperature for up to 2 days. The crust will firm up beautifully overnight, developing deeper flavor.
I always store mine wrapped in a clean kitchen towel inside the bag—this prevents sogginess while maintaining that perfect crunch. For extra freshness, place the loaf on a wire rack inside the container to allow airflow. 🌾
Fridge Preservation
If you need to store for 3-4 days, slice the bread and wrap tightly in plastic wrap or parchment paper before placing in an airtight container. The fridge slows down staling, but whole-grain breads dry out faster than white.
To revive stale slices, wrap them in a damp paper towel and microwave for 10-15 seconds—the steam brings back that fresh-baked texture. 💧
Freezer Magic
For long-term storage, freeze your loaf unwrapped for 1 hour to firm up, then wrap tightly in foil followed by a plastic bag to prevent freezer burn. This method keeps bread fresh for 3 months while preserving moisture.
To use, thaw overnight at room temperature or reheat sliced bread in a 350°F oven for 5-7 minutes with a splash of water on the pan for steam. The crust stays crisp, and the crumb remains tender. ❄️
Reheating Secrets
For that just-out-of-the-oven feel, wrap slices in foil and warm in a toaster oven at 375°F for 3-4 minutes. Avoid microwaving whole-grain bread—it turns gummy.
My pro tip: Spritz slices with water before reheating to restore moisture. For sandwiches, toast the bread first, then assemble—this locks in freshness longer. 🔥
Crust Revival
If your bread’s crust loses its crunch, brush with melted butter or olive oil and toast for 1-2 minutes until golden again. For extra flavor, sprinkle with coarse salt or everything bagel seasoning before reheating.
The grains in this bread absorb moisture quickly, so always reheat in batches—2 slices at a time works best. 🧂
Nutrition facts
Frequently asked questions
Can I substitute any of the grains in this 5-grain bread?
If you’re missing a grain, try these swaps: rye can be replaced with extra whole wheat, millet works with buckwheat (same amount), and barley can be skipped if you use spelt flour. The oats are crucial for texture—use quick oats in a pinch, but they’ll make the bread denser. Always maintain 5 cups total of dry ingredients for proper hydration.
Why does my bread machine dough look too sticky?
Whole-grain doughs are naturally stickier due to the higher fiber content. If it’s too wet after kneading, let it rest 10-15 minutes covered with a damp towel—this helps the flour absorb moisture. For stubborn cases, add 1 tablespoon more flour (up to ½ cup total) during kneading. Never skip the olive oil—it’s essential for moisture and flavor in grain breads.
How do I know when the bread is fully baked?
Your bread is done when it reaches 190-210°F internally (use an instant-read thermometer) and has a deep golden-brown crust with no pale spots. The machine’s beep signals completion, but check for doneness early—some machines overbake. If unsure, tap the bottom: it should sound hollow. Let it cool 10 minutes before slicing to prevent crumb gumminess.
Can I make this recipe without a bread machine?
Yes! Mix all ingredients, knead by hand for 8-10 minutes (or use a stand mixer with a dough hook), then let rise 1-2 hours until doubled. Shape into a loaf, place in a greased 9×5-inch pan, and bake at 375°F for 40-45 minutes. For extra crust color, broil 2-3 minutes at the end. The texture will be slightly denser than machine-made bread.
What makes this bread nutty compared to regular whole wheat?
The combination of toasted grains (lightly heat them in a dry pan first) and rye flour creates depth, while olive oil and honey enhance the caramelization during baking. The barley adds malty notes, and millet contributes a subtle sweetness. Slow baking at 350°F allows these flavors to develop fully—rushing the process dulls the nutty profile.

- 12 Bean Chili Recipe: Hearty Slow-Cooked Depth With 12 Legumes - October 17, 2026
- 5 Seed Bread Recipe: Nutty Crunch and Artisan Flavor in One Loaf - October 17, 2026
- 1 Lb Macaroni Salad Recipe: Bold, Crunchy, and Crowd-Pleasing - October 17, 2026