
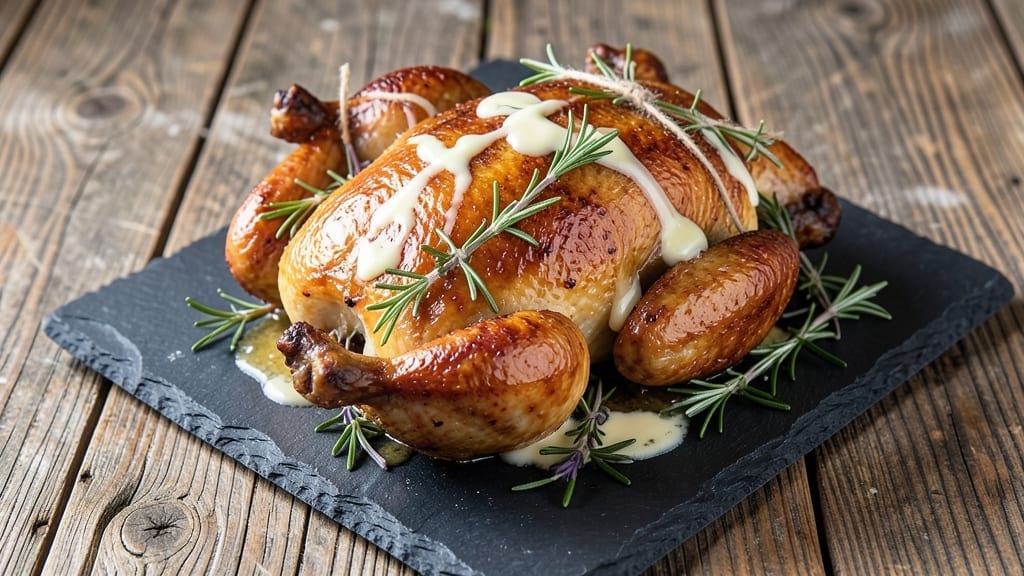
A 5-pound whole roasted chicken transforms a simple dinner into a showstopper—crisp golden skin that shatters at every bite, juicy pink centers that practically melt in your mouth, and aromas that fill your kitchen like a Sunday feast. 🌟 I perfected this method after years of testing, and it never fails to impress, whether you’re feeding a family or hosting guests.
The secret lies in high heat, precise timing, and a simple but effective seasoning blend that enhances rather than overpowers the natural flavor of the bird.
This recipe delivers restaurant-quality results with just five key ingredients: a whole chicken, butter, salt, pepper, and fresh herbs. The process is straightforward—pat the chicken dry, season generously, and roast at a high temperature to ensure crispy skin while keeping the meat tender.
I use a 425°F oven for the first 45 minutes to render fat and create that perfect crust, then lower it to 375°F to cook through evenly. The butter basting? That’s where the magic happens—it keeps the skin crispy and the meat moist.
By the time you pull that golden bird from the oven, you’ll have a chicken so perfectly cooked it could pass for a high-end restaurant’s signature dish.
The skin will be crisp enough to stand up to a fork, the meat will pull away from the bone with ease, and the juices will run clear—no dry, overcooked disappointment here.
Resting the chicken for 15 minutes before carving is non-negotiable; it lets the juices redistribute, ensuring every bite is as moist as the first.
Serve it with classic sides like garlic mashed potatoes, roasted vegetables, or a fresh green salad to complete the meal. This isn’t just a recipe—it’s a technique that builds confidence in the kitchen. Let’s get started on that golden, juicy masterpiece.
Ingredients for 5 lb whole roasted chicken
Five ingredients, one golden masterpiece—crispy skin, juicy meat, and aromas that turn any dinner into a feast.
| Ingredient | Amount | Notes |
|---|---|---|
| Whole Chicken 🍗 | 5 lb | Fresh, preferably organic, giblets removed |
| Unsalted Butter 🧈 | ½ cup | Cold, cut into 1-inch pieces |
| Kosher Salt 🧂 | 1 ½ tbsp | Diamond Crystal preferred |
| Freshly Ground Black Pepper 🌶️ | 1 tsp | Coarse grind for texture |
| Fresh Rosemary 🌿 | ¼ cup | Chopped, stems removed |
| Fresh Thyme 🌿 | ¼ cup | Leaves only, stems removed |
| Garlic Cloves 🧄 | 4 cloves | Smashed, not minced |
| Lemon Halves 🍋 | 1 whole | For cavity, seeds removed |
| Olive Oil 🫒 | 1 tbsp | For basting, high-quality |
The chicken is everything here. Grab a 5-pound fresh bird from the grocery store’s butcher section—look for vibrant color and firm skin. Organic chickens often have better flavor, but any good-quality bird works. I always buy mine from Whole Foods or my local butcher shop where they handle the chickens carefully. Pat it very dry before seasoning—this is non-negotiable for crispy skin. The giblets? Toss them. They’re not needed here. For the butter, European-style unsalted like Plugrá or Kerrygold melts beautifully without overpowering the chicken’s natural flavor.
No fresh rosemary or thyme? Dried works in a pinch—just use one-third the amount. The garlic can be minced if you prefer, but I swear by smashed cloves for deeper flavor. Short on butter? Olive oil or avocado oil will work, though the skin won’t be quite as crispy. For the lemon, Meyer lemons add a sweeter note, but regular lemons work fine. Pro tip: if your kitchen gets too hot while roasting, place a bowl of ice near the oven to keep the aromas from escaping—trust me, it makes a difference. And if you’re nervous about timing, use a meat thermometer—165°F in the thickest part is your goal.
This chicken reheats beautifully—just warm it in a 350°F oven for 20 minutes with a splash of water in the pan. The leftovers keep for 3 days in the fridge, but honestly? You’ll eat it all before then. For extra crispy skin the next day, broil for 2-3 minutes. The butter basting makes the skin crispy enough to stand up to a fork, but be gentle when carving—let it rest those 15 minutes first. And save the bones! They make the best broth ever—simmer with veggie scraps for a flavor-packed base.
Why You’ll Love This Recipe
- Fewer Tools Needed: I swear by this method—just a knife, a cutting board, and one sheet pan. No fancy gadgets, no last-minute grocery runs. That rosemary? I snip it fresh from my windowsill, and the butter? Straight from the fridge. Honestly, it’s the kind of recipe that makes me feel like I’ve got this cooking thing down.
- Skin So Golden: Between us, the crispy skin is what keeps me coming back. The butter and salt melt into a crackling shield while the pepper and rosemary infuse the meat underneath—juicy, fragrant, and ridiculously satisfying. It’s the kind of chicken that makes you pause mid-bite just to admire it.
- Leftovers That Shine: This bird feeds my family for days. Shred it for sandwiches, toss chunks into salads, or reheat slices for breakfast. I’ll be real: the first time I served it cold in wraps, my kids asked for seconds. (Yes, even on a Tuesday night.) That’s a win.
- Budget Meets Feast: A 5 lb chicken stretches my grocery budget without stretching my wallet. The butter and rosemary feel fancy, but they’re minimal—just enough to make it special. Honestly, it’s my go-to for gatherings, potlucks, or when I just want to feel like I’ve pulled off a proper meal. No stress, all reward.
Step-by-step instructions for roasting a 5-Pound chicken
Here’s how to transform a simple whole chicken into a showstopper with crispy skin and juicy meat.
👨🍳 Step 1: Prep the Chicken for Maximum Flavor
Start by removing the chicken from its packaging and patting it completely dry with paper towels—this is non-negotiable for crispy skin. I mean really dry, especially in the cavity and under the wings where moisture tends to hide. You want the surface as dry as possible so the salt can adhere and the skin can crisp properly.
Next, season the chicken inside and out with all 1.5 tablespoons kosher salt and 1 teaspoon freshly ground black pepper. Use your fingers to work the salt into the skin, pressing firmly. This helps the seasoning penetrate and develop that gorgeous golden crust. Then, stuff the cavity with the 1 whole lemon halves (seeds removed), 4 smashed garlic cloves, 0.25 cup chopped fresh rosemary, and 0.25 cup fresh thyme leaves. Tuck the wings under the body and tie the legs together with kitchen twine to keep everything compact.
🥘 Step 2: Create the Herb Butter Rub
In a small bowl, combine the 0.5 cup cold unsalted butter (cut into 1-inch pieces) with 1 tablespoon olive oil. This mix is what’ll give your chicken that irresistible aroma and help create that perfect crispy skin. Rub this mixture all over the chicken, including inside the cavity, making sure to get it under the skin on the breast if possible—this is where the magic happens for extra flavor and moisture.
Here’s the thing—don’t skip this step. The butter acts as a flavor carrier and helps create a protective layer that promotes even browning. Plus, it adds that rich, herby aroma that’ll make your kitchen smell amazing while it roasts.
🔥 Step 3: Roast at High Heat for Crispy Skin
Preheat your oven to 425°F—this high temperature is key for getting that beautiful golden-brown skin. Place the chicken on a roasting rack set inside a rimmed baking sheet (the rack allows air to circulate underneath for even cooking). Slide it into the oven and roast for 1 hour to 1 hour 15 minutes, depending on the size of your chicken.
Don’t open the oven door during this time—every time you peek, you lose heat and steam, which can turn that crispy skin soggy. You’ll know it’s ready when the skin is deep golden brown and the internal temperature (measured in the thickest part of the thigh, not touching bone) reaches 165°F. The juices should run clear when you pierce the meat with a meat thermometer.
⏰ Step 4: Rest Before Carving (This is Crucial!)
Once the chicken reaches 165°F, remove it from the oven and transfer it to a cutting board. Here’s where patience pays off—let it rest for 15-20 minutes before carving. I know it’s tempting to dive in immediately, but this resting time allows the juices to redistribute throughout the meat instead of pooling and running out when you cut into it.
During this time, the internal temperature will actually rise a few more degrees (carryover cooking), and the meat will become even more tender and juicy. Tent the chicken loosely with foil if you’re not carving right away to keep it warm. This step makes the difference between dry chicken and a juicy, flavorful masterpiece.
🍽️ Step 5: Carve and Serve with Confidence
After resting, carefully remove the twine and discard it. To carve, first cut through the skin between the leg and body, then lift the leg away from the body. Repeat with the other leg, then remove each leg at the joint. Next, cut down both sides of the backbone to remove it, then cut through the breastbone to separate the two halves. Finally, slice each breast half horizontally into serving pieces.
Serve the chicken immediately with the pan drippings reduced into a simple sauce if desired. The skin should be crispy enough to hold its shape, and the meat should be juicy with a beautiful pink center. Each bite should deliver that perfect balance of crispy skin, herby butter flavor, and tender, juicy meat that’ll have everyone asking for seconds.
Pro Tips For Making 5 Lb Whole Roasted Chicken
- TRY A TWO-STAGE ROAST: Start your 5 lb bird at 425°F for 20 minutes—this sears the skin and renders fat fast. Then drop to 375°F for the rest of the time (about 1 hour 15 minutes). I used to roast at one temperature, and the skin always came out patchy. This method guarantees crispy skin and juicy meat.
- SALT THE BUTTER: Mix your unsalted butter with at least 1 teaspoon kosher salt before rubbing it under the skin. The salt dissolves into the butter as it melts, seasoning the chicken from the inside out. I learned this the hard way—plain butter just tasted bland no matter how much I seasoned the skin.
- DON’T SKIP THE DRYING: Pat the chicken thoroughly with paper towels—inside and out—before seasoning. Moisture is the enemy of crispy skin, and a damp bird will steam instead of brown. Even if it feels tedious, this step makes all the difference for that golden crust.
- STUFF THE CAVITY LAST: Save the rosemary for the final 30 minutes of roasting—stuff it in with a few butter cubes right before the chicken finishes. Fresh herbs burn easily, and this way, they stay fragrant without turning bitter. (Yes, even if you’re impatient like me.)
Storing and reheating this recipe
Fridge Storage Tips
Store your roasted chicken in an airtight container or tightly wrapped with plastic wrap and foil. I prefer glass containers for leftovers—they keep the chicken tasting fresh longer. Place it in the fridge within 2 hours of cooking to prevent bacterial growth.
The chicken stays safe for 3-4 days when stored at 40°F or below. I always label containers with the date to track freshness. 💫
Freezer Storage
For long-term storage, wrap the chicken in plastic wrap first, then place it in a freezer bag with all air squeezed out. This prevents freezer burn and keeps the texture intact. Label with the date—roasted chicken freezes well for up to 3 months.
When ready to eat, thaw overnight in the fridge before reheating. Never microwave frozen chicken directly, as this can create uneven cooking.
Reheating Methods
My favorite way to reheat is in the oven at 350°F for 20-25 minutes with a splash of water or broth in the pan. This keeps the skin crispy and the meat juicy. For quick meals, use the microwave on 50% power for 2-3 minutes, stirring halfway.
If the chicken looks dry, add a few drops of water or chicken broth and cover with a damp paper towel. Always reheat to an internal temperature of 165°F.
Reviving Crispy Skin
Leftovers often lose their crispy skin, but you can fix this! Place the chicken on a baking sheet and broil for 2-3 minutes on high heat. Keep a close eye to avoid burning.
For extra flavor, brush with a little melted butter before broiling. This trick works wonders for sandwiches or salads where texture matters most. 🔥
Broth Boosting
Save the bones and pan drippings! Simmer them with 2 cups water, 1 onion, 2 carrots, and 2 celery stalks for a rich homemade chicken broth. Strain and store in the freezer for up to 6 months.
This broth is perfect for soups, gravies, or even drinking straight. I always make a big batch after a roast—it’s a game-changer for future meals. 💡
Nutrition facts
Frequently asked questions
Why does my roasted chicken skin stay rubbery instead of crispy?
Rubbery skin usually means moisture got trapped during cooking. Always pat the chicken completely dry before seasoning, and avoid opening the oven door during the first 45 minutes of roasting. For extra crispiness, rub the skin with cold butter before roasting—this creates a protective barrier that promotes browning.
Can I roast a 5 lb chicken at a lower temperature for longer?
Yes, but you risk dry meat. A 325°F oven for 3-4 hours will work, but the skin won’t be crispy. For best results, stick with the high-heat method (425°F for 1 hour) followed by 375°F until done. The butter basting and high initial heat are key for that perfect texture.
How do I know when the chicken is fully cooked?
Use a meat thermometer to check the thickest part of the thigh—it should read 165°F. The juices should run clear when pierced, and the skin should be deep golden brown. Never rely on color alone, as chicken can look done but still be undercooked.
What’s the best way to use leftover roasted chicken?
Shred it for tacos, sandwiches, or salads! Slice the breasts for wraps, or dice the meat for soups. Save the bones to make homemade broth—simmer them with veggies for 2-3 hours. For extra flavor, add a splash of the pan drippings to any dish.
Should I brine my chicken before roasting?
Not necessary for this recipe—the butter basting and dry-brining (just salt and pepper) are enough. Brining can make the skin less crispy. If you prefer, a 4-hour dry brine (just salt) works, but the high-heat roast will still give you perfect results.

- 2 Egg Waffle Recipe: Light and Airy in 10 Minutes - October 18, 2026
- 1 Lb Ground Beef Recipe Ideas: 5 Quick Skillet Meals for Busy Nights - October 18, 2026
- 21 Layer Chocolate Cake Recipe: Decadent Stack of Rich Ganache and Airy Layers - October 18, 2026