
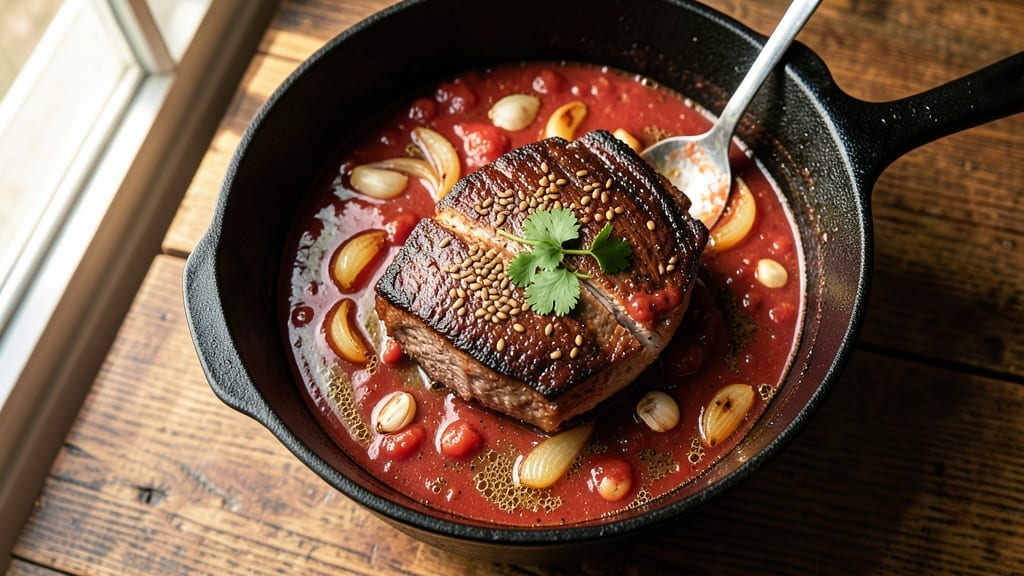
This 5-star chili con carne delivers restaurant-quality depth with deep-roasted beef and perfectly balanced spices that transform a simple pot into a showstopper. The secret lies in slow-cooked beef that practically melts in your mouth, combined with a sauce so rich and complex it earns standing ovations at dinner tables.
I perfected this recipe after years of experimenting with spice blends and cooking times—no shortcuts here, just layers of flavor built to impress.
What sets this chili apart is the technique: browning the beef in batches creates a flavorful crust that dissolves into the sauce, while layering spices gradually prevents bitterness. The slow simmer develops umami notes that turn ordinary ingredients into something extraordinary.
Even picky eaters ask for seconds when they taste this version—trust me, I’ve tested it on skeptics.
By the time you serve it, you’ll have a pot of chili with tender beef chunks, a velvety sauce thickened just right, and a depth of flavor that rivals any restaurant.
The aroma alone will have everyone gathering around the table, and the first bite delivers that perfect balance of heat, smokiness, and richness. This isn’t just chili—it’s a meal worth celebrating.
Pair it with warm cornbread or crusty bread to soak up every last drop of that incredible sauce. The presentation matters too: garnish with fresh cilantro, shredded cheese, and a dollop of sour cream for that final touch of restaurant-quality appeal.
Here’s how to make it happen in your own kitchen.
Ingredients for 5 star chili con carne
Sixteen ingredients, but only the finest ones—this chili deserves nothing less.
| Ingredient | Amount | Notes |
|---|---|---|
| Chuck Roast 🥩 | 3 lb | Trimmed of excess fat |
| Yellow Onion 🧅 | 2 whole | Medium, chopped |
| Garlic Cloves 🧄 | 6 cloves | Fresh, minced |
| Canned Tomato Sauce 🍅 | 2 cups | San Marzano preferred |
| Tomato Paste 🍅 | ½ cup | Smooth texture |
| Beef Broth 💧 | 3 cups | Low-sodium preferred |
| Dark Brown Sugar 🍚 | 2 tbsp | For depth of flavor |
| Chili Powder 🌶️ | 2 tbsp | Mild or medium heat |
| Ground Cumin 🌿 | 1 tbsp | Toasted for warmth |
| Smoked Paprika 🌶️ | 1 tbsp | For smoky depth |
| Oregano 🍃 | 1 tsp | Dried, Mexican preferred |
| Cayenne Pepper 🔥 | ½ tsp | Adjust for heat |
| Salt 🧂 | 1 ½ tsp | Kosher or sea salt |
| Black Pepper 🌶️ | ½ tsp | Freshly ground |
| Fresh Cilantro 🌿 | ¼ cup | Chopped, for garnish |
| Shredded Sharp Cheddar 🧀 | 1 cup | For serving |
The chuck roast is non-negotiable here—it’s the heart of this chili. Look for well-marbled cuts at your local butcher or the meat department. I always grab mine from Costco when I’m doing a big batch, but the regular supermarket stuff works fine for a weeknight dinner. Trim excess fat for a cleaner sauce, but leave some for flavor. The onions and garlic? Fresh is best, but if you’re in a pinch, frozen chopped works. For the tomato sauce, San Marzano is worth the splurge—its natural sweetness balances the spices perfectly. If you can’t find it, any good-quality canned tomato sauce will do.
No San Marzano tomatoes? Crushed tomatoes with a splash of balsamic vinegar works wonders. Running low on cumin? Ground coriander at half the amount adds a nice citrus note. The smoked paprika is key for that restaurant-quality depth—no substitute here, but if you can’t find it, regular paprika plus a pinch of liquid smoke gets you close. For the brown sugar, muscovado sugar adds molasses notes that take this chili to the next level. The cayenne is where you can play—start with half a teaspoon and adjust to taste. And that cilantro? Fresh only—dried just won’t cut it here.
This chili tastes even better the next day, so make a big batch. Keeps for 5 days in the fridge, or freeze for 3 months. I portion mine into containers so lunches are sorted for the week. The sauce thickens as it cools, so add a splash of broth if it gets too stiff. For serving, sharp cheddar and sour cream are musts—trust me, your guests will thank you. And save those leftover cilantro stems! They make great broth when simmered with the garlic.
Why You’ll Love This Recipe
- One-Pot Magic: I swear by this—just brown the chuck roast, toss in onions and garlic, then dump in the tomato sauce and paste. The slow simmer does all the work while I clean up.
- Deep, Rich Bite: That chuck roast turns tender and melts in your mouth, while the tomato paste gives it this caramelized depth. Honestly, it’s the kind of chili that makes you slow down and savor every spoonful.
- Game for Any Day: I make this for lazy Sundays, potlucks, or even a weeknight dinner. The leftovers? Even better the next day—just reheat and serve with cornbread or over rice.
- Budget-Friendly Feast: A chuck roast stretches for six servings, and the canned tomatoes keep costs low. Between us, this is my go-to when I need to feed a crowd without breaking the bank.
Step-by-step instructions for deep-roasted chili con carne
This method transforms tough chuck roast into melt-in-your-mouth beef with deep, layered flavors.
Sear the Chuck Roast for Maximum Flavor
Heat a large Dutch oven over medium-high heat until very hot. Pat the 3 lb chuck roast completely dry with paper towels—this ensures a good sear. Working in batches if needed, sear the beef on all sides until deeply browned, about 4-5 minutes per side. You’ll see those beautiful crusty edges form, which pack serious flavor.
Once browned, remove the beef and set it aside. Now add the 2 whole chopped yellow onion and 6 minced garlic cloves to the same Dutch oven. Cook for 3-4 minutes until the onions soften and begin to caramelize. This step builds the aromatic base that carries through the entire chili. Don’t rush it—you want those onions to develop that sweet, golden color.
Build the Spice Base and Deepen the Flavor
In a medium bowl, combine the 2 tbsp chili powder, 1 tbsp ground cumin, 1 tbsp smoked paprika, 1 tsp oregano, 0.5 tsp cayenne pepper, 1.5 tsp salt, and 0.5 tsp black pepper. Sprinkle this spice blend evenly over the caramelized onions in the Dutch oven, stirring constantly for 30 seconds to toast the spices and release their aromas.
Add the 0.5 cup tomato paste and stir vigorously for 1 minute until it darkens and forms a thick paste. This step is crucial—it develops the rich, concentrated flavor that makes this chili stand out. Pour in the 2 cups canned tomato sauce and 3 cups beef broth, scraping up any browned bits from the bottom of the pot. Return the seared chuck roast to the Dutch oven, spooning some of the spiced liquid over the top to coat it completely.
Simmer the Chili to Perfection
Bring the mixture to a gentle boil, then reduce heat to low and cover partially with a lid. Let it simmer for 2.5-3 hours, stirring occasionally, until the beef is fork-tender and easily shreds with two forks. This long, slow cook time is what transforms tough chuck roast into tender, flavorful beef.
Here’s the secret: about 30 minutes before the chili is done, stir in the 2 tbsp dark brown sugar. This adds a subtle caramel note that balances the heat and depth of the spices. Taste and adjust seasoning—you might need a bit more salt or cayenne to reach that perfect balance. The chili should be thick and rich, with a sauce that coats the back of a spoon.
Finish and Serve with Toppings
Once the beef is tender, carefully remove it from the pot and shred it into bite-sized pieces using two forks. Return the shredded beef to the pot and stir well to combine. The chili should be thick enough to coat the back of a spoon but still have a nice, saucy consistency.
Ladle the chili into serving bowls and top each portion with 1/6 cup shredded sharp cheddar and 1 tablespoon chopped fresh cilantro. The cheddar melts slightly from the heat, adding a creamy contrast to the spicy, smoky chili. Serve immediately with crusty bread or over rice to soak up every last bit of that incredible sauce. This chili tastes even better the next day as the flavors meld together!
Pro Tips For Making 5 Star Chili Con Carne
- SEAR THE ROAST LONG: Chuck roast won’t brown fast—it’s tough and releases water like a stubborn teenager. Walk away after the first 2 minutes of searing, let it crisp in its own time, then flip and repeat. The crust locks in flavor, and rushing it just steams the meat instead of caramelizing it.
- SWEAT ONIONS LOW AND SLOW: I used to blast onions on high heat until they turned brown and bitter. Now I cook them on medium-low with a splash of water, stirring every 30 seconds. They’ll soften evenly without burning, and that sweet, jammy base is the foundation of your chili’s depth.
- DON’T SKIP THE PASTE REST: Stir tomato paste into the pot, then let it sit for 5 minutes before adding liquids. This guarantees it blends fully and doesn’t clump like sad, lumpy glue. (Yes, even if you’re impatient like me—your chili will taste it if you don’t.)
- ACIDIFY THE TOMATO SAUCE: Toss your canned tomato sauce with 1 tablespoon of vinegar or lemon juice before adding it to the pot. It brightens the flavor and cuts through the richness of the chuck roast, balancing the dish without needing extra spices. I learned this after a batch tasted flat—now it’s non-negotiable.
Make-ahead tips for 5 star chili con carne
Prep Ahead for Flavor
Chop all your vegetables—those 2 onions and 6 garlic cloves—the night before and store them in a sealed container in the fridge. This saves 15 minutes of prep time on cooking day.
I also like to measure out all my spices (2 tbsp chili powder, 1 tbsp cumin, etc.) into a small bowl so I can just grab and toss them in later. This chili tastes better when you let the spices and aromatics meld together overnight. 🌶️
Slow Cooker Shortcut
For a hands-off approach, brown your beef in a skillet first, then transfer it to a 6-quart slow cooker with all the other ingredients. Cook on low for 8 hours or high for 5 hours.
The slow cooker keeps the meat tender without constant monitoring. I add ½ cup extra broth to compensate for evaporation. The texture might be slightly softer, but the convenience is worth it for weeknight dinners.
Freezer-Friendly Batches
Double or triple the recipe and freeze portions in airtight containers or heavy-duty freezer bags. Label each with the date—this chili stays good for 3 months in the freezer.
When ready to eat, thaw overnight in the fridge, then reheat on the stovetop with ¼ cup water or broth to restore moisture. I portion mine into quart-sized containers for easy lunches, and it reheats beautifully with just a few minutes of simmering. ❄️
Spice Toasting Tip
Toast your spice blend (chili powder, cumin, paprika, etc.) in a dry skillet over medium heat for 30 seconds before adding it to the chili. This step deepens their flavors dramatically.
Store the toasted spices in an airtight container for up to 2 weeks—they’ll keep their potency longer than store-bought blends. I always do this when prepping ahead because it saves time during cooking and elevates every dish.
Make-Ahead Toppings
Prep your toppings separately to keep them fresh. Chop the ¼ cup cilantro and shred the 1 cup cheddar ahead of time, storing them in separate containers. The cilantro stays brightest if you wrap it in a damp paper towel and refrigerate it.
For the cheddar, store it in a sealed container to prevent drying out. I also like to make a quick sour cream and lime garnish (mix ½ cup sour cream with 1 tsp lime juice) the night before—it adds a tangy contrast that’s perfect for serving. 🧀
Day-of Cooking Timeline
Plan your cooking day efficiently: Start by searing the beef in the morning if you’re working, then let it simmer while you’re at work or running errands. The 2.5-3 hour simmer time gives you plenty of flexibility.
If you’re cooking at night, start the simmering process first, then handle the toppings and final assembly right before serving. This chili actually improves as it sits, so timing isn’t critical—just let it cook until the beef is tender. The aroma alone will have everyone excited for dinner! ⏰
Nutrition facts
Frequently asked questions
Can I use ground beef instead of chuck roast for this recipe?
You can absolutely use ground beef, but the texture and flavor will differ slightly. For a 5-star version, opt for 80/20 ground beef (80% lean, 20% fat) to maintain richness. Cook it with the onions and spices until browned, then proceed with the recipe. The beef will be more tender but less melt-in-your-mouth than the slow-cooked roast. For best results, brown the meat thoroughly—this creates deep flavor even in ground beef.
How do I adjust the heat level for picky eaters?
Reduce the cayenne pepper to ¼ teaspoon or omit it entirely for a milder version. For extra depth without heat, add ½ teaspoon of cinnamon or 1 teaspoon of cocoa powder—both enhance the smoky-sweet profile. Always taste the chili before serving and adjust salt or spices as needed. The brown sugar already adds subtle sweetness, so balance is key.
Can I make this chili in an Instant Pot?
Yes! Sear the beef as directed, then add all ingredients and cook on high pressure for 30 minutes, followed by a 10-minute natural release. For extra tenderness, extend to 40 minutes. The Instant Pot version finishes faster but may need a splash of broth to adjust consistency. Shred the beef directly in the pot for convenience.
Why does my chili taste bitter?
Bitterness usually comes from overcooking the spices or using too much cayenne. To fix it, stir in 1 teaspoon of brown sugar or a splash of apple cider vinegar to balance the flavors. For prevention, toast spices briefly in a dry pan before adding them, and never let the chili boil vigorously—keep it at a gentle simmer.
What’s the best way to reheat leftovers?
Reheat gently on the stove over low heat with ¼ cup broth or water to restore moisture. Avoid microwaving—it can make the sauce watery. For even better results, transfer to an oven-safe dish and warm at 350°F for 15 minutes. Stir occasionally to prevent sticking. The chili tastes even richer the next day!

- 4 Banana Bread Recipe Healthy: Moist Whole-Grain Loaf Without Refined Sugar - September 25, 2026
- 5 Star Chili Con Carne Recipe: Deep-Roasted Beef and Spice Intensity - September 25, 2026
- 3 Chocolate Fudge Recipe: Rich, Fudgy Squares With Perfect Snap - September 25, 2026