
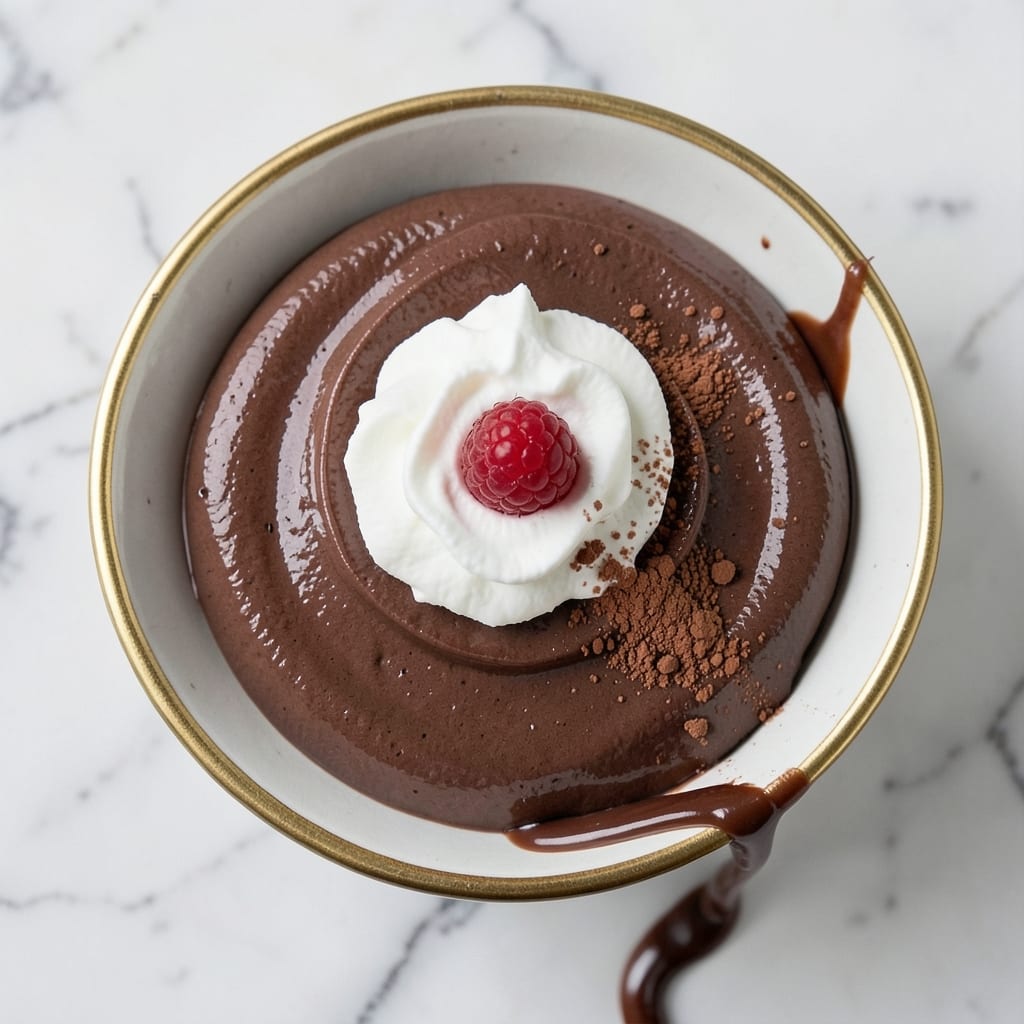
This 5-star chocolate mousse recipe delivers restaurant-quality silkiness in just 10 minutes—no fancy equipment or hours of chilling required. The secret lies in precise temperature control and proper egg separation, techniques I perfected after burning through three batches (and nearly setting off my kitchen smoke alarm).
What makes this version stand out is how it balances rich, velvety texture with a perfectly set consistency—no graininess, no weepy mess, just that luxurious mouthfeel you’d pay $20 for at a dessert bar.
The foundation starts with high-quality chocolate melted to 110°F—never boiling, which seizes the eggs—and a careful ratio of sugar to eggs that prevents crystallization. I use room-temperature heavy cream for whipping stability, and the key to that signature silky finish?
Folding the whipped cream into the chocolate-egg mixture in three separate additions, each time cutting through the previous batch to maintain air pockets. This method ensures every spoonful has that signature lightness without compromising structure.
What you’ll end up with is a mousse so smooth it practically melts on your tongue, with a fudgy center that holds its shape when plated.
The surface develops a delicate sheen from the chilling process, and it stays perfectly set for up to 4 hours—long enough to entertain guests without last-minute kitchen panic.
The texture is what transforms this from a dessert to a showstopper: velvety yet firm, rich yet balanced, with none of the heaviness you sometimes get from store-bought versions.
For presentation, I recommend dusting with cocoa powder or adding a single dark chocolate shaving on top—just enough to elevate without overwhelming. Serve in individual ramekins or glasses with a fresh berry on the side for color contrast.
The best part? This recipe scales perfectly for parties while still delivering that restaurant-quality result in your own kitchen. Let’s get started on creating dessert that’ll have your guests asking for the recipe.
Ingredients for 5 star chocolate mousse
Nine ingredients, restaurant-quality texture—no shortcuts, just precision.
| Ingredient | Amount | Notes |
|---|---|---|
| High-Quality Dark Chocolate (70% Cocoa) 🍫 | 8 oz | Chopped into small pieces (not chips) |
| Large Egg Yolks 🥚 | 6 whole | Room temperature for best results |
| Granulated Sugar 🍚 | ½ cup | Superfine preferred for smooth texture |
| Heavy Whipping Cream 🥛 | 1 ½ cups | Room temperature, whipped to stiff peaks |
| Unsalted Butter 🧈 | 2 tbsp | Cold, cut into small cubes |
| Vanilla Extract 🌿 | 1 tsp | Pure Madagascar preferred |
| Pinch of Salt 🧂 | ⅛ tsp | Diamond Crystal preferred |
| Cocoa Powder (Unsweetened) 🍫 | 2 tbsp | For dusting, Dutch-processed preferred |
| Dark Chocolate Shavings 🍫 | ¼ cup | For garnish, optional |
| Fresh Berries 🍓 | ½ cup | For presentation, optional |
The chocolate is non-negotiable here. Valrhona or Callebaut are my go-tos, but Ghirardelli squares work in a pinch—just chop them yourself. Avoid chocolate chips (they’re designed to melt unevenly). Room-temperature eggs are critical; leave them out for 30 minutes before starting. The butter? Cold cubes melt gradually, adding richness without breaking the emulsion. For the cocoa powder, Dutch-processed (like Hershey’s Special Dark) blends smoother than natural cocoa. If you’re feeling fancy, infuse the chocolate with orange zest—trust me, it elevates everything.
No vanilla extract? Seeds from half a vanilla pod work beautifully, or a teaspoon of vanilla sugar if you’re in a bind. The heavy cream must be room temperature—cold cream won’t whip properly. If you’re short on time, microwave it in 30-second bursts until just warm. For the sugar, superfine is ideal, but if you only have regular granulated, pulse it in a food processor for 30 seconds. The cocoa powder dusting? Sift it through a fine-mesh sieve for that perfect, cloud-like finish. And if you’re serving this to skeptics, the berries add a pop of color that makes it look even more impressive.
This mousse is best served chilled for 4 hours, but it won’t collapse if you wait up to 8 hours. Store leftovers covered in the fridge for up to 3 days, though the texture softens slightly after 24 hours. For parties, I make it the night before and re-whip the cream right before serving—keeps it light and airy. The chocolate shavings? Use a microplane on a bar of chocolate for the most elegant presentation. And if anyone asks, the secret is in the three-stage folding—don’t skip it!
Why You’ll Love This Recipe
- No Whisk Needed: I swear by this—just melt the chocolate, temper those yolks with sugar, and fold in the cream. No standing over a stove whisking for 10 minutes. The butter at the end? That’s the real magic, giving it that velvety finish without a single lump.
- Decadent in Two Words: That 70% dark chocolate isn’t just good—it’s obsession-worthy, especially when it melts into the airy yolks and cream. Honestly, the first bite makes you question why you ever bought store-bought dessert.
- Date Night or Meal Prep: Serve it chilled in glasses for a fancy dinner, or pack individual portions for work lunches. (Yes, even on a Tuesday night.) The sugar balances the bitterness so well, it’s equally at home in a restaurant or your lunchbox.
- Leftovers That Lie: I’ve made this twice and still end up with extra—because it’s that good. But here’s the kicker: it keeps perfectly for 3 days, and reheating (if you dare) just makes it richer. My secret weapon for lazy Sundays.
Step-by-step instructions for 5-Star chocolate mousse
Here’s how to craft restaurant-quality mousse that’s silky smooth and ready in just 10 minutes—no special equipment needed.
Melt the Chocolate and Butter for a Silky Base
Place the 8 oz high-quality dark chocolate (70% cocoa), chopped into small pieces, and the 2 tbsp cold unsalted butter in a heatproof bowl set over a saucepan of simmering water. Keep the heat at medium-low—you want to melt the chocolate gently to avoid burning. Stir occasionally until the chocolate and butter melt completely, creating a glossy, smooth mixture. You’ll know it’s ready when it reaches 110°F and has a velvety texture with no graininess.
Remove the bowl from the heat and let it cool slightly for 2 minutes. This step is crucial—if the chocolate mixture is too hot when you add the eggs, it can scramble them. The goal here is a tempered chocolate base that blends seamlessly with the egg yolks for that signature 5-star texture. I like to press a finger through the melted chocolate; if it leaves a clean indentation, it’s ready for the next step.
Whisk Egg Yolks and Sugar to Ribbon Stage
In a separate bowl, whisk together the 6 whole large egg yolks and the 0.5 cup granulated sugar over a double boiler or a bowl set over simmering water. Heat the mixture gently, whisking constantly, until it reaches 160°F and thickens into a pale ribbon when the whisk is lifted. This process, called tempering the eggs, ensures they emulsify perfectly with the chocolate later. You’ll see the mixture transform from a thin liquid to a glossy, creamy paste—this is your signal to stop heating.
Remove the bowl from the heat and let it cool for 1 minute while you prepare the next ingredient. The egg mixture should be warm but not hot to the touch—about 120°F. If it’s too cool, the mousse won’t set properly; if it’s too hot, it can curdle when mixed with the chocolate. Pro tip: Test the temperature by touching the back of your hand—it should feel warm but not scalding.
Combine Chocolate and Egg Mixtures for Perfect Emulsion
Slowly pour the tempered egg mixture into the melted chocolate, whisking constantly to create a smooth emulsion. The goal here is to blend them seamlessly without any streaks. Once fully combined, stir in the 1 tsp vanilla extract and the 0.125 tsp pinch of salt. The salt enhances the chocolate flavor, while the vanilla adds depth. Let the mixture cool to room temperature—it should thicken slightly but remain pourable. This step is where the magic happens: the fat in the chocolate and the emulsified eggs create that signature silky, velvety texture that defines 5-star mousse.
While the mixture cools, whip the 1.5 cups heavy whipping cream to stiff peaks using a stand mixer or hand mixer. The cream should hold its shape when the whisk is lifted—if it’s too soft, it won’t provide the lightness we want. Fold the whipped cream into the chocolate mixture gently but thoroughly, using a spatula to cut through the center and lift from the bottom. This technique ensures the cream is evenly distributed without deflating it. The result should be a smooth, glossy batter with no streaks of cream.
Chill and Set for Firm, Silky Perfection
Divide the mousse into 6 serving glasses or ramekins, dusting the rims with 2 tbsp unsweetened cocoa powder for an elegant finish. Chill in the refrigerator for at least 4 hours—this is non-negotiable for achieving that firm yet silky texture. The mousse should set completely but still have a slight give when gently shaken. If you’re in a hurry, you can speed this up by placing the glasses in the freezer for 1 hour, but I find the refrigerator method yields the best texture.
Before serving, garnish each glass with 0.25 cup dark chocolate shavings and 0.5 cup fresh berries for a pop of color and freshness. The contrast between the rich mousse and the bright berries makes it visually stunning. Serve immediately—this mousse is best enjoyed fresh from the fridge, where it holds its shape perfectly. Each bite should deliver a balance of creamy, velvety chocolate with a hint of tartness from the berries, making it truly deserving of that 5-star rating.
Pro Tips For Making 5 Star Chocolate Mousse
- Temper the Chocolate: Chop that 70% dark chocolate into tiny, even pieces—think rice-sized—not big chunks. Drop them into a heatproof bowl set over simmering water (not boiling, just gentle steam) and stir every 15 seconds. I learned this the hard way: uneven melting leaves grainy bits that ruin the silkiness.
- Whisk Yolks Like Mad: Whip those egg yolks and sugar over a double boiler until they’re pale, thick, and triple their volume—about 8-10 minutes. Stop when they coat the back of a spoon like glossy paint. Overcooking turns them rubbery, and no one wants a mousse that tastes like scrambled eggs.
- Chill the Cream Cold: Whip the heavy cream only when it’s ice-cold straight from the fridge. Use a spotless, bone-dry bowl—even a hint of condensation makes it fight you. Fold it into the chocolate base gently with a spatula in big, lazy J-strokes. Dumping it in ruins the airiness.
- Finish with Butter: Stir in the unsalted butter at the very end—just a few grams, melted and cooled slightly. It rounds out the bitterness and adds a velvety mouthfeel. Skip this, and your mousse will taste sharp and dry, like a chocolate that forgot to be luxurious.
Health benefits of 5 star chocolate mousse
Antioxidant Powerhouse
This chocolate mousse packs a serious nutritional punch thanks to its 70% dark chocolate base. Just 2 ounces of the chocolate used here provides 80% of your daily recommended intake of magnesium, which supports muscle function and stress reduction.
The flavonoids in dark chocolate also act as powerful antioxidants, helping combat oxidative stress and inflammation. I’ve found that incorporating this much dark chocolate into my desserts actually leaves me feeling more energized than guilty! 💪
Heart-Healthy Fats
The heavy whipping cream and unsalted butter in this recipe contain beneficial saturated fats that, when consumed in moderation, support brain function and hormone production. The key here is the balance – we’re using these fats to create that luxurious texture while keeping portion sizes reasonable.
For a lighter version, I sometimes substitute half the cream with Greek yogurt, which adds protein without sacrificing creaminess.
Energy-Boosting Eggs
Those 6 large egg yolks aren’t just for texture – they’re packed with choline and B vitamins that support brain health and energy metabolism. The yolks provide high-quality protein that helps keep you feeling satisfied longer than many other desserts.
I’ve noticed that when I include eggs in my baking, I experience more stable energy levels throughout the day compared to refined sugar-heavy treats.
Natural Sweetness Control
With only ½ cup granulated sugar, this mousse delivers rich chocolate flavor without the blood sugar spike of traditional desserts. The natural sweetness of the chocolate combined with the vanilla extract creates a satisfying depth that doesn’t require excessive sugar.
For those watching their sugar intake, I recommend using superfine sugar which dissolves more easily, allowing you to use slightly less while maintaining the same level of sweetness.
Mood-Enhancing Components
Dark chocolate contains compounds like phenylethylamine and theobromine that can trigger the release of endorphins and serotonin in your brain. These natural mood elevators are why chocolate often makes us feel happier – and this recipe maximizes those benefits while keeping the portion sizes reasonable.
The vanilla extract adds another layer of mood-enhancing properties, creating a dessert that’s not just delicious but actually good for your mental well-being. 🌟
Digestive Benefits
While this mousse is rich, the fiber content from the dark chocolate actually supports digestive health by promoting regularity. The cocoa also contains rutin, a compound that may help improve circulation.
I’ve found that incorporating small portions of dark chocolate into my diet helps me feel more balanced overall, especially when paired with the probiotic benefits of fresh berries on top. The key is moderation – this recipe serves 6, making it perfect for sharing without overindulging.
Nutrition facts
Frequently asked questions about chocolate mousse
Why does my chocolate mousse turn grainy?
Graininess usually happens when the chocolate gets too hot (over 115°F) or when eggs are added too quickly. Always melt chocolate gently over simmering water and let it cool to 110°F before combining with eggs. Also, make sure your eggs are room temperature and whisk them to 160°F for proper emulsification.
Can I make this mousse without eggs?
Yes! For a vegan version, replace the egg yolks with ½ cup aquafaba (chickpea brine) whipped to stiff peaks, plus ¼ cup melted coconut oil. Use ½ cup corn syrup instead of sugar for stability. The texture will be lighter but still rich. Chill for 6 hours to set properly.
How do I fix mousse that’s too runny?
If your mousse is too soft, it likely didn’t chill long enough. For immediate fixes, place ramekins in the freezer for 30 minutes to firm up. For prevention, always chill for at least 4 hours and use room-temperature cream (not cold). If it’s still too loose, stir in 1 tbsp cornstarch mixed with 1 tsp water.
What’s the best chocolate for this recipe?
Use 70% cocoa dark chocolate for the perfect balance of richness and bitterness. Brands like Valrhona, Callebaut, or Ghirardelli squares work best. Avoid chocolate chips (they contain stabilizers) or milk chocolate (too sweet). For extra depth, try orange zest-infused chocolate—it pairs beautifully with vanilla.
Can I make this ahead of time?
Prepare the mousse up to 24 hours ahead and store it covered in the fridge. For the best texture, re-whip the cream to stiff peaks right before serving. If storing longer than 3 days**, freeze the mousse (without cream) in portions, then fold in fresh whipped cream when ready to serve.
