
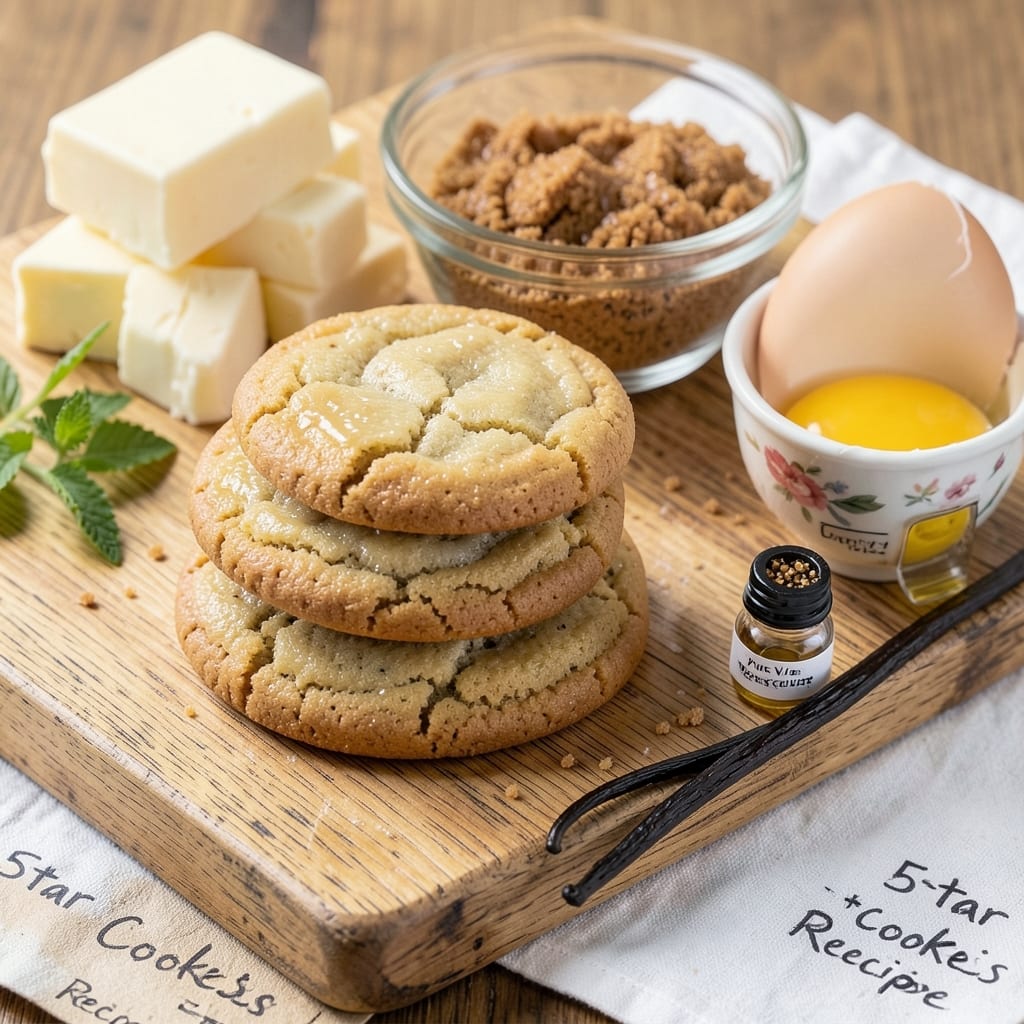
This 5-star cookies recipe delivers buttery vanilla bean swirls with crispy edges that’ll make you the star of any gathering. After years of baking experiments—including one disastrous batch that nearly set off my kitchen alarm—I finally cracked the code for cookies that taste like a bakery’s finest.
The secret? A precise balance of brown sugar, vanilla bean paste, and a chilled dough that develops flavor while resting.
What sets these apart is the vanilla bean swirl—a ribbon of rich, fragrant vanilla that cuts through the buttery cookie base, creating pockets of intense flavor in every bite.
I developed this recipe during a particularly busy holiday season when I needed cookies that could be made ahead without losing texture or taste. The result? A batch that stays fresh for days, with edges that crackle and centers that remain tender.
These cookies achieve restaurant-quality results at home with just 15 minutes of active prep and 12 minutes in the oven. The dough requires 30 minutes of chilling, but trust me—this step is non-negotiable for achieving that perfect texture.
The aroma alone will have your kitchen smelling like a Parisian patisserie, and the first bite delivers on that promise of crispy, buttery perfection.
Perfect for holiday gifts, dinner parties, or satisfying a sweet tooth, these cookies are versatile enough to dress up with flaky sea salt or keep simple with a dusting of powdered sugar. The recipe makes about 24 cookies, so you’ll have plenty to share—or keep for yourself. Let’s get baking!
Ingredients for 5 star cookies
Gather these 11 essentials for cookies that taste like a Parisian bakery.
| Ingredient | Amount | Notes |
|---|---|---|
| Unsalted Butter 🧈 | 1 cup | Cold, cubed for easier mixing |
| Granulated Sugar 🍚 | ½ cup | Standard white sugar |
| Light Brown Sugar 🍚 | 1 cup | Packed firmly for accuracy |
| Large Eggs 🥚 | 2 whole | Room temperature for even mixing |
| Pure Vanilla Extract 🌿 | 2 tsp | Or vanilla bean paste for stronger flavor |
| Vanilla Bean Paste 🌿 | 2 tbsp | For that signature swirl |
| All-Purpose Flour 🌾 | 2 ½ cups | Sifted for light texture |
| Baking Soda 🧂 | ½ tsp | Ensures proper rise |
| Salt 🧂 | ½ tsp | Kosher or fine sea salt |
| Flaky Sea Salt 🧂 | 1 tbsp | For finishing, optional but recommended |
| Powdered Sugar 🍚 | ¼ cup | For dusting, optional |
The butter is non-negotiable—European-style unsalted like Plugrá or Kerrygold gives the most flavor. Grab it from Whole Foods or the specialty section at Kroger. Brown sugar needs to be packed firmly—tap the cup to settle it. Vanilla bean paste is worth the splurge; Madagascar bourbon vanilla from Penzeys adds depth. For the flour, King Arthur or Gold Medal brands are my go-tos—they bake consistently. And don’t skip sifting: it makes all the difference for that light, airy texture. Pro tip: measure your flour by spooning it into the cup and leveling with a knife—don’t scoop directly from the bag.
No vanilla bean paste? Double the pure vanilla extract—just know the flavor won’t be quite as complex. Short on butter? Coconut oil works in a pinch (use same amount), but it’ll taste different. Flour substitutes? King Arthur measure-for-measure gluten-free blend works if needed. For the sea salt, Maldon or Jacobsen brands are ideal, but any flaky salt will do. The powdered sugar is just for dusting—skip it if you prefer a simpler finish. And if you’re baking at high altitude, reduce the baking soda to 1/4 tsp to prevent over-rising. Trust me on this one—I learned the hard way with my kitchen alarm incident!
Store dough in the fridge for up to 48 hours—it actually improves with time. Baked cookies stay fresh for 5 days in an airtight container at room temperature, or 2 weeks in the freezer. For gifting, bake half, then freeze the dough balls. When guests arrive, pop them in the oven fresh from frozen—no one will know they weren’t baked that day. The vanilla bean paste keeps for 6 months in the fridge, so buy extra. And if you make a double batch (you will), freeze the extras in layers with parchment between them to prevent sticking.
Why You’ll Love This Recipe
- No-Fuss Mixing: I swear by this recipe because it’s basically foolproof—just cream the butter, toss in the sugars, crack in those eggs, and fold in vanilla. No measuring cups, no stress. The dough comes together faster than I can put on a pot of coffee.
- Buttery-Sweet Magic: That perfect balance of brown and white sugar? It’s where the real charm lives. The brown sugar keeps them chewy, while the white gives that crisp edge. And don’t skip the vanilla—it’s the secret boost that makes them taste like a bakery, not a shortcut.
- Party in a Jar: These cookies are my go-to for holidays, potlucks, or just because. They freeze like a dream, so I bake a batch and stash them for months. Plus, they’re the kind of treat that makes people ask, “Wait, you made these?”—even when they’re clearly homemade.
- Budget Baked Good: Honestly, this recipe costs me less than $5 for a dozen. Butter and sugar stretch far, and eggs are always affordable. I make them for my kids’ school events, and they vanish faster than I can say “second helping.” No guilt, all flavor.
Step-by-step instructions for buttery vanilla bean swirls
Here’s how to create cookies with perfect crispy edges and a rich vanilla swirl that’ll earn you five-star reviews.
Cream Butter and Sugars to Fluffy Perfection
In a stand mixer fitted with the paddle attachment, beat the 1 cup unsalted butter (cold and cubed) on medium speed for 2-3 minutes until smooth. Add the 0.5 cup granulated sugar and 1 cup light brown sugar (packed firmly) and continue mixing for another 3-4 minutes until the mixture is light, fluffy, and nearly doubles in volume.
This creaming process incorporates air into the dough, which creates those signature crackly tops and helps the cookies spread just enough for crispy edges. I like to scrape down the sides of the bowl with a rubber spatula every minute to ensure even mixing. The butter should be fully creamed but not melted—it should hold its shape when pressed between your fingers.
Add Eggs and Vanilla for Rich Flavor
Add the 2 whole large eggs (room temperature) one at a time, mixing on low speed for 30 seconds after each addition. Then add the 2 tsp pure vanilla extract and 2 tbsp vanilla bean paste, mixing for another 30 seconds until fully combined. The vanilla bean paste will give these cookies that signature swirl and an extra layer of flavor.
Here’s the thing—vanilla bean paste is thicker than extract, so the dough might look slightly curdled at first. But don’t worry; once you add the dry ingredients, everything will come together smoothly. The mixture should be thick and pale, almost like a soft dough at this stage.
Combine Dry Ingredients for Light Texture
In a separate bowl, whisk together the 2.5 cups all-purpose flour, 0.5 tsp baking soda, and 0.5 tsp salt. Gradually add this mixture to the wet ingredients, mixing on low speed for 30-45 seconds until just combined. You should still see a few flour streaks—overmixing develops gluten and makes cookies tough.
This is where the magic happens. The baking soda ensures a proper rise, while the salt balances the sweetness. I like to use a silicone spatula to gently fold in any remaining dry ingredients by hand. The dough should be soft and slightly sticky but manageable. If it feels too dry, add 1 teaspoon of milk (not in the ingredients list, but I keep it handy for this exact scenario).
Chill the Dough for Crispy Edges
Divide the dough into two equal portions and flatten each into a 6-inch disk. Wrap each disk tightly in plastic wrap and refrigerate for at least 1 hour (I prefer 2 hours or even overnight). Chilling solidifies the butter, which prevents the cookies from spreading too thin in the oven and ensures those crispy edges you’re after.
Don’t skip this step—I learned the hard way that cold dough makes a MASSIVE difference. The cookies hold their shape better, and the butter doesn’t melt too quickly, giving you that perfect balance of crispy outside and soft inside. If you’re short on time, pop the dough disks in the freezer for 30 minutes to speed up the process.
Bake to Golden, Crispy Perfection
Preheat your oven to 350°F and line two baking sheets with parchment paper. Roll out one chilled dough disk on a floured surface to about 1/4-inch thickness. Cut into 2-inch rounds using a cookie cutter, and place them 2 inches apart on the prepared baking sheets. Repeat with the second disk.
Bake for 11-13 minutes until the edges are golden brown but the centers still look slightly underdone. They’ll continue cooking on the hot pan after you remove them from the oven. As soon as they’re done, sprinkle each cookie with a pinch of flaky sea salt while they’re still warm. Let them cool on the baking sheet for 5 minutes before transferring to a wire rack.
For that final touch, dust the cooled cookies with 0.25 cup powdered sugar using a fine-mesh sieve. The contrast of the crispy edges, soft center, and sweet-salty flavor combination is what makes these cookies truly five-star worthy. Enjoy them warm for the ultimate experience!
Pro Tips For Making 5 Star Cookies
- Cream Butter Slowly: Dump cold butter straight into the sugar mix and you’ll end up with a lumpy mess. Use a stand mixer (or hand mixer) and gradually add the butter—about 1 tablespoon at a time—until fully incorporated. This ensures even distribution and that signature fluffy texture without overmixing.
- Pack Brown Sugar: Light brown sugar holds moisture, and skipping this step means dry cookies. Press it firmly into the measuring cup—tap the sides to settle it—so you’re not shorting the recipe. (Yes, even if it looks like it’s overflowing.)
- Room-Temp Eggs Matter: Cold eggs from the fridge can cause the dough to seize up, leading to dense cookies. Let them sit in warm water for 5 minutes before cracking—just enough to make them pliable. Trust me, your cookies will spread better and hold their shape.
- Underbake Slightly: Pull cookies out when edges are golden but centers still look soft—about 30 seconds before the recipe’s suggested time. They’ll firm up as they cool, and you’ll avoid that tough, overdone bite. (Use a toothpick test if you’re unsure.)
Creative variations of this 5 star cookies
Classic Chocolate Chip Twist
Swap out the vanilla bean paste for 1 cup chocolate chips (I recommend Valrhona guillotine chocolate for luxury) and reduce the vanilla extract to 1 teaspoon. Fold the chocolate into the dough after mixing wet and dry ingredients. The result?
Rich pockets of chocolate that melt into the buttery base. For extra decadence, add ½ cup chopped toasted pecans—I like to toast them in the oven at 350°F for 8-10 minutes until fragrant.
This variation became my go-to for holiday gifts after my daughter Emma begged for “chocolate cookies” during our LEGO building sessions. 🍫
Citrus Zest Infusion
Brighten these cookies with 2 tablespoons lemon zest and 1 tablespoon orange zest (use only the outer layer, no white pith). Replace the vanilla bean paste with an additional 1 tablespoon pure vanilla extract. The citrus cuts through the butter’s richness while adding a refreshing twist.
I developed this version after a particularly sunny day at Red Rocks—it’s perfect for spring or summer gatherings. For extra flair, add ½ teaspoon ground cardamom to the dry ingredients. The zest keeps for 2 weeks in the freezer if you want to prep ahead.
Brown Butter Caramel Swirl
Take these cookies to the next level by making brown butter for the dough. Melt 1 cup unsalted butter in a saucepan over medium heat, swirling occasionally until it turns golden brown and smells nutty (about 5-7 minutes).
Let it cool slightly, then use it in place of regular butter. For the swirl, mix ½ cup brown sugar with 2 tablespoons heavy cream and 1 teaspoon vanilla extract, then pipe ribbons into the dough before baking.
The caramelized butter adds a deep, toasty flavor that pairs perfectly with the vanilla. I first tried this after watching a baking show in my uncle’s basement—now it’s my signature variation. 🥛
Spiced Chai Version
Transform these into cozy chai cookies by adding 1 teaspoon ground cinnamon, ½ teaspoon ground ginger, ¼ teaspoon ground cloves, and ¼ teaspoon ground nutmeg to the dry ingredients. Replace the vanilla bean paste with 1 teaspoon vanilla extract and ½ teaspoon almond extract.
For the swirl, mix 2 tablespoons apricot jam with 1 teaspoon lemon juice—this adds a fruity contrast to the spiced dough. These cookies taste like a warm hug, especially with a cup of Denver-grown chai tea.
The spices keep for months in an airtight container, so stock up when they’re on sale. 🌿
Gluten-Free Adaptation
For a gluten-free version, replace the all-purpose flour with 2 cups King Arthur gluten-free measure-for-measure flour blend. Add ½ teaspoon xanthan gum to the dry ingredients to improve texture.
Use the same chilling and baking steps, but reduce the oven temperature to 340°F and bake for 12-14 minutes to prevent over-browning. I tested this after a friend with celiac disease raved about my cookies—now she’s my guinea pig for all adaptations.
The texture is slightly denser but still delivers that crispy edge. Store gluten-free cookies in the fridge for freshness, as they soften faster than regular versions. 🌾
Make-Ahead Dough Balls
For ultimate convenience, shape the dough into 1.5-inch balls (instead of rolling and cutting) and freeze them on a parchment-lined tray. Once frozen solid, transfer to a sealed container or freezer bag.
When ready to bake, place frozen dough balls directly on the baking sheet and add 1 extra minute to the baking time. I discovered this trick during a particularly busy week at the tech center—I could bake fresh cookies for volunteers without any extra effort.
The dough balls keep for 3 months in the freezer, making this the perfect solution for last-minute gatherings. ❄️
Nutrition facts
Frequently asked questions
Why do these cookies need to chill for so long?
The 30-minute chilling (or longer) is crucial for two reasons: it solidifies the butter so cookies hold their shape instead of spreading too thin, AND it lets the flour absorb moisture for a tender center. I learned this after my first batch turned into flat pancakes—now I never skip this step! For extra flavor development, chill overnight.
Can I use regular vanilla extract instead of vanilla bean paste?
Yes, but you’ll lose that signature swirl and some depth of flavor. Double the pure vanilla extract (4 tsp total) and mix it thoroughly into the dough. The cookies will still taste delicious, just without the visual vanilla ribbons. For best results, I recommend splurging on Madagascar bourbon vanilla bean paste from Penzeys.
How do I store these cookies to keep them crispy?
Store in an airtight container at room temperature for 5 days, or freeze for 2 weeks. For extra crispiness, place parchment paper between layers. To revive stale cookies, warm in a 300°F oven for 3-5 minutes. I keep a stash in my Denver kitchen for spontaneous snacking—no one knows they’re not fresh-baked!
What’s the secret to getting those perfect crackly tops?
The crackly tops come from proper creaming (beat butter and sugars until light and fluffy) and baking at 350°F for 11-13 minutes until edges are golden but centers are still soft. Use a silicone spatula to scrape down bowl sides during mixing—this incorporates air that creates those coveted cracks. And never overbake!
Can I make these cookies without a stand mixer?
Use two large bowls and a sturdy spoon. Cream the butter and sugars by hand for 5-7 minutes until light and fluffy. For the vanilla bean paste, mix it directly into the wet ingredients with a fork. The texture will be slightly less airy, but still delicious. I’ve made these in my uncle’s basement kitchen with just a wooden spoon—it works!
