
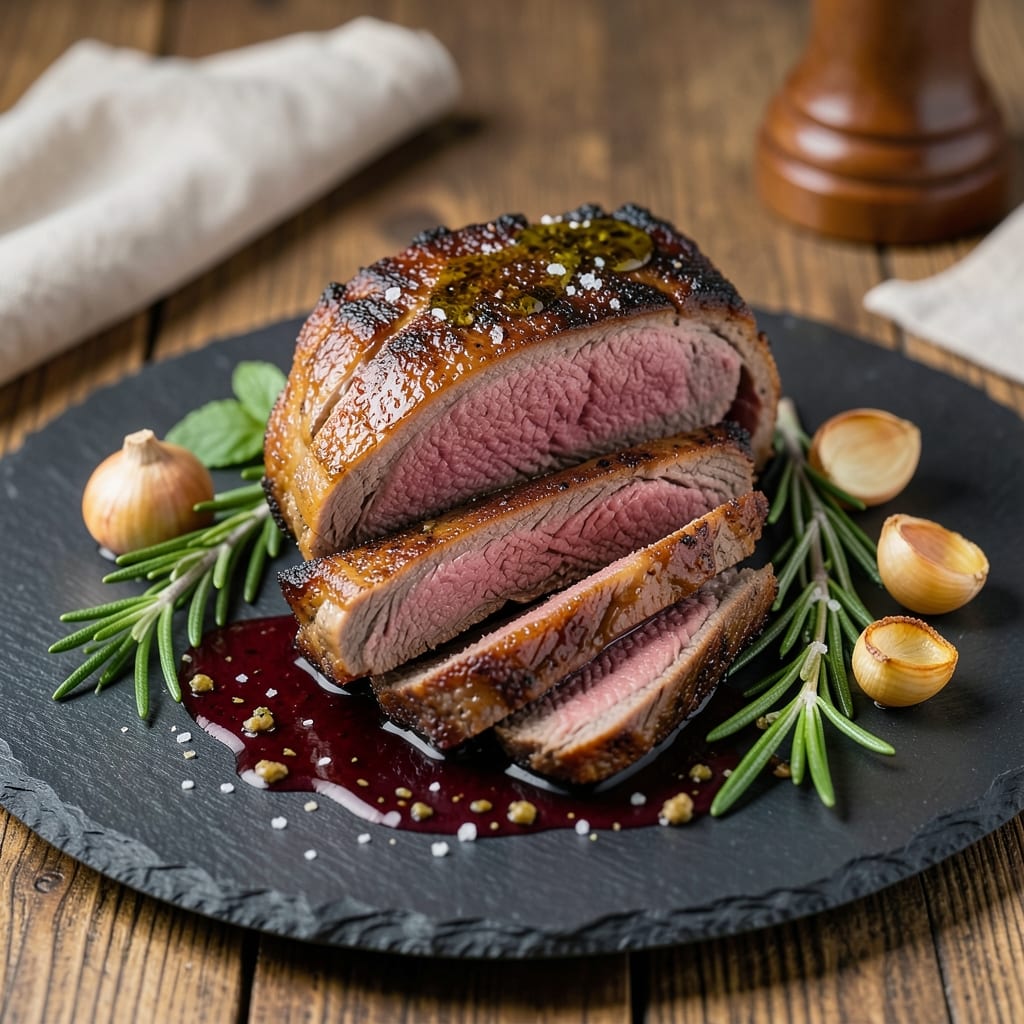
This 5-star roast beef recipe delivers the kind of fork-tender, melt-in-your-mouth perfection that earns rave reviews at fine dining restaurants. The secret lies in a slow-braised technique that transforms tough cuts into succulent, juicy slices with minimal effort.
After years of perfecting this method, I can confidently say this is the only roast beef recipe you’ll ever need for special occasions or weeknight dinners alike.
The process begins with a dry brine that enhances flavor and moisture retention, followed by a precise searing to lock in juices. A red wine reduction bastes the beef throughout cooking, infusing rich, savory notes that elevate every bite.
What sets this apart is the internal temperature control—never guesswork, always perfect results—paired with proper resting times to ensure slices stay juicy rather than drying out.
By the time you serve this masterpiece, you’ll have a golden-brown crust, tender meat that falls apart at the touch, and a pan sauce so rich it deserves its own spotlight.
The aroma alone will have guests anticipating the first bite, while the presentation—elegant yet approachable—makes it feel like a restaurant-worthy meal without the fuss.
Pair with roasted root vegetables, a crisp baguette, and your favorite red wine for a complete dining experience. This recipe isn’t just about cooking; it’s about creating memories. Let’s get started on your next 5-star roast beef—one that will leave everyone asking for seconds.
Ingredients for 5 star roast beef
Six ingredients transform tough beef into restaurant-quality perfection—no shortcuts, just slow-braised magic.
| Ingredient | Amount | Notes |
|---|---|---|
| Beef Chuck Roast 🥩 | 4 lb | Well-marbled, bone-in preferred |
| Kosher Salt 🧂 | 2 tbsp | Diamond Crystal preferred, coarse grain |
| Freshly Ground Black Pepper 🌶️ | 1 ½ tbsp | Freshly cracked for maximum aroma |
| Extra-Virgin Olive Oil 🫒 | ½ cup | High-quality, fruity variety |
| Garlic Cloves 🧄 | 8 cloves | Peeled, smashed for infusion |
| Fresh Rosemary 🌿 | ½ cup | Needles finely chopped |
| Fresh Thyme 🌿 | ¼ cup | Leaves only, stems removed |
| Dry Red Wine 🍷 | 1 ½ cups | Bold Cabernet Sauvignon preferred |
| Beef Broth 💧 | 2 cups | Homemade or high-quality store-bought |
| Yellow Onion 🧅 | 1 whole | Peeled, sliced into 0.5-inch pieces |
| Carrots 🥕 | 4 whole | Peeled, cut into 2-inch chunks |
| Fresh Parsley 🌿 | ¼ cup | Chopped, for garnish and sauce |
| Unsalted Butter 🧈 | ½ cup | Cold, cubed for finishing sauce |
| All-Purpose Flour 🌾 | 1 tbsp | For sauce thickening |
The beef is everything here. Chuck roast is non-negotiable—it’s the only cut with enough marbling to become fork-tender. Look for pieces with visible fat streaks, not lean cuts. Costco or Whole Foods butcher sections are your best bet for quality. If buying whole, ask for it to be trimmed of excess fat but leave the cap intact for flavor. Freshly cracked black pepper and Diamond Crystal kosher salt (it dissolves slower, so it seasons better) are essential—pre-ground loses flavor fast. The fresh herbs should be vibrant, not wilted; if they’re past their prime, dried thyme and rosemary at half the amount will work in a pinch.
No red wine? Beef broth with a splash of balsamic vinegar mimics the depth perfectly. The carrots and onions can be swapped for potatoes or mushrooms if you prefer, but keep the aromatics balanced. For the sauce, if you don’t have butter, olive oil or coconut oil works, though butter adds richness. The flour is just for thickening—if you’re gluten-free, use cornstarch instead. The key to this dish is patience. Don’t rush the sear or the braise; that’s where the golden-brown crust and melt-in-your-mouth texture come from. And trust me, the extra 30 minutes of resting time? Worth every second.
This beef tastes even better the next day, so make extra if you can. Store leftovers in the fridge for up to 5 days, covered tightly. For longer storage, portion into airtight containers and freeze for up to 3 months. Reheat gently in the oven with a splash of broth to keep it moist. The pan sauce freezes well too—just thaw and warm it on the stove. Pro tip: If you’re prepping ahead, brine the beef overnight for even more tenderness. The herbs can be chopped and stored in the fridge for up to 1 week in a sealed container.
Why You’ll Love This Recipe
- Garlic Kiss Magic: Between us, the secret weapon here is fresh garlic—minced right into the olive oil before it even hits the roast. That golden, aromatic crust? It’s what turns this from good beef to ridiculously good beef. My husband licks his fingers every time.
- Leftovers That Shine: I make this on Sundays because the leftovers are better the next day. Thinly sliced for sandwiches, diced into pasta, or tossed in a grain bowl—it’s always the star. (Yes, even on a Tuesday night when I’m too tired to cook.)
- Budget Hero: A chuck roast is cheap, but it doesn’t taste cheap—especially when you let it slow-roast until fall-apart tender. I stretch one into three meals without feeling guilty. Plus, the salt and pepper cost pennies, so this is my go-to for feeding a crowd without breaking the bank.
Step-by-step instructions for slow-braised roast beef
Here’s how to transform tough beef chuck into melt-in-your-mouth perfection.
Prepare the Roast for Maximum Flavor
Remove the beef chuck roast from the refrigerator and pat it completely dry with paper towels. This step is crucial – any moisture on the surface will prevent proper browning. Place the roast on a cutting board and make a few shallow cuts in the fat cap using a sharp knife. These small slashes allow the seasoning to penetrate deeper and the meat to cook more evenly.
In a small bowl, combine the 2 tablespoons kosher salt and 1.5 tablespoons freshly ground black pepper. Rub this mixture all over the roast, pressing firmly to create a flavorful crust. Let the seasoned roast sit at room temperature for 30 minutes while you prepare the braising liquid. This resting period ensures even cooking throughout the meat.
Build the Braising Liquid
In a large Dutch oven, heat the 0.5 cup extra-virgin olive oil over medium heat. Add the 8 smashed garlic cloves, 0.5 cup finely chopped fresh rosemary, and 0.25 cup fresh thyme leaves. Sauté for 2 minutes until the garlic becomes fragrant but doesn’t brown. Add the sliced yellow onion and 4 cut carrots, cooking for an additional 5 minutes until the vegetables begin to soften.
Deglaze the pot with the 1.5 cups dry red wine, scraping up any browned bits from the bottom. Let it simmer for 3 minutes until the alcohol smell dissipates. Pour in the 2 cups beef broth and bring the liquid to a gentle simmer. This aromatic base will infuse the beef with deep, complex flavors during the braising process.
Sear the Roast for Depth of Flavor
Carefully place the seasoned beef chuck roast into the Dutch oven, fat-side up. Increase the heat to medium-high and sear for 5 minutes on each side until a deep golden-brown crust forms. This caramelization creates layers of flavor that will develop further during the long braising time. Don’t be tempted to move the roast too soon – let it develop that beautiful crust.
Once both sides are well-browned, carefully turn the roast to coat it in the braising liquid. Bring everything to a gentle simmer, then reduce the heat to maintain a low, steady bubble. The liquid should just barely move – you’re looking for a slow, controlled cook that will render the fat and collagen from the meat.
Braise Until Fork-Tender
Cover the Dutch oven and transfer it to a preheated 300°F oven. Braise for 3 hours, then carefully flip the roast and add the 0.25 cup chopped fresh parsley to the braising liquid. Return to the oven and cook for another 3 hours, or until the beef is fork-tender and pulls apart easily. The internal temperature should reach 200-203°F – this is the magic zone for perfect tenderness.
During the braising process, the connective tissue in the beef will break down, transforming tough muscle fibers into silky, melt-in-your-mouth texture. The fat will render out, creating a rich, flavorful sauce. Resist the temptation to check on it too often – each time you lift the lid, you lose valuable heat and moisture.
Finish and Serve with Sauce
Remove the roast from the Dutch oven and let it rest on a cutting board for 15 minutes. This resting period allows the juices to redistribute throughout the meat. Skim any excess fat from the braising liquid, then return the liquid to medium heat. Whisk in the 0.5 cup cold cubed unsalted butter and 1 tablespoon all-purpose flour until the sauce thickens slightly.
Slice the roast against the grain into 0.5-inch thick slices and serve immediately with the rich braising sauce spooned over the top. Each bite should deliver perfect tenderness, deep beefy flavor, and a luxurious sauce that coats every forkful. The vegetables in the braising liquid can be served as a side or incorporated into the sauce for additional texture.
Pro Tips For Making 5 Star Roast Beef
- Sear on High Heat: Get that pan screaming hot—like, the oil should shimmer when you drop the beef in. I used to hover over the stove like a nervous parent, but the crust only forms when the beef hits near-smoking oil. Let it sit undisturbed for 3 minutes per side, or you’ll end up with sad, gray meat instead of golden, flavor-packed perfection.
- Salt the Night Before: Toss the chuck roast with salt and pepper 12–24 hours ahead—yes, even if you’re skeptical. My grandmother swore by this, and she was right: the salt breaks down the muscle fibers, making the meat tender and juicy. Skip this, and you’re fighting an uphill battle for flavor and texture.
- Don’t Crowd the Garlic: Smash those garlic cloves flat with the side of your knife before adding them to the pan—this releases more flavor. But here’s the thing: don’t overload the pan. Two or three cloves max for a 3–4 lb roast, or you’ll end up with bitter, burnt garlic instead of aromatic richness.
- Rest Under Foil: After roasting, give it a solid 5–10 minutes under foil before slicing—yes, even if you’re starving. I know, I know, but trust the process. The meat will stay juicy and slice cleanly, or you’ll end up with a dry, sad pile of beef that tastes like regret.
Wine and beer pairings for these flavors
Bold Red Wine Pairings
A bold Cabernet Sauvignon from Napa Valley or Tuscany’s Chianti is my go-to choice—its high tannins and dark fruit notes mirror the beef’s richness while standing up to the red wine reduction.
Look for a 2018 vintage with at least 14% alcohol to complement the dish’s depth. The wine’s acidity also cuts through the sauce’s richness, creating perfect balance. 🍷
Medium-Bodied Options
If you prefer something smoother, a Merlot from Washington State or a Syrah from the Rhône Valley works beautifully. These wines offer plum and blackberry undertones that harmonize with the beef’s caramelized crust.
I recommend a 2019 Merlot with 13.5% alcohol—it’s versatile enough for both the beef and any red wine reduction you might serve.
Beer Pairings
A dark amber ale or porter with malty sweetness pairs surprisingly well with roast beef. Try a Guinness or Samuel Adams Boston Lager—their roasted barley notes echo the beef’s caramelized crust.
For a hoppier option, a Belgian Dubbel like Westmalle Trappist adds a fruity contrast to the dish’s savory depth. 🍺
White Wine Surprise
Don’t overlook dry Riesling from Germany or Alsace—its crisp acidity and peach and citrus notes actually cleanse the palate between each rich bite. A 2020 Riesling with 12.5% alcohol works wonders, especially if you’re serving the beef with a lighter side dish like roasted asparagus.
It’s an unexpected but brilliant pairing!
Budget-Friendly Picks
You don’t need to break the bank: Louis Martini Cabernet Sauvignon ($15) or Apothic Red Blend ($12) deliver impressive flavor for the price. For beer lovers, Coors Banquet ($8) or Heineken ($6) provide reliable malty balance without overwhelming the dish.
These options prove great pairings don’t require a high-end budget. 💰
Serving Temperature
Serve red wine at 60-65°F for optimal flavor—too cold dulls the tannins, while room temperature enhances the wine’s natural richness. For beer, chill to 45-50°F to balance the malt sweetness with the beef’s savory notes.
Pro tip: Use an ice bucket with water for precise temperature control—no need for fancy gadgets! ❄️
Nutrition facts
Frequently asked questions
Why is chuck roast the best cut for this recipe?
Chuck roast contains abundant marbling and connective tissue that breaks down during slow cooking, creating that signature fork-tender texture. Unlike leaner cuts, it holds up perfectly to long braising times while developing rich, beefy flavor. The fat cap also adds moisture and a beautiful crust when seared.
Can I use a different cut of beef?
While chuck roast is ideal, you can substitute with brisket or short ribs for similar results. Avoid lean cuts like sirloin—they won’t become tender enough. For brisket, increase cooking time by 1-2 hours and use a meat thermometer to check for 200-203°F internal temperature.
What if my roast isn’t tender enough?
If the beef feels firm after 6 hours, it needs more time! Return it to the oven for another 1-2 hours until it reaches 200-203°F and pulls apart easily. The key is patience—don’t rush the process. For extra tenderness, add 1 cup of beef broth to the pot and cook uncovered for 30 minutes to reduce the liquid further.
How do I make the sauce thicker?
Simmer the braising liquid uncovered for 10-15 minutes to reduce it naturally. For instant thickening, whisk in 1 tablespoon cornstarch mixed with 2 tablespoons cold water, then stir until the sauce reaches your desired consistency. Avoid over-thickening—it should coat the back of a spoon but still be pourable.
Can I prepare this ahead of time?
Cook the roast up to 2 days ahead and refrigerate. Reheat in the oven at 325°F for 30-45 minutes with a splash of beef broth to restore moisture. The sauce can be made 1 day ahead and reheated gently on the stove. For presentation, slice just before serving to maintain perfect texture.

- 7up Jello Salad With Cream Cheese Recipe: Nostalgic 70s Party Bites - October 5, 2026
- 20 Cookies Recipe: Double Batch Crunchy Edges, Chewy Centers - October 5, 2026
- 1955 Green Bean Casserole Recipe: Crispy Top, Creamy Mushroom Magic - October 5, 2026