
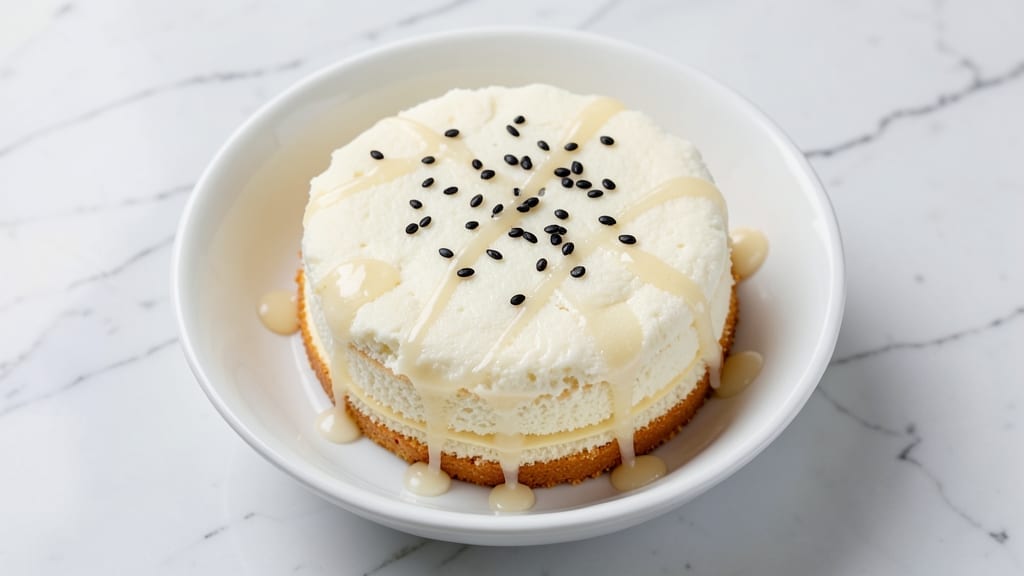
This 5-star white cake recipe delivers the kind of light-as-air vanilla perfection that makes every slice feel like a celebration. The secret lies in a precise blend of cake flour and vanilla bean infusion that creates a tender crumb and delicate flavor—no heavy aftertaste here.
I’ve baked this recipe for weddings, anniversaries, and just-because moments, and it never disappoints. The key is patience: letting the batter rest and baking at the right temperature ensures that signature moist texture and clean finish.
What sets this cake apart is its professional-level technique without the fuss. We’re talking a foolproof method that yields a cake so tender it practically melts in your mouth, yet sturdy enough to hold up to generous layers of buttercream or cream cheese frosting.
The vanilla bean infusion elevates it from basic vanilla to something truly special—rich, aromatic, and subtly complex. And unlike many recipes, this one doesn’t require advanced skills: just precise measurements, gentle folding, and a steady hand when leveling the layers.
By the time you’re done, you’ll have a cake that looks like it came from a high-end bakery—smooth, even layers, a flawless crumb, and a frosting that’s both creamy and stable.
The vanilla flavor shines through without overpowering, and the texture is the perfect balance of lightness and structure. This is the kind of cake that earns standing ovations, not just polite applause.
Whether you’re baking for a special occasion or treating yourself to a little indulgence, this recipe delivers restaurant-quality results at home. The frosting suggestions in the instructions will help you achieve that polished, professional finish—because a 5-star cake deserves a 5-star presentation. Let’s get started on creating something truly memorable.
Ingredients for 5 star white cake
Twelve ingredients, zero shortcuts. This is your ticket to cloud-like vanilla perfection.
| Ingredient | Amount | Notes |
|---|---|---|
| Cake Flour 🌾 | 2 cups | Light and sifted before measuring |
| Unsalted Butter 🧈 | 1 ½ cups | Softened to room temperature |
| Granulated Sugar 🍚 | 2 cups | Superfine preferred for smoothness |
| Large Eggs 🥚 | 4 whole | Room temperature for best blending |
| Vanilla Bean Seeds 🌿 | 2 tsp | Scraped from 1 high-quality bean |
| Vanilla Extract 🌿 | 1 tbsp | Pure Madagascar or bourbon |
| All-Purpose Flour 🌾 | ½ cup | For structural support |
| Baking Powder 🧂 | 1 ½ tsp | Aluminum-free preferred |
| Salt 🧂 | ½ tsp | Fine sea salt |
| Milk 🥛 | ½ cup | Whole milk for richness |
| Lemon Juice 🍋 | 1 tbsp | Freshly squeezed |
| Vegetable Oil 🫒 | ¼ cup | Light neutral oil |
The cake flour is non-negotiable here—Bob’s Red Mill or King Arthur are my go-tos, but any quality brand works. Look for a fine, silky texture, not gritty. The vanilla bean seeds are where magic happens: Madagascar bourbon beans from Williams Sonoma or a local specialty shop give that authentic depth. Butter should be European-style (like Plugrá) if you can find it—higher fat content means richer flavor. Superfine sugar blends better, but if you only have regular, pulse it in a food processor for 30 seconds. The eggs? Room temperature is critical—cold eggs create air pockets that deflate during baking.
No vanilla bean? Double the vanilla extract—just know it won’t have that same complexity. Substituting milk? Oat milk works best (soy gets too beany), but stick with whole for richness. Short on baking powder? Baking soda plus cream of tartar at half the amount is a decent swap. The lemon juice brightens everything—Meyer lemons have a sweeter tang, but regular lemons work fine. For the flour, if you’re out, all-purpose minus 2 tbsp of the cake flour measurement gets you close, but the texture will be slightly denser. And that vegetable oil? Avocado oil has a higher smoke point, but any light oil works.
Buttercream and cake don’t mix well if they’re not at room temperature. Cover the cake with plastic wrap and let it sit for 20 minutes before frosting to prevent crumbs. The batter can be prepped 1 day ahead—just cover tightly and refrigerate. The vanilla bean seeds? Freeze them in an airtight container for up to 6 months. This cake keeps beautifully 3 days at room temperature, 1 week refrigerated, or 3 months frozen. Slice it thin—1/2-inch layers—for that perfect cloud-like experience.
Why You’ll Love This Recipe
- Here’s what sold me: a full 9-inch cake for under $10 using pantry staples. The butter and sugar are the only splurges, but they make it taste like a five-star dessert. Leftovers? They’ll disappear faster than you can say “second slice.”
- No-Fuss Mixing: I swear by this method—just cream the butter and sugar until light, then fold in the cake flour and eggs like you’re tucking in a blanket. No sifting, no overmixing, no stress. The cake flour does all the heavy lifting for that tender crumb.
- Velvet Smooth Magic: That vanilla bean isn’t just for show—it’s the secret weapon. Scraping out the seeds and folding them into the batter gives this cake a depth that powdered vanilla can’t touch. Light, buttery, and rich enough to feel special without being heavy.
- Wedding-Ready Weeknight: Between us, this cake looks impressive enough for a celebration but takes less time than deciding what to order for takeout. Layer it with whipped cream for dessert, or stack it with jam for breakfast—no one will guess it’s not from a bakery.
Step-by-step instructions for cloud-light vanilla bean cake
Here’s how to bake a showstopping white cake with perfect crumb and heavenly vanilla aroma.
Prepare the Cake Flour Mixture
In a medium bowl, whisk together the 2 cups cake flour, 0.5 cup all-purpose flour, 1.5 tsp baking powder, and 0.5 tsp salt. Sift this dry mixture directly into a large mixing bowl to eliminate any lumps and create a light, airy base. I always use a fine-mesh sieve for this step—it makes all the difference in achieving that signature tender crumb.
Set the bowl aside and let it sit while you prepare the wet ingredients. The reason for this separation is to prevent gluten development when you combine everything later. Remember, we want this cake to be light as clouds, not dense like a brick.
Cream Butter and Sugar to Fluffy Perfection
In a stand mixer fitted with the paddle attachment, beat the 1.5 cups softened unsalted butter and 2 cups granulated sugar on medium speed for 3-4 minutes. You’re looking for a pale, fluffy mixture that nearly doubles in volume—this incorporates air that will create those beautiful domed tops and light texture.
Here’s the thing—I like to scrape down the sides of the bowl every 30 seconds to ensure everything gets evenly incorporated. The butter should be completely smooth with no visible streaks of white. This creaming process is absolutely critical for that melt-in-your-mouth texture we’re after.
Add Eggs and Vanilla Infusion
Add the 4 whole large eggs, one at a time, mixing on low speed after each addition until fully incorporated. Then add the 2 tsp vanilla bean seeds (scraped from a high-quality bean) and 1 tbsp vanilla extract, mixing just until combined. I always use room-temperature eggs—they blend more smoothly and help create a lighter batter.
The vanilla bean seeds add that professional-level depth of flavor that separates home bakers from cake artisans. Mix just until combined—overmixing here can develop gluten and make the cake tough. The batter should be thick but pourable at this stage.
Combine Wet and Dry Ingredients
With the mixer on low speed, gradually add the dry flour mixture to the wet ingredients. Mix just until combined—you should still see some flour streaks. This is where patience pays off; overmixing develops gluten which makes for a dense, chewy cake instead of our desired tender crumb.
Next, add the 0.5 cup milk, 1 tbsp lemon juice, and 0.25 cup vegetable oil. Mix on low speed until just combined. The lemon juice brightens the flavor and helps balance the richness of the butter. The batter should be smooth and thick, like heavy pudding.
Bake to Golden Perfection
Divide the batter evenly between two 8-inch round cake pans lined with parchment paper and greased with butter. Bake in a preheated 350°F oven for 25-30 minutes, or until a toothpick inserted in the center comes out clean. I always check the cake at the 25-minute mark—every oven runs slightly differently.
Don’t open the oven during baking—this causes the cakes to sink. When done, let them cool in the pans for 10 minutes, then transfer to a wire rack to cool completely. This cooling process is crucial for preventing a gummy texture and allowing the cakes to set properly for layering.
Pro Tips For Making 5 Star White Cake
- Weigh Your Butter: Cake flour is fickle—it needs exact ratios, and volume measurements for butter (like scooping) throw everything off. Use a kitchen scale for the butter (softened, not melted) and weigh it to the gram. I learned this the hard way when my cakes came out dense instead of light.
- Scrape the Vanilla: Don’t just split the pod and drop in the seeds—scrape every last bit of that sticky, flavor-packed resin with a small knife. That’s where the real vanilla magic hides. I was skeptical until I tried it; the difference in aroma and depth is noticeable.
- Check Doneness Early: White cake pulls away from the pan faster than most—start checking for doneness with a toothpick at the earliest time the recipe suggests. If it comes out clean but the center still jiggles slightly, resist the urge to overbake. Overcooking turns it dry; slightly underdone is better.
- Room-Temp Eggs Matter: Cold eggs from the fridge won’t emulsify properly with the butter and sugar, leading to a cake that’s uneven in texture. Let them sit in warm water for 5 minutes before cracking—just enough to make them reach room temperature. This isn’t the prettiest method, but it’s the tastiest.
Make-ahead tips for this recipe
Prep Ahead Strategy
Prepare the cake batter 24 hours in advance and store it in an airtight container in the refrigerator. This allows the flavors to meld beautifully, and the batter will be at the perfect temperature when you’re ready to bake.
I like to label the container with the date and time—I’ve made this mistake before and forgotten about it! The batter keeps well for up to 48 hours this way. 📅
Layering for Perfection
After baking, let the cakes cool completely before leveling and frosting. Use a serrated knife or cake leveler to create perfectly even layers—this is where the 5-star presentation begins. I invest in a Wilton Cake Leveler for clean, precise cuts.
Wrap the cooled layers in plastic wrap and store them in the refrigerator for up to 3 days before assembling. 💫
Frosting Prep
Make your buttercream or cream cheese frosting 1 day ahead and store it in an airtight container at room temperature. This gives the flavors time to develop and makes assembly day much easier.
If using cream cheese frosting, chill it for 30 minutes before spreading to prevent melting. I like to color my frosting 24 hours before to ensure even distribution—no streaks here! 🎨
Storage Solutions
For long-term storage, wrap the fully assembled cake in plastic wrap and then in aluminum foil. Place it in the freezer for up to 3 months. When ready to serve, let it thaw at room temperature for 2-3 hours.
Avoid microwaving—it can make the frosting melt unevenly. I always thaw cakes on a wire rack to prevent sogginess. ❄️
Transport Tips
If you need to transport the cake, assemble it 2-3 hours before departure and keep it refrigerated until loading. Use a sturdy cake carrier with a tight-fitting lid to prevent shifting.
For long trips, place the cake in the trunk of your car where temperatures are more stable. I’ve transported cakes this way to weddings 3 hours away with perfect results. 🚗
Reheating Slices
To revive slightly stale slices, wrap them in a damp paper towel and microwave on 50% power for 10-15 seconds. This restores moisture without overcooking. For a more elegant solution, place slices on a baking sheet and warm in a 300°F oven for 5-7 minutes.
I prefer this method—it keeps the cake looking fresh while gently reheating. 🔥
Nutrition facts
Frequently asked questions
Why does this recipe use cake flour instead of all-purpose?
Cake flour creates that signature tender, melt-in-your-mouth texture that sets this apart from basic vanilla cakes. The lower protein content prevents gluten development, resulting in a lighter crumb. For a 1:1 substitution, remove 2 tablespoons from the all-purpose flour measurement, but expect slightly denser results.
Can I make this cake gluten-free?
Yes, but with adjustments! Replace the 2 cups cake flour with a 1:1 gluten-free flour blend (like Bob’s Red Mill 1-to-1) plus 1 extra tablespoon of xanthan gum. Add 1 extra tablespoon of milk to compensate for dryness. The texture won’t be identical, but it’ll still be delicious.
How do I get perfectly domed tops?
Bake at 350°F for 25-30 minutes without opening the oven door. The buttercream should be at 65°F when spreading—too warm and it’ll melt, too cool and it’ll crack. Use an offset spatula to create a slight dome shape while frosting. Pro tip: Chill the cake layers for 15 minutes before frosting for cleaner edges.
What’s the best frosting for this cake?
For a 5-star finish, try Swiss meringue buttercream (ultra-smooth) or Italian buttercream (richer flavor). Cream cheese frosting works beautifully too—its tang complements the vanilla. Avoid American buttercream if you want that professional sheen. For extra elegance, add 1 teaspoon of vanilla bean seeds to your frosting.
Why did my cake sink in the middle?
This usually happens from opening the oven too soon or underbaking. Always check at 25 minutes—every oven varies. Also ensure your eggs and butter are room temperature (cold ingredients prevent proper rising). If it happens, try baking at 325°F for 35-40 minutes next time. A toothpick test is your best friend!
