
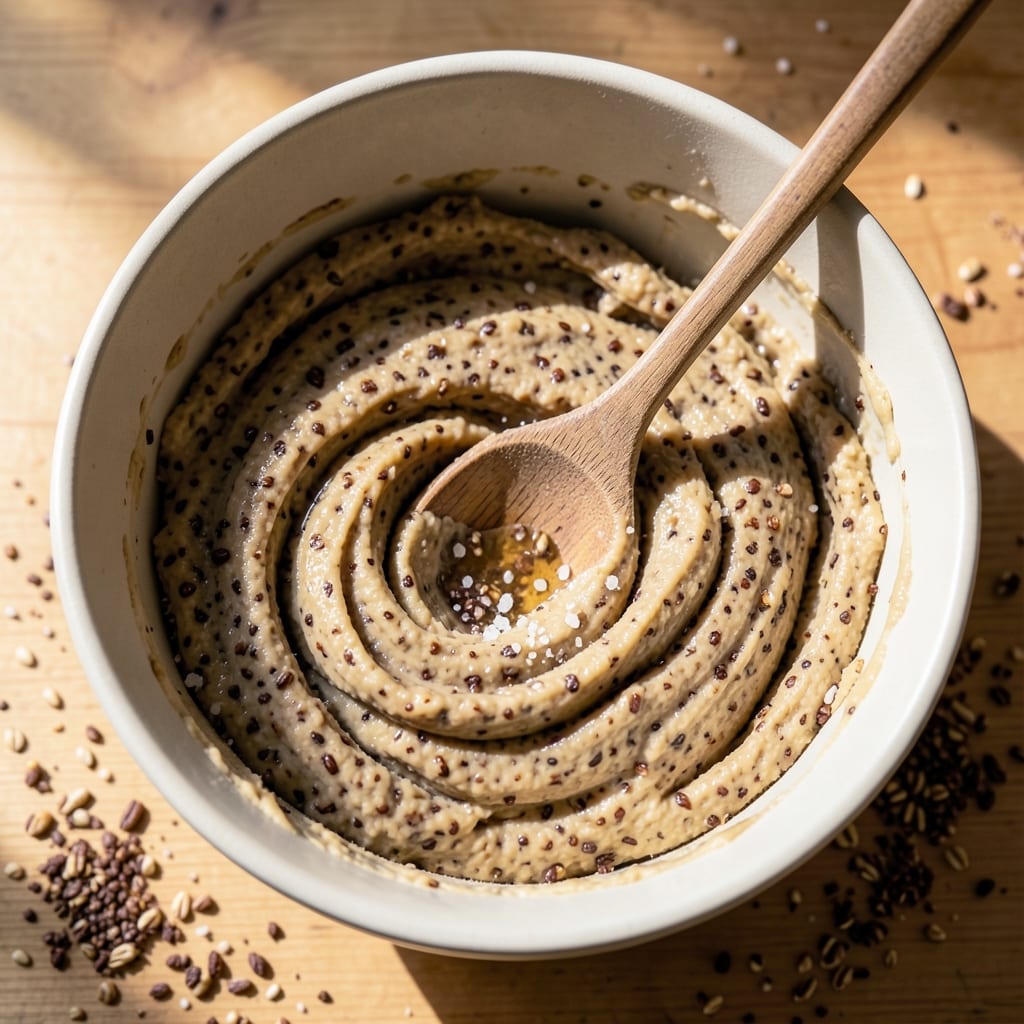
This 50 50 whole wheat sourdough bread delivers the perfect balance of tangy crust and hearty nutty flavor—ideal for sandwiches, toast, or serving with soups. The 50% whole wheat blend adds depth while maintaining a light, airy crumb, and traditional sourdough techniques ensure a crispy, flavorful exterior.
I’ve refined this recipe over years of baking, focusing on proper hydration and fermentation for maximum flavor and texture.
The magic happens in the fermentation process, where the sourdough starter works its magic to develop that signature tang and improve digestibility. With a hydration ratio of 70%, this dough is slightly sticky but manageable, and the bulk fermentation (8–12 hours at room temperature) ensures a well-developed flavor.
No special equipment is needed—just time and patience, which pay off in every crispy, golden bite.
By the time you pull it from the oven, you’ll have a loaf with a crisp, caramelized crust and a soft, open crumb that’s perfect for slicing.
The whole wheat flour adds a subtle earthiness, while the sourdough starter lends a bright, slightly acidic note that makes this bread stand out. It’s the kind of loaf that elevates everyday meals into something special.
Whether you’re a seasoned baker or new to sourdough, this recipe is designed to deliver restaurant-quality results at home. The step-by-step instructions cover everything from starter maintenance to scoring the loaf, ensuring you achieve that perfect tangy crust and tender crumb every time. Let’s get started!
Ingredients for 50 50 whole wheat sourdough bread
These carefully balanced ingredients create the perfect tangy, nutty 50/50 sourdough loaf you’ll crave every day.
| Ingredient | Amount | Notes |
|---|---|---|
| Active Sourdough Starter 🍞 | ½ cup | 100% hydration, bubbly and active |
| Bread Flour 🌾 | 2 cups | High-protein for structure |
| Whole Wheat Flour 🌾 | 2 cups | Stone-ground for nutty flavor |
| Filtered Water 💧 | 2.8 cups | Room temperature (70°F) |
| Granulated Sugar 🍚 | ½ tsp | Feeds starter for activity |
| Salt 🧂 | 2 tsp | Diamond Crystal preferred |
| Olive Oil 🫒 | 1 tbsp | Extra-virgin for richness |
| Honey 🍯 | 1 tsp | Wildflower preferred |
| Cornmeal 🌽 | ¼ cup | For dusting and scoring |
| Instant Yeast 🍞 | ¼ tsp | Optional for extra lift |
The sourdough starter is the heart of this recipe—it’s what gives that signature tang and improves digestibility. King Arthur or Bob’s Red Mill flours work best for the 50/50 blend, but any high-protein bread flour will do. I use Bobs Red Mill stone-ground whole wheat for that extra nutty depth. Your starter should be active (bubbly and doubled) when you begin. If it’s sluggish, feed it an extra hour with sugar before mixing. The 70% hydration ratio makes this dough slightly sticky but manageable—just wet your hands when handling it to prevent sticking.
No instant yeast? Skip it entirely—this recipe relies on the sourdough starter for all its lift. Honey can be swapped for maple syrup or agave if you prefer, though wildflower honey adds subtle floral notes. For the olive oil, avocado oil works too, but extra-virgin olive oil gives that authentic sourdough richness. If your whole wheat flour is too dense, sift it lightly to prevent a heavy crumb. And trust me on the Diamond Crystal salt—it dissolves better than table salt and enhances flavor without overpowering.
This dough needs 8–12 hours of bulk fermentation at room temperature, so plan ahead. Cover it loosely with a damp towel to prevent drying. For storage, wrap cooled loaves in beeswax wrap or a cotton towel—they stay fresh for 3–4 days at room temperature. Freeze slices for up to 6 months by wrapping tightly in plastic. The crust gets crunchier as it cools, so slice when fully room temperature for the best texture. Leftovers? Toast them—nothing beats warm sourdough toast with butter.
Why You’ll Love This Recipe
- No-Fuss Mix-In: The whole wheat and bread flour combo means no extra steps—just toss everything together. My starter does the heavy lifting while I sip coffee, and the dough comes together faster than store-bought.
- Earthy & Tangy: That whole wheat adds a nutty depth, but the sourdough starter keeps it bright and airy—not dense or heavy. Honestly, the slight sweetness from the sugar makes it taste like a bakery loaf, not a chore.
- Weeknight Hero: Toss a slice in the toaster for breakfast, pack it for lunch, or serve it warm with dinner. It’s my go-to for sandwiches, toast, or even croutons—no planning required, just slice and enjoy.
- Budget-Friendly Staple: Whole wheat flour stretches my grocery budget, and this recipe makes two loaves. Freeze extras for quick meals later, or gift them to neighbors—everyone wins, and my wallet thanks me.
Step-by-step instructions for 50/50 whole wheat sourdough bread
Here’s how to craft a loaf with perfect balance—tangy crust, nutty crumb, and that satisfying sourdough rise.
Mix the Dough with Precision
In a large mixing bowl, combine the 0.5 cup active sourdough starter, 2 cups bread flour, 2 cups whole wheat flour, 0.5 tsp granulated sugar, and 2 tsp salt. I like to use a wooden spoon first to break up any flour clumps, ensuring even distribution of the salt and sugar throughout the dry ingredients. This step is crucial for balancing the flavors and texture of your bread.
Next, add the 2.8 cups room-temperature filtered water, 1 tbsp olive oil, and 1 tsp honey. The olive oil adds richness while the honey feeds the yeast and contributes subtle sweetness. Mix vigorously with your hands or a dough whisk for about 5 minutes until the dough comes together into a shaggy mass. You’ll know it’s ready when the dough pulls away from the sides of the bowl and forms a cohesive, slightly sticky ball.
For the final touch, sprinkle the 0.25 cup cornmeal into the bowl, then add the 0.25 tsp instant yeast. Gently fold these into the dough using a silicone spatula. The cornmeal will help prevent sticking later, while the yeast provides that extra lift. Now cover the bowl with a damp kitchen towel and let it rest at room temperature for 30 minutes. This initial rest allows the gluten to begin relaxing, making the subsequent kneading much easier.
Develop the Gluten for Structure
After the 30-minute rest, turn the dough onto a lightly floured surface and begin kneading. I prefer using the “fold and turn” method—grab one side of the dough, stretch it toward the center, then fold it over itself. Rotate the dough a quarter turn and repeat, working through all four sides. This technique builds gluten more efficiently than traditional kneading and reduces the risk of overworking the dough.
Knead for about 10 minutes, or until the dough becomes smooth and elastic. You’ll know it’s ready when it springs back slowly when poked with your finger. The whole wheat flour will make the dough slightly stickier than all-purpose flour, so don’t be afraid to use a bit more bread flour on your surface if needed. This step is where the magic happens—the gluten network forms, giving your bread its structure and chewiness.
Once the dough is properly developed, shape it into a round ball and place it back in the bowl. Cover it again with the damp towel and let it rise at room temperature for 1 to 2 hours, or until it has nearly doubled in size. You’re looking for about 50% to 75% increase in volume. This rise is critical—it allows the dough to develop flavor and texture before the final proof in the fridge.
Cold Proof for Enhanced Flavor
After the initial rise, transfer the dough to a lightly oiled bowl and cover it tightly with plastic wrap. Place the bowl in the refrigerator and let it cold-proof for 12 to 16 hours. This slow, cold fermentation is what gives sourdough its complex, tangy flavor and improves the crumb structure. The cold temperature slows yeast activity, allowing more time for flavor development.
During this time, the dough will rise gradually. I like to check it after 12 hours—it should have risen noticeably but not fully doubled. If it’s ready, proceed to shaping. If not, give it a few more hours. The cold proof also makes the dough easier to handle, as the gluten relaxes further. Here’s the thing—this step is non-negotiable for achieving that authentic sourdough taste.
Shape and Score for a Perfect Loaf
Remove the dough from the refrigerator and let it sit at room temperature for 1 hour to relax. This final rest is essential—it prevents the dough from shrinking back during shaping. Dust your work surface with the 0.25 cup cornmeal and gently shape the dough into a round boule or an oval batard. For a boule, tuck the edges underneath as you shape it, creating surface tension that helps maintain the shape during baking.
Place the shaped dough on a parchment-lined baking sheet and let it rest, uncovered, for 30 to 60 minutes at room temperature. You’ll see it expand slightly as it warms up. Just before baking, use a sharp razor or lame to score the dough. For a boule, make a deep, decorative slash about ½ inch long. This step is crucial—it controls where the dough expands and prevents it from cracking unpredictably.
Bake to Golden Perfection
Preheat your oven to 450°F with a Dutch oven inside for at least 30 minutes. The Dutch oven creates steam, which is essential for developing that crisp crust and open crumb. Carefully transfer the dough, with the parchment, into the hot Dutch oven. Cover tightly with the lid and bake for 20 minutes.
After 20 minutes, remove the lid and continue baking for another 20 to 25 minutes, or until the bread is deep golden brown. You’ll know it’s done when it sounds hollow when tapped on the bottom and the internal temperature reaches 205°F. The crust should be crackly and dark, while the interior should be fully baked with no raw spots. If the top browns too quickly, tent it loosely with aluminum foil to prevent over-browning.
Let the bread cool on a wire rack for at least 1 hour before slicing. This resting period allows the crumb to set and the flavors to fully develop. The longer you wait, the better the texture will be. Once cooled, slice into thick pieces and enjoy the perfect balance of tangy crust and hearty, nutty crumb that makes this 50/50 whole wheat sourdough truly special.
Pro Tips For Making 50 50 Whole Wheat Sourdough Bread
- Weigh Your Whole Wheat: Whole wheat flour packs differently than bread flour—don’t eyeball it. Use a kitchen scale for accuracy, especially when splitting the 50/50 ratio, or your dough will either feel too dense or too slack. I learned this the hard way when my first batch turned out like a brick.
- Autolyse First: Mix the flours and water before adding starter or sugar—let them sit for 30 minutes. This step hydrates the whole wheat properly, making the final dough easier to handle and less sticky. Skip it, and you’ll fight a stubborn, gummy mess later.
- Don’t Over-Knead: Whole wheat dough tears easily, and overworking it will turn your bread into a sad, tough loaf. Aim for 5-6 minutes of stretch-and-folds during bulk fermentation—just until the dough springs back but still feels slightly tacky. Less is more here.
- Use Cold Proofing: After shaping, refrigerate the dough overnight instead of proofing at room temp. The slow rise improves flavor and texture, especially with whole wheat, which can get gummy if rushed. I know, it’s tempting to speed things up, but trust the process—your bread will thank you.
Make-ahead tips for leftovers
Starter Prep Ahead
Feed your sourdough starter 12 hours before baking to ensure it’s at peak activity. I like to store mine in a glass jar on my countertop—I feed it 1:1:1 ratio (starter:flour:water) and keep it at 70-75°F for consistent results.
If your kitchen is cooler, place the jar near your oven’s pilot light for warmth. An active starter will have bubbles throughout and pass the float test—drop a small spoonful in water, and it should float. 🌱
Dough Prep Timeline
Mix your dough in the evening and refrigerate it overnight for the cold proof—this saves you morning baking time. I set a reminder on my phone for 12 hours later to check the dough’s rise. The cold proof not only enhances flavor but also makes shaping easier.
For busy mornings, shape the dough the night before and store it in the fridge until ready to bake. Just let it sit at room temperature for 1 hour before scoring and baking. ⏰
Baking in Batches
Make two loaves at once by doubling the recipe—just use two Dutch ovens. I bake them side-by-side on the middle rack for even heat distribution. For storage, wrap cooled loaves in beeswax wrap and freeze one immediately while keeping the other at room temperature.
Thaw frozen loaves at room temperature for 2 hours before slicing to preserve texture. This method ensures you always have fresh bread on hand. ❄️
Freezing for Later
Slice your baked loaf and freeze portions in quart-sized freezer bags for up to 6 months. I like to label each bag with the date—just toast slices directly from frozen for 5-7 minutes at 375°F until crispy.
For sandwiches, toast the bread first, then assemble with fillings to prevent sogginess. This works perfectly for meal prep—grab a slice in the morning and have breakfast ready in minutes. 💫
Reviving Stale Bread
If your bread starts to dry out, revive it by wrapping it in a damp towel and microwaving for 10-15 seconds. For a crisper texture, toast slices in a 350°F oven for 3-5 minutes.
I also keep a small loaf in the freezer specifically for toast—I pull out slices as needed and toast them fresh. This trick keeps your bread tasting fresh for days beyond its usual shelf life. 🔥
Equipment Shortcuts
No Dutch oven? Use a heavy ovenproof pot with a lid or even a baking stone. Line it with parchment paper to mimic steam retention. For scoring, a sharp knife works in a pinch—just dip it in hot water first to prevent sticking.
I also keep a spray bottle handy to mist the oven walls for extra steam if needed. These small adjustments ensure great results even without specialty tools. 💡
Nutrition facts
Frequently asked questions
Can I substitute white flour for the whole wheat in this recipe?
While you can use all white flour, the 50/50 blend is what gives this bread its signature nutty depth and improved digestibility. For a lighter texture, replace up to 1 cup of whole wheat with bread flour, but expect less flavor complexity. The whole wheat adds fiber and a subtle earthiness that pairs perfectly with the sourdough tang.
Why does my dough feel too sticky to handle?
The 70% hydration ratio makes this dough intentionally sticky—it’s normal! Wet your hands thoroughly before handling to prevent sticking. If it’s unbearable, add 1-2 tablespoons of bread flour during kneading, but avoid over-drying the dough. The stickiness actually helps develop better gluten structure for that perfect open crumb.
How do I know when the cold proof is complete?
After 12 hours in the fridge, your dough should show noticeable expansion (about 25-50% increase). Gently press the surface—it should spring back slowly rather than collapsing. If it hasn’t risen at all, give it 2-4 more hours. The cold proof is done when the dough has clearly expanded but still has some resistance when poked.
Can I bake this without a Dutch oven?
Yes! Use a heavy ovenproof pot with a lid or place the dough on a baking stone. For extra steam, spray the oven walls with water when you put the bread in. The key is maintaining moisture—cover the loaf with foil if it browns too quickly. The crust won’t be quite as crispy, but you’ll still get great flavor and texture.
What’s the best way to store leftovers?
Wrap cooled loaves in beeswax wrap or a cotton towel to maintain freshness for 3-4 days at room temperature. For longer storage, slice and freeze portions in airtight bags for up to 6 months. To revive stale bread, wrap it in a damp towel and microwave for 10-15 seconds—or toast slices for a crispy texture.

- Baked Potatoes in Crock Pot Recipe: Buttery Interiors and Crispy Top Magic - November 1, 2026
- Braised Beef Short Ribs Recipe: Crock Pot Fall-Off-Bone Magic in 6 Hours - November 1, 2026
- Crock Pot Cocoa Recipe: Velvety Warmth With Hidden Spice Magic - November 1, 2026