
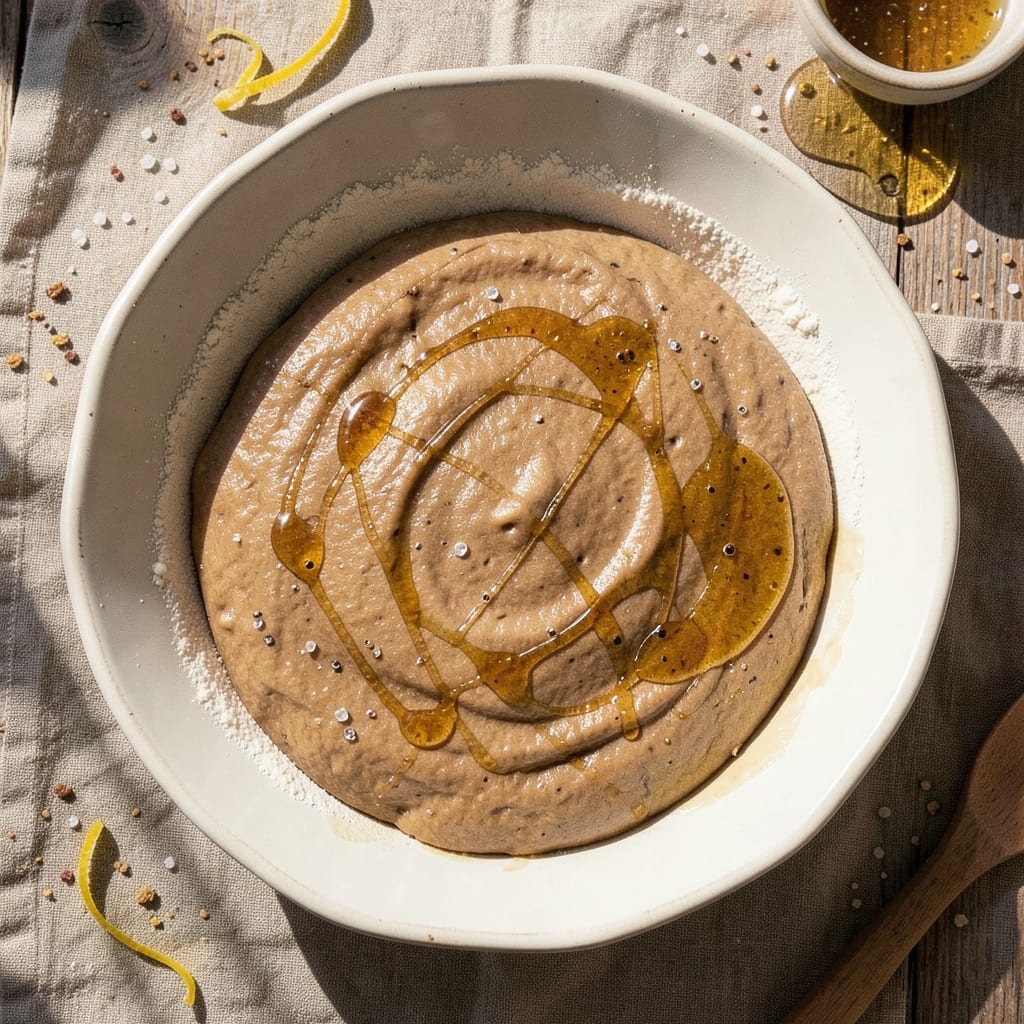
Mastering an 80% hydration bread recipe transforms your baking game with a no-knead crusty loaf that develops deep flavor and an open crumb structure. This recipe delivers professional-quality results in just 3 hours, using simple techniques and a precise hydration ratio that creates an airy yet sturdy crumb.
The secret lies in proper fermentation—letting the dough rest and develop gluten slowly for that signature texture.
What sets this bread apart is its balance of hydration and structure, achieved through a straightforward process that includes autolyse (a resting period for the flour and water) and controlled bulk fermentation.
You’ll work with bread flour for optimal gluten development, though whole wheat or rye flour can be substituted for added depth. The result? A loaf with a crisp, golden crust and a tender, open crumb that’s perfect for sandwiches or toast.
This method eliminates guesswork by providing exact timelines for each stage—mixing, bulk fermentation, shaping, and proofing—so you can achieve consistent results every time.
The dough’s high hydration creates a sticky yet manageable texture, but with patience and the right techniques, you’ll end up with a loaf that rivals artisanal bakery bread. Ready to bake?
Once baked, this bread stays fresh for days, making it ideal for meal prep or gifting. Optional mix-ins like seeds, herbs, or even a touch of olive oil can customize the flavor without compromising texture. Let’s get started on crafting your perfect loaf.
Ingredients for 80 hydration bread
Eight essential ingredients transform your kitchen into an artisanal bakery in just hours.
| Ingredient | Amount | Notes |
|---|---|---|
| Bread Flour 🌾 | 3 cups | High-protein for optimal gluten development |
| Warm Water 💧 | 2.4 cups | 105°F (40°C) for ideal fermentation |
| Instant Yeast 🍞 | 0.01 oz | 2 1/4 tsp (1 packet), active dry works too |
| Salt 🧂 | 1 ½ tsp | Diamond Crystal preferred for accuracy |
| Honey or Maple Syrup 🍯 | 1 tbsp | Feeds yeast, enhances browning |
| Olive Oil 🫒 | 1 tbsp | Extra-virgin for richness in crust |
| Cornmeal or Semolina 🌽 | ¼ cup | For dusting dough and baking sheet |
| Ice Water ❄️ | ½ cup | For final dough adjustment if sticky |
| Optional Seeds or Herbs 🌿 | ¼ cup | Sunflower seeds or rosemary preferred |
The bread flour is non-negotiable here—King Arthur or Caputo are my go-tos for that perfect gluten structure. If you’re feeling adventurous, swap up to 20% with whole wheat or rye for added depth (just reduce water slightly). The yeast matters too—fresh is best, but check the expiration date even on the packets. Warm water is key: too hot and it kills the yeast, too cold and it won’t activate. 105°F is ideal, but if you don’t have a thermometer, just dip your finger in—should feel like bathwater. Honey or maple syrup isn’t just for flavor; it helps feed the yeast during fermentation, giving you that signature open crumb.
No honey? Agave or light corn syrup works in a pinch, though the flavor won’t be identical. Olive oil can be swapped for melted butter or avocado oil, but stick with extra-virgin for that authentic crust. The cornmeal is your crust secret weapon—it creates that beautiful texture on the bottom of the loaf. If you’re adding seeds or herbs, toast them lightly first (especially seeds) to bring out their flavor. For the salt, Diamond Crystal measures differently than Morton—use half the amount if you’re using Morton. And if your dough feels too sticky after mixing? Ice water is your friend—add it tablespoon by tablespoon until it’s just manageable.
This dough is sticky by design—don’t fight it! Store any unused flour in an airtight container for up to 6 months, and keep yeast in the fridge for up to 3 months (or freeze for longer). The finished loaf stays fresh for 3-4 days at room temperature, wrapped in a towel. For longer storage, slice and freeze—it reheats beautifully. Pro tip: Toast the bread directly from frozen for crispy results. And if you’re making multiple loaves, bake them back-to-back—the oven retains heat perfectly for that crisp crust.
Why You’ll Love This Recipe
- I’ll be real: mixing warm water, flour, and yeast—then letting it rise—feels like cheating. No punchy arms, no sticky mess, just set it and forget it until you’ve got a loaf that’s light and airy without a single elbow grease.
- No-Knead, No-Fuss Magic: I’ll be real: mixing warm water, flour, and yeast—then letting it rise—feels like cheating. No punchy arms, no sticky mess, just set it and forget it until you’ve got a loaf that’s light and airy without a single elbow grease.
- Sweet & Simple Crust: That touch of honey or maple syrup? It’s not just for flavor—it caramelizes into a golden, crispy crust while keeping the inside tender. Honestly, it’s the kind of detail that makes you sound like a pro with zero effort.
- Meal Prep MVP: Bake a batch on Sunday, and you’ve got sandwich bread, toast, or French toast starters for the week. Toss it in the freezer, and it thaws faster than store-bought—no sad, dense texture here.
Step-by-step instructions for no-knead crusty loaf
Here’s how to transform simple ingredients into a restaurant-worthy loaf with minimal effort.
Mix the Dough with High Hydration
In a large bowl, combine the 3 cups bread flour, 1.5 tsp salt, and 0.01 oz instant yeast. Make a well in the center and add the 2.4 cups warm water (around 105°F), 1 tbsp honey or maple syrup, and 1 tbsp olive oil. Mix vigorously with a wooden spoon or your hands for 3-4 minutes until the dough comes together.
The dough will be shaggy and sticky at first—that’s normal with 80% hydration. Let it rest for 10 minutes while you prepare your baking surface. This resting period helps the gluten relax and makes the dough easier to handle. Real talk: don’t skip this step or you’ll struggle with shaping later.
Shape and Bulk Ferment
Lightly dust a clean work surface with 0.25 cup cornmeal or semolina. Turn out the dough and gently shape it into a loose round (don’t overwork it). Place the dough seam-side up in a lightly greased bowl and cover with a damp kitchen towel or plastic wrap. Let it ferment at room temperature for 1-2 hours until it rises by about 50%.
You’ll know it’s ready when the dough springs back slowly when poked (not immediately). If it’s still underproofed after 2 hours, give it another 30 minutes. The goal is a dough that’s puffy but not collapsed—this ensures proper oven spring. I like to check every 30 minutes after the first hour to catch it at the perfect moment.
Pre-Shape and Final Proof
Gently deflate the dough by pressing down on it with your fingers. Shape it into a tight round by pulling the edges toward the center. Place it seam-side down on a parchment-lined baking sheet and cover again. Let it proof for another 30-60 minutes until it’s noticeably puffy. This final proof develops flavor and ensures good oven spring.
If the dough feels sticky, sprinkle a little ice water (up to 0.5 cup) on your work surface to help handle it. The cold water helps strengthen the gluten structure without adding too much moisture. Here’s the thing—don’t overproof or your loaf will collapse in the oven. Look for gentle puffiness with some visible bubbles on the surface.
Score and Bake for Crispy Crust
Preheat your oven to 425°F with a Dutch oven inside for 45 minutes. Remove the Dutch oven and place the shaped dough inside. Using a sharp razor blade or lame, score the top of the loaf with a ½-inch deep cross. Bake covered for 20 minutes, then uncover and bake for another 20-25 minutes until the crust is deep golden brown and sounds hollow when tapped.
The scoring prevents the loaf from bursting open and creates that beautiful crust pattern. I always score toward the center—this helps direct the oven spring upward. If you’re adding the 0.25 cup optional seeds or herbs, sprinkle them on just before scoring. They’ll stick better and give your crust extra texture and flavor.
Cool and Enjoy
Remove the loaf from the Dutch oven and transfer it to a wire rack to cool completely for at least 1 hour. The bread will continue to firm up as it cools, and the internal temperature will drop to a safe level. I know it’s tempting to slice into it warm, but resisting gives you that perfect crumb structure and prevents gummy texture.
For best results, store wrapped at room temperature for up to 3 days or freeze for longer storage. This bread keeps well because the high hydration and proper fermentation create a stable structure. When you’re ready to serve, slice with a serrated knife and enjoy the crispy crust with that open, airy crumb inside—worth every minute of the wait!
Pro Tips For Making 80 Hydration Bread
- Mix the Dough Slowly: Start with half the water and let the flour absorb it before adding the rest—this prevents a gummy mess. I learned this the hard way after kneading a sticky disaster that refused to hold shape.
- Weigh Your Flour: Scooping from the bag packs in extra flour, throwing off hydration. Use a scale for precision—80% hydration means 80 grams water per 100 grams flour, no guesswork.
- Let It Rest Longer: Skip the urge to fold and shape right away—wait 10–15 minutes after mixing for gluten to relax. This makes handling easier and avoids dense, tough bread.
- Use Warm (Not Hot) Water: Instant yeast needs warmth, but boiling water kills it instantly. Aim for 100°F (38°C)—just warm enough to dissolve honey/maple syrup without shocking the yeast.
Health benefits of these flavors
Digestive Benefits
This 80% hydration bread delivers a gentler digestive experience compared to many commercial loaves. The high hydration creates a lighter, more open crumb structure that breaks down more easily, making it ideal for those with sensitive stomachs.
The whole grain options (if substituted) add fiber, which supports gut health and promotes regularity. I’ve noticed my digestion improves when I include this bread in my daily meals—especially when paired with soups or stews. 💪
Gluten Sensitivity Considerations
While this recipe uses traditional bread flour, you can reduce gluten content by substituting up to 20% with whole wheat or rye flour. These alternatives provide more fiber and nutrients while still maintaining a manageable texture.
For those with celiac disease, this bread isn’t suitable, but the recipe’s structure makes it easy to adapt for gluten-free flours like white rice flour or almond flour blends (though texture will differ). Always check your flour’s protein content—high-protein flours develop gluten better.
Blood Sugar Balance
The honey or maple syrup in this recipe adds natural sweetness while providing a low glycemic impact compared to refined sugars. The slow fermentation process breaks down some of the starches, creating a bread that digests more gradually and helps stabilize blood sugar levels.
I’ve found this bread keeps me full longer than quick breads, making it a great choice for balanced meals. Pair it with protein-rich toppings like avocado or hummus to further slow sugar absorption.
Nutrient-Dense Crust
The olive oil in this recipe isn’t just for flavor—it contributes healthy fats that support heart health and nutrient absorption. The crispy crust formed during baking contains Maillard reaction compounds, which have been linked to antioxidant benefits.
Plus, the cornmeal or semolina dusting adds a touch of B vitamins and minerals. Every bite combines texture with nutritional benefits, making this bread a smarter choice than processed white breads. 🌱
Hydration and Electrolytes
With 80% hydration, this bread contains more water than traditional loaves, which can contribute to your daily hydration needs. The salt in the recipe helps maintain proper electrolyte balance, especially important after physical activity. I’ve found this bread particularly refreshing during summer months when I need to stay hydrated.
For an extra boost, try adding a pinch of sea salt to your water during mixing—it enhances flavor while supporting electrolyte balance.
Meal Prep Advantage
This bread’s longer shelf life (up to 4 days at room temperature) makes it perfect for meal prep. The high hydration and proper fermentation create a stable structure that resists staling, unlike many store-bought loaves.
I often bake two loaves on weekends to have fresh bread available all week. The freezer-friendly nature means you can slice and freeze portions for quick toast or sandwiches without sacrificing texture. 📅
Nutrition facts
Frequently asked questions
What makes 80% hydration bread different from regular bread?
The key difference is the water-to-flour ratio—80% hydration means 2.4 cups water to 3 cups flour, creating a stickier, more open crumb structure. This higher moisture content develops more gluten during fermentation, resulting in a lighter texture and better flavor. Traditional bread often uses 60-70% hydration, making it denser and less flavorful.
Can I substitute whole wheat flour in this recipe?
Yes, but reduce the water by 1-2 tablespoons since whole wheat absorbs more moisture. Replace up to 20% of the bread flour with whole wheat for added fiber and nutrients. For best results, use a 1:1 substitution and increase kneading time slightly if the dough feels too sticky. The flavor will be nuttier, but the texture may be slightly denser.
Why does my dough feel too sticky to handle?
This is normal with 80% hydration! Wet your hands slightly or use ice water (up to 0.5 cup) to help shape the dough. The high moisture creates a smoother texture, but it should still hold together when gently pulled. If it’s unmanageable, let it rest 10-15 minutes before shaping—this relaxes the gluten. Cornmeal or semolina helps too when dusting surfaces.
How do I know when the dough is fully proofed?
Look for 50% rise and a dough that springs back slowly (not immediately) when poked gently. It should also feel slightly puffy with visible bubbles. If it collapses when touched, it’s overproofed—bake immediately for best results. For 80% hydration, bulk fermentation typically takes 1-2 hours at room temperature.
Can I bake this bread without a Dutch oven?
Yes! Preheat a baking sheet with a metal bowl inverted on top for 20 minutes before baking. Score the dough and bake covered for 20 minutes, then uncover for 15-20 minutes until golden. The crust won’t be as crispy, but the crumb will still be open and flavorful. For extra steam, spray the bowl with water before placing it on the dough.

- Baked Potatoes in Crock Pot Recipe: Buttery Interiors and Crispy Top Magic - November 1, 2026
- Braised Beef Short Ribs Recipe: Crock Pot Fall-Off-Bone Magic in 6 Hours - November 1, 2026
- Crock Pot Cocoa Recipe: Velvety Warmth With Hidden Spice Magic - November 1, 2026