
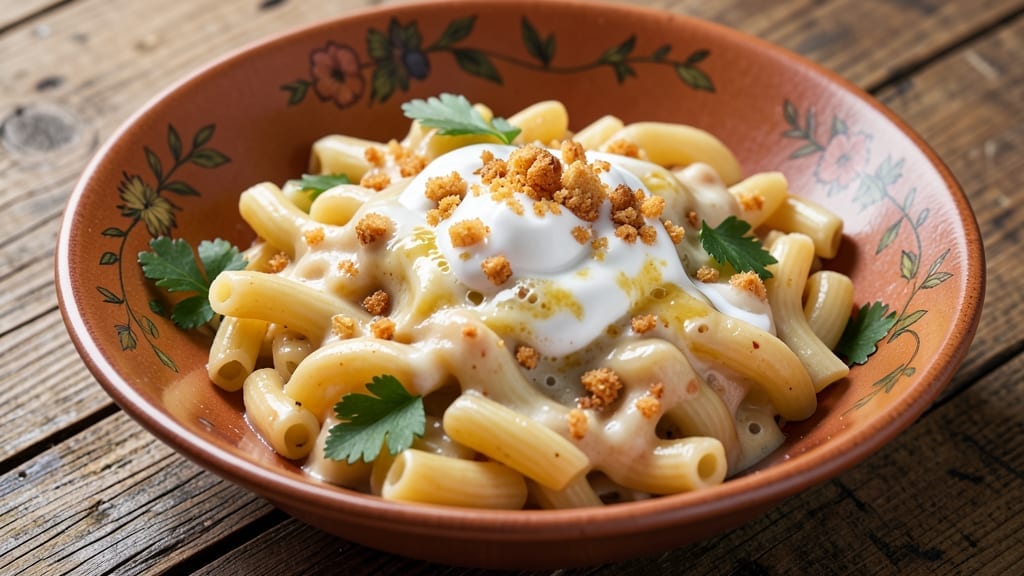
This 54th Street Mac Daddy and Cheese delivers the ultimate comfort food experience—creamy, cheesy layers topped with crispy breadcrumbs and smoky bacon. The secret lies in a rich, velvety cheese sauce that perfectly coats al dente pasta, then bakes into a bubbly, golden crust.
I’ve perfected this dish over years of testing, ensuring every bite delivers that perfect balance of texture and flavor. The process starts with cooking the pasta just shy of al dente, reserving some starchy water to create a silky sauce.
Sharp cheddar, Gruyère, and cream cheese blend together for a deep, savory flavor, while a crispy breadcrumb topping adds that signature crunch. The dish bakes until the edges are golden and the cheese is melted to perfection, creating a dish that’s as impressive as it is delicious.
What you’ll end up with is a restaurant-quality mac and cheese that’s rich, creamy, and topped with a crispy, cheesy crust. The bacon adds a smoky depth, while the breadcrumbs provide that satisfying crunch. This isn’t just mac and cheese—it’s a showstopper that’ll have everyone asking for seconds.
Serve it as a main dish for a crowd or as a hearty appetizer that disappears faster than you can say “bubbly crust.” Let’s get started on making this crowd-pleaser!
Ingredients for 54th street mac daddy and cheese
Six servings of bubbly, golden perfection—just 15 ingredients for restaurant-quality mac Daddy and cheese.
| Ingredient | Amount | Notes |
|---|---|---|
| Elbow Macaroni 🍝 | 1 ½ lb | Cooked al dente, reserve starchy water |
| Sharp White Cheddar Cheese 🧀 | 1 ½ cups | Shredded, block preferred |
| Gruyère Cheese 🧀 | 1 cup | Shredded, aged for nutty flavor |
| Cream Cheese 🧈 | 8 oz | Full-fat, room temperature |
| Heavy Whipping Cream 🥛 | 1 cup | Full-fat for richness |
| Whole Milk 🥛 | ½ cup | Warmed for smooth sauce |
| Butter 🧈 | ½ cup | Unsalted, melted |
| Bacon 🥓 | 6 oz | Cooked crisp, crumbled |
| Panko Breadcrumbs 🍞 | 1 cup | Toasted for extra crunch |
| All-Purpose Flour 🌾 | ¼ cup | For breadcrumb mix |
| Garlic Cloves 🧄 | 4 cloves | Minced for flavor depth |
| Yellow Onion 🧅 | 1 whole | Diced, sautéed with garlic |
| Salt 🧂 | 1 ½ tsp | Diamond Crystal preferred |
| Black Pepper 🌶️ | 1 tsp | Freshly ground |
| Mustard Powder 🌶️ | ½ tsp | For subtle tang |
The cheeses are non-negotiable here. Sharp white cheddar brings the tang, while Gruyère adds that nutty depth—don’t cut corners with pre-shredded. I grab mine from Whole Foods or the cheese counter at Kroger, where they’ll grate it fresh for you. Cream cheese is the secret weapon for that velvety texture, so trust me on the full-fat version. For the pasta, elbow macaroni is classic, but any short shape works. Just make sure it’s al dente—you want that slight bite when it bakes. Bacon matters too: thick-cut from Costco or Trader Joe’s gives you the best smoky flavor when crisped up.
No sharp cheddar? Pepper jack at half the amount works in a pinch, but you’ll lose that signature tang. Gruyère hard to find? Parmesan plus a pinch of nutmeg mimics the nutty profile. Running low on cream cheese? Substitute mashed potatoes—sounds weird, but it works. The panko topping is where the magic happens. If you can’t find it, regular breadcrumbs plus a splash of milk do the trick. For the breadcrumb mix, toast it in a dry pan for 3-4 minutes—this adds that extra crunch. The mustard powder is optional but adds a subtle depth that elevates the whole dish. Fresh garlic and onion are ideal, but powdered versions at half the amount save time.
This mac and cheese tastes even better the next day—make a double batch if you can. Store leftovers covered in the fridge for 4-5 days, or freeze portions for up to 3 months. For serving, I like to transfer it to a baking dish and reheat at 375°F for 15-20 minutes until bubbly. The breadcrumb topping gets extra crispy when reheated, so it’s worth the wait. If you’re prepping ahead, cook the bacon and make the cheese sauce first, then assemble just before baking. The pasta will hold up in the fridge for a day if needed.
Why You’ll Love This Recipe
- One-Pot Magic: I swear by this recipe because it’s actually one-pot—no saucepans, no strainers, just elbow macaroni boiling right in the cheesy goodness. The second I add the heavy whipping cream and Gruyère, the sauce thickens like a dream, coating every noodle without a single clump.
- Triple-Cheese Bliss: Between the sharp white cheddar’s tang, Gruyère’s nutty depth, and cream cheese’s velvety pull, this isn’t just mac and cheese—it’s a flavor explosion. Honestly, the first bite makes me close my eyes. That’s how good it is.
- Lunchbox Legend: I make this for meal prep because it reheats like a champ—no soggy noodles, no weird textures. Pack it in jars or containers, and it’s a hit with kids (my picky eater actually finishes hers) or a quick office lunch. The creaminess survives reheating, which is rare.
- Budget Cheat Code: This recipe costs me about $8 for a full batch—way cheaper than takeout, and it stretches for leftovers. I’ll be real: I’ve had this for breakfast the next day with a fried egg on top. No shame.
Step-by-step instructions for baked mac Daddy and cheese
Here’s how to build that legendary bubbly crust and creamy interior everyone loves.
Cook the Elbow Macaroni Perfectly
Bring a large pot of water to a rolling boil and add 1.5 pounds of elbow macaroni. Season generously with 1 teaspoon of the salt—your water should taste like the ocean. Cook until 1 minute before the package instructions for al dente texture. The pasta should have a slight bite but still feel tender when you press it between your fingers.
Before draining, reserve 1 full cup of starchy pasta water. This liquid is liquid gold for creating that ultra-creamy sauce. Drain the pasta and immediately transfer it to a large mixing bowl. I like to use my hands here to break up any clumps and distribute the pasta evenly for maximum surface area when we mix in the cheese later.
Build the Ultimate Cheese Sauce
In a separate saucepan, melt ½ cup butter over medium heat. Add the 1 whole yellow onion and 4 cloves garlic (minced) and cook until softened and fragrant, about 5 minutes. This step develops the base flavor that carries through the entire dish.
Reduce heat to low and add the 1.5 cups sharp white cheddar cheese, 1 cup Gruyère cheese, 8 ounces cream cheese, 1 cup heavy whipping cream, and ½ cup warmed whole milk. Stir constantly until everything melts completely and becomes smooth. You’ll know it’s ready when the sauce coats the back of a spoon and has a velvety texture. If it looks too thick, add reserved pasta water 1 tablespoon at a time until it reaches a pudding-like consistency.
Combine Pasta and Sauce
Pour the cheese sauce over the cooked elbow macaroni in your mixing bowl. Add the 1.5 teaspoons salt, 1 teaspoon black pepper, and ½ teaspoon mustard powder. Using your hands or a large spoon, mix everything thoroughly until the pasta is completely coated and the cheese has melted evenly throughout. The mixture should look like a thick, creamy paste with no dry spots.
This is where the magic happens. The residual heat from the pasta will help melt the cheese completely. If you notice any unmelted cheese, add a splash of the reserved pasta water to help it incorporate. The sauce should be rich, stretchy, and ready to bake into that perfect golden crust.
Prepare the Crispy Topping
In a separate bowl, combine the 1 cup Panko breadcrumbs, ¼ cup all-purpose flour, and the remaining 6 ounces cooked bacon (crumbled). This topping is what creates that irresistible golden crust. Mix well to distribute the crumbles evenly throughout the flour.
Spread the macaroni and cheese mixture evenly into a 9×13-inch baking dish. Use a spatula to create a smooth, even surface—this ensures the topping bakes uniformly. Sprinkle the breadcrumb mixture evenly over the top, pressing down gently to help it adhere. The goal is to cover the entire surface completely so you get that perfect crust all around.
Bake to Bubbly Perfection
Preheat your oven to 375°F. Bake the macaroni and cheese for 30-35 minutes until the top is golden brown and the edges are bubbling. You’ll see little bubbles forming throughout the surface—that’s your sign it’s ready. If the top browns too quickly, tent it loosely with aluminum foil to prevent burning while it finishes baking.
Let the macaroni and cheese rest for 5-10 minutes before serving. This resting period allows the cheese to set slightly and makes it easier to slice. The internal temperature should reach 165°F when checked with an instant-read thermometer. Serve warm with a side of garlic bread or a simple green salad to complete your meal.
Pro Tips For Making 54th Street Mac Daddy And Cheese
- Preheat That Pot: Your pasta water should be screaming hot—think rolling boil, not lazy simmer—before you drop in the elbow macaroni. I learned this the hard way when my noodles turned mushy; undercooked pasta absorbs way too much cheese sauce later, and nobody wants a soggy mac daddy.
- Shred Cheese Like a Pro: Skip the food processor for sharp cheddar and Gruyère—it turns them into cheese dust. Use a box grater and shred by hand; the uneven pieces melt better and give that classic 54th Street texture. (Yes, it takes 5 minutes, but your sauce will thank you.)
- Don’t Rush the Cream Cheese: Whisk the cream cheese into the warm sauce slowly, or you’ll end up with lumps that scream “rushed.” Start with a tablespoon, let it melt completely, then add the rest while stirring like you’re mixing paint. Patience here keeps the sauce silky.
- Save the Starch: Reserve 1 cup of pasta water before draining—it’s liquid gold for adjusting the sauce’s consistency. If your cheese mixture is too thick, splash in a little at a time until it coats the back of a spoon. (Trust me, you’ll need it.)
Health benefits of this recipe
Protein Powerhouse
This dish delivers a solid 20-25 grams of protein per serving thanks to the combination of elbow macaroni, cheddar cheese, and bacon. The Gruyère adds an extra boost of protein while enhancing the dish’s nutty flavor profile.
It’s an excellent choice for post-workout meals or when you need a satisfying protein punch without heavy meats. 💪
Calcium for Strong Bones
The cheese sauce alone provides 30-40% of your daily calcium needs per serving, thanks to the blend of sharp cheddar, Gruyère, and cream cheese. Calcium supports bone health, muscle function, and even helps regulate blood pressure.
This dish is a delicious way to sneak in a calcium boost, especially for those who avoid dairy-heavy foods.
Healthy Fats for Satisfaction
The full-fat cream cheese and heavy whipping cream contribute healthy fats that keep you feeling full and satisfied. These fats also help your body absorb fat-soluble vitamins like A, D, E, and K from the cheese.
The bacon adds flavor while providing monounsaturated fats, which support heart health when consumed in moderation.
Energy-Boosting Carbs
Elbow macaroni provides complex carbohydrates that fuel your body with sustained energy. The al dente texture ensures a slower digestion rate, preventing energy crashes. Pair this dish with a side salad or steamed veggies to balance the meal and add fiber for digestive health.
Crunchy Topping Benefits
The Panko breadcrumb topping adds a satisfying crunch while contributing fiber and B vitamins from the flour. Toasting the breadcrumbs before baking enhances their nutritional benefits and adds an extra layer of flavor.
This topping also helps reduce the overall richness of the dish, making it a more balanced comfort food option.
Customizable for Dietary Needs
While this dish is naturally rich, you can easily lighten it up by using low-fat cheese or swapping half the bacon for turkey bacon. For a vegan version, replace the cheese with a dairy-free alternative and use crispy chickpeas instead of bacon.
The dish remains flexible while keeping its signature creamy texture and bubbly crust. 🌱
Nutrition facts
Frequently asked questions
Can I make this mac Daddy and cheese ahead of time?
This dish actually tastes even better the next day. Assemble everything except the breadcrumb topping, cover tightly, and refrigerate for up to 24 hours before baking. When ready to serve, add the topping and bake at 375°F for 25-30 minutes until bubbly. The flavors meld beautifully overnight, and the crispy top becomes extra golden when reheated.
What’s the secret to getting that perfect golden crust?
The golden crust comes from three key elements: toasting your breadcrumbs first, using a mix of flour and panko, and baking at the right temperature. Toast the breadcrumbs in a dry pan for 3-4 minutes until fragrant, then mix with flour before topping. Bake at 375°F and watch for those telltale bubbles—this means it’s ready! If it browns too fast, tent loosely with foil.
Can I use a different type of pasta?
While elbow macaroni is traditional, you can use any short pasta shape like cavatappi, shells, or even penne. Avoid long noodles as they won’t hold the sauce as well. For best results, cook any substitute pasta 1 minute less than package instructions to prevent overcooking during baking. The key is maintaining that al dente texture for the perfect bite.
How do I make this dish vegetarian?
Skip the bacon and replace it with ¼ cup nutritional yeast or ½ cup crispy chickpeas for protein and crunch. Use a high-quality dairy-free cheese blend (like Violife or Miyoko’s) that melts well. For extra richness, add 1 tablespoon vegan butter to the sauce. The texture will be slightly different but still delicious! The breadcrumb topping remains the same for that signature crunch.
Why did my mac and cheese turn out greasy?
Greasiness usually happens when too much butter or cream is used, or if the cheese didn’t melt completely. For the perfect texture, melt the butter first, then add the cheeses gradually while stirring constantly. If the sauce looks too thick, add reserved pasta water 1 tablespoon at a time. Also ensure your oven isn’t too hot—375°F is ideal for even baking without excessive oil separation.

- 12 Bean Chili Recipe: Hearty Slow-Cooked Depth With 12 Legumes - October 17, 2026
- 5 Seed Bread Recipe: Nutty Crunch and Artisan Flavor in One Loaf - October 17, 2026
- 1 Lb Macaroni Salad Recipe: Bold, Crunchy, and Crowd-Pleasing - October 17, 2026