
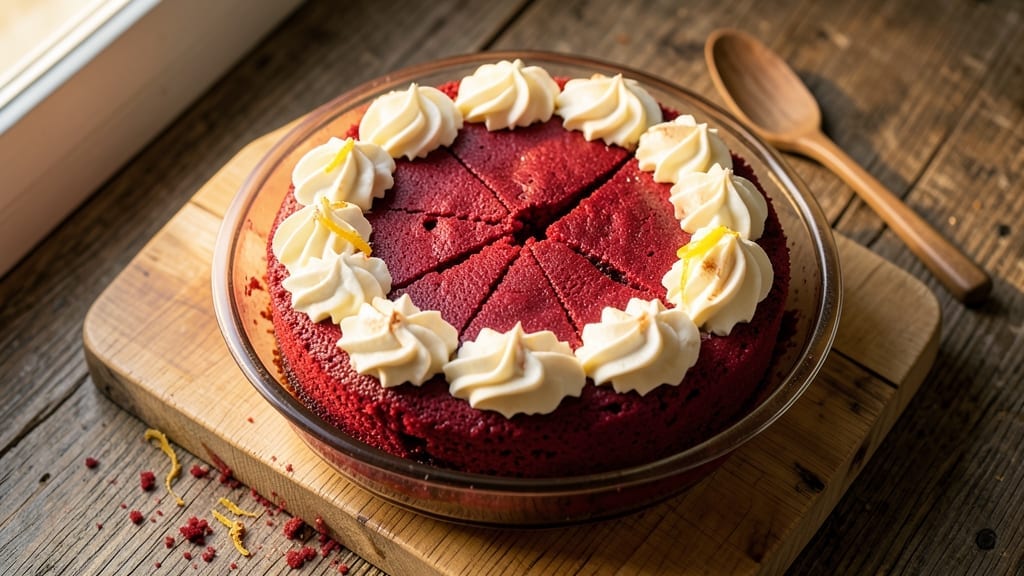
This 7-inch red velvet cake recipe delivers the perfect balance of tender crumb, subtle cocoa depth, and velvety cream cheese frosting—every bite is moist, rich, and irresistibly creamy. The secret lies in precise mixing techniques and a foolproof frosting method that creates that signature marbled effect without overworking the batter.
I’ve perfected this recipe over years of baking, ensuring it’s foolproof for both beginners and seasoned bakers alike.
The cake’s signature red hue comes from natural food coloring, while buttermilk and sour cream keep the layers impossibly tender. Baking at the right temperature ensures even rise and a golden crust, while the cream cheese frosting—whipped to just the right consistency—adds a tangy contrast that makes this cake unforgettable.
No special equipment is needed, just patience and attention to detail.
What you’ll end up with is a moist, perfectly proportioned 7-inch cake with layers that slice cleanly and a frosting so smooth it practically melts in your mouth. The flavor is balanced—slightly sweet, with just enough cocoa and vanilla to satisfy any craving.
This recipe is ideal for special occasions, but it’s simple enough for a weeknight treat.
Serve with a dollop of whipped cream or fresh berries for extra indulgence. The frosting’s tangy sweetness pairs beautifully with the cake’s subtle richness, making every slice a showstopper. Let’s get baking!
Ingredients for 7 inch red velvet cake
These carefully measured ingredients create a perfectly moist 7-inch red velvet cake with velvety cream cheese frosting.
| Ingredient | Amount | Notes |
|---|---|---|
| All-Purpose Flour 🌾 | 2 ¼ cups | Sifted for light texture |
| Granulated Sugar 🍚 | 1 ¾ cups | White or light brown |
| Natural Red Food Coloring 🎨 | 1 tsp | Liquid or gel form |
| Unsalted Butter 🧈 | 1 cup | Room temperature, softened |
| Buttermilk 🥛 | 1 cup | Cold, full-fat preferred |
| Sour Cream 🍦 | ½ cup | Full-fat for richness |
| Pure Vanilla Extract 🌸 | 1 tbsp | High-quality, pure vanilla |
| Cocoa Powder 🍫 | ½ cup | Dutch-processed for smoothness |
| Baking Soda 🧂 | 1 tsp | Freshly opened |
| Salt 🧂 | ½ tsp | Fine sea salt preferred |
| Large Eggs 🥚 | 2 whole | Room temperature |
| Vegetable Oil 🫒 | ¼ cup | Light or canola oil |
| Cream Cheese 🧀 | 8 oz | Room temperature, full-fat |
| Powdered Sugar 🍚 | 3 cups | Sifted for smooth frosting |
| Heavy Whipping Cream 🥛 | ½ cup | Cold for whipping |
The Dutch-processed cocoa powder is non-negotiable here—it dissolves smoothly without bitterness, creating that signature subtle depth. Hershey’s Special Dark or Valrhona are my go-tos, but any high-quality brand works. For the red coloring, natural liquid or gel food coloring gives the most vibrant hue without artificial aftertaste. The buttermilk and sour cream must be cold when mixed—they prevent overmixing and keep the crumb impossibly tender. If you can’t find buttermilk, mix 1 cup milk with 1 tbsp vinegar and let sit for 5 minutes. The room-temperature butter and eggs ensure proper emulsification, so take them out 30 minutes before baking.
No buttermilk? Substitute with 1 cup milk plus 1 tbsp vinegar or lemon juice—just let it curdle for 5 minutes before using. The sour cream can be swapped for Greek yogurt in a pinch, though the texture will be slightly denser. For the frosting, if you’re short on powdered sugar, confectioners’ sugar works identically. The heavy whipping cream should be cold when whipped—if it’s too warm, the frosting won’t hold its shape. For extra stability, chill the bowl and beaters for 10 minutes before whipping. The cake layers can be baked up to 2 days ahead and stored at room temperature, while the frosting keeps for 3 days in the fridge—just rewhip before using.
The cake layers stay fresh for 4 days at room temperature, wrapped tightly in plastic. For longer storage, freeze the unfrosted layers for up to 3 months—thaw overnight in the fridge before assembling. The frosting, once whipped, should be used within 3 days for peak texture, though it can be refrigerated for up to a week. To prevent soggy layers, always let the cake cool completely before frosting. I like to spread a thin layer of jam or curdled fruit between layers for extra moisture, but it’s optional. The assembled cake keeps for 5 days** in the fridge, though it’s best enjoyed fresh.
Why You’ll Love This Recipe
- No Mixer Needed: The buttermilk and butter combo makes this cake so tender, you’ll barely need to cream it properly. Just fold the dry ingredients into the wet—no standing over a mixer, no extra stress.
- Velvet Magic: That natural red food coloring blends right into the batter, giving you a deep, rich hue without overpowering the classic cocoa-buttermilk flavor. Honestly, the first bite feels like a hug.
- Mini but Mighty: A 7-inch cake is perfect for one person’s craving or a small gathering—no leftovers to stress over, but enough to share. My go-to for date nights or when I just want a slice without commitment.
- Budget-Friendly Luxury: Flour, sugar, and butter are pantry staples, and this recipe stretches them beautifully. I’ll be real: it’s cheaper than ordering a cake, but way more satisfying when you’re the one who made it.
Step-by-step instructions for 7-Inch red velvet cake
Achieve velvety texture and perfect moisture with these precise baking techniques.
Prepare the Cake Pans and Mix Dry Ingredients
Preheat your oven to 350°F and grease two 7-inch round cake pans thoroughly with vegetable oil, then line the bottoms with parchment paper circles. Sift together the 2.25 cups all-purpose flour, 1 tsp baking soda, and 0.5 tsp salt in a medium bowl. Set aside—this prevents lumps that could create uneven texture in your cake.
In a separate bowl, whisk together the 1.75 cups granulated sugar, 0.5 cup cocoa powder, and 1 tsp natural red food coloring until completely homogeneous. The cocoa powder should be fully dissolved with no visible streaks—this ensures even color distribution throughout the batter. I like to use Dutch-processed cocoa for smoother texture and richer flavor.
Cream Butter and Add Wet Ingredients
In a stand mixer fitted with the paddle attachment, beat the 1 cup softened unsalted butter on medium speed until light and fluffy—about 2-3 minutes. This step is crucial for creating air pockets that will make your cake tender. Gradually add the 2 whole large eggs, one at a time, mixing well after each addition.
Pour in the 1 cup cold buttermilk and 0.5 cup sour cream alternately, beginning and ending with the buttermilk. Mix on low speed just until combined—overmixing develops gluten and makes the cake dense. Add the 1 tbsp pure vanilla extract and mix for another 30 seconds to fully incorporate the flavors.
Combine Wet and Dry Ingredients
With the mixer on low speed, gradually add the dry ingredient mixture to the wet ingredients in three additions. After each addition, mix just until combined—you should still see some flour streaks. This gentle folding technique maintains the airiness we created earlier. Scrape down the sides of the bowl as needed to ensure even mixing.
Finally, pour in the 0.25 cup vegetable oil and mix on low speed for another 30 seconds until the batter is completely smooth. The batter should be thick but pourable. Divide the batter evenly between the prepared cake pans, spreading it out to the edges. Tap the pans gently on the counter to remove any air bubbles.
Bake and Cool the Cake Layers
Bake the cakes for 25-30 minutes, or until a toothpick inserted into the center comes out clean. The edges should be pulling away slightly from the pan, and the top should spring back when gently pressed. Rotate the pans halfway through baking for even browning. Let the cakes cool in their pans for 10 minutes, then transfer to a wire rack to cool completely.
This cooling step is critical—cooling too quickly causes cracking. I like to let them cool completely before frosting, which typically takes about 1 hour. The layers should be moist but firm enough to handle when you’re ready to assemble.
Prepare the Cream Cheese Frosting
In a large bowl, beat the 8 oz room-temperature cream cheese and 3 cups powdered sugar together on medium speed until smooth and creamy. Add the 0.5 cup cold heavy whipping cream and beat until stiff peaks form. The frosting should be light and fluffy—this ensures it spreads easily between the cake layers.
Spread a thin layer of frosting on the bottom cake layer to help it hold together. Place the second layer on top and spread the remaining frosting evenly over the top and sides of the cake. Use a spatula to create clean, straight edges. Chill the cake in the refrigerator for 30 minutes before serving to allow the frosting to set slightly.
Pro Tips For Making 7 Inch Red Velvet Cake
- Bake at 325°F—Not Hotter: I learned this the hard way—cranking the oven to 350°F for a 7-inch cake makes the outside set too fast while the center stays undercooked. The butter in this recipe needs time to melt evenly, so stick to the lower temp and check for doneness with a toothpick at 30-35 minutes.
- Mix the Red Velvet Color Last: Natural food coloring can turn your batter into a muddy mess if you add it too early. Whisk it into the buttermilk mixture right before combining everything—this keeps the color vibrant and prevents the flour from absorbing it unevenly.
- Don’t Overmix the Batter: This isn’t a pancake recipe. Once the flour and buttermilk are just combined, stop stirring. Overmixing develops the gluten and makes the cake dense. A few lumps are fine—they’ll disappear when baked.
- Use Cold Buttermilk for Stability: Room-temperature buttermilk can make the cake sink in the center. Pop the buttermilk in the fridge for 10 minutes before mixing, then let it sit out for just 5 minutes before using. This keeps the structure tight and prevents a gummy texture.
Common mistakes when making this recipe
Overmixing the Batter
This is the #1 mistake I see beginners make—turning their mixer up too high or mixing for too long. The moment your batter becomes smooth with no visible flour streaks, STOP. Overmixing develops gluten, which makes your cake dense and tough instead of tender.
I recommend mixing on low speed just until combined, with visible streaks still present. The batter should be thick but pourable, not silky smooth. 💛
Skipping Room Temperature Ingredients
Cold butter, eggs, and dairy create pockets of steam during baking that help lift the cake, but if they’re straight from the fridge, your cake will sink. Take your butter, eggs, and cream cheese out 30 minutes before mixing.
The buttermilk and sour cream should be cold (not warm) when added to the batter. I keep mine in the fridge until the last minute to maintain that chill.
Incorrect Oven Temperature
Your oven might read 350°F but actually run hotter or cooler. Test your oven accuracy by baking a simple cake or using an oven thermometer. If your cake rises too quickly and browns on the outside before cooking through, your oven runs hot.
If it’s underdone in the center but not browned, it runs cool. Adjust your temperature by ±25°F as needed. I’ve had cakes fail because the oven was off by 50°F!
Not Leveling the Cake Layers
Uneven layers create an uneven finished cake that’s hard to frost smoothly. Always use a serrated knife or cake leveler to trim the domed tops of your cooled cake layers. This ensures clean, flat surfaces for spreading frosting.
I like to place the cake on a plate, press down gently, and slice off the top at a 45-degree angle to create a flat surface. Never skip this step!
Overfilling the Pans
Filling your 7-inch pans more than ⅔ full causes the cake to overflow or bake unevenly. The batter should reach just below the rim of the pan. When you tap the pan gently on the counter, you should see the batter settle slightly but not spill over.
I use a rubber spatula to spread the batter evenly to the edges, then tap the pan 3-4 times to remove air bubbles before baking.
Frosting Too Soon
Warm cake layers absorb moisture from the frosting, making it soggy. Always let your cakes cool completely to room temperature before frosting. I wait at least 1 hour after removing them from the oven.
You can speed this up by placing them on a wire rack in the fridge for 20 minutes after their initial 10-minute pan cool**. Never frost warm layers—it ruins the texture and makes your cake slide off the plate! 🔥
Nutrition facts
Frequently asked questions
Can I make this 7-inch red velvet cake in a different size pan?
Yes, but adjust the baking time and batter quantity. For an 8-inch pan, increase batter by 20% and bake 5-7 minutes longer. For a 6-inch pan, reduce batter by 30% and bake 15-20 minutes. Always check doneness with a toothpick. The key is maintaining the same batter depth—about ⅔ full—to ensure even baking.
How do I get the perfect marbled effect in the frosting?
Divide the frosting into two bowls—leave one plain and tint the other with ½ tsp red gel food coloring. Swirl the colors together using an offset spatula or skewer, then spread immediately. For extra drama, pipe swirls on top after spreading. Work quickly so the colors don’t fully blend before setting.
Why did my cake crack on top?
Cracking usually happens from rapid cooling or overmixing. Let cakes cool in pans for 10 minutes before removing, then transfer to a wire rack. If cracks appear, cover with extra frosting or decorate with fresh berries. For next time, avoid opening the oven door during baking to prevent temperature shifts.
Can I make this cake gluten-free?
Yes, but use a 1:1 gluten-free flour blend (like Bob’s Red Mill) and add ½ tsp xanthan gum. Increase flour by 10% to compensate for lower density. Replace buttermilk with a gluten-free dairy alternative, and expect slightly denser texture. Test with a small batch first to adjust ratios.
How do I store leftovers without drying out?
Wrap the frosted cake tightly in plastic wrap, then place in an airtight container. Store at room temperature for 2 days or refrigerate for up to 5 days. For longer storage, freeze unfrosted layers for 3 months**. Thaw overnight in the fridge, then refrost with a thin layer of cream cheese frosting to refresh.

- 12 Bean Chili Recipe: Hearty Slow-Cooked Depth With 12 Legumes - October 17, 2026
- 5 Seed Bread Recipe: Nutty Crunch and Artisan Flavor in One Loaf - October 17, 2026
- 1 Lb Macaroni Salad Recipe: Bold, Crunchy, and Crowd-Pleasing - October 17, 2026