
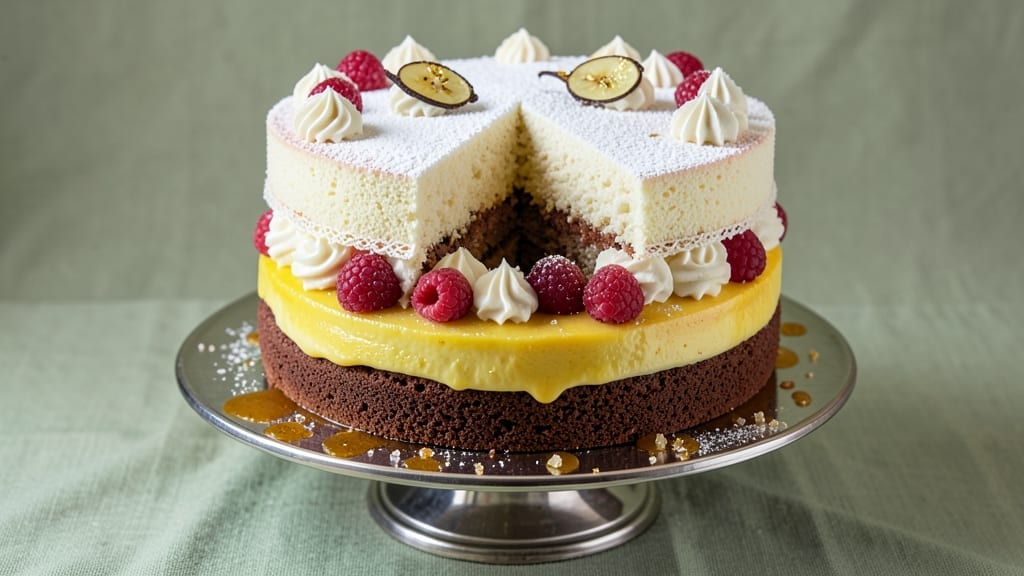
The 6-6-6 cake delivers the perfect balance of moist vanilla layers, velvety buttercream, and elegant swirls that make every slice feel like a celebration. 💛 This classic dessert—three 6×6-inch layers stacked with precision—isn’t just visually stunning; it’s foolproof for bakers of all skill levels, with a foolproof technique that ensures consistent results every time.
The secret lies in baking time precision and proper cooling, which transforms this cake from homemade to showstopper.
What sets this recipe apart is the vanilla bean swirls that run through each layer, adding depth and a professional touch without requiring advanced piping skills. The buttercream, rich and smooth, binds the layers together while keeping the texture light.
With just five key steps—baking, cooling, layering, frosting, and swirling—you’ll create a cake that looks like it came from a bakery, not your kitchen.
By the time you’re done, you’ll have a triple-layered masterpiece with golden-brown edges, tender crumb, and swirls of vanilla that taste like summer in every bite. The cake’s structure holds beautifully, making it perfect for weddings, birthdays, or simply treating yourself.
Each slice reveals that perfect balance of moist cake, creamy frosting, and aromatic vanilla—proof that even the most classic desserts can be elevated with the right technique.
Ready to bake? This recipe includes step-by-step instructions for baking the layers, assembling them with precision, and creating those signature swirls. Whether you’re a beginner or a seasoned baker, the 6-6-6 cake is your go-to for a dessert that’s as impressive as it is delicious. Let’s get started!
Ingredients for 6 6 6 cake
Twelve ingredients transform into a showstopping cake with swirls of vanilla magic.
| Ingredient | Amount | Notes |
|---|---|---|
| All-Purpose Flour 🌾 | 3 ½ cups | Sifted for lightness, plus extra for dusting |
| Unsalted Butter 🧈 | 2 cups | Room temperature, European-style preferred |
| Granulated Sugar 🍚 | 2 ½ cups | Superfine preferred for smoother texture |
| Large Eggs 🥚 | 6 whole | Room temperature, separated for stability |
| Pure Vanilla Extract 🌿 | 2 tbsp | Bourbon or Madagascar preferred |
| Vanilla Beans 🌸 | 2 whole | Split lengthwise for seeds and swirls |
| Baking Powder 🍞 | 1 tbsp | Aluminum-free for tender crumb |
| Salt 🧂 | ½ tsp | Fine sea salt for balance |
| Whole Milk 🥛 | 1 cup | Room temperature for even mixing |
| Powdered Sugar 🍚 | 4 cups | For buttercream, sifted for smoothness |
| Heavy Whipping Cream 🥛 | 1 cup | Cold for stiff peaks |
| Vanilla Bean Seeds 🌸 | 1 tbsp | Scraped from 2 beans for intense flavor |
| Cornstarch 🌾 | 1 tsp | For buttercream stability |
| Lemon Zest 🍋 | 1 tsp | Brightens the vanilla flavor |
The vanilla beans are non-negotiable—Madagascar or Tahitian deliver the most aromatic seeds. Splitting them lengthwise gives you both the fragrant pods for infusing and the seeds for swirling. Penzeys Spices or specialty grocers carry the best quality, and you’ll use them twice: once in the cake batter and again in the buttercream. The buttercream’s secret lies in the European-style butter—it has 82% fat content, giving you that ultra-smooth, pipeable consistency. If you can’t find it, Plugrá or Land O’Lakes European Style are solid substitutes. For the cake layers, King Arthur or Gold Medal flour ensures that tender crumb. Sifting it removes lumps and incorporates air, which is critical for that light, airy texture.
No vanilla beans? Double the pure vanilla extract and add a pinch of almond extract for depth, but you’ll miss that signature speckled look. Running out of heavy cream? Whipped topping works in a pinch, though it won’t hold as stiffly. The buttercream can be made ahead—up to 3 days in the fridge—but bring it to room temperature before using. For extra richness, add 1 tbsp of the vanilla bean-infused milk from the cake batter. The lemon zest is key—it cuts through the sweetness and brightens the vanilla. If you don’t have fresh lemons, 1/2 tsp of lemon extract works, but it lacks that zesty pop.
The cake layers keep beautifully—2 days at room temperature covered loosely with plastic, or 1 week in the fridge. The buttercream, once made, stays fresh for 5 days in the fridge and can be frozen for 3 months. Assemble the cake 24 hours before serving to let the layers fully set and the flavors meld. Store leftovers in an airtight container with parchment between layers to prevent sogginess. For a showstopping presentation, dust with powdered sugar or add edible gold leaf just before serving.
Why You’ll Love This Recipe
- You’re using pantry basics here: flour, butter, sugar, eggs, and a splash of vanilla. No specialty ingredients, no waste—leftovers? They’ll disappear faster than you can say “second slice.”
- No-Mix Needed: I swear by this one—just fold the dry ingredients into the creamed butter, eggs, and sugar. No sifting, no extra bowls, no stress. The secret’s in the quick tossing of flour over the wet mix to keep it light.
- Vanilla Butter Bliss: That classic combo of vanilla and butter? It’s the kind of flavor that makes you forget you’re eating cake. The sugar caramelizes just enough to give it this warm, golden edge—like biting into a hug.
- Birthday or Boredom: Serve it for a celebration or when you’re craving something sweet on a Tuesday. The 6-6-6 ratio (flour, butter, sugar) means it’s always reliable—whether you’re feeding a crowd or just treating yourself.
Step-by-step instructions for triple-layered vanilla bean cake
This is where the magic happens—layer upon layer of vanilla bliss comes together.
👨🍳 Step 1: Prepare the Cake Batter with Vanilla Infusion
Preheat your oven to 350°F and generously grease three 6-inch round cake pans with butter, then dust with flour. Split each of the 2 whole vanilla beans lengthwise and scrape out the seeds into a small bowl—you’ll need all 1 tablespoon of seeds for the batter. Save the empty pods for swirling.
In a large mixing bowl, cream together the 2 cups unsalted butter and 2.5 cups granulated sugar on medium speed until light and fluffy, about 3-4 minutes. Add the 6 whole large eggs one at a time, mixing well after each addition. Stir in the 2 tablespoons pure vanilla extract and the scraped vanilla bean seeds—this is where the deep vanilla flavor develops.
👨🍳 Step 2: Combine Dry Ingredients for Light Texture
In a separate bowl, whisk together the 3.5 cups all-purpose flour, 1 tablespoon baking powder, 0.5 teaspoon salt, and the remaining vanilla bean pods (cut into small pieces). With the mixer on low speed, gradually add the dry ingredients to the butter mixture, alternating with the 1 cup whole milk in 3 additions—this creates a tender, even crumb.
Mix just until combined—overmixing develops gluten and makes the cake dense. The batter should be smooth and slightly thick. Divide the batter evenly among the three prepared pans, filling each about ⅔ full. Tap each pan gently on the counter to remove air bubbles and ensure even baking.
🔥 Step 3: Bake the Layers to Perfect Doneness
Bake the cakes in the preheated oven for 25-30 minutes, or until a toothpick inserted into the center comes out clean. Rotate the pans halfway through for even baking. Here’s the thing—vanilla cakes can dry out quickly, so don’t overbake. They should be golden on top but still slightly springy to the touch.
Let the cakes cool in their pans for 10 minutes, then transfer to a wire rack to cool completely. This resting period prevents them from breaking when you remove them from the pans. Once fully cooled, trim the domed tops if needed for even layers.
🥘 Step 4: Whip the Vanilla Bean Buttercream
While the cakes cool, prepare the buttercream by beating the 2 cups unsalted butter (softened but not melted) with the 4 cups powdered sugar and 1 teaspoon cornstarch until smooth. Add the 1 cup heavy whipping cream, 1 tablespoon vanilla bean seeds, and 1 teaspoon lemon zest. Beat on high speed until light and fluffy—this should take about 3-5 minutes.
Here’s the secret to silky buttercream: whip the cream to stiff peaks before adding it to the butter mixture. This ensures a stable, pipeable consistency. Taste and adjust sweetness if needed—you can add a bit more powdered sugar or a splash of milk to reach your preferred balance.
🥘 Step 5: Assemble the Triple-Layered Cake
Place the first cake layer on a cake stand or plate. Spread a generous layer of buttercream over the top, then place the second layer on top, pressing down slightly. Repeat with the third layer. Now for the swirls: pipe a border of buttercream around the edges of the cake, then pipe a rosette in the center. Use a small offset spatula to create elegant swirls by dragging the buttercream from the center outward.
Chill the cake in the refrigerator for 30 minutes before serving to let the buttercream set slightly. This ensures clean slices and prevents crumbs. The final result should be a towering, decadent cake with layers of moist vanilla cake and rich buttercream swirls—perfect for celebrations or simply indulging in pure vanilla bliss.
Pro Tips For Making 6 6 6 Cake
- Cream Butter Slowly: DESCRIPTION: The 6-6-6 cake lives or dies by its butter. Beat it with sugar until it’s pale, fluffy, and almost room temp—about 3-4 minutes on medium-high. If it looks greasy or clumps, you’re rushing it. (Yes, even if you’re impatient like me.)
- Sift That Flour: DESCRIPTION: Skip sifting the flour, and you’re asking for a dense, heavy cake. Use a fine-mesh sieve to aerate it before folding it into the butter mixture—this lightens the texture without overmixing. Pro move: Sift directly into the bowl to avoid clouds of flour everywhere.
- Eggs at Room Temp: DESCRIPTION: Cold eggs? Your cake’s rise will be sluggish. Crack them into a bowl, cover it, and let them sit for 30 minutes before adding. Cold eggs also separate easier—no one wants scrambled cake batter.
- Bake Until Springy: DESCRIPTION: The toothpick trick is overrated. Press the center: it should bounce back slowly, not wobble like jelly. Overbaking dries it out; underbaking leaves it gummy. Pull it when the edges are set but the middle still has a tiny give—about 25-30 minutes in a 350°F oven, depending on your pan.
Essential equipment for great 6 6 6 cake
Must-Have Baking Tools
Start with three 6-inch round cake pans—I recommend Wilton Perfect Results pans for their even heat distribution. They’re non-stick and have a removable bottom, making removal effortless.
A stand mixer (like the KitchenAid Artisan Series) is essential for creaming butter and sugar properly and whipping buttercream to stiff peaks. If you don’t have one, a hand mixer works, but expect more elbow grease. 💛
Precision Measuring Essentials
Accurate measurements are critical for a perfect 6-6-6 cake. Invest in a digital kitchen scale (like the OXO Good Grips) for dry ingredients—it’s more precise than measuring cups.
For liquids, a liquid measuring cup with clear markings ensures you don’t over- or under-measure. A microplane is a game-changer for zesting lemons and scraping vanilla bean seeds efficiently.
Swirl Creation Tools
To achieve those professional-looking swirls, grab a small offset spatula (like the Ateco 301) and a piping bag with a star tip (Wilton 1M). The spatula helps drag buttercream into elegant swirls, while the piping bag makes clean, even borders.
For extra flair, a turntable (like the Wilton Cake Stand Turntable) makes decorating a breeze by rotating the cake smoothly under your hands.
Cooling and Storage Gear
Let your cakes cool properly to avoid crumbling layers. A wire cooling rack (preferably with a removable tray) is a must—it allows air to circulate evenly. For storage, use airtight cake carriers (like the Wilton Cake Carrier) to keep layers fresh.
If you’re making the buttercream ahead, a food-safe plastic container works well for refrigeration.
Budget-Friendly Alternatives
Don’t have all the fancy tools? No problem. Use aluminum cake pans (like the USA Pan) for budget-friendly baking. A whisk and large mixing bowls can replace a stand mixer for small batches.
For swirls, a butter knife works in a pinch—just spread the buttercream and drag it with your knife for a rustic look. A spoon or spatula can also help create simple rosettes.
Nutrition facts
Frequently asked questions
Why does this recipe use three 6×6-inch layers instead of one large cake?
Three 6×6-inch layers create a perfect balance of height and stability for stacking. The smaller size ensures even baking and cooling, while the triple-layer structure gives that impressive bakery-style presentation. Each layer also cools faster than a single large cake, preventing cracks or uneven texture.
Can I substitute vanilla extract for vanilla beans in this recipe?
Yes, but you’ll miss the signature speckled look and deeper vanilla flavor. Use double the pure vanilla extract (4 tbsp total) plus a pinch of almond extract for complexity. For visual appeal, add a few drops of vanilla extract to a piping bag with a tiny bit of buttercream to create faux swirls.
How do I fix cracked cake layers after baking?
Cracks usually happen from overmixing or uneven cooling. If they appear, don’t worry—just level the tops with a serrated knife before frosting. For prevention, ensure your oven is fully preheated, avoid opening the oven door during baking, and let cakes cool completely before assembling.
Can I make the buttercream ahead of time?
The buttercream stays fresh for 5 days in the fridge or 3 months in the freezer. Just bring it to room temperature and rewhip briefly before using. For extra flavor, add 1 tbsp of vanilla bean-infused milk from the cake batter when rewhipping.
What’s the best way to store a fully assembled 6-6-6 cake?
Keep it at room temperature for 2 days covered loosely with plastic wrap, or refrigerate for 1 week. For longer storage, freeze the fully assembled cake (unfrosted) for up to 1 month. Thaw overnight in the fridge before serving. Always use parchment between layers to prevent sogginess.
