
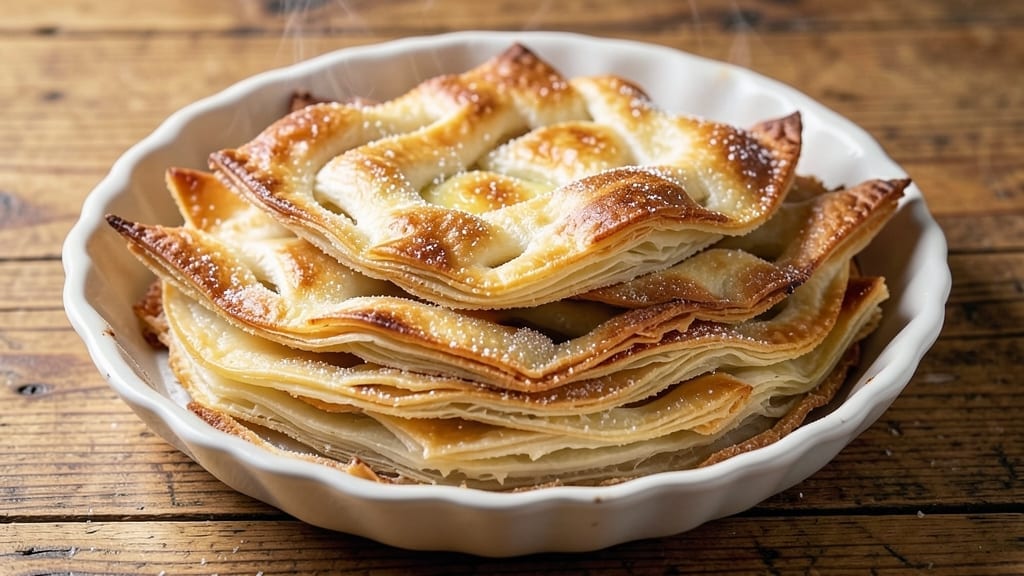
A perfect pie crust should be flaky, crisp, and foolproof—no matter which of these six variations you choose. Whether you’re baking a classic apple pie, a savory chicken pot pie, or a rich chocolate cream pie, the foundation matters most.
I’ve tested each recipe to ensure they deliver that signature shatteringly thin, golden-brown crust every time, with techniques that work for both beginners and seasoned bakers.
From a traditional all-butter crust to a gluten-free option and even a vegan-friendly version, this collection covers all bases. Each recipe includes step-by-step instructions for rolling, blind-baking, and handling the dough without stress. The key to flaky layers?
Cold butter, proper chilling, and patience—no shortcuts here. You’ll also find tips for lattice crusts, freezer storage, and how to adapt these crusts for both sweet and savory pies.
What sets these crusts apart is their versatility. Use the classic butter crust for apple or cherry pies, the puff pastry-style version for a showstopping dessert, or the gluten-free option for dietary restrictions.
Every crust is designed to hold its shape, resist sogginess, and deliver that satisfying crunch. The best part? No special equipment is needed—just a few simple tools and a little time.
Ready to elevate your pie game? Start with the recipe that fits your needs, then explore the variations. Whether you’re baking for a holiday feast or a weeknight dessert, these pie crusts will become your go-to foundation. Let’s get started on creating the perfect base for your next masterpiece.
Ingredients for 6 pie crust
Six foolproof crusts—flaky, crisp, and ready for any pie adventure.
| Ingredient | Amount | Notes |
|---|---|---|
| All-Purpose Flour 🌾 | 3 ½ cups | Sifted for light texture |
| Cold Unsalted Butter 🧈 | 1 ½ cups | Cubed, frozen 15 minutes |
| Ice Water 💧 | ½ cup | Chilled for best results |
| Diamond Crystal Kosher Salt 🧂 | ½ tsp | Fine grain preferred |
| Granulated Sugar 🍚 | 2 tbsp | For subtle sweetness |
| Large Egg Yolk 🥚 | 1 whole | For binding (optional) |
| White Vinegar 🍶 | 1 tsp | Enhances flakiness |
| Vegetable Shortening 🧈 | ½ cup | For extra flakiness |
| Xanthan Gum 🌾 | ¼ tsp | For gluten-free version |
| Coconut Oil 🥥 | 1 tbsp | For vegan option |
| Cornstarch 🌾 | 2 tbsp | For crisp texture |
| Almond Flour 🌰 | ½ cup | For alternative crust |
The butter is non-negotiable for that signature flakiness. European-style unsalted butter (like Plugrá) has higher fat content—perfect here. Freeze your butter cubes for 15 minutes before mixing to mimic professional techniques. For the gluten-free version, Bob’s Red Mill 1:1 flour works best, but add xanthan gum to replicate gluten’s binding properties. The almond flour option? Blanched, finely ground almonds from Trader Joe’s give the best texture. And if you’re making a vegan crust, coconut oil (solid) mimics butter’s behavior beautifully—just let it firm up in the fridge first.
No butter? Vegetable shortening (like Crisco) delivers flakiness without dairy, though it lacks flavor. Short on eggs? 1 tbsp cold water works as a binder in a pinch. The vinegar isn’t just for flavor—it tenderizes the gluten slightly, creating those perfect layers. For a shinier crust, add 1 tsp lemon juice to the water. Need a lower-fat option? Replace half the butter with apricot jam (yes, really)—it keeps the crust tender without excess grease. And if you’re baking in high humidity? Add 1 extra tbsp flour to prevent stickiness.
Wrap dough tightly in plastic and chill for at least 2 hours—overnight is ideal. For freezer storage, flatten into discs, wrap, and freeze for up to 3 months. Thaw in the fridge before rolling. Blind-bake your crusts for 15 minutes at 375°F with pie weights or dried beans—this prevents sogginess. The almond flour crust browns faster, so watch it closely. And here’s a pro tip: Brush the baked crust with egg wash (1 yolk + 1 tbsp water) for that golden sheen. These crusts reheat beautifully—just 5 minutes at 350°F to revive that crisp texture.
Why You’ll Love This Recipe
- No-Fuss Foundation: I swear by this crust—just flour, butter, ice water, and salt. No food processor, no overworking, just two knives and 10 minutes of gentle folding. The secret? Keep everything cold, and you’ll end up with that perfect flaky layers without stressing.
- Butter’s Golden Touch: That cold, unsalted butter gets cut into the flour until it’s no bigger than peas. When baked, it melts into tiny pockets of pure, rich flavor—crisp on the edges, tender inside. Honestly, it’s the difference between a good pie and one that makes people sigh with happiness.
- Your Crust, Any Way: Need a pie for Thanksgiving? A hand pie for a picnic? Even a sugar cookie crust for the kids’ baking day? This recipe does it all. Between us, I’ve used it for savory galettes, sweet tarts, and even a quiche crust—it’s my go-to for any occasion without fail.
- Pantry Staple Magic: Flour, butter, salt—ingredients you already own. No fancy substitutions, no last-minute store runs. And since it keeps well in the fridge for days (or freezes beautifully), I make two crusts at once. Less planning, more baking—what’s not to love?
Step-by-step instructions for flaky layers without the hassle
Here’s the foolproof method for restaurant-quality pie crust every time.
Prepare the Dough Ingredients
First, let the 1.5 cups cold unsalted butter sit in the freezer for 15 minutes to firm up—this is crucial for flakiness. While it chills, sift together the 3.5 cups all-purpose flour, 0.5 tsp diamond crystal kosher salt, 2 tbsp granulated sugar, 2 tbsp cornstarch, and 0.25 tsp xanthan gum in a large bowl. I like to use a fine-mesh sieve for the flour to ensure no lumps form.
Make two wells in the center of the dry ingredients—one for the butter and one for the wet ingredients. This keeps everything organized and prevents overmixing. If you’re using the 1 whole large egg yolk or 1 tbsp coconut oil for binding, set those aside for later.
Cut in the Butter for Maximum Flakiness
Add the 1.5 cups cold unsalted butter (still frozen) to the flour mixture. Using a pastry cutter or your fingers, work the butter into the flour until you have pea-sized pieces evenly distributed. The goal is to create as much surface area as possible between the butter and flour—this is what creates those signature flaky layers.
If you’re using 0.5 cup vegetable shortening, cut it in now as well. Shortening has a higher melting point than butter, which can add extra crispness to the crust. Continue cutting until the mixture resembles coarse crumbs with some butter pieces still visible—this texture is perfect for flaky results.
Incorporate Wet Ingredients for Perfect Texture
In a separate small bowl, combine the 0.5 cup ice water and 1 tsp white vinegar. The vinegar helps tenderize the gluten, making the crust more flaky. If you’re using the 1 whole large egg yolk or 1 tbsp coconut oil, add it to the wet mixture now for extra binding.
Slowly pour the wet ingredients over the flour-butter mixture while stirring gently with a fork. Be careful not to overmix—just combine until the dough comes together. If it’s too crumbly, add 1 tablespoon of ice water at a time until it holds when pressed. The dough should be just shy of being too wet but firm enough to handle.
Chill the Dough for Easier Handling
Divide the dough into two equal disks (about 1.75 cups each) and flatten them into 6-inch rounds. Wrap each round tightly in plastic wrap and refrigerate for at least 1 hour. Chilling relaxes the gluten and firms up the butter, making rolling out the crust much easier and preventing shrinking during baking.
Here’s the thing—don’t skip this step. I’ve made this mistake, and the dough becomes sticky and unmanageable. If you’re in a hurry, you can chill the dough for up to 24 hours—it actually improves the flavor and texture.
Roll and Blind-Bake for Perfect Results
On a lightly floured surface, roll out one disk into a 9-inch circle, about 1/8-inch thick. If you’re using 0.5 cup almond flour for a variation, sprinkle it lightly over the rolling surface to prevent sticking. Gently transfer the crust to a parchment-lined pie dish and trim the edges, leaving about 1/2-inch overhang. Fold the overhang under to create a neat edge.
For a pre-baked crust, preheat your oven to 375°F. Line the crust with parchment paper, fill it with pie weights or dried beans, and bake for 15 minutes. Remove the weights and bake for another 5-7 minutes until the crust is lightly golden. Prick the bottom all over with a fork to prevent puffing. For a filled pie, you can skip the blind-baking step and fill the crust directly.
Pro Tips For Making 6 Pie Crust
- Cut Butter Fast: Use a bench scraper or your fingers to break the cold butter into pea-sized chunks before mixing—this saves time and keeps the dough from warming up while you work. I learned this the hard way after struggling to cut butter with a dull knife and ending up with greasy, sticky dough that wouldn’t hold together.
- Measure Salt Precisely: Diamond Crystal kosher salt is not the same as table salt—use the recipe’s measurement exactly (usually 1 tsp) or your crust will taste flat. I once doubled it by accident and nearly ruined a batch; now I weigh it if I’m unsure.
- Keep Water Ice Cold: Fill a glass with ice water and use a spoon to scoop out cold water—room temp water melts the butter too fast, turning your dough into a sad, sticky mess. Sounds obvious, but I’ve seen people grab water straight from the tap and wonder why their crust fell apart.
- Rest Before Rolling: Let the dough chill for at least 30 minutes before rolling—this prevents shrinking and cracking when baking. I used to skip this step out of impatience, and my pies always ended up looking like they’d been through a war. (Yes, even if you’re impatient like me.)
Troubleshooting great 6 pie crust
Butter Bleeds During Baking
This is the #1 issue new bakers face, but the fix is simple: don’t skip chilling. If your crust looks greasy or spreads too much in the oven, your butter melted too soon.
Always use cold butter (frozen for 15 minutes) and chill the dough for at least 2 hours—overnight is best. For extra insurance, wrap the dough in plastic and refrigerate. If you’re in a rush, pop it in the freezer for 30 minutes before rolling. 🧈
Dough Sticks to Surface
Flour is your best friend here, but too much makes the crust tough. Lightly dust your rolling pin and surface with all-purpose flour, but don’t go overboard. For almond flour crusts, use cornstarch instead—it prevents sticking without adding bulk.
If the dough still clings, sprinkle a tiny bit of ice water (just ½ tsp) to help it release. Pro tip: Use parchment paper under the dough when transferring to your pie dish. ✨
Crust Shrinks or Cracks
Overworking the dough causes shrinking, while sudden temperature changes cause cracks. Handle the dough as little as possible—just until it holds together. If cracks appear, brush them with a little beaten egg wash (1 yolk + 1 tbsp water) before baking to seal them.
For extra stability, blind-bake the crust for 10-15 minutes at 375°F before adding filling. If using a lattice top, cut strips ¼ inch wide—thicker strips burn faster and crack more easily. 🔥
Soggy Bottom Syndrome
No one likes a mushy crust, and it’s usually from under-baking or moist fillings. Pre-bake your crust for 15 minutes with pie weights or dried beans to create a barrier. For extra protection, sprinkle crushed cornflakes or oats on the bottom before adding filling.
If your pie has a wet filling (like berries), brush the pre-baked crust with a thin layer of egg white to create a moisture barrier. And always bake pies on the lower oven rack for even heat distribution. 💧
Dough Too Dry or Crumbly
This happens when the butter is too warm or you’ve overmixed. If your dough feels like sand, add 1 tbsp ice water at a time until it just holds together. For gluten-free or almond flour crusts, 1 extra tbsp water may be needed.
Avoid overworking—mix just until the dough comes together. If it’s still too dry, let it rest for 10 minutes before adding more liquid. The dough should be slightly tacky but not sticky when pressed. 🌾
Uneven Browning
Hot spots in your oven cause uneven color. Rotate your pie halfway through baking (every 20-25 minutes) for even browning. If the edges brown too fast, cover them with aluminum foil or a pie shield.
For a golden, even finish, brush the baked crust with egg wash (1 yolk + 1 tbsp water) before the final 5 minutes of baking. If using a dark pie dish, reduce oven temp by 25°F to prevent burning. 🌟
Nutrition facts
Frequently asked questions
Can I substitute shortening for butter in any of these crusts?
Yes! For the all-butter crust, you can replace up to half the butter with shortening for extra flakiness. Shortening has a higher melting point, which prevents greasy spots. However, butter adds rich flavor—so if you’re making a savory pie, the difference is minimal. For vegan crusts, use coconut oil instead of butter for a similar texture.
How do I make a lattice crust with these recipes?
Roll out one disk for the base and another for the lattice top. Cut the top disk into ¼-inch-wide strips, then weave them in a basket pattern over the filled pie. Brush strips with egg wash (1 yolk + 1 tbsp water) for a golden finish. For extra stability, blind-bake the base first. The gluten-free crust works best for lattice—it’s less prone to cracking.
Can I use these crusts for savory pies instead of sweet?
All six crusts work beautifully for savory pies like chicken pot pie or quiche. For extra flavor, add 1 tsp dried herbs (like thyme or rosemary) to the dough. The puff pastry-style crust is especially elegant for savory dishes. Just avoid adding sugar to the dough—it can caramelize too much with savory fillings.
Why does my crust turn out tough instead of flaky?
Overworking the dough or using warm butter are the most common culprits. Always keep butter cold (frozen for 15 minutes) and handle the dough minimally. If the crust feels tough after baking, it may need more fat—try adding 1 tbsp extra shortening next time. The almond flour crust is naturally more tender, so it’s a great alternative.
How long can I store these crusts before baking?
Refrigerated dough lasts 2-3 days when wrapped tightly in plastic. For longer storage, flatten into discs, wrap, and freeze for up to 3 months. Thaw in the fridge overnight before rolling. The gluten-free version freezes best—it’s less prone to drying out. Always let frozen dough sit at room temp for 10 minutes before handling to prevent cracking.

- 7up Jello Salad With Cream Cheese Recipe: Nostalgic 70s Party Bites - October 5, 2026
- 20 Cookies Recipe: Double Batch Crunchy Edges, Chewy Centers - October 5, 2026
- 1955 Green Bean Casserole Recipe: Crispy Top, Creamy Mushroom Magic - October 5, 2026