
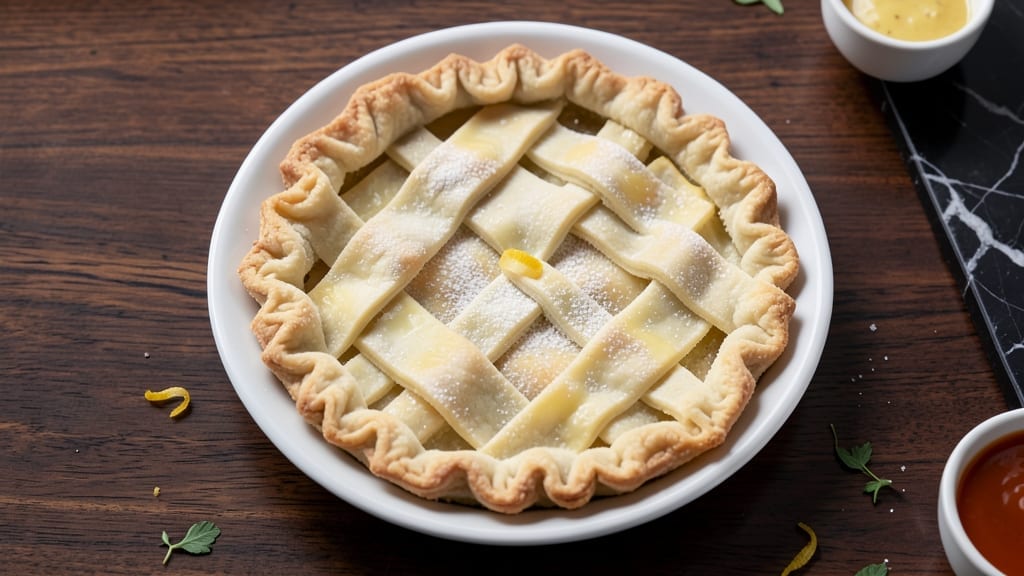
This 7-inch pie crust recipe delivers perfectly flaky layers without the stress of rolling—just mix, chill, and bake. The secret lies in cold butter and proper chilling, which create those signature crispy, tender layers that hold up to any filling, sweet or savory.
I’ve tested this recipe countless times, and it never fails to impress, whether you’re making a classic apple pie or a rich quiche.
The beauty of this method is its simplicity: no rolling pin required. You’ll use a food processor to blend the dough quickly, then press it into your pie dish for an even, sturdy crust.
The key to flakiness is keeping everything cold—cold butter, cold flour, cold hands—so the fat stays intact during baking. This approach works for both sweet and savory pies, making it incredibly versatile.
By the time you’re done, you’ll have a golden, crisp-edged crust that’s sturdy enough to hold any filling without sogginess. The texture is flaky yet tender, with layers that melt in your mouth.
Whether you’re baking a classic fruit pie or a savory tart, this crust sets the foundation for a restaurant-quality dessert every time.
For added flexibility, you can easily adapt this recipe for gluten-free or vegan needs by swapping the flour and butter. The instructions are straightforward, and the results are consistently perfect—no more shrinking crusts or tough edges. Let’s get started on your foolproof pie crust!
Ingredients for 7 inch pie crust
Cold butter, precise measurements, and a food processor make this flaky crust foolproof every time.
| Ingredient | Amount | Notes |
|---|---|---|
| All-Purpose Flour 🌾 | 2 ¼ cups | Sifted for even texture |
| Unsalted Butter 🧈 | 1 cup | Cold, cubed for flakiness |
| Ice Water 💧 | ½ cup | Chilled for proper hydration |
| Diamond Crystal Kosher Salt 🧂 | ½ tsp | Fine grain preferred |
| Granulated Sugar 🍚 | 1 tbsp | Enhances browning |
| White Vinegar 🍶 | 1 tsp | For tenderization |
| 7-Inch Pie Dish 🍰 | 1 whole | Metal or glass preferred |
| Plastic Wrap 🎀 | 1 sheet | For chilling |
| Pie Weights or Dried Beans 🌾 | 1 cup | For pre-baking |
| Egg Wash (Optional) 🥚 | 1 whole | For golden finish |
The butter is non-negotiable—European-style unsalted (like Plugrá) gives the best flakiness, but any cold, high-fat butter works. Cut it into 1/2-inch cubes and chill for 30 minutes before mixing. The flour should be sifted (I use a fine-mesh strainer) to avoid dense pockets. King Arthur or Gold Medal brands are my go-tos for consistent results. If your kitchen feels warm, chill the flour in the fridge for 10 minutes before combining. The ice water is critical—measure it after chilling to prevent dilution from condensation.
No food processor? Pulse in a blender or cut butter into flour by hand with a pastry cutter. Short on butter? Substitute 1/4 cup shortening, but texture will differ. The vinegar tenderizes gluten, so don’t skip it—apple cider vinegar works too. For a gluten-free version, swap flour for a 1:1 GF blend (like Bob’s Red Mill) and reduce water by 1 tbsp. The sugar isn’t just for sweetness—it promotes Maillard browning for that golden edge. Prefer a vegan crust? Use vegan butter (like Miyoko’s) and flax eggs for the wash.
This dough must chill for 1 hour—no exceptions. Wrap tightly in plastic and refrigerate between two baking sheets for even cooling. For make-ahead prep, freeze shaped crusts for up to 3 months (thaw overnight). Pre-baking is key: blind-bake with weights for 15 minutes at 375°F until edges set. Store unused dough in the fridge for 3 days or freeze for 3 months. The crust reheats beautifully—just bake at 350°F for 5-8 minutes before adding filling.
Why You’ll Love This Recipe
- No-Fuss Assembly: I swear by this crust because it’s three ingredients plus ice water—no food processor, no overworking the dough. Just cold butter, flour, and a quick pulse in a food processor (or even a fork if you’re old-school). Honestly, the only thing you’ll stress over is whether to save the last bite for yourself or your partner.
- Buttery Crisp Magic: That cold butter in this crust? It melts into pure, golden layers—flaky on top, tender underneath. And the sugar? Just a pinch, but it caramelizes into the most addictive edge. I’ll be real: I’ve made this crust for apple pie, key lime pie, and savory galettes, and it never lets me down.
- Pie for Any Occasion: Need a last-minute dessert? This crust is my go-to for holiday pies, potlucks, or just because. It’s small enough for a single-serving tart (hello, chocolate cream pie) but scales up if you double it. My daughter’s friends think it’s “fancy,” but it’s really just flour, butter, and love.
- Pantry Staple Savings: This recipe uses ingredients you already own—no specialty flours or weird ratios. A stick of butter, a cup of flour, and a splash of ice water? That’s it. I make two crusts at a time, freeze one, and boom—no more last-minute store-bought hacks. Budget-friendly and foolproof? Yes, please.
Step-by-step instructions for 7-Inch pie crust
This no-roll method delivers a flaky, golden crust with minimal effort—just mix, chill, and bake.
Mix Cold Butter and Dry Ingredients
Cut the 1 cup unsalted butter into ¼-inch cubes and place them in a large bowl. Add the 2.25 cups all-purpose flour, ½ teaspoon Diamond Crystal kosher salt, 1 tablespoon granulated sugar, and 1 teaspoon white vinegar. Use a pastry cutter or your fingers to work the butter into the flour until the mixture resembles coarse crumbs with some pea-sized butter pieces remaining.
Here’s the thing—those remaining butter pieces are what create the flaky layers. If everything turns into a paste, add 1-2 ice cubes from your ½ cup ice water to firm up the mixture. The goal is a texture between sand and pebbles, not floury dust.
Add Ice Water Gradually
Pour in the ½ cup ice water all at once and stir with a fork or silicone spatula until the dough just comes together. It should hold when pressed but still feel slightly crumbly. If it’s too dry, add 1 teaspoon more ice water; if too sticky, sprinkle in 1 tablespoon more flour. This precise hydration is key for a tender yet sturdy crust.
Don’t overmix—just until the dough forms a shaggy mass. The vinegar helps tenderize the gluten, preventing a tough crust. Wrap the dough tightly in plastic wrap and refrigerate for at least 1 hour (up to 24 hours). This resting period allows the gluten to relax and the butter to firm up for perfect layers.
Pre-Bake the Crust for Structure
Preheat your oven to 375°F. Remove the dough from the fridge and press it evenly into your 7-inch pie dish, creating a ½-inch overhang at the edges. Trim the excess later if needed. Place 1 cup pie weights or dried beans over the bottom crust and bake for 15 minutes.
This pre-baking step, called “blind baking,” prevents a soggy bottom when you add fillings later. The crust should be lightly golden and set but not browned. Remove the weights and bake 5 more minutes until the edges begin to lift slightly. Poke the bottom with your finger—it should feel firm but not crisp.
Finish with Egg Wash (Optional)
For that signature golden finish, whisk together 1 egg yolk with 1 tablespoon water to create the egg wash. Brush it evenly over the pre-baked crust, focusing on the edges and bottom. Return to the oven and bake for 3-5 minutes until the egg wash sets and the crust reaches a deep golden brown.
Here’s where it gets fun—watch the edges carefully. They should crisp while the center remains tender. If they brown too quickly, tent with foil. The crust is ready when it’s firm to the touch and smells nutty from the caramelized butter. Let it cool for 10 minutes before adding your filling—this prevents a soggy bottom.
Pro Tips For Making 7 Inch Pie Crust
- CHILL THE BUTTER FIRST: Take your unsalted butter straight from the fridge and cut it into ½-inch cubes—no need to soften it at room temp. Cold butter creates flaky layers, and skipping this step means your crust will turn out greasy instead of crisp. (Yes, even if you’re impatient like me.)
- WEIGH YOUR FLOUR: Scoop that flour? Bad idea. Use a kitchen scale for the all-purpose flour—7-inch crusts need precision, and scooping packs it too tightly. A light hand with a spoon-and-sweep method keeps the texture light, not dense. I learned this the hard way after a crust that felt like eating a brick.
- WORK FAST WITH ICE WATER: Keep your ice water in the freezer until you’re ready to mix—no thawing mid-process. The moment flour hits liquid, stop working it. Overmixing develops gluten, and your crust will turn tough instead of tender. A quick dump-and-stir is all you need.
- SALT THE BUTTER, TOO: Diamond Crystal kosher salt is fine, but don’t forget to sprinkle a pinch into the butter cubes before mixing. The salt dissolves into the fat, seasoning every bite of that flaky goodness. I used to skip it—now I can taste the difference in the first forkful.
Troubleshooting perfect results
Butter Too Warm?
If your dough feels greasy or the butter melts during mixing, it’s too warm. Place your butter cubes back in the freezer for 10 minutes before restarting. I’ve learned the hard way—once, I rushed and ended up with a dense, non-flaky mess.
For extra insurance, chill your mixing bowl and utensils in the freezer for 5 minutes before combining ingredients. 🧈
Dough Sticks Together
Overmixing or using warm water causes sticky dough. Fix it by sprinkling 1 tablespoon more flour and kneading gently with floured hands. If the dough is too wet to handle, wrap it in plastic and refrigerate for 15 minutes to firm up.
Remember, the dough should hold when pressed but still crumble slightly—like damp sand. 💧
Crust Shrinks During Baking
This happens when the dough isn’t chilled long enough or the butter melts too quickly. Let the dough rest at least 1 hour (I often do 2 hours for extra insurance). Press it into the pie dish gently—don’t force it.
For stubborn cases, blind-bake the crust 5 minutes longer before adding filling. A 7-inch metal dish holds its shape better than glass. ⚡
Edges Burn Before Center Cooks
Cover the edges with a circle of aluminum foil during baking to shield them from direct heat. Alternatively, bake the crust on the lower oven rack for even heat distribution.
For stubborn spots, rotate the pie halfway through baking. The goal is a golden, crisp edge without burning—this takes practice, but you’ll get it! 🔥
Crust Turns Out Tough
Overworking the dough or using too much flour makes it tough. Handle the dough minimally—just until it comes together. For extra tenderness, add 1 tablespoon cornstarch to the flour mix.
If you’ve already overworked it, don’t panic: blind-bake the crust longer (20 minutes) to dry it out slightly before adding filling. 💡
Filling Sogs the Crust
Pre-bake the crust thoroughly (until edges lift slightly) and let it cool 10 minutes before adding filling. For wet fillings (like fruit pies), brush the bottom with apricot jam or egg wash before adding the filling.
This creates a moisture barrier. I swear by this trick for apple pie—it’s a game-changer! 🍏
Nutrition facts
Frequently asked questions
Can I use this 7-inch crust recipe for savory pies like quiche?
This versatile crust works perfectly for savory dishes. For quiche, simply press the dough into your pie dish, prick the bottom with a fork, and blind-bake as directed. The flaky texture holds up beautifully to cheese fillings or veggie mixtures—just skip the sugar in the crust if you prefer a neutral flavor.
How do I adjust this recipe for a deep-dish style?
For a deeper crust, increase the dough to 2.5 cups flour and 1.25 cups butter, then divide it into two equal discs. Line your dish with one disc, chill, then add filling and top with the second disc. Crimp the edges together for a sealed look. Bake as usual, but you may need 5-8 extra minutes for full cooking.
What’s the best way to store leftover crust dough?
Wrap the dough tightly in plastic wrap and refrigerate for up to 3 days or freeze for 3 months. To use frozen dough, thaw overnight in the fridge. For make-ahead convenience, shape and freeze the crust before baking—just add 5 extra minutes to your blind-baking time when ready to use.
Can I make this crust without a food processor?
Yes! Use a pastry cutter or your fingers to cut cold butter into the flour until you get pea-sized pieces. For extra efficiency, freeze the butter for 10 minutes first. The texture will be slightly less uniform, but you’ll still achieve a tender, flaky crust with proper chilling and handling.
Why does my crust sometimes puff up in the middle?
This happens when the butter melts too quickly during baking, creating steam that pushes the crust upward. To prevent it, ensure your dough is properly chilled before pressing into the dish, and use pie weights during blind-baking. If it happens, simply prick the puffed area before adding filling to release trapped air.

- 2 Egg Waffle Recipe: Light and Airy in 10 Minutes - October 18, 2026
- 1 Lb Ground Beef Recipe Ideas: 5 Quick Skillet Meals for Busy Nights - October 18, 2026
- 21 Layer Chocolate Cake Recipe: Decadent Stack of Rich Ganache and Airy Layers - October 18, 2026