
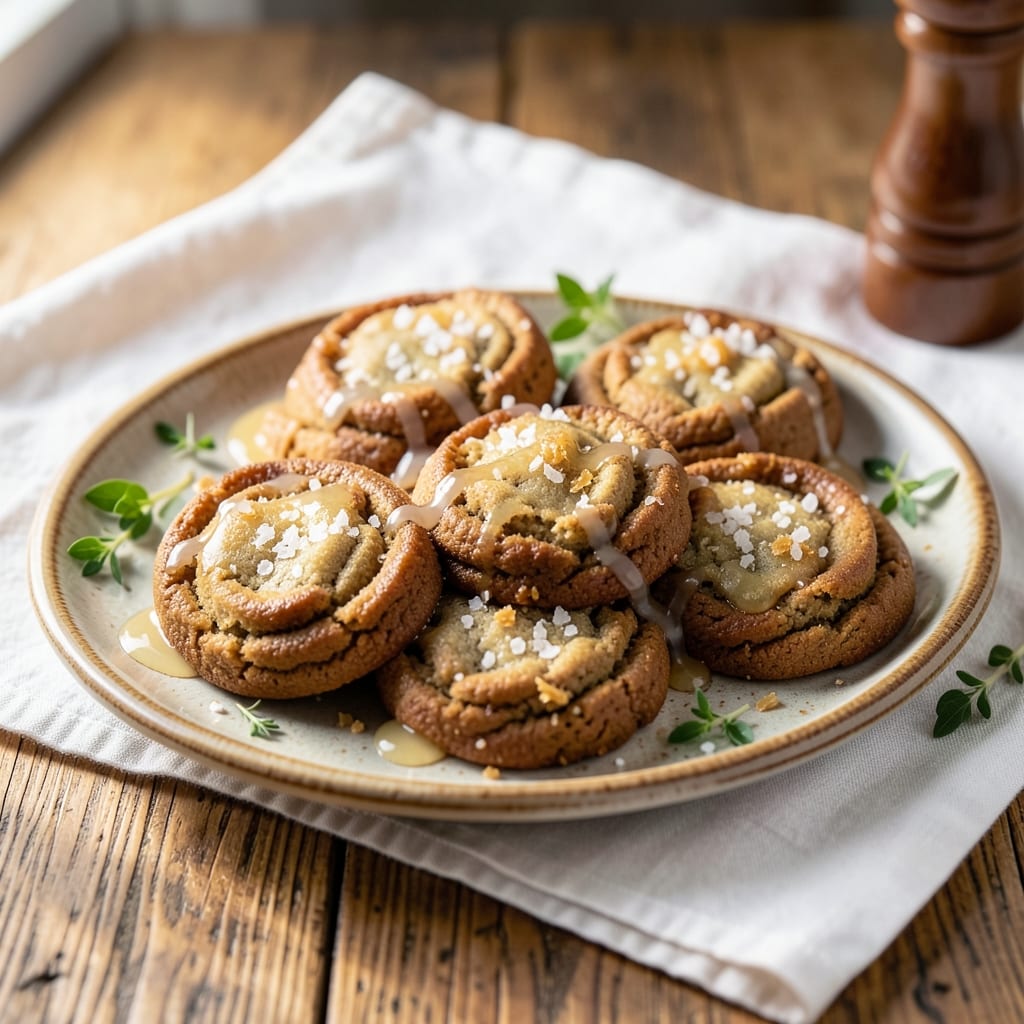
This 72-hour cookie recipe transforms ordinary dough into cookies with crispy edges and melt-in-your-mouth centers through time-tested patience. The secret lies in extended resting—allowing flour to hydrate fully and flavors to meld into deep, buttery complexity.
I’ve perfected this method after years of experimentation, and the results speak for themselves: cookies that stay tender for days without drying out.
The process begins with a simple dough of butter, sugar, and eggs, but the magic happens during the 72-hour rest in the refrigerator. This slow fermentation develops a rich, caramelized flavor while preventing the cookies from spreading too much in the oven.
The dough’s texture becomes velvety, almost like fondant, making it easier to scoop and shape perfectly round cookies.
When baked at 350°F, these cookies emerge with a golden, crackly crust that gives way to a soft, chewy interior. The edges stay crisp even after cooling, while the centers remain tender for hours.
This isn’t just a recipe—it’s a lesson in how time enhances flavor and texture, turning a simple dessert into something extraordinary.
Perfect for holiday gifting, potlucks, or satisfying a late-night craving, these cookies improve with age. The longer they rest, the more intense their flavor becomes. Here’s how to achieve the same results in your kitchen.
Ingredients for 72 hour cookie
Time, butter, and sugar create cookies with extraordinary texture and depth.
| Ingredient | Amount | Notes |
|---|---|---|
| Unsalted Butter 🧈 | 1 cup | Cold, cut into small cubes |
| Granulated Sugar 🍚 | 1 cup | Light brown preferred for depth |
| Packed Light Brown Sugar 🍚 | 1 cup | For caramelized flavor |
| Large Eggs 🥚 | 2 whole | Room temperature for even mixing |
| All-Purpose Flour 🌾 | 2 ½ cups | Sifted, spooned and leveled |
| Diamond Crystal Kosher Salt 🧂 | ½ tsp | Fine grain for even distribution |
| Pure Vanilla Extract 🌿 | 1 tbsp | High-quality, 100% pure |
| Ground Cinnamon 🌶️ | ½ tsp | Toasted for enhanced aroma |
| Baking Soda 🧪 | ¼ tsp | Freshly opened for potency |
| Vanilla Bean Seeds 🌿 | 1 tsp | Scraped from 1 vanilla bean |
| Heavy Cream 🥛 | ¼ cup | Cold for proper emulsification |
| Flaky Sea Salt 🧂 | 1 tbsp | For finishing cookies |
The butter is non-negotiable here—European-style unsalted butter from brands like Plugrá or President delivers the richest flavor and proper fat content. Look for a high butterfat percentage (at least 82%) to ensure optimal texture. If you’re using salted butter, reduce the kosher salt by 0.25 tsp. The sugars are equally critical: light brown sugar for initial moisture, dark brown for caramelized depth. Domino or C&H brands work well, but avoid granulated substitutes—they lack the molasses notes that develop during resting. For vanilla, Madagascar bourbon vanilla provides the most complex flavor profile, though high-quality imitation works in a pinch.
No vanilla bean? Double the extract and add a pinch of cinnamon to mimic depth. Running short on heavy cream? Half-and-half or whole milk will work, though texture may slightly differ. The baking soda must be fresh—if it’s over six months old, replace it entirely. For flour, King Arthur or Gold Medal brands are ideal due to their consistent protein levels. If your kitchen is humid, consider adding 1 tbsp cornstarch to prevent dough stickiness. The flaky sea salt should be Maldon or Jacobsen—coarse grains melt dramatically when heated, creating the perfect contrast to the tender interior.
Store the dough in an airtight container between layers of parchment paper for up to 72 hours. The butter will soften slightly, but this is normal—it’s part of the flavor development process. Once baked, cookies will maintain crisp edges for 5-7 days at room temperature when stored in a sealed container. For longer storage, freeze baked cookies in a single layer before transferring to a container—3 months of freshness guaranteed. Reheat in a 300°F oven for 3-5 minutes to restore crispness if they soften.
Why You’ll Love This Recipe
- Just Five Ingredients: I swear, this recipe is the cookie equivalent of a blank canvas—you mix butter, sugars, eggs, and flour, then let time work its magic. No fancy add-ins, no stress, just pure simplicity that somehow delivers perfection.
- Caramel-Kissed Magic: That 72-hour wait? It turns the cookies into melt-in-your-mouth heaven. The brown sugar’s deep richness softens into a chewy center, while the edges stay just crisp enough—like biting into a warm hug with every bite.
- No-Bake, No-Stress Prep: Honestly, I make these on Sundays when I’m exhausted. You toss everything in a bowl, press the dough into pans, and forget about it. No rolling, no cutting, no waiting around—just set it and truly let it rise.
- Budget-Friendly Luxury: A single batch costs me pennies but tastes like a bakery treat. The butter and sugars stretch further than you’d think, and the cookies keep for days without drying out—meaning fewer grocery runs and more time enjoying them.
Step-by-step instructions for 72 hour cookie recipe
Transform simple ingredients into cookies with perfect texture through precise timing and technique.
Cream Butter and Sugars for Maximum Flavor Development
In a stand mixer fitted with the paddle attachment, combine the 1 cup unsalted butter (cold cubes) with the 1 cup granulated sugar and 1 cup packed light brown sugar. Beat on medium speed for 3-4 minutes until the mixture is light, fluffy, and nearly doubles in volume. You’ll notice the color lighten and small air pockets form—this incorporates air that creates the signature texture.
Here’s the thing—don’t rush this step. The butter needs to emulsify completely with the sugars to create that perfect balance of crispy edges and chewy centers. I press down on the mixture occasionally with a spatula to ensure all the butter is incorporated, especially the cold cubes that might resist blending. The sugars should be completely dissolved with no grainy texture remaining.
Incorporate Eggs and Vanilla for Richness
Add the 2 whole large eggs (room temperature) one at a time, mixing on low speed for 30 seconds after each addition. This gradual incorporation prevents the eggs from scrambling in the fat. After the eggs are fully incorporated, add the 1 tablespoon pure vanilla extract and 1 teaspoon vanilla bean seeds, mixing just until combined.
The vanilla bean seeds add a subtle depth that’s worth the extra effort. I like to scrape them directly from a split vanilla bean into the mixture—this ensures you capture all the aromatic compounds. The mixture should now be smooth and pale yellow, with a slightly thick, custard-like consistency. If it looks too thin, don’t worry—the flour will come together perfectly in the next step.
Combine Dry Ingredients for Even Distribution
In a separate bowl, whisk together the 2.5 cups all-purpose flour, 0.5 teaspoon diamond crystal kosher salt, 0.5 teaspoon ground cinnamon, and 0.25 teaspoon baking soda. Sift the flour mixture directly into the wet ingredients, mixing on low speed for 30-45 seconds until just combined. You should still see small flour streaks—overmixing develops gluten and makes cookies tough.
Real talk: This is where many home bakers go wrong. The dough should be slightly shaggy, not smooth. Once combined, remove the bowl from the mixer and gently fold in the 0.25 cup cold heavy cream using a silicone spatula. The cream adds moisture that enhances the chewiness, but don’t overmix—just distribute it evenly throughout the dough.
Chill and Rest for Optimal Texture
Divide the dough into two equal portions and flatten each into a disk about 1-inch thick. Wrap each tightly in plastic wrap and refrigerate for at least 24 hours, preferably 72 hours. This extended chilling period allows the flour to fully hydrate and the flavors to meld, resulting in cookies with superior texture and depth.
I know it seems counterintuitive to wait this long, but trust me—this step makes all the difference. The cold dough prevents excessive spreading in the oven while creating that perfect balance of crispy edges and soft centers. After chilling, the dough should be firm but still pliable when pressed gently with your finger.
Bake to Golden Perfection with Crispy Edges
Preheat your oven to 350°F and line two baking sheets with parchment paper. Working with one dough disk at a time (keep the other chilled), roll the dough to 1.5-inch thickness and cut out 2.5-inch rounds using a cookie cutter. Place cookies 2 inches apart on the prepared sheets—they’ll spread slightly during baking.
Bake for 11-13 minutes until the edges are deep golden brown and the centers still look slightly underdone. They’ll continue cooking on the hot pan after removal. Immediately after baking, sprinkle each cookie with 1 tablespoon flaky sea salt while they’re still warm. The salt enhances the caramelized flavor and adds a sophisticated finish.
Pro Tips For Making 72 Hour Cookie
- Cream Butter Slowly: I learned this the hard way—dumping cold butter into the mix and ending up with lumpy dough that never came together. Let the butter sit at room temperature for 2 hours (or microwave in 10-second bursts), then beat it with the sugars until it’s pale and fluffy. That light color means proper aeration, which keeps your cookies tender.
- Measure Brown Sugar Right: Packed brown sugar is a pain, but don’t skip it—this recipe relies on that moisture. Use a spoon to press it firmly into the measuring cup, then level it off. If you scoop it straight from the bag, you’re losing weight and texture. (Yes, even if you’re impatient like me.)
- Chill Dough Fully: This isn’t optional. Wrap the dough in plastic and refrigerate for at least 24 hours—no exceptions. The longer it rests, the more flavor develops, and the less likely your cookies are to spread into sad pancakes. I once skipped this and ended up with flat, dry cookies. Don’t repeat my mistake.
- Use Room-Temp Eggs: Cold eggs in warm dough = lumpy mess. Take the eggs out of the fridge 30 minutes before mixing, or even better, place them in warm water for 5 minutes. Smooth dough = even baking, and that’s what you’re after. (Your future self will thank you.)
Regional styles of this 72 hour cookie
Classic New England Style
In New England, these cookies take on a slightly spiced character with additions like ½ teaspoon ground nutmeg and ¼ teaspoon ground cloves to the dry ingredients. The dough is often rolled slightly thinner—about 1.25-inch thickness—to create a thinner, crispier cookie perfect for holiday gatherings.
I’ve found that using European-style butter (like Plugrá) enhances the buttery flavor that New Englanders love in their baked goods. 🌶️
Southern Caramelized Version
The Southern approach focuses on maximizing caramelization by increasing the brown sugar to 1.5 cups total (1 cup granulated + 1.5 cups packed light brown).
The dough is rested for the full 72 hours to deepen the molasses notes, and after baking, cookies are finished with a drizzle of molasses glaze (equal parts molasses and water). This creates a sticky, chewy cookie with intense caramel undertones—perfect with sweet tea. 🍯
Midwest Brown Butter Twist
For a Midwest-inspired variation, brown the butter before creaming it with sugars. Cook 1 cup unsalted butter in a light-colored saucepan over medium heat until it turns golden brown and smells nutty (5-7 minutes), then cool before using.
The nutty depth pairs beautifully with the vanilla and cinnamon. Midwest bakers often add ¼ cup chopped walnuts for texture contrast, creating a cookie with both chew and crunch. 🌰
West Coast Almond Joy Fusion
This coastal variation incorporates ½ cup chopped almonds and ¼ cup shredded coconut into the dough, along with a touch of almond extract (¼ teaspoon). The dough is rolled slightly thicker (1.75-inch) and baked for 14-16 minutes to ensure the coconut toasts while the centers stay soft.
Finish with a sprinkle of toasted coconut flakes and flaky salt for that West Coast tropical-meets-classic vibe. 🌴
Texas Spiced Chai Adaptation
For a Texas-inspired take, replace the cinnamon with 1 teaspoon chai spice blend (½ tsp each cinnamon, cardamom, ginger, and cloves). The dough is often shaped into irregular rounds rather than perfect circles, and baked at 325°F for 15-17 minutes to create a thicker, cake-like texture.
Serve with a side of chai tea for an authentic pairing that’s become popular in Texas bakeries. ☕
Nordic Cardamom Variation
In Nordic countries, these cookies often feature 1 teaspoon ground cardamom instead of cinnamon, creating a bright, aromatic profile. The dough is rested for the full 72 hours and baked at 325°F for 12-14 minutes to develop a denser, almost cake-like texture.
Finish with a dusting of powdered sugar and a pinch of cardamom for a sophisticated Nordic touch. The cookies pair beautifully with lingonberry jam for a tart contrast. 🍓
Nutrition facts
Frequently asked questions
Why do these cookies need 72 hours of resting?
The extended resting time allows the flour to fully hydrate and develop gluten strands that create the perfect balance between crisp edges and chewy centers. This slow process also lets the butter and sugars emulsify completely, resulting in deeper flavor and improved texture. The longer rest prevents excessive spreading while baking.
Can I use this dough for other baked goods?
While this recipe is specifically designed for cookies, you could experiment with making 1-inch thick bars by pressing the dough into a pan and baking at 325°F for 25-30 minutes. For best results, stick to the cookie method though—the texture and flavor are optimized for that specific shape. The dough is too rich for traditional bread or rolls.
What if my dough is too sticky after chilling?
If the dough feels too sticky after 72 hours, it’s likely because your kitchen is too warm or humid. Try adding 1-2 tablespoons more flour (up to 2.75 cups total) or chilling the dough an additional 12-24 hours. For extra insurance, wrap the dough disks in parchment paper before plastic wrap to prevent sticking. The dough should be pliable but not wet when ready to roll.
How do I store these cookies to maintain crisp edges?
Store baked cookies in an airtight container at room temperature for up to 5-7 days. For longer storage, freeze cookies in a single layer before transferring to a container—they’ll keep for 3 months. To restore crispness, reheat in a 300°F oven for 3-5 minutes or on a wire rack over low heat for 2 minutes.
Can I make these cookies without a stand mixer?
Use a hand mixer or even a sturdy wooden spoon to cream the butter and sugars—just mix for 5-7 minutes until light and fluffy. For the dough, fold ingredients together by hand using a rubber spatula, being careful not to overwork the dough. The texture will be slightly less uniform but still delicious. The key is thorough mixing of the butter and sugars.

- 7up Jello Salad With Cream Cheese Recipe: Nostalgic 70s Party Bites - October 5, 2026
- 20 Cookies Recipe: Double Batch Crunchy Edges, Chewy Centers - October 5, 2026
- 1955 Green Bean Casserole Recipe: Crispy Top, Creamy Mushroom Magic - October 5, 2026