
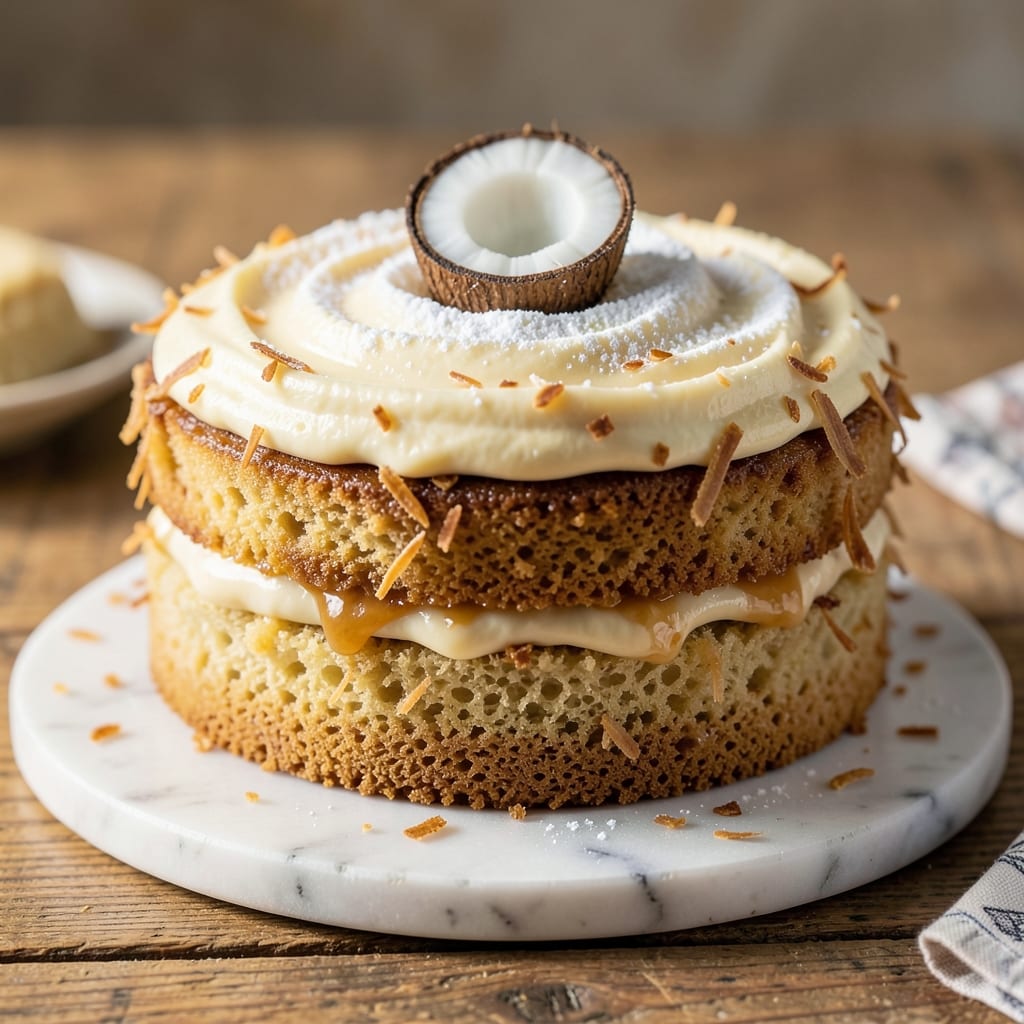
This 2-layer coconut cake recipe delivers the perfect balance of moist vanilla sponge, luscious coconut filling, and a toasted coconut crunch topping that tastes like a tropical vacation in every bite. The secret lies in the precise layering technique that prevents sogginess while creating that signature swirl effect. I’ve perfected this recipe over years of baking, and it consistently receives rave reviews—even from coconut skeptics.
The cake starts with a tender vanilla sponge base that bakes up golden and moist, thanks to a simple trick of folding in whipped egg whites at the end.
Between the layers, a rich coconut cream filling—made with condensed milk and toasted coconut—adds that signature tropical flavor without being overly sweet. The final touch is a crunchy coconut topping that gives each slice satisfying texture contrast.
What makes this recipe truly special is how it combines professional-level results with home-baker simplicity. You’ll achieve perfectly even layers, a smooth frosting finish, and that coveted coconut crunch without specialized equipment.
The cake keeps well for up to three days, making it ideal for celebrations or when you want to treat yourself to something extraordinary.
Whether you’re baking for a birthday, anniversary, or just because, this cake delivers restaurant-quality presentation with minimal effort. The vanilla swirls peek through the coconut topping, creating visual appeal that matches the delicious flavor. Let’s get started on creating your showstopping dessert.
Ingredients for 2 layer coconut cake
Here’s what you need to create this tropical vanilla swirl coconut cake with perfect layers.
| Ingredient | Amount | Notes |
|---|---|---|
| All-Purpose Flour 🌾 | 3 cups | Sifted for light texture |
| Granulated Sugar 🍚 | 2 cups | White or light brown |
| Unsalted Butter 🧈 | 1 ½ cups | Room temperature, salted works too |
| Large Eggs 🥚 | 6 whole | Room temperature for best volume |
| Vanilla Extract 🌸 | 2 tsp | Pure extract, not imitation |
| Baking Powder 🍞 | 2 tsp | Diamond Crystal preferred |
| Salt 🧂 | ½ tsp | Fine sea salt preferred |
| Sweetened Condensed Milk 🥛 | 1 can (14 oz) | Unopened for best texture |
| Unsweetened Coconut Flakes 🥥 | 2 cups | Toasted for extra crunch |
| Coconut Milk 🥥 | 1 can (13.5 oz) | Full-fat for richness |
| Powdered Sugar 🍚 | 2 cups | For dusting and filling |
| Toasted Coconut Flakes 🥥 | 1 ½ cups | For topping and filling |
| Vanilla Bean Paste 🌸 | 1 tbsp | Or 1 tsp pure extract |
The flour and sugar are your foundation, so grab King Arthur flour if you can—it bakes up lighter. For the butter, Land O’Lakes or Plugrá work perfectly, but any good brand is fine. The coconut milk can be any full-fat canned brand, but Aroy-D or Thai Kitchen have that extra richness. Toast your coconut flakes in a dry pan for 3-4 minutes until golden—this makes all the difference for that signature crunch. I always double-check my vanilla extract is pure by smelling the bottle; imitation won’t give you that authentic tropical aroma.
No vanilla bean paste? Double the extract works in a pinch. Running short on condensed milk? Mix 1 cup powdered sugar with 1 cup milk as a substitute. For the powdered sugar, Domino or C&H brands work perfectly for dusting. If you can’t find Diamond Crystal baking powder, Aluminum-free baking powder is the next best choice. The toasted coconut flakes can be pre-toasted from the package, but fresh-toasted gives that restaurant-quality crunch. For the filling, if you’re feeling fancy, add 1 tsp coconut extract for extra tropical flavor.
Store your cake in an airtight container at room temperature for up to 3 days—it actually improves as the flavors meld. For longer storage, wrap tightly and refrigerate for up to 1 week. The coconut topping stays crisp for 2 days before it softens slightly. To reheat, warm slices in a 200°F oven for 5-10 minutes to restore that perfect crunch. I always make this cake the day before—it gives the flavors time to develop beautifully.
Why You’ll Love This Recipe
- No Fuss Layers: I swear, this cake has two layers but feels like one job. Mix the batter, pour it into pans, bake—no fussing with frosting layers or piping. The butter and sugar create that melt-in-your-mouth texture without needing a food processor.
- Tropical Comfort: That first bite of coconut flavor? It’s like a hug from a warm beach. The vanilla extract ties it all together—sweet, creamy, and just enough to make you want seconds. Honestly, I’ve never met a coconut cake that didn’t make me happy.
- Party or Pantry: Slice it for a birthday, serve it at brunch, or stash it in the fridge for a lazy afternoon. The layers hold up perfectly—no soggy middle, no crumbling edges. Between us, I’ve taken this cake to potlucks, book clubs, and even my own pity parties. It never lets me down.
- Budget Magic: Five ingredients, one cake. The butter and sugar do all the heavy lifting, and eggs keep it rich without breaking the bank. Plus, leftovers? They last forever—moist, delicious, and ready to grab when cravings hit. My wallet and my taste buds thank me every time.
Step-by-step instructions for tropical vanilla coconut cake
Let’s bake this luscious two-layer cake with its signature vanilla swirls and crunchy coconut topping.
Prepare the Cake Batter
Preheat your oven to 350°F and grease two 9-inch round cake pans, then line the bottoms with parchment paper. In a large mixing bowl, cream together the 1.5 cups unsalted butter and 2 cups granulated sugar on medium speed until light and fluffy—about 3-4 minutes. This step is crucial for a tender crumb.
Add the 6 whole large eggs one at a time, mixing well after each addition. Stir in the 2 tsp vanilla extract and 1 tbsp vanilla bean paste until fully combined. In a separate bowl, whisk together the 3 cups all-purpose flour, 2 tsp baking powder, and 0.5 tsp salt. Gradually fold the dry ingredients into the wet mixture until just combined—don’t overmix.
Pour the batter evenly between the prepared cake pans. For the signature swirl, divide the remaining batter into two portions. In one portion, gently fold in 1 cup unsweetened coconut flakes. Alternate spoonfuls of plain batter and coconut batter between the pans, then swirl gently with a knife to create marbled patterns. Bake for 25-30 minutes or until a toothpick inserted comes out clean.
Make the Coconut Filling
While the cakes bake, prepare the coconut filling by opening the 1 can (13.5 oz) coconut milk and 1 can (14 oz) sweetened condensed milk. Whisk them together in a medium bowl until smooth. In a separate small bowl, mix 1 cup powdered sugar with 1 tsp vanilla extract until dissolved. Combine both mixtures and set aside.
For the crunchy topping, lightly toast the remaining 1 cup unsweetened coconut flakes in a dry skillet over medium heat for 2-3 minutes until golden brown. Transfer to a plate to cool while you work. This toasting step enhances the coconut flavor and adds texture contrast to the cake.
Assemble the Cake
Remove the cakes from the oven and let them cool in the pans for 10 minutes, then transfer to a wire rack to cool completely. Once cooled, level the tops if needed using a serrated knife. Spread half of the coconut filling evenly over the first layer, then place the second layer on top. Gently press down to create a smooth surface.
Spread the remaining coconut filling over the top layer, then sprinkle the 1.5 cups toasted coconut flakes evenly across the surface. For extra flair, press some of the coconut flakes into the sides of the cake. Chill the assembled cake in the refrigerator for at least 2 hours to allow the filling to set and the flavors to meld.
Serve and Enjoy
Before serving, dust the top and sides of the cake generously with the remaining 1 cup powdered sugar using a fine-mesh sieve. This creates that signature snowy appearance and adds a sweet, delicate finish. Slice with a warm, clean knife for clean cuts and serve at room temperature.
Each slice reveals the beautiful vanilla swirls and layers of coconut flavor. The moist cake layers contrast perfectly with the creamy coconut filling and crunchy toasted coconut topping. Store leftovers covered at room temperature for up to 3 days or refrigerate for up to 5 days.
Pro Tips For Making 2 Layer Coconut Cake
- Melt Butter Slowly: If you’re dumping cold butter straight into the hot batter, you’re fighting a losing battle—it’ll create lumps and make your cake dense. Instead, melt the butter first, then let it cool to just above body temperature (dip your finger in; it should feel warm, not hot). This ensures even distribution and a lighter texture. (I used to rush this, and the cake always turned out greasy.)
- Weigh Your Eggs: Cracking eggs into a bowl and eyeballing it is how you end up with a cake that either sinks or tastes like raw egg. Use a kitchen scale for the eggs—large eggs should be 50g each (shell and all, then crack out). The weight keeps your layers consistent, and you won’t end up with a dry or gummy texture. (Yes, even if you’re impatient like me.)
- Don’t Overmix the Batter: The moment your flour batter turns from a rough dough to a smooth paste, stop stirring. Overmixing develops the gluten, and your cake layers will turn out tough instead of tender. Mix just until the dry ingredients disappear—about 10-12 strokes with a spatula. (I learned this the hard way after biting into a cake that felt like eating a shoe.)
- Chill the Batter Before Baking: Skipping this step is how you get domed, cracked layers that bake unevenly. After mixing, pop your batter in the fridge for at least 30 minutes (up to 2 hours if you’re really committed). The cold slows down the leavening agents, so your cake rises smoothly and doesn’t collapse in the oven. (Your future self will thank you—trust me.)
Common mistakes when making this recipe
Overmixing the Batter
This is the #1 mistake I see that leads to dense, tough cake layers. Once you’ve folded in all the dry ingredients, stop mixing immediately when just combined—you should see a few dry spots.
Overmixing develops gluten, which makes your cake chewy instead of light and tender. I’ve ruined many cakes by continuing to stir until everything looks perfectly smooth. 🌾
Skipping the Cooling Step
Rushing to assemble your cake while layers are still warm is a fast track to a soggy disaster. Always let cakes cool completely in their pans for 10 minutes, then transfer to a wire rack for another 30-45 minutes before assembling.
The temperature difference between warm cake and cold filling creates condensation that ruins texture. Trust me, the extra waiting time is worth it for that perfect crumb.
Uneven Layer Distribution
When spreading your coconut filling, use a serrated knife or offset spatula to create an even layer—about ¼-inch thick. I’ve seen cakes with filling pooling in the center that creates a hollow spot when sliced.
For extra insurance, weigh your layers (they should be identical) and use a cake leveler if needed. This ensures clean slices and even flavor distribution throughout every bite.
Under-Toasting the Coconut
The topping’s crunch comes from proper toasting—don’t just toss in pre-toasted flakes straight from the package. Lightly toast your 2 cups coconut flakes in a dry skillet for 3-4 minutes until golden brown and fragrant.
Under-toasted flakes will be bland and soft, while over-toasted ones burn quickly. Watch closely and remove immediately when you smell that nutty aroma. ✨
Not Chilling Before Serving
Skipping the 2-hour refrigeration before serving is tempting, but this crucial step lets the filling set properly and prevents messy slides. The cake needs time for the filling to firm up slightly and for flavors to meld.
I’ve served this cake too soon and watched the filling ooze out onto plates—never again! The first slice will be worth the wait.
Using Wrong Mixing Bowls
Metal mixing bowls conduct heat and can cause your butter to melt prematurely. Always use glass or plastic bowls** for cake batter. I’ve had butter turn into a greasy mess when using my stainless steel bowl.
Also, make sure your bowls are completely dry before starting—any moisture can affect your batter’s texture. The right bowl makes all the difference in achieving that perfect light texture.
Nutrition facts
Frequently asked questions
Can I make this cake without coconut milk?
Yes, you can substitute with 1 cup heavy cream or evaporated milk mixed with 1 cup powdered sugar to mimic the richness. For the filling, replace the coconut milk with ½ cup melted butter plus ½ cup milk to maintain creaminess. The texture will be slightly different but still delicious.
How do I store leftovers to keep the coconut topping crisp?
Store the cake in an airtight container at room temperature for up to 2 days—this preserves the topping’s crunch. For longer storage (3-5 days), refrigerate and bring slices to room temperature before serving. To refresh the crunch, sprinkle extra toasted coconut flakes on top just before serving.
Can I make this cake in a different shape (like a sheet cake)?
For a 9×13-inch sheet cake, bake a single layer for 25-30 minutes at 350°F in a greased pan. Spread the filling over the cooled layer, then top with toasted coconut. For a 3-layer effect, bake two sheet pans and stack them with filling between. The swirl technique works best in round pans, but the flavor remains the same.
Why did my cake layers crack?
Cracking usually happens when the cake cools too quickly or the oven temperature fluctuates. To prevent this, avoid opening the oven door during baking and let cakes cool gradually in their pans for 10 minutes before removing. Also, ensure your oven is properly calibrated—some ovens run hotter than their settings. A simple fix is to level the tops after cooling to create a smooth surface.
Can I use this recipe for a gluten-free version?
Yes! Replace the all-purpose flour with a 1:1 gluten-free baking flour blend (like Bob’s Red Mill). For best results, add ½ tsp xanthan gum to the dry ingredients. The cake will be slightly denser but still moist. Keep all other ingredients and methods the same. Test your gluten-free flour blend first in a small batch to check texture.

- 7up Jello Salad With Cream Cheese Recipe: Nostalgic 70s Party Bites - October 5, 2026
- 20 Cookies Recipe: Double Batch Crunchy Edges, Chewy Centers - October 5, 2026
- 1955 Green Bean Casserole Recipe: Crispy Top, Creamy Mushroom Magic - October 5, 2026