
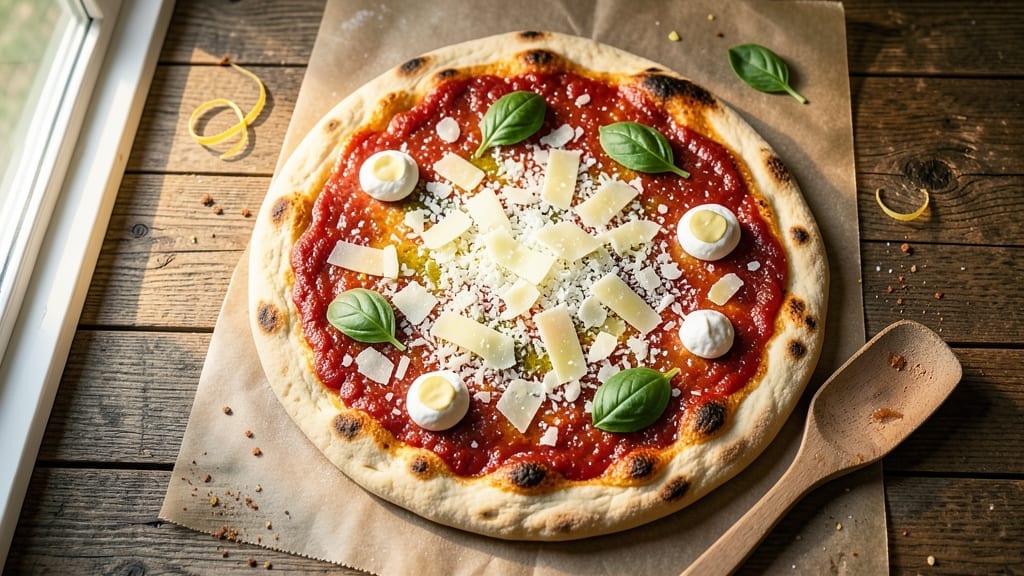
A 75-percent hydration pizza dough delivers that perfect chewy crust without the grueling kneading—just the right balance of moisture and structure for a professional-quality result at home. The secret lies in the autolyse technique, where flour and water rest together before adding yeast, creating a dough that develops gluten effortlessly.
This approach transforms what was once labor-intensive into a foolproof, no-knead process that still yields a crispy yet tender crust.
The beauty of this dough lies in its adaptability—ideal for classic Neapolitan-style pizzas with minimal toppings or loaded deep-dish creations. With just five simple ingredients and 30 minutes of active time, you’ll have dough ready for shaping, proofing, and baking in under 24 hours.
The higher hydration (75%) creates an open, airy crumb while maintaining structure, eliminating the need for excessive flour dusting or stiff dough struggles.
What sets this recipe apart is how it transforms ordinary ingredients into a restaurant-quality crust—crispy at the edges, chewy in the middle, and perfectly charred from wood-fired heat or a home oven.
The dough’s flexibility means you can shape it into classic rounds, rectangular pan pizzas, or even stuffed calzones. Whether you’re a beginner or a seasoned baker, this method ensures consistent results every time.
Ready to elevate your pizza game? This dough keeps well in the fridge for up to 3 days or can be frozen for future use, making it the ultimate make-ahead solution for busy weeks. Let’s get started with the exact ratios and techniques that guarantee success.
Ingredients for 75 hydration pizza dough
Five essential ingredients transform into restaurant-quality pizza dough with minimal effort.
| Ingredient | Amount | Notes |
|---|---|---|
| Bread Flour 🌾 | 3 cups | High-protein for optimal gluten development |
| Extra-Virgin Olive Oil 🫒 | ½ cup | Cold-pressed for authentic flavor |
| Granulated Sugar 🍚 | ½ tsp | Feeds yeast for proper fermentation |
| Active Dry Yeast 🍞 | ¼ tsp | Freshly opened for viability |
| Diamond Crystal Kosher Salt 🧂 | 1 ½ tsp | Fine grain for even distribution |
| Cold Water 💧 | 1 ½ cups | Room temperature preferred |
| Semolina Flour 🌾 | ¼ cup | For dusting and finishing crust |
The foundation starts with bread flour—its high protein content (12-14%) creates the ideal gluten structure for that signature chewy texture. King Arthur or Caputo brands are industry standards, but any high-protein flour works. For the olive oil, California extra-virgin brands like Corto or Lucini deliver the best flavor profile without overpowering. The yeast should be freshly opened—check the expiration date, as old yeast loses potency. Store your flour in a cool, dark place to prevent rancidity, and keep yeast in the fridge for extended shelf life.
No bread flour? All-purpose flour plus 1 tbsp vital wheat gluten mimics the protein content effectively. Substitute olive oil with avocado oil for a neutral flavor, though it lacks the same depth. For yeast alternatives, instant yeast can be used at the same quantity, but active dry yeast requires the 5-minute proofing step. The sugar can be swapped for honey (½ tsp) for a subtle sweetness, though it may slightly alter fermentation speed. Semolina can be replaced with fine cornmeal if unavailable, though it lacks the same rustic texture. Always measure flour by weight for precision—1 cup bread flour weighs about 4.5 oz—as scooping leads to inconsistent results.
This dough develops best with autolyse—mix flour and water, then rest for 20 minutes before adding yeast and salt. Store completed dough in an airtight container in the fridge for up to 3 days, or freeze for 3 months by wrapping tightly in plastic. For best results, let dough return to room temperature before shaping. The semolina not only prevents sticking but also adds a subtle crunch to the crust. Divide dough into 4 equal portions (about 8 oz each) for perfect-sized pizzas.
Why You’ll Love This Recipe
- I’ll be real: the ingredients cost pennies. A bag of bread flour lasts forever, yeast is cheap, and olive oil? You’re using it for everything anyway. Plus, this dough keeps for days in the fridge, so you’re not scrambling to use it up. My wallet—and my taste buds—thank me every time.
- No-Knead Magic: I’ll admit, I was skeptical at first—just mixing bread flour, olive oil, and yeast? But that sugar kick starts the yeast faster than my old method, and the dough stretches like butter after a 12-hour rest. No punishing kneading, no sticky mess, just a silky-smooth base that’s ready when you are.
- Crispy-Chewy Perfection: Between us, the secret’s in the hydration. That 75% water-to-flour ratio gives you a dough so tender it practically melts in your mouth, but the high-protein bread flour delivers that snap at the edges. Slather it with olive oil before baking, and you’ve got a crust that’s dangerously good—no sad, soggy slices here.
- Weeknight Wonder: Honestly, this is my go-to when I’m too tired to think. Make the dough Sunday night, let it chill in the fridge, and boom—pizza night is ready Monday through Friday. It’s the kind of recipe that turns “what’s for dinner?” into “oh, pizza again?” (And yes, even on a Tuesday night.)
Step-by-step instructions for 75-Percent hydration pizza dough
Here’s the method for creating a perfectly chewy, no-knead pizza crust with optimal gluten development.
Activate the Yeast and Mix Wet Ingredients
In a large mixing bowl, combine the 1.5 cups cold water, 0.5 tsp granulated sugar, and 0.25 tsp active dry yeast. Let this mixture sit for 5-10 minutes until it becomes frothy and bubbly. This indicates the yeast is active and ready to work. The sugar helps feed the yeast, while the cold water prevents over-activation before mixing.
Next, add the 0.5 cup extra-virgin olive oil and 1.5 tsp diamond crystal kosher salt to the yeast mixture. Whisk vigorously for 1-2 minutes until the salt dissolves completely and the oil emulsifies into the water. The mixture should look like a thick, creamy liquid with no visible oil separation. This emulsion is crucial for creating a tender, flavorful crust.
Incorporate the Dry Ingredients
Gradually add the 3 cups bread flour to the wet mixture while stirring with a wooden spoon or dough whisk. Start with half the flour and mix until a shaggy dough forms, then add the remaining flour. The dough will be sticky and wet at this stage—this is normal for a 75% hydration dough. Use your hands to work the dough together for 2-3 minutes, pressing and folding until it comes together into a cohesive mass.
Here’s the thing—don’t be tempted to add extra flour. The high hydration creates that signature chewy texture, but it requires patience. After mixing, let the dough rest for 10 minutes covered with a damp towel. This brief rest allows the gluten to relax slightly, making it easier to handle in the next step.
Perform the Autolyse for Optimal Gluten Development
After the initial rest, return the dough to your mixing bowl and cover it tightly with plastic wrap or a damp towel. Let it undergo an autolyse—essentially a resting period where the flour absorbs the water and gluten begins to develop naturally—for 1 hour. You’ll notice the dough becomes smoother and more pliable as it rests. This step is what gives your dough its professional-quality texture without requiring excessive kneading.
During the autolyse, the dough should spread slightly and develop small bubbles on the surface. This indicates proper gluten formation. Avoid the urge to check on it too often—disturbing the dough can slow down this critical development phase. The room temperature should be around 70-75°F for optimal fermentation; if your kitchen is cooler, extend the autolyse by 15-20 minutes.
Shape and Rest the Dough
After the autolyse, turn the dough out onto a lightly floured surface dusted with semolina flour. Gently shape it into a rough ball by folding the edges toward the center and rotating the dough as you work. The semolina creates a non-stick surface that prevents sticking and adds a subtle nutty flavor to the crust. Don’t overwork the dough—just enough to bring it together into a smooth ball.
Place the shaped dough back in the mixing bowl, cover it, and let it rise at room temperature for 2-3 hours until it has roughly doubled in size. You’ll know it’s ready when the dough springs back slowly when poked with your finger and leaves a slight indentation. This final rise develops the dough’s structure and flavor. For best results, use the dough within 24 hours of mixing, though it can be refrigerated for up to 3 days if needed.
Pro Tips For Making 75 Hydration Pizza Dough
- Measure Salt by Weight: Diamond Crystal kosher salt clumps like a liar under pressure. Use a scale for the 2% hydration—20g for 1kg flour—so your dough doesn’t end up either bland or salty enough to make your guests question your life choices.
- Hydrate Yeast Properly: Mix the yeast with warm water (105-110°F) and sugar first, then let it sit for 5-10 minutes until foamy. If it’s sluggish, your dough will be too—no amount of kneading fixes lazy yeast.
- Autolyse First, Always: Mix flour and water (75% hydration) before adding yeast/oil. Let it rest 20-30 minutes—this relaxes the gluten so your final dough stretches like butter, not tough leather.
- Oil the Bowl Right: Coat your mixing bowl with olive oil after autolyse, not before. The oil sticks better to wet dough, preventing it from sticking to the bowl when you knead—saving you from scrubbing flour off your hands later.
Troubleshooting your 75 hydration pizza dough
Dough Too Sticky
If your dough feels impossibly sticky during handling, resist the urge to add extra flour—this is normal for 75% hydration dough. Instead, wet your hands slightly with water and use semolina flour (not regular flour) to create a barrier.
I find that 1-2 tablespoons of semolina on my hands works wonders for preventing sticking while shaping. The key is to work quickly and keep your surface clean. 💫
Underproofed Dough
An underproofed dough will collapse during baking, resulting in a dense, flat crust. To test readiness, gently press your finger into the dough—it should leave a slow-moving indentation that doesn’t spring back immediately. If your kitchen is cooler than 70°F, extend the proofing time by 30-60 minutes.
For faster results, place the dough in a warm oven (70°F) with the light on for 1-2 hours.
Overproofed Dough
Overproofed dough will look puffy but collapse during baking, losing its structure. If you notice large bubbles or the dough feels hollow when poked, it’s overproofed. To salvage it, shape immediately and bake right away—skip the second rise.
For future attempts, reduce proofing time by 30 minutes and monitor closely. A digital thermometer helps track your kitchen’s temperature accurately.
Uneven Baking
Uneven baking often stems from inconsistent dough thickness. Roll your dough to ¼-inch thickness for even cooking. Preheat your oven to 500°F (or as hot as it goes) with a pizza stone or steel inside for 60 minutes.
If using a home oven, bake for 10-12 minutes until the crust is golden and crispy. For wood-fired style, use a broiler on high for 2-3 minutes at the end for char.
Dough Not Rising
If your dough fails to rise, check your yeast first—it may be expired or stored improperly. Always use freshly opened yeast and store it in the fridge for longer shelf life. Ensure your water is room temperature (not hot) and that your kitchen is warm enough (70-75°F).
If using a cool kitchen, extend the autolyse by 20 minutes and proofing by 1 hour to compensate.
Crust Too Dry
A dry crust often means the dough didn’t hydrate properly. Ensure your water is cold but not icy—too cold can inhibit yeast activity. If your dough feels dry after mixing, add 1 tablespoon water at a time until it reaches a shiny, slightly tacky consistency.
For extra moisture, brush the crust with olive oil before baking or add a thin layer of tomato sauce underneath the toppings.
Nutrition facts
Frequently asked questions
Why does this dough use 75% hydration instead of the typical 60%?
A 75% hydration ratio creates a more open, airy crumb with a chewy texture—ideal for Neapolitan-style pizzas. The extra water develops gluten more efficiently during the autolyse, resulting in a lighter crust without excessive kneading. This method also prevents a tough, dense texture while maintaining structure for your favorite toppings.
Can I make this dough without a stand mixer?
This recipe is designed for hand mixing. After combining wet ingredients, use a wooden spoon to incorporate the flour, then work the dough by hand for 2-3 minutes until it forms a cohesive ball. The autolyse technique eliminates the need for vigorous kneading—just let the dough rest and develop naturally.
How do I know when the dough is fully proofed?
Gently press your finger into the dough—it should leave a slow-moving indentation that doesn’t spring back immediately. The dough should also feel slightly springy when poked. If your kitchen is cooler than 70°F, extend proofing by 30-60 minutes or use a warm oven (70°F) with the light on to speed it up.
Can I use all-purpose flour instead of bread flour?
Yes, but add 1 tablespoon vital wheat gluten per 3 cups flour to mimic bread flour’s protein content. Without it, your crust may lack the signature chewiness. For best results, stick with bread flour—it’s worth the small investment for that professional-quality texture.
How long can I keep this dough in the fridge?
Store shaped dough in an airtight container in the fridge for up to 3 days. For longer storage, freeze the dough for 3 months by wrapping it tightly in plastic. Thaw overnight in the fridge before using to maintain texture. This makes it perfect for meal prep!

- 3 Cheese Pimento Cheese Recipe: Sharp Cheddar, Peppery Heat, and Creamy Spread Magic - October 10, 2026
- 7 Egg Cake Recipe: Fluffy Layers With Vanilla Bean Infusion - October 10, 2026
- 3 Musketeers Cookie Recipe: Crunchy Chocolate Shells With Gooey Caramel Centers - October 10, 2026