
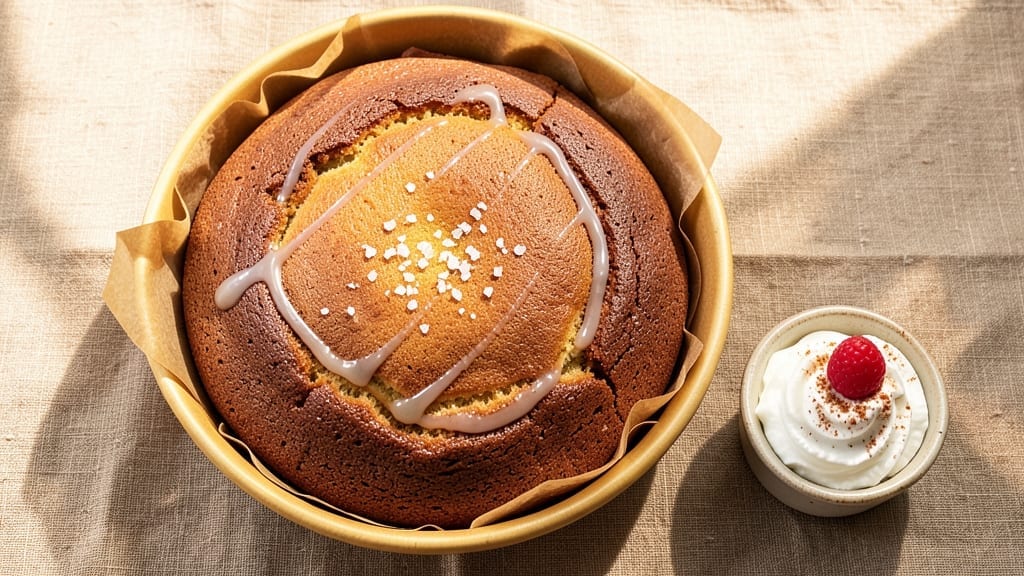
This 8 by 8 cake recipe delivers double-layered vanilla perfection with foolproof frosting that even beginners can master. The secret lies in precise ingredient ratios and a simple baking technique that ensures moist layers every time.
I’ve baked this cake countless times for gatherings, and it never fails to impress—no fancy equipment required.
What makes this recipe truly special is its easy frosting method, which creates a smooth, professional finish without the stress. The cake itself bakes in a standard 8×8-inch pan, yielding 16 perfect servings that disappear quickly.
Each layer stays tender and flavorful, thanks to a carefully balanced mix of butter, sugar, and eggs that creates the ideal texture.
By the time you’re done, you’ll have a beautifully frosted cake with clean layers and a velvety coating that’s impossible to resist. The frosting is rich but not overly sweet, allowing the vanilla flavor to shine through. This is the kind of dessert that transforms any occasion into something memorable.
Perfect for birthdays, holidays, or just because—this cake comes together in under an hour, with minimal cleanup. Let’s get started on creating your showstopper dessert.
Ingredients for 8 by 8 cake
Sixteen perfect servings of vanilla heaven—just these ingredients transform your kitchen into a bakery.
| Ingredient | Amount | Notes |
|---|---|---|
| All-Purpose Flour 🌾 | 2 ½ cups | Sifted for even texture |
| Unsalted Butter 🧈 | 1 ½ cups | Room temperature for creaming |
| Granulated Sugar 🍚 | 2 cups | Superfine preferred for smoothness |
| Large Eggs 🥚 | 4 whole | Room temperature for even baking |
| Pure Vanilla Extract 🌿 | 2 tsp | High-quality Madagascar preferred |
| Baking Powder 🧂 | 1 ½ tsp | Aluminum-free for consistent rise |
| Salt 🧂 | ½ tsp | Fine sea salt preferred |
| Milk 🥛 | 1 cup | Whole milk for richness |
| Vanilla Bean Seeds 🌿 | 1 tbsp | Scraped from 1 vanilla bean |
| Powdered Sugar 🍚 | 4 cups | Sifted for smooth frosting |
| Heavy Whipping Cream 🥛 | 1 ½ cups | Cold for stable whipping |
| Vanilla Bean Paste 🌿 | 1 tbsp | For enhanced vanilla flavor |
The butter and sugar are non-negotiable for that signature vanilla cake texture. Crisco or Country Crock work in a pinch, but nothing beats real butter for moisture and flavor. For the vanilla, Madagascar beans from Whole Foods or McCormick’s pure extract are my go-tos—they make all the difference. The flour should be sifted to avoid dense layers, and Bob’s Red Mill all-purpose is my preferred brand for consistent results. Room-temperature eggs and milk ensure even mixing, so take them out 30 minutes before you start.
No vanilla bean? Double the vanilla extract—it’s a solid swap. Running short on powdered sugar? Process granulated sugar in a food processor for a quick substitute, though it won’t be as smooth. The heavy cream can be replaced with whipped coconut cream for a dairy-free option, though the texture will differ slightly. For the frosting, European-style butter like Plugrá creates a richer finish. If you’re short on time, pre-whipped cream from the grocery store works, but it lacks the professional touch of homemade.
Store cake layers wrapped in plastic at room temperature for up to 3 days or in the fridge for 5 days. The frosting keeps for 2 days covered in the fridge, but bring it to room temperature before using. For longer storage, freeze the assembled cake for up to 3 months. Thaw overnight in the fridge before serving. The secret to perfect slices? Chill the cake for 30 minutes before cutting—it makes all the difference.
Why You’ll Love This Recipe
- One-Bowl Wonder: I swear by this recipe because it’s literally one bowl—no mixing bowls to wash, no extra steps. Just cream butter and sugar until fluffy (that’s the magic), toss in eggs one at a time, fold in flour, and vanilla ties it all together. Done.
- Buttery Vanilla Bliss: That rich, creamy texture? All thanks to the butter-to-flour ratio—it’s just sweet enough without being cloying. The vanilla extract isn’t just an afterthought; it’s the star, giving it that warm, homey depth that makes you want seconds.
- Party in a Pan: This 8×8 size is my go-to for gatherings—cut into squares, it feeds a crowd without looking fussy. Serve it warm with ice cream or chill it for a no-fuss dessert that’s always a hit, even when I forget to bake ahead.
- Budget-Friendly Staples: Honestly, the ingredients won’t break the bank—flour, butter, sugar, eggs, and vanilla are pantry basics. And the leftovers? They’re even better the next day, sliced thin for toast or crumbled over yogurt. Minimal cost, maximum satisfaction.
Step-by-step instructions for double-layered vanilla bliss cake
Here’s how to create a perfectly balanced cake with tender layers and silky frosting.
Prepare the Cake Batter
Preheat your oven to 350°F and grease two 8×8-inch cake pans with butter, then line the bottoms with parchment paper. In a large mixing bowl, combine the 2.5 cups all-purpose flour, 1.5 tsp baking powder, and 0.5 tsp salt. Sift the mixture to remove any lumps and set aside.
In a separate bowl, cream together the 1.5 cups unsalted butter and 2 cups granulated sugar on medium speed until light and fluffy, about 3-4 minutes. This step is crucial—you’ll know it’s ready when the mixture nearly doubles in volume and becomes pale. Add the 4 whole large eggs one at a time, mixing well after each addition. Stir in the 2 tsp pure vanilla extract and 1 tbsp vanilla bean seeds.
Gradually add the dry ingredients to the wet mixture, alternating with the 1 cup milk, beginning and ending with the flour mixture. Mix on low speed just until combined—overmixing develops gluten and can make the cake dense. Divide the batter evenly between the prepared pans and smooth the tops with a spatula.
Bake the Layers
Bake the cakes for 25-30 minutes or until a toothpick inserted into the center comes out clean. The edges should be golden brown, and the tops should spring back when gently pressed. Rotate the pans halfway through baking for even cooking. Let the cakes cool in the pans for 10 minutes, then transfer them to a wire rack to cool completely.
This cooling step is essential—it prevents the cakes from becoming soggy when you add the frosting. If the cakes cool too quickly, they may develop a crusty top. For best results, allow them to cool for at least 1 hour before assembling.
Prepare the Vanilla Frosting
In a medium bowl, combine the 1.5 cups heavy whipping cream and 1 tbsp vanilla bean paste. Whip the mixture with an electric mixer on medium-high speed until soft peaks form, about 2-3 minutes. Gradually add the 4 cups powdered sugar, one cup at a time, mixing well after each addition until the frosting is smooth and fully combined.
For a lighter texture, you can also whip the frosting in two stages: first, whip the cream to stiff peaks, then gently fold in the powdered sugar. This method creates a fluffier, more stable frosting that holds up better for layering. Taste the frosting and adjust the sweetness if needed—you can add a few drops of vanilla extract if desired.
Assemble the Cake
Place one of the cooled cake layers on a serving plate or cake stand. Spread a thin layer of frosting over the top to create a “crust,” which helps prevent the cake from becoming soggy. Place the second cake layer on top and repeat the process, spreading frosting over the top and sides of the cake. Use a spatula to smooth the frosting evenly.
For a polished finish, chill the assembled cake in the refrigerator for 30 minutes to allow the frosting to set. This step also makes it easier to slice cleanly. Once chilled, you can decorate the cake with additional frosting swirls, sprinkles, or fresh berries if desired. Serve at room temperature for the best texture and flavor.
Pro Tips For Making 8 By 8 Cake
- Cream Butter and Sugar Slowly: I used to pulse mine in the food processor like I was in a hurry—big mistake. For this cake, beat the butter and sugar by hand (or on low speed) until it’s light and fluffy, about 3-4 minutes. That’s the only way to trap enough air for a tender crumb. (Yes, even if you’re impatient like me.)
- Weigh Your Flour Properly: Scooping flour straight from the bag packs it down, and this cake hates dense flour. Use a kitchen scale for precision—aim for 240 grams (about 2 cups lightly spooned and leveled). My first two batches were cakey and dry because I eyeballed it.
- Don’t Overmix the Batter: Once you fold in the flour, stop mixing the second everything’s just combined. Overmixing develops gluten, and this cake turns tough instead of moist. I learned this after a batch that tasted like a sad, dense pancake.
- Rotate the Pan Mid-Bake: Your oven’s hot spots are real, and an 8×8 pan sits in them like a target. After 20 minutes, swap the pan front-to-back (or top-to-bottom if your oven runs hotter on one side). This guarantees even baking—no dry edges or undercooked centers.
Best sauces and condiments for this dish
Classic Vanilla Glaze
This simple syrup glaze elevates your cake with minimal effort. Combine 1 cup powdered sugar with 2-3 tablespoons milk and 1 teaspoon vanilla extract in a small bowl. Whisk until smooth, then drizzle over the cooled cake layers before adding frosting.
The glaze adds a glossy finish and extra moisture—perfect for a restaurant-quality look without extra work. 💫
Cream Cheese Frosting Twist
Swap the vanilla frosting for a rich cream cheese version that pairs beautifully with vanilla cake. Beat 8 ounces cream cheese, ½ cup butter, and 3 cups powdered sugar until fluffy.
Add 1 teaspoon vanilla extract and spread between layers. This frosting adds tangy depth that balances the sweetness, making every bite more complex. I love this combo for holiday celebrations!
Chocolate Ganache Drizzle
For a sophisticated touch, melt ½ cup dark chocolate chips with ¼ cup heavy cream in a microwave-safe bowl. Stir until smooth, then let cool slightly before drizzling over the assembled cake. The bitter-sweet contrast of chocolate against vanilla creates a luxurious finish.
Use a piping bag with a small tip for elegant swirls—it takes just 5 minutes and looks like you spent hours decorating. 🍫
Lemon Curd Swirl
Brighten your cake with homemade lemon curd swirled into the frosting. Mix ½ cup lemon curd with 2 cups of the vanilla frosting and pipe dollops onto the cake before spreading the remaining frosting.
The zesty citrus notes cut through the richness, making each slice feel fresh and vibrant. For extra flair, top with lemon zest or berries for a springtime vibe.
Caramel Drizzle
Add a gooey caramel drizzle by heating ½ cup granulated sugar in a saucepan until melted, then whisk in 2 tablespoons butter and 2 tablespoons cream. Let cool slightly before drizzling over the cake.
The sweet-salty caramel adds texture and a decadent touch. For a cleaner look, use a fork to drag the caramel into thin lines across the frosting. 🍯
Berry Compote Topping
Simmer 1 cup mixed berries (fresh or frozen) with 2 tablespoons sugar and 1 teaspoon lemon juice for 5-7 minutes until thickened. Spread the warm compote over the cake after frosting, then top with fresh berries.
The fruit-forward flavor** adds freshness and pops of color, making your cake feel seasonal and special. This works beautifully with summer berries or winter cranberries!
Nutrition facts
Frequently asked questions
Why does this recipe use two 8×8-inch pans instead of one 9×13-inch pan?
Two 8×8-inch pans create perfectly even layers that stay moist and tender after baking. A single 9×13-inch pan would yield one thick layer that’s harder to slice cleanly and often results in a denser texture. The double-layer approach also gives you a more professional-looking cake with clean separation between layers. Plus, it’s easier to handle and serve!
Can I make this cake in a single 8×8-inch pan instead of two?
Yes, but the texture and presentation will differ. For a single-layer cake, reduce the batter by half and bake for 35-40 minutes in one pan. The cake will be thicker and denser, but it works well for smaller gatherings. If you want the same height as the double-layer version, bake in one pan for 25-30 minutes, then carefully slice horizontally to create two layers.
What’s the best way to store leftover cake?
Wrap each layer tightly in plastic wrap and store at room temperature for up to 3 days, or refrigerate for 5 days. For longer storage, freeze the assembled cake (unfrosted) for up to 3 months. Thaw overnight in the fridge before serving. The frosting can be stored separately in the fridge for 2 days—just bring it to room temperature before using.
Why did my cake crack on top while baking?
Cracking usually happens when the oven temperature fluctuates or the cake rises too quickly. Preheat your oven thoroughly for 15 minutes before baking, and avoid opening the oven door during the first 20 minutes. Also, make sure your butter and eggs are at room temperature—this helps create a smoother batter that rises evenly. A light crack is normal, but deep cracks can affect texture.
Can I substitute powdered sugar with granulated sugar in the frosting?
Not directly—powdered sugar dissolves smoothly for a silky frosting. For a substitute, blend 1 cup granulated sugar in a food processor until it becomes a fine powder. You’ll need about 1.5 cups granulated sugar to equal 1 cup powdered sugar. The frosting will be slightly grainier, but it will still work. For best results, sift the powdered sugar to avoid lumps in your final frosting.

- 77 Texas BBQ Taco Sauce Recipe: Smoky Chipotle Heat With Caramelized Depth - October 19, 2026
- 1930’s Chocolate Cake Recipe: Vintage Richness With Vanilla Bean Swirls - October 19, 2026
- 6 Ingredient Bread Recipe: No-Knead Wonder With Pantry Staples - October 19, 2026