
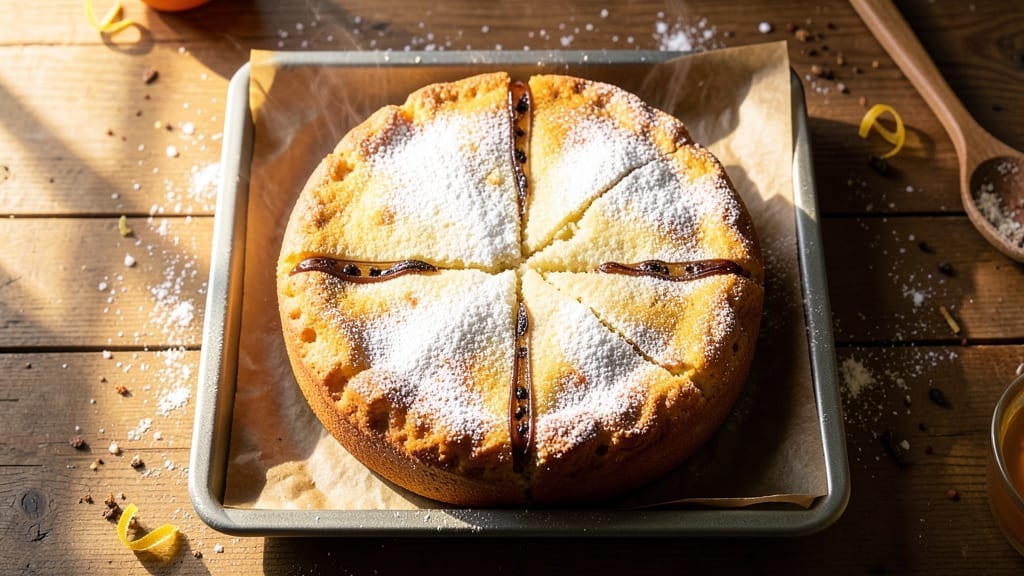
An 8×8 inch cake recipe that combines velvety vanilla bean layers with rich chocolate ganache creates a showstopper dessert that’s perfect for celebrations or satisfying cravings. This recipe delivers a foolproof method for achieving perfectly moist layers and a glossy, professional finish without requiring advanced baking skills.
The vanilla bean infuses each bite with aromatic warmth, while the chocolate ganache ties everything together with its velvety texture.
What sets this cake apart is the simple yet sophisticated technique—no fancy equipment needed, just precise layering and a quick-cooling trick to ensure clean slices. The recipe uses standard ingredients like all-purpose flour and butter, making it accessible for home bakers while still delivering restaurant-quality results.
Each step is designed to minimize stress, so you can focus on the rewarding process of creating something truly special.
The final product is a decadent dessert with a tender crumb, glossy ganache layers, and a balance of sweetness that’s hard to resist. Whether you’re serving it at a party or treating yourself, this cake promises to impress with its elegant presentation and rich flavors.
The best part? It’s designed to be adaptable—swap the ganache for cream cheese frosting or add fresh berries for a seasonal twist.
Ready in about 1 hour and 30 minutes (including cooling time), this cake is perfect for when you need a dessert that’s both impressive and manageable.
The secret to success lies in the precise measurements and patience during the layering process—trust the method, and you’ll achieve a cake that looks and tastes like it came from a bakery. Let’s get started!
Ingredients for 8×8 inch cake
Eighteen ingredients transform into a restaurant-worthy cake with velvety layers and glossy ganache.
| Ingredient | Amount | Notes |
|---|---|---|
| All-Purpose Flour 🌾 | 2 cups | Sifted for light texture |
| Granulated Sugar 🍚 | 1 ½ cups | Superfine preferred for smoothness |
| Unsalted Butter 🧈 | 1 cup | Cold, cubed for even mixing |
| Large Eggs 🥚 | 2 whole | Room temperature for even baking |
| Vanilla Bean Paste 🌿 | 2 tsp | High-quality for authentic flavor |
| Baking Powder 🍞 | 1 tsp | Fresh for proper leavening |
| Salt 🧂 | ½ tsp | Fine sea salt preferred |
| Milk 🥛 | ½ cup | Whole milk for richness |
| Dark Chocolate Chips 🍫 | 1 cup | 70% cocoa for ganache |
| Heavy Cream 🥛 | 1 cup | Cold for stable ganache |
| Vanilla Extract 🌿 | 1 tsp | Pure vanilla for depth |
| Powdered Sugar 🍚 | 1 cup | For dusting between layers |
| Unsweetened Cocoa Powder 🍫 | 2 tbsp | For dusting between layers |
The vanilla bean paste is non-negotiable here—Nestlé or Madagascar vanilla gives that aromatic depth. Grab it from the baking aisle at Williams Sonoma or Sur La Table if you want the best. Dark chocolate chips? Ghirardelli or Lindt are worth the splurge—they melt smoothly and add richness. The powdered sugar should be sifted before using, and cocoa powder? Dutch-processed for a smoother finish. Butter matters too—Plugrá or Land O’Lakes work perfectly, just make sure it’s cold when you measure it.
No vanilla bean paste? Pure vanilla extract at double the amount works in a pinch, but you’ll lose that signature aroma. Substituting dark chocolate? Semisweet chips at 60% cocoa are fine, but the ganache won’t be as rich. Heavy cream too thick? Whip it briefly to loosen it up before melting the chocolate. Milk can be swapped for cream or buttermilk, but whole milk keeps the crumb tender. For the cocoa dusting, hot cocoa mix in a bind? Use it, but sift it well to avoid lumps.
Store cake layers wrapped tightly in plastic at room temperature for 3 days—they actually improve overnight. Ganache? Keep it in the fridge for 1 week, but bring it to room temp before using. To reheat slices, microwave for 10 seconds—just enough to melt the ganache without drying the cake. Freeze assembled cake for 2 months by wrapping it tightly in plastic wrap and foil. Thaw overnight in the fridge before serving.
Why You’ll Love This Recipe
- No Mixer Needed: I swear by this recipe when my stand mixer’s on strike—just cream butter and sugar by hand until light and fluffy. That vanilla bean paste? One little swipe of the pod makes the whole batch smell like a bakery window.
- Butter-Sugar Magic: The moment that melted butter and sugar blend into a thick paste? Pure comfort. It’s rich but not heavy, with just enough vanilla to make you want to cut yourself a second slice before it even cools.
- Double-Duty Pan: An 8×8 cake is my secret weapon for birthdays and breakfast—slice it for dessert, bake it again as a quick bread, or even freeze half for later. Honestly, I’ve repurposed this recipe more times than I can count.
- Budget-Friendly Luxury: Five ingredients, zero specialty items, and it still tastes like you slaved over it. Between us, this is how I feed a crowd without breaking the bank—everyone gets cake, and I get to brag about how cheaply I did it.
Step-by-step instructions for layered vanilla bean and chocolate ganache cake
Here’s how to create a showstopping 8×8-inch cake with perfect layers and luscious ganache—every step matters!
Prepare the Cake Batter for Maximum Lightness
Preheat your oven to 350°F and grease two 8×8-inch baking pans with butter, then line them with parchment paper for easy removal. In a medium bowl, whisk together the 2 cups all-purpose flour, 1.5 cups granulated sugar, 1 tsp baking powder, and 0.5 tsp salt. Sift the flour mixture twice to ensure a light, airy texture—this prevents dense cake layers.
In a separate large bowl, cream the 1 cup cold, cubed unsalted butter with an electric mixer on medium speed until light and fluffy, about 3-4 minutes. Gradually add the dry ingredients while mixing on low speed, then add the 2 whole large eggs, one at a time, mixing just until combined. Stir in the 2 tsp vanilla bean paste and 0.5 cup milk until smooth. The batter should be thick but pourable—if it looks too stiff, add 1-2 tablespoons milk to loosen it.
Bake the Layers to Perfect Doneness
Divide the batter evenly between the two prepared pans. Bake for 25-30 minutes or until a toothpick inserted into the center comes out clean and the edges are lightly golden. Rotate the pans halfway through baking for even browning. Let the cakes cool in the pans for 10 minutes before transferring them to a wire rack to cool completely—this prevents cracking when layering.
Here’s the thing—if the tops look slightly domed, don’t worry. The ganache will create a smooth, professional finish. Once fully cooled, level the tops if needed using a serrated knife. This ensures your layers are even and the ganache distributes perfectly.
Create the Chocolate Ganache for Silky Layers
In a heatproof bowl, combine the 1 cup dark chocolate chips and 1 cup cold heavy cream. Place the bowl over a pot of simmering water (double boiler method) and stir gently until the chocolate melts completely and the mixture is smooth. Remove from heat and stir in the 1 tsp vanilla extract. Let the ganache cool slightly—it should be thick enough to coat the back of a spoon but still pourable.
Real talk: If the ganache sets too quickly, microwave it in 10-second bursts to loosen it. The goal is a glossy, spreadable consistency that clings beautifully to the cake layers. This ganache is rich but not overly sweet, letting the vanilla cake shine.
Assemble the Cake with Professional Flair
Place the first cake layer on a serving plate or cake stand. Dust the top evenly with 2 tbsp unsweetened cocoa powder using a fine-mesh sieve—this creates a stunning contrast with the ganache. Pour about ½ cup of the chocolate ganache over the layer and spread it evenly using an offset spatula, leaving a ½-inch border uncovered.
Dust the top of the ganache with another 2 tbsp cocoa powder, then place the second cake layer on top. Repeat the ganache and cocoa powder process, ensuring the top layer is completely covered. Chill the assembled cake in the refrigerator for at least 2 hours—this allows the ganache to set firmly and the layers to meld together.
Dust with Powdered Sugar for Finishing Touches
Before serving, dust the entire cake generously with 1 cup powdered sugar using a fine-mesh sieve. This creates a snowy, elegant finish that contrasts beautifully with the dark ganache. Let the powdered sugar sit for 5 minutes before serving to allow it to settle evenly.
Slice with a sharp, hot knife for clean cuts and serve immediately. Each bite delivers a perfect balance of tender vanilla cake, rich chocolate ganache, and delicate cocoa dusting. The contrast of textures—soft cake, smooth ganache, and powdery sugar—makes this cake truly unforgettable.
Pro Tips For Making 8×8 Inch Cake
- Cream Butter and Sugar Slowly: I learned this the hard way—dumping cold butter into sugar and whipping it on high just makes a greasy mess. Use room-temperature butter (65°F) and beat it with sugar on medium for 3–4 minutes first. The mixture should look fluffy and pale, not streaky, before adding eggs. This ensures a light, tender crumb instead of a dense one.
- Sift Flour Like a Pro: Skimping on sifting flour in an 8×8 cake means uneven texture and potential lumps. Use a fine-mesh sieve and sift the flour directly into the batter bowl while gently folding it in with a spatula—don’t just dump and stir. This keeps air incorporated, and your cake will rise more evenly. (Yes, even if you’re impatient like me.)
- Avoid Overmixing the Batter: The moment your batter turns from shaggy to smooth is the moment to stop. Overmixing develops gluten, which makes an 8×8 cake tough instead of tender. Mix just until the flour disappears—about 10–12 strokes with a spatula. If you’re unsure, err on the side of underdone batter.
- Rotate the Pan Early: Your oven’s hot spots will wreck an 8×8 cake if you ignore them. After 15 minutes, rotate the pan front-to-back and side-to-side. This evens out baking and prevents a dark top or pale edges. I was skeptical until I tried it—now I never skip this step.
Flavor customization for this dish
Spiced Vanilla Twist
Swap the vanilla bean paste for a warm spiced blend—mix 1 tsp vanilla extract with ½ tsp cinnamon, ¼ tsp nutmeg, and a pinch of cardamom. This adds depth that pairs beautifully with the chocolate ganache.
For extra warmth, fold in 1 tbsp orange zest with the milk. The spices complement the richness without overpowering the delicate cake layers. 🌿
Citrus Zest Infusion
Brighten the cake with 1 tbsp lemon or lime zest mixed into the dry ingredients. The citrus cuts through the richness of the ganache, creating a refreshing contrast. For a tropical twist, add ½ cup diced pineapple to the batter—it keeps the cake moist and adds a subtle tang.
Just be sure to pat the fruit dry first to avoid a soggy texture. 🍋
Espresso Chocolate Boost
Amplify the chocolate ganache by adding 1 tsp instant espresso powder to the melted chocolate mixture. This deepens the chocolate flavor and balances the sweetness perfectly. For an extra kick, reduce the sugar in the cake batter by 1 tbsp—the espresso enhances the natural sweetness of the vanilla.
Trust me, it’s a game-changer for coffee lovers. ☕
Salted Caramel Swirl
Replace the ganache with a salted caramel filling by heating ½ cup heavy cream, ½ cup brown sugar, and 2 tbsp butter until bubbly, then stirring in 1 tsp vanilla and ½ tsp flaky sea salt.
Let it cool slightly before swirling it into the cake layers. The caramel’s buttery sweetness with a hint of salt elevates the entire dessert to next-level decadence. 🍯
Berry Compote Layers
Add a seasonal twist by replacing the ganache with a berry compote. Simmer 1 cup mixed berries (fresh or frozen), 2 tbsp sugar, and 1 tsp lemon juice until thickened.
Spread it between the cake layers and dust with unsweetened cocoa powder for contrast. This works especially well with strawberries, raspberries, or blackberries. The fruity acidity balances the richness beautifully. 🍓
Coffee Cream Cheese Frosting
Swap the ganache for a coffee-infused cream cheese frosting. Beat 8 oz cream cheese, ½ cup butter, 2 cups powdered sugar, 1 tsp vanilla, and 1 tsp instant coffee until smooth.
Spread it between the cake layers and on top. The tangy cream cheese adds a sophisticated contrast to the vanilla cake, while the coffee ties it all together. 💫
Nutrition facts
Frequently asked questions
Can I bake this cake in a different pan size?
Yes, but you’ll need to adjust the baking time. For a 9×9-inch pan, reduce oven temperature to 340°F and bake for 20-25 minutes. For a 9×13-inch pan, use 340°F for 25-30 minutes. Always check doneness with a toothpick—it should come out clean. The key is lower heat for larger pans to prevent over-browning.
How do I prevent my cake layers from cracking?
Cracking happens when cakes cool too quickly or aren’t properly leveled. Let layers cool in pans for 10 minutes before removing, then cool completely on a wire rack. Level domed tops with a serrated knife before assembling. Also, avoid opening the oven door too soon—sudden temperature changes cause cracks. Patience is key for smooth layers!
Can I make this cake ahead of time?
Bake the layers up to 2 days ahead and store them wrapped tightly at room temperature. Assemble the cake 1 day before serving and refrigerate. The ganache will firm up beautifully overnight. For best results, bring to room temperature before slicing. This makes it perfect for make-ahead desserts!
What if my ganache is too thick or too thin?
If too thick, gently reheat in 10-second microwave bursts while stirring until smooth. If too thin, chill for 10 minutes to thicken. The perfect consistency coats the back of a spoon but spreads easily. Room temperature ganache works best—never microwave it directly from the fridge.
How do I get clean, professional-looking slices?
Use a sharp serrated knife and dip it in hot water between each slice. Wipe the knife clean after each dip. This prevents crumbs and gives you that bakery-style finish. Work quickly once the cake is chilled—warmer ganache is easier to slice cleanly. Practice makes perfect!

- 3 Cheese Pimento Cheese Recipe: Sharp Cheddar, Peppery Heat, and Creamy Spread Magic - October 10, 2026
- 7 Egg Cake Recipe: Fluffy Layers With Vanilla Bean Infusion - October 10, 2026
- 3 Musketeers Cookie Recipe: Crunchy Chocolate Shells With Gooey Caramel Centers - October 10, 2026