
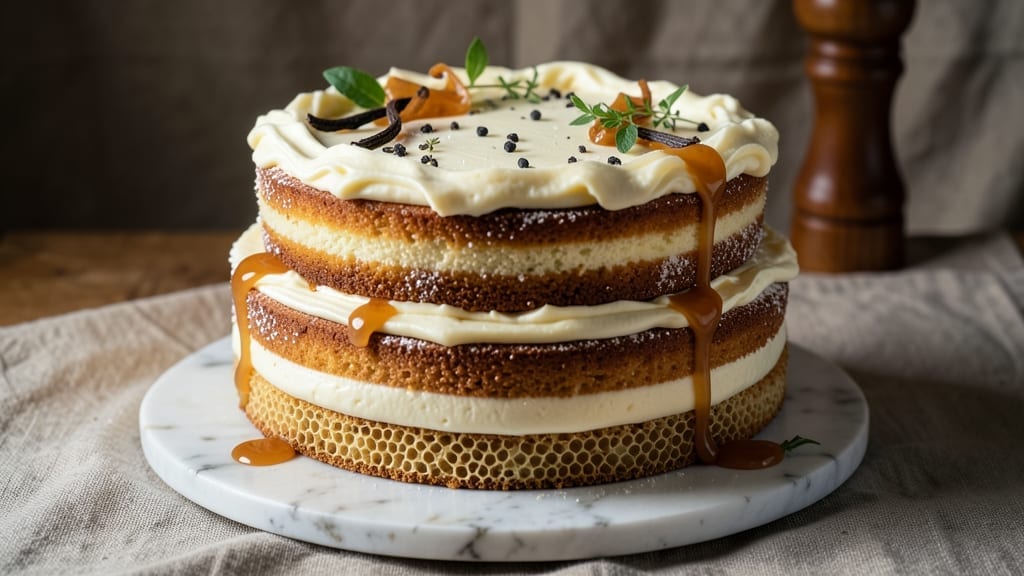
This 8-inch birthday cake recipe delivers vanilla bean swirls and festive buttercream frosting—the ideal centerpiece for any celebration, elegant yet simple, with layers of flavor that feel special without the fuss.
The secret lies in a light, tender crumb that holds up beautifully to rich vanilla frosting, while the swirled batter adds visual appeal that makes it feel like a bakery creation. This recipe delivers foolproof results every time, whether you’re baking for a child’s first birthday or an adult milestone.
The beauty of this 8-inch cake is its balance—simple ingredients (flour, sugar, eggs, butter) combine with two key techniques to elevate it: a vanilla bean paste for depth of flavor and a swirl method that creates stunning marbled layers.
The buttercream frosting isn’t just decoration; it’s a creamy, stable finish that stays smooth in any temperature, making it ideal for decorating with sprinkles, fresh berries, or hand-piped designs. Even beginners will achieve restaurant-quality results with minimal fuss.
What you’ll end up with is a golden-domed cake that’s moist, flavorful, and perfectly portioned for an 8-inch round pan, serving 8-10 guests.
The vanilla bean swirls add a professional touch without requiring advanced skills, while the buttercream frosting—sweet, smooth, and pipeable—lets you customize with colors or textures. This cake isn’t just a dessert; it’s a celebration in every bite, designed to impress without the stress.
Need it chocolate instead? Swap the vanilla extract for cocoa powder. Want extra flair? Add a mirror glaze or edible gold leaf. The recipe scales easily for 6-inch or 10-inch pans, and the frosting can be made ahead.
Let’s make a cake that’s as delicious as it is beautiful—your guests won’t believe it’s homemade.
Ingredients for 8 inch birthday cake
Simple ingredients elevate to restaurant-quality with vanilla bean swirls and flawless buttercream.
| Ingredient | Amount | Notes |
|---|---|---|
| All-Purpose Flour 🌾 | 2 ½ cups | Sifted for light texture |
| Granulated Sugar 🍚 | 2 cups | Superfine preferred for smoothness |
| Unsalted Butter 🧈 | 1 ½ cups | Cold, cubed for creaming |
| Large Eggs 🥚 | 4 whole | Room temperature for even mixing |
| Pure Vanilla Extract 🌿 | 2 tbsp | High-quality, Madagascar preferred |
| Vanilla Bean Paste 🌿 | 1 tbsp | For authentic vanilla flavor |
| Baking Powder 🍞 | 2 tsp | Aluminum-free for tender crumb |
| Salt 🧂 | ½ tsp | Fine sea salt preferred |
| Milk 🥛 | 1 cup | Whole milk for richness |
| Vanilla Bean Seeds 🌿 | 1 whole | Scraped from 1 vanilla bean |
| Powdered Sugar 🍚 | 4 cups | Confectioners' sugar, sifted |
| Heavy Whipping Cream 🥛 | 1 cup | Cold for buttercream stability |
| Vanilla Extract 🌿 | 1 tsp | For buttercream flavor |
| Food Coloring (optional) 🎨 | 1 tsp | Gel-based for vibrant swirls |
The vanilla bean paste and seeds are non-negotiable for authentic depth—Trader Joe’s and Williams Sonoma carry high-quality options. For the butter, European-style unsalted butter (like Plugrá) creates a richer crumb. Sift the flour and powdered sugar to avoid dense layers. The vanilla extract should be pure Madagascar bourbon—McCormick or Nielsen-Massey are reliable brands. Pre-measure everything for foolproof results in an 8-inch round pan lined with parchment.
No vanilla bean paste? Double the vanilla extract and add a pinch of vanilla sugar. Substitute powdered sugar with cornstarch-sifted granulated sugar (1 cup granulated + 1 tbsp cornstarch = 1 cup powdered). For dairy-free buttercream, replace butter with vegan butter and heavy cream with coconut cream (chilled overnight). The food coloring can be omitted for a classic vanilla look, but gel colors blend better than liquid. If your buttercream curdles, whisk in 1 tbsp warm milk to restore stability.
Store cake layers at room temperature for up to 2 days wrapped in plastic. Buttercream keeps 3 days refrigerated or 3 months frozen. To prevent drying, place a damp towel over the cake when not serving. For extra flair, add a mirror glaze (equal parts powdered sugar and light corn syrup) or edible gold leaf before serving. The frosting can be made 2 days ahead—just re-whip before decorating.
Why You’ll Love This Recipe
- No Mixer Needed: This cake comes together with just a bowl and a whisk—no stand mixer or fancy tools required. The butter and sugar get creamed by hand in minutes, and the eggs blend right in without fuss.
- Vanilla Butter Bliss: That classic combo of rich butter and pure vanilla extract? It’s the secret to a cake that tastes like nostalgia. The sugar caramelizes just enough to give it a subtle depth, while the flour keeps it light—no heavy aftertaste here.
- Birthday or Bake Sale: Too small for a crowd but perfect for a single celebration? This 8-inch cake is ideal for intimate gatherings, surprise parties, or even a last-minute bake sale. The portions are generous, and it’s easy to scale up if you’re feeling ambitious.
- Budget-Friendly Luxury: You’re using pantry staples—flour, sugar, butter—that won’t break the bank, yet the result feels special. Leftovers? Slice it the next day, toast it lightly, and it’s just as good—if not better—than day one.
Step-by-step instructions for vanilla bean birthday cake with festive buttercream
Here’s the precise method for baking and decorating a showstopping 8-inch birthday cake.
Prepare Cake Layers with Vanilla Bean Swirls
Preheat your oven to 350°F and grease two 8-inch round cake pans, lining the bottoms with parchment paper. In a stand mixer fitted with the paddle attachment, beat the 1.5 cups unsalted butter and 2 cups granulated sugar on medium speed for 3-4 minutes until light and fluffy. Scrape down the sides of the bowl as needed.
Add the 4 whole large eggs, one at a time, mixing well after each addition. Then add the 2 tablespoons pure vanilla extract, 1 tablespoon vanilla bean paste, and the vanilla bean seeds scraped from the whole vanilla bean. Mix until fully combined. In a separate bowl, whisk together the 2.5 cups all-purpose flour, 2 teaspoons baking powder, and 0.5 teaspoon salt. Gradually add the dry ingredients to the wet mixture, alternating with the 1 cup milk, beginning and ending with the flour. Mix on low speed just until combined.
Divide the batter evenly between the prepared pans. For the signature swirls, use an offset spatula to create 6-8 gentle swirls in each layer. Bake for 25-30 minutes or until a toothpick inserted into the center comes out clean. Let the cakes cool in the pans for 10 minutes before transferring to a wire rack to cool completely.
Prepare the Festive Buttercream Frosting
In a large mixing bowl, beat the 1 cup heavy whipping cream with an electric mixer until soft peaks form. Gradually add the 4 cups powdered sugar, mixing on low speed until combined. Increase the speed to medium-high and beat for 2-3 minutes until the buttercream is smooth and holds stiff peaks. Add the 1 teaspoon vanilla extract and mix until fully incorporated.
For the optional food coloring, add 1 teaspoon gel-based food coloring and mix until evenly distributed. If you prefer a swirled design, divide the buttercream into two bowls, tinting one portion with your desired color. Use an electric mixer to whip both portions to stiff peaks before proceeding.
Assemble and Decorate the Birthday Cake
Once the cake layers are completely cool, level the tops if necessary using a serrated knife. Place the first layer on a cake stand or plate and spread a thin layer of buttercream on top. Place the second layer on top of the first, gently pressing down to create a level surface. Spread a thin crumb coat of buttercream over the entire cake, then chill in the refrigerator for 15 minutes to set.
After chilling, apply the final layer of buttercream, using an offset spatula to create smooth sides. For the swirl design, pipe alternating colors of buttercream in a spiral pattern starting from the outer edge, then use a small offset spatula to gently swirl the colors together. For a classic look, simply cover the cake with a smooth layer of buttercream and decorate with fresh berries, sprinkles, or a simple border of piped buttercream.
Pro Tips For Making 8 Inch Birthday Cake
- MEASURE FLOUR BY SPOONING: I learned this the hard way—packing flour into measuring cups compresses it, making your cake dense and heavy. Instead, fluff the flour first, then scoop and level. That light, airy texture is what keeps your 8-inch cake tender.
- SOFTEN BUTTER TO ROOM TEMP: Cold butter creates pockets of air in your batter, leading to uneven baking. Press the butter between two slices of bread for 10 minutes—it’ll soften perfectly without melting, giving you that smooth, creamy consistency the recipe needs.
- DON’T OVERMIX THE BATTER: I used to beat this like I was trying to win a race, but that’s how you get a tough cake. Mix just until the flour disappears—about 30 seconds after that. Overworking it develops gluten, and your cake will turn out more like a dense pound cake than a light, fluffy birthday treat.
- LET THE CAKE COOL IN PAN: Resist the urge to pull it out the second it’s done. Let it sit for 10 minutes with the pan still on the rack—this keeps it from collapsing when you transfer it. Trust me, your frosting will thank you later.
Essential equipment for great 8 inch birthday cake
Must-Have Baking Tools
Start with a stand mixer—I swear by my KitchenAid Artisan Series—it handles both the cake batter and buttercream effortlessly. A 9-inch offset spatula (like OXO Good Grips) is essential for creating those signature swirls in the batter and smoothing frosting.
Don’t skip the 8-inch round cake pans—I recommend Wilton Perfect Results pans for even baking and easy release. 🌟
Precision Measuring Essentials
Accurate measurements make all the difference! Use a digital kitchen scale (I love OXO Good Grips) for butter and powdered sugar to avoid packing errors. A fine-mesh sifter (like Microplane) ensures your flour and baking powder are light and aerated.
For the vanilla bean seeds, a small paring knife works perfectly to scrape every last bit of flavor. Precision here prevents dense layers.
Decorating Tools for Pro Results
For the buttercream swirls, a piped bag with a star tip (Wilton #1M) creates professional-looking rosettes. A turntable (like Cake Boss) makes decorating a breeze—no more awkward angles!
For leveling cake layers, a serrated knife (I use Mercer Culinary) is a game-changer. A bench scraper (like OXO) helps spread frosting smoothly without tearing layers. 🎨
Optional Extras for Flair
Add a mirror glaze? Grab a pastry brush (like Ateco) for even application. Want edible gold leaf? A soft paintbrush (size 00) applies it beautifully. For food coloring, a gel-based set (like Wilton) blends seamlessly without thinning your frosting.
These tools elevate your cake from homemade to bakery-worthy without breaking the bank.
Budget-Friendly Swaps
No stand mixer? A hand mixer (like Black+Decker) works for buttercream. Skip the turntable? Use a plate and rotate the cake manually. For swirls, a wooden spoon can replace an offset spatula in a pinch.
The key is patience—take your time with each step, and your cake will still shine. Even with basic tools, you’ll nail this recipe! ✨
Nutrition facts
Frequently asked questions
Can I make this recipe in a different pan size?
Yes! For a 6-inch cake, reduce all ingredients by 50% (bake 20-25 minutes), and for a 10-inch cake, increase by 125% (bake 30-35 minutes). Adjust baking time based on your oven—always check with a toothpick. The buttercream quantity should scale with the cake surface area.
How do I store leftover cake?
Wrap individual layers in plastic wrap and store at room temperature for up to 2 days. For longer storage, refrigerate layers for 3 days or freeze for 3 months. Keep buttercream refrigerated and re-whip before using. To prevent drying, place a damp towel over the cake when not serving.
Can I substitute vanilla extract with vanilla sugar?
Yes! Replace 1 tablespoon vanilla bean paste with 2 tablespoons vanilla sugar (finely ground vanilla bean seeds mixed with sugar). For the buttercream, use 1 teaspoon vanilla sugar** instead of extract. The flavor will be slightly different but still delicious.
Why did my cake sink in the middle?
This usually happens from overmixing the batter or opening the oven too soon. Mix just until combined (don’t overbeat the eggs), and bake until a toothpick comes out clean. Let cakes cool 10 minutes in pans before removing. If it sinks slightly, the buttercream will still hold it together beautifully!
How do I make this recipe gluten-free?
Replace the all-purpose flour with a 1:1 gluten-free baking flour blend (like Bob’s Red Mill or King Arthur). Add 1/4 teaspoon xanthan gum to help bind the crumb. Reduce milk by 2 tablespoons to compensate for the blend’s moisture differences. The texture will be slightly denser but still delicious.

- 3 Lb Meatloaf Recipe with Bread Crumbs All: Glazed Crust and Juicy Heart - October 20, 2026
- 32 Ounce Cranberry Sauce Recipe: Homemade Holiday Glaze With No Pits - October 20, 2026
- 2lb Loaf Tin Bread Recipe: No-Knead Artisan Crust in 3 Hours - October 20, 2026