
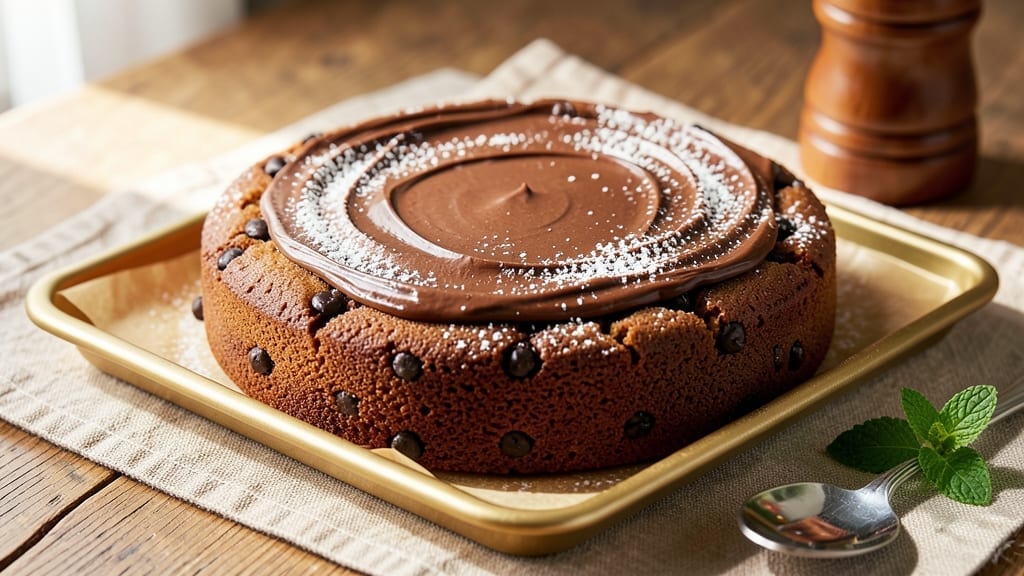
An 8-square chocolate cake delivers rich, fudgy layers and velvety texture without the density of traditional sheet cakes. This recipe balances precision with simplicity—perfect for beginners eager to master a moist, even bake every time.
The secret lies in precise ingredient ratios and gentle folding, ensuring no dry crumbs or overmixed batter. What sets this apart is the vanilla bean frosting, which cuts through the chocolate’s intensity while adding a luxurious finish.
The cake’s structure relies on a two-stage mixing method: creaming butter and sugar until light, then alternating dry ingredients with melted chocolate for depth. Bake at 350°F for 25-30 minutes for a golden crust and a springy center. The result?
A decadent yet approachable dessert with clean layers and a crackly top. Serve slices warm with a scoop of vanilla ice cream or dust with cocoa powder for an elegant touch. This recipe proves that professional-quality chocolate cake doesn’t require advanced skills—just patience and attention to detail.
For extra richness, swap half the milk for buttermilk, or add a pinch of espresso powder to enhance the chocolate’s flavor. The frosting can also be tinted with food coloring for a marbled effect. Let’s get baking!
Ingredients for 8 square chocolate cake
Precision-measured ingredients create a velvety chocolate cake with flawless layers and rich vanilla frosting.
| Ingredient | Amount | Notes |
|---|---|---|
| Unsalted Butter 🧈 | 1 cup | Room temperature for creaming |
| Granulated Sugar 🍚 | 2 cups | Superfine preferred for smoothness |
| Dark Chocolate Chips 🍫 | 8 oz | 70% cocoa or higher for depth |
| Large Eggs 🥚 | 2 whole | Room temperature for even mixing |
| All-Purpose Flour 🌾 | 1 ½ cups | Sifted for light texture |
| Baking Powder 🍞 | 1 ½ tsp | Aluminum-free for stability |
| Cocoa Powder 🍫 | ½ cup | Natural, unsweetened preferred |
| Vanilla Extract 🌿 | 1 ½ tsp | Pure Madagascar for authentic flavor |
| Whole Milk 🥛 | ½ cup | Room temperature for smooth batter |
| Salt 🧂 | ½ tsp | Fine sea salt for balance |
| Vanilla Bean Paste 🌿 | 1 tbsp | For frosting luxury |
| Powdered Sugar 🍚 | 2 cups | Sifted for smooth frosting |
| Heavy Whipping Cream 🥛 | 1 cup | Cold for stable frosting |
| Espresso Powder ☕ | ½ tsp | Optional for chocolate depth |
The butter and sugar must be room temperature—this ensures proper creaming for a light texture. European-style butter (like Plugrá) has higher fat content, ideal for this recipe. For the dark chocolate, prioritize high-quality bars over chips (melt your own for smoother layers). The vanilla extract should be pure—imitation extracts lack the depth needed to complement the chocolate. Whole milk adds richness, but buttermilk can be substituted for extra moisture. Sift the flour and cocoa powder together to prevent lumps and ensure even distribution in the batter.
No superfine sugar? Pulse granulated sugar in a food processor for 30 seconds to achieve a similar texture. Dutch-process cocoa (like Hershey’s Special Dark) yields richer color but slightly less chocolate flavor than natural cocoa. Running short on vanilla bean paste? Pure vanilla extract works, but reduce to 1 tsp—the paste’s seeds add extra flavor. Espresso powder enhances chocolate flavor without coffee taste; instant espresso can substitute at the same ratio. For a marbled effect, tint half the frosting with red food coloring before swirling. Melted chocolate can replace up to 4 oz of the chocolate chips if needed, though texture may vary slightly.
Store baked cake layers wrapped in plastic at room temperature for up to 2 days or refrigerate for 5 days. The frosting keeps for 3 days in the fridge—whip it just before assembling to maintain stability. For longer storage, freeze the unfrosted layers for up to 3 months; thaw at room temperature before frosting. Assemble the cake within 2 hours of baking to prevent drying. Dust with cocoa powder or grated chocolate just before serving for a professional finish. Prevent cracking by ensuring even cooling before frosting—let layers sit 10 minutes after baking.
Why You’ll Love This Recipe
- No Mixer Needed: I swear by this recipe because it’s one bowl—just melt butter, mix eggs and sugar, fold in flour and chocolate chips. No sifting, no extra pans, no fuss. The cake turns out rich and fudgy without overmixing.
- Fudgy Yet Light: That butter-sugar base creates a tender crumb, while the dark chocolate chips melt into pockets of gooey goodness. Honestly, it’s the kind of cake that disappears faster than my willpower on a bad day.
- Party in a Pan: Cut into eight squares, so you can serve it at potlucks, book club meetings, or just because. (Yes, even on a Tuesday night.) It’s easy to slice, easy to share—no one will guess it’s this simple.
- Budget-Friendly Luxury: Uses pantry staples you already own, and the dark chocolate chips add a restaurant-worthy touch without breaking the bank. Leftovers? They’ll last days, wrapped in foil or stored in the fridge.
Step-by-step instructions for fudgy chocolate cake with vanilla bean frosting
Here’s the precise method for achieving perfectly dense, moist layers and velvety frosting.
Prepare the Cake Batter for Maximum Fudginess
Preheat your oven to 350°F and grease an 8×8-inch square pan with butter, then line it with parchment paper for easy removal. In a stand mixer fitted with the paddle attachment, cream together the 1 cup unsalted butter and 2 cups granulated sugar on medium speed for 4-5 minutes until light and fluffy. This step incorporates air, which creates that signature tender crumb.
Add the 2 whole large eggs, one at a time, mixing well after each addition. Scrape down the sides of the bowl to ensure all ingredients are fully incorporated. Then add the 1.5 teaspoons vanilla extract and mix for another 30 seconds. The mixture should be smooth and slightly thickened—this is your base for rich chocolate flavor.
Combine Dry Ingredients and Fold in Chocolate
In a separate bowl, sift together the 1.5 cups all-purpose flour, 1.5 teaspoons baking powder, 0.5 cup cocoa powder, and 0.5 teaspoon salt. Whisk gently to combine—this prevents lumps that could create dense pockets in your cake. Gradually add the dry mixture to the wet ingredients, mixing on low speed just until combined. Avoid overmixing, which develops gluten and makes the cake tough.
Remove the bowl from the mixer and fold in the 8 ounces dark chocolate chips using a silicone spatula. You want them evenly distributed throughout the batter. Stir in the 0.5 cup whole milk until just combined. The batter should be thick but pourable—this consistency ensures a fudgy texture rather than a light, airy cake.
Bake Until Perfectly Set
Pour the batter into the prepared square pan and smooth the top with a spatula. Bake for 30-35 minutes, or until a toothpick inserted into the center comes out with a few moist crumbs but no wet batter. The edges should be set, but the center should still appear slightly underdone—this ensures maximum moisture. Rotate the pan halfway through baking for even heat distribution.
Let the cake cool in the pan for 15 minutes, then transfer it to a wire rack to cool completely. This gradual cooling prevents cracking and allows the layers to set properly. The cake should be firm to the touch but still tender—never dry or crumbly.
Prepare the Vanilla Bean Frosting
While the cake cools, prepare the frosting by whipping the 1 cup heavy whipping cream in a chilled bowl until soft peaks form. Gradually add the 2 cups powdered sugar, 1 tablespoon vanilla bean paste, and 0.5 teaspoon espresso powder, mixing on low speed until fully combined. Increase the speed to medium-high and whip for 2-3 minutes until the frosting is thick, glossy, and holds its shape.
The frosting should be smooth and pipeable—if it’s too thin, chill it for 10 minutes before proceeding. Here’s the thing—vanilla bean paste adds a luxurious depth that regular extract can’t match. The espresso powder enhances the chocolate flavor without being overpowering, creating a perfect balance.
Assemble and Chill for Best Texture
Once the cake is completely cool, spread a thin layer of frosting over the top to seal in moisture. Cut the cake into 4 equal squares and arrange them in the pan. Frost the top and sides with the remaining frosting, using a spatula to create clean edges. For a professional finish, dip the spatula in warm water and smooth the frosting.
Chill the cake in the refrigerator for at least 1 hour before serving. This step is crucial—it allows the frosting to set and the flavors to meld. The cake will be rich, fudgy, and perfectly balanced with the velvety frosting. Slice into perfect squares and serve with a dusting of cocoa powder for an elegant touch.
Pro Tips For Making 8 Square Chocolate Cake
- Melt Butter Slowly: I learned this the hard way—dumping cold butter into hot sugar makes a greasy mess that won’t emulsify. Instead, melt the butter first (microwave in 15-second bursts or use a double boiler), then let it cool slightly before mixing with sugar. The batter will be smoother and less likely to curdle.
- Weigh the Flour: Scooping flour from the bag packs in air, which makes your cake dense and dry. Use a kitchen scale and spoon the flour into the measuring cup—then level it off with a knife. This keeps the texture light and fudgy, not brick-like.
- Don’t Overmix the Batter: The second you see streaks of flour disappear, stop stirring. Overmixing develops gluten, which turns your rich chocolate cake into a chewy loaf. Fold in the chocolate chips at the very end—just until they’re distributed.
- Rotate the Pan: The oven’s hot spots are real, and your 8-square cake will bake unevenly if you don’t move it halfway through. After 20 minutes, swap the pan from top to bottom rack (or front to back if your oven runs hotter on one side). This guarantees evenly baked edges.
Serving suggestions for this dish
Warm Serving Style
Serve slices slightly warm from the fridge for the best texture contrast—the frosting stays cool and creamy while the cake retains its fudgy warmth. I like to dust each square with 1 teaspoon cocoa powder right before serving.
For an extra touch, add a few chocolate-covered espresso beans on top to echo the espresso powder in the frosting. 🌟
Ice Cream Pairings
A scoop of vanilla bean ice cream (like Häagen-Dazs or Ben & Jerry’s) melts beautifully against the cake’s richness. For contrast, try coffee-flavored ice cream—the bitterness balances the sweetness perfectly.
I also love a small scoop of salted caramel ice cream for a modern twist that ties into the cake’s chocolate depth.
Coffee Companion
This cake pairs wonderfully with a strong dark roast coffee (like a French press or espresso). The coffee’s acidity cuts through the frosting’s sweetness while enhancing the chocolate’s complexity. For a dessert coffee, try a cortado—the creamy milk complements the cake’s texture beautifully.
Garnish Ideas
Fresh raspberries add a bright pop of color and acidity that refreshes the palate. For a more decadent touch, add gold leaf flakes—they look stunning and add a subtle metallic flavor. I also like a sprinkle of crushed peppermint candy—the cool mint contrasts perfectly with the warm chocolate.
Make-Ahead Serving
This cake keeps beautifully for 3 days at room temperature when wrapped tightly in plastic. For make-ahead gatherings, assemble the cake up to 24 hours ahead and refrigerate.
Bring to room temperature before serving to let the frosting soften slightly. The flavors actually improve as the cake sits—the chocolate and vanilla meld together beautifully. ⏰
Portioning Tips
Use a sharp chef’s knife to cut clean squares—dip the knife in hot water between slices for perfectly straight edges. For individual servings, cut into 1-inch squares—they’re easy to handle and serve.
If you’re serving at a party, arrange squares on a marble slab** for an elegant presentation that keeps the cake cool.
Nutrition facts
Frequently asked questions
Why does this recipe use both dark chocolate chips AND cocoa powder?
This combination creates the perfect chocolate flavor balance! The dark chocolate chips provide rich, melty pockets of flavor, while the cocoa powder ensures even distribution of chocolate throughout the batter. Together, they prevent a one-dimensional taste and create that signature fudgy texture.
Can I substitute buttermilk for the whole milk in the batter?
Yes! Buttermilk adds extra moisture and tanginess that enhances the chocolate flavor. Use 0.5 cup buttermilk instead of the whole milk, but reduce the vanilla extract to 1 teaspoon since buttermilk has a slight tang. The cake will be even more tender and rich.
What’s the best way to tell when the cake is fully baked?
Look for three key signs: 1) The edges pull away from the pan, 2) A toothpick comes out with moist crumbs (not wet batter), and 3) The center still jiggles slightly. Overbaking makes the cake dry—remove it when it’s just set! Let it cool completely before frosting to prevent cracking.
How do I prevent the cake from cracking when frosting?
Cracking happens when frosting is applied to warm or unevenly cooled cake. Always let layers cool completely, then spread a thin “crumb coat” of frosting first. Chill the cake for 1 hour before adding the final layer. For extra insurance, use a spatula dipped in warm water to smooth the frosting—this creates a clean finish.
Can I make this cake in a different pan size?
For best results, stick to an 8×8-inch square pan—this recipe is designed for that specific shape. If you must use another pan, adjust baking time: 9×9-inch pan needs 25-30 minutes, while 9×13-inch requires 35-40 minutes. Reduce oven temperature by 25°F for larger pans to prevent overbaking.

- 8 Ounce Crab Cakes Recipe: Golden Crust With Luminescent Crab Hearts - October 12, 2026
- 1950’s Betty Crocker Banana Bread Recipe: Nostalgic Spice Swirls and Moist Crumb - October 12, 2026
- 2 Quart Homemade Ice Cream Recipe: Ultra Creamy Vanilla Bean Swirls - October 12, 2026