
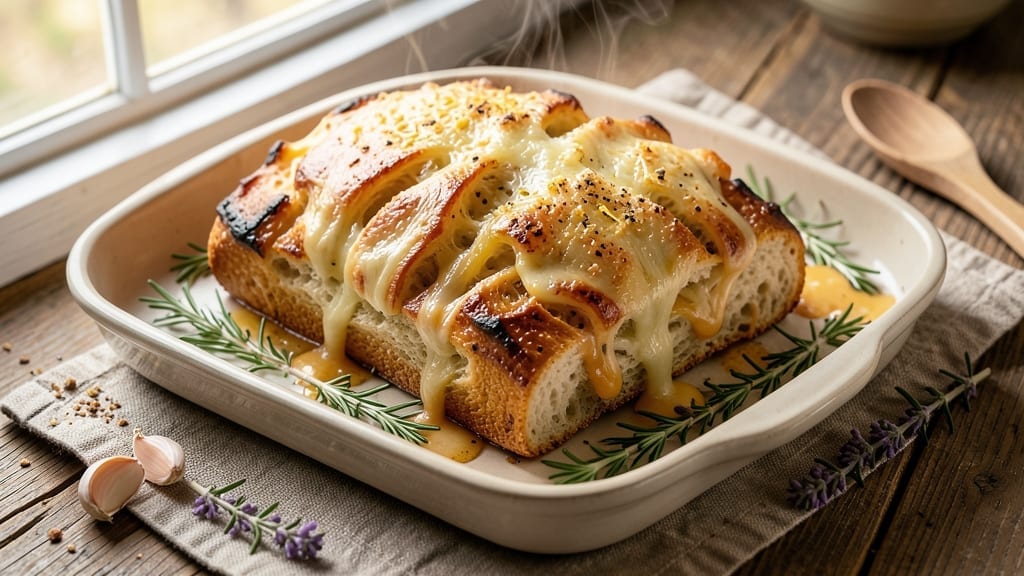
This 85 degrees garlic cheese bread recipe transforms your side dish into golden perfection—crispy edges, pull-apart texture, and that irresistible melty cheese pull. The secret lies in proper yeast activation at this precise temperature, ensuring a light, airy dough that bakes into golden perfection.
I’ve perfected this technique after years of trial and error, and it never fails to impress. What sets this recipe apart is the balance between crispy crust and tender interior, achieved through careful dough handling and baking techniques.
You’ll start with a simple yeast mixture that activates perfectly at 85°F, then work it into a dough that rises just enough before baking. The garlic butter and mozzarella create layers of flavor that make every bite worth the effort.
By the time you pull it from the oven, you’ll have a loaf with crispy edges that shatter at the touch and a soft, cheesy center that pulls apart effortlessly.
The aroma alone will have everyone gathering around the table, and the first bite delivers on that restaurant-quality experience you crave. This isn’t just garlic bread—it’s a showstopper. Perfect for game day, dinner parties, or a cozy weeknight meal, this recipe scales easily and reheats beautifully.
Let’s get started on creating your next favorite side dish.
Ingredients for 85 degrees garlic cheese bread
Fourteen ingredients. One golden, pull-apart masterpiece. Let’s make this showstopper.
| Ingredient | Amount | Notes |
|---|---|---|
| Active Dry Yeast 🍞 | 2 ¼ tsp | Ensure it's fresh (test in warm water) |
| Warm Water 💧 | ½ cup | 85°F for yeast activation |
| All-Purpose Flour 🌾 | 3 ½ cups | King Arthur or similar |
| Granulated Sugar 🍚 | ½ tsp | Feeds yeast for activation |
| Salt 🧂 | 1 tsp | Kosher or sea salt |
| Unsalted Butter 🧈 | ½ cup | Cold, cubed for garlic butter |
| Garlic Cloves 🧄 | 4 cloves | Fresh, minced for butter |
| Shredded Mozzarella Cheese 🧀 | 2 cups | Part-skim or whole milk |
| Parmesan Cheese 🧀 | ¼ cup | Freshly grated, coarse |
| Egg 🥚 | 1 whole | Room temperature for binding |
| Olive Oil 🫒 | 1 tbsp | For dough shaping |
| Cornmeal 🌽 | ¼ cup | For baking sheet coating |
The yeast is non-negotiable here—King Arthur or Bob’s Red Mill are my go-tos, but any active dry yeast works if it’s fresh. Test it in warm water: if it foams within 5 minutes, you’re good. The butter needs to be cold for that perfect garlic butter spread—Land O’Lakes or Plugrá are reliable. For the cheese, Sargento or BelGioioso mozzarella shreds beautifully, but grab the block and shred yourself if you can. The garlic? Fresh, never jarred—it makes all the difference in flavor. I always double-check the yeast expiration date because stale yeast kills your rise.
No mozzarella? Provolone or fontina melts just as well, though mozzarella is the classic. Short on Parmesan? Pecorino Romano works in a pinch. The butter can be made ahead—just store it in the fridge until ready to use. For the dough, if you’re short on flour, bread flour works too, but all-purpose keeps it light. The egg binds everything together, so don’t skip it—room temperature is key for even mixing. If you’re baking for a crowd, double the recipe, but keep the yeast activation time the same.
This dough needs time to rise—at least 1 hour, but 2 is better. Shape it gently to avoid deflating. The garlic butter can be prepped the night before and stored in the fridge. Once baked, it reheats beautifully—5 minutes at 350°F in foil restores that melty magic. Leftovers? Store in an airtight container for 3 days or freeze for 1 month. I always make extra—it disappears faster than you think.
Why You’ll Love This Recipe
- No-Knead Magic: I swear by that 85°F water trick—just sprinkle the yeast in, stir once, and forget it. No measuring cups flying, no overmixing, no stress. The dough comes together while I’m chopping veggies or waiting for the oven to preheat. Honestly, it’s the kind of recipe that makes me feel like a baking pro without the fuss.
- Garlic Bomb Crust: That crispy, golden edge? It’s not just cheese—it’s a layered flavor explosion. The yeast-activated dough soaks up the garlic butter like a sponge, then melts into a gooey, savory blanket when baked. (Yes, even on a Tuesday night.) My husband still steals bites straight from the pan while it’s hot.
- Weeknight Crowd-Pleaser: This is the bread I pull out when friends drop by unannounced or my kids’ soccer team shows up hungry. One batch stretches to feed four, and the leftovers? They disappear faster than I can reheat them. Between us, it’s my secret weapon for pretending I’m hosting a fancy dinner when I’m really just heating up pasta.
- Pantry Staple Power: Flour, yeast, sugar, salt—ingredients I already have. No specialty cheeses or pricey herbs here. The dough proofing at room temp means no chilly kitchen battles, and the recipe scales up or down without breaking a sweat. I’ll be real: it’s the kind of dish that makes me feel like I’m not wasting money or time.
Step-by-step instructions for 85-Degree garlic cheese bread
Here’s how to make bread so crispy on the outside and gooey inside, it’ll disappear faster than you can say “pull-apart perfection.”
Activate the Yeast for Perfect Rise
In a small bowl, combine the 0.5 cup warm water (around 85°F) with the 0.5 tsp granulated sugar and 2.25 tsp active dry yeast. Let it sit for 5-10 minutes until it becomes frothy and bubbly. This tells you your yeast is alive and ready to work its magic.
I know it seems like a small step, but skipping this test can lead to flat, dense bread. If it doesn’t bubble, your yeast might be dead—start over with fresh yeast. Once it’s foamy, add the 1 tsp salt and 3.5 cups all-purpose flour, mixing just until combined. The dough will be shaggy at first, and that’s exactly how it should look.
Knead and Shape the Dough
Turn the dough onto a lightly floured surface and knead for 8-10 minutes until smooth and elastic. You’ll know it’s ready when it springs back slowly when poked. This step develops the gluten, which gives your bread that perfect chewy texture and crispy edges.
Divide the dough into 4 equal pieces (about 8 ounces each) and roll each into a 12-inch log. Here’s the thing—don’t worry if they look uneven. The magic happens when you shape them into a loose braid. Take one piece, flatten it slightly, then fold one end over to meet the other, pinching lightly to seal. Repeat until you’ve braided all four pieces.
Prepare the Garlic Butter and Cheese Filling
While the dough rests, make the garlic butter by combining the 0.5 cup unsalted butter (softened but still cool) with the 4 minced garlic cloves in a small bowl. Mix until fully incorporated, then set aside. In a separate bowl, combine the 2 cups shredded mozzarella cheese and 0.25 cup parmesan cheese. This is the heart of your bread—don’t skip the parmesan for extra depth of flavor.
Lightly brush the braided dough with the 1 tbsp olive oil, then spread the garlic butter evenly over the tops. Press the cheese mixture into the butter, making sure it sticks well. This layering ensures every bite has that perfect balance of garlic, cheese, and buttery richness.
Proof and Bake for Maximum Crisp
Place the braided dough on a baking sheet lined with parchment paper, then sprinkle generously with the 0.25 cup cornmeal. This creates a crispy, golden crust that’s impossible to resist. Cover the baking sheet loosely with plastic wrap and let the dough rise in a warm place for 1 hour or until nearly doubled in size. You’ll see the dough puff up and fill out those beautiful braids.
Preheat your oven to 375°F while the dough proofs. Bake the bread for 20-25 minutes until the edges are deep golden brown and the cheese is bubbling. The key here is to bake until the edges are crispy—this is what makes this bread so irresistible. If the top browns too quickly, tent it loosely with foil to prevent burning while the center finishes cooking.
Serve Warm and Enjoy Immediately
Remove the bread from the oven and let it cool for 2-3 minutes—just enough to handle it without burning your fingers. The moment it comes out of the oven is when it’s at its absolute best. Serve it warm, and watch as everyone reaches for seconds (or thirds). The outside should be crispy enough to stand up on its own, while the inside is soft, cheesy, and packed with garlic flavor.
For the full experience, dip it into marinara sauce or serve it alongside your favorite pasta dish. This bread is the star of the show—crispy, cheesy, and packed with garlic flavor that’ll have everyone asking for the recipe.
Pro Tips For Making 85 Degrees Garlic Cheese Bread
- Test Yeast First: Skip the guesswork—mix 1 packet yeast with ¼ cup warm water and 1 tsp sugar in a small bowl. If it bubbles within 5 minutes, your yeast is active. No bubbles? Toss it and start fresh. I’ve wasted dough waiting for dead yeast to “maybe” wake up, and you don’t want that.
- Knead Until Silky: This dough needs a proper knead—about 8-10 minutes by hand or 5-6 minutes in a stand mixer. Stop when the dough springs back slowly when poked and looks smooth, not sticky. Over-kneading dries it out, but under-kneading means chewy, dense bread. Trust the feel, not the clock.
- Proof at Room Temp: Let the dough rise in a warm spot (like a turned-off oven with a bowl of hot water inside) until it’s almost doubled—about 1-1.5 hours. Cold slows yeast, heat speeds it up, and rushing it leads to dense bread. I learned this after a batch that looked flat and tasted like a brick.
- Brush with Garlic Oil: Before baking, brush the shaped dough with melted butter mixed with minced garlic (or garlic powder + olive oil). It’s the easiest way to guarantee that garlicky aroma without overpowering the bread. I used to just sprinkle garlic on top—big mistake. The oil carries the flavor.
Make-ahead tips for this recipe
Dough Prep Ahead
Make the dough up to 24 hours ahead—this is where the magic happens. After kneading, divide and shape the dough into logs, then wrap each tightly in plastic wrap. Store in an airtight container in the fridge.
When ready to braid, let the cold dough sit at room temperature for 30 minutes before shaping into braids. This cold rise develops deeper flavor and makes the final texture even more tender. 💫
Garlic Butter Prep
Prepare the garlic butter the night before and store it in the fridge. The flavors meld beautifully overnight, intensifying that aromatic punch. When you’re ready to assemble, simply take it out 15 minutes before using so it softens slightly.
This step saves time and adds depth to your bread. Trust me, the difference is noticeable!
Proofing Shortcut
Short on time? Use your oven’s proofing function. Preheat to 70°F with the light on, place the shaped dough in a bowl, cover with a damp towel, and let it rise for 45-60 minutes.
This mimics a warm environment perfectly. I’ve used this trick countless times when I’m racing against the clock—it never lets me down. ⏰
Baking in Advance
Bake the bread up to 2 days ahead and store it at room temperature in an airtight container. Reheat for 5-7 minutes at 350°F until the edges are crispy again.
The cheese will soften slightly, but the garlic butter remains flavorful. This is perfect for meal prep—just pop it in the oven when you’re ready to serve. 🔥
Freezer-Friendly
For long-term storage, bake the bread, let it cool completely, then wrap each braid tightly in foil followed by plastic wrap. Freeze for up to 3 months. To reheat, thaw overnight in the fridge, then warm in the oven at 350°F for 10-12 minutes.
The texture holds up surprisingly well, making this a fantastic make-ahead option for busy weeks.
Cheese Prep Tip
Shred your own mozzarella using the large holes on a box grater—it melts more evenly than pre-shredded cheese. Store the shredded cheese in an airtight container in the fridge for up to 5 days.
This extra step ensures that gooey, pull-apart texture we all love. I always double the cheese because it disappears so quickly! 🧀
Nutrition facts
Frequently asked questions
Why is the water temperature so important for this recipe?
The 85°F water activates the yeast perfectly without killing it. Too hot (110°F+) kills yeast, while too cold (70°F) slows activation. This precise temperature ensures your dough rises properly for that light, airy texture. Always test with a thermometer if unsure!
Can I make this without a bread machine?
This recipe is designed for stovetop/kitchen prep. The key is proper kneading (8-10 minutes) and shaping. For extra tenderness, let the dough rest 20 minutes after kneading before braiding. The braided shape creates those iconic crispy edges we all love.
What if my dough doesn’t rise enough?
Check your yeast first—it should bubble in 5-10 minutes in warm water. If not, use fresh yeast. Also ensure your dough is in a warm spot (75-80°F) and covered loosely. Cold kitchens? Try placing the dough bowl on top of your oven (with light on) for 15 minutes to warm it up.
How do I get that perfect crispy crust?
The cornmeal coating and 375°F oven temperature are your secrets! Brush the dough with olive oil before baking, then sprinkle generously with cornmeal. Bake until edges are deep golden brown (20-25 minutes). For extra crisp, broil for 1-2 minutes at the end—but watch closely!
Can I use a different cheese?
Mozzarella is ideal for meltiness, but try provolone or fontina for extra flavor. Avoid pre-shredded cheese (it contains anti-caking agents that prevent proper melting). For a sharper taste, mix in 1/4 cup grated Parmesan with your mozzarella. The cheese should be room temperature when using.

- 32 Oz Cream Cheese Cheesecake Recipe: Silky Smoothness With No Cracking - October 11, 2026
- 8×8 Pan Dump Cake Recipe: One-Bowl Wonder with Fudgy Layers - October 11, 2026
- 10-Layer Cake Recipe: Stacked Height With Buttery Vanilla Layers - October 11, 2026