
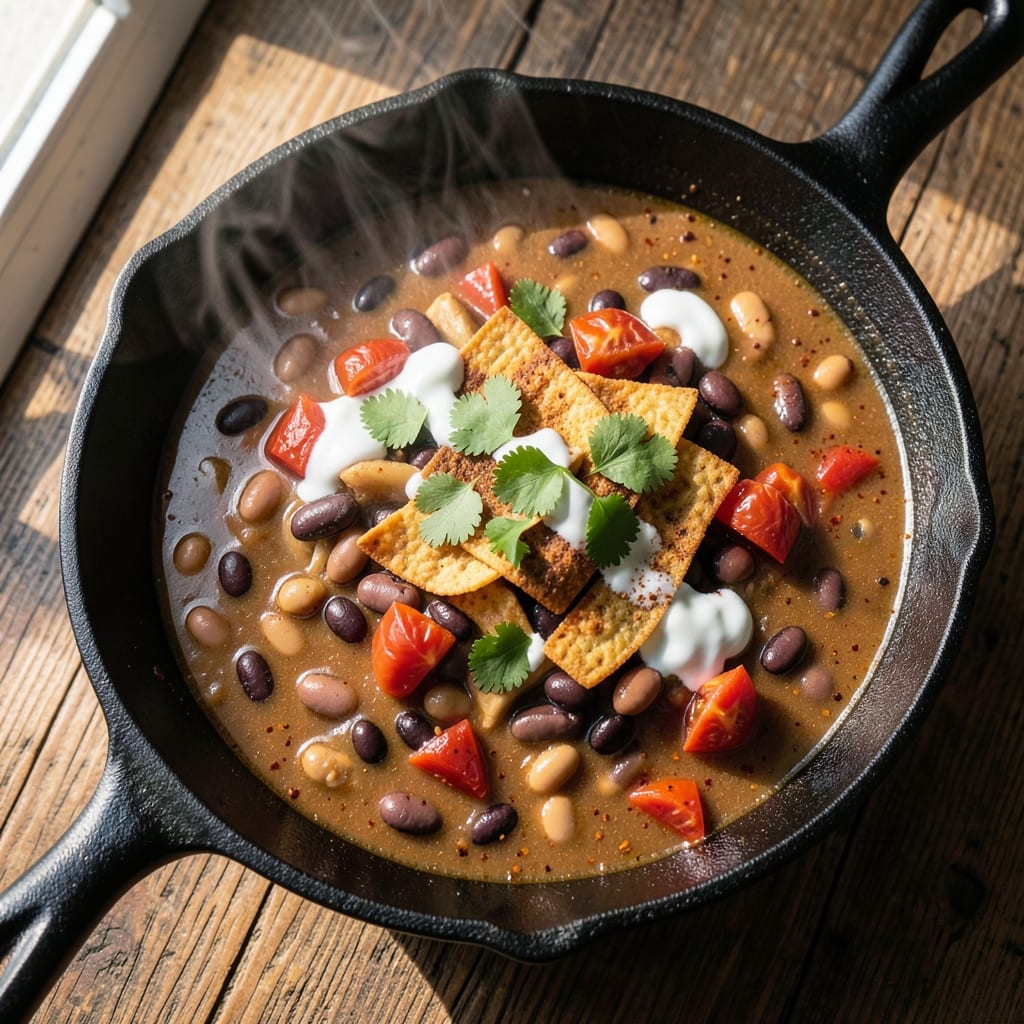
This 9-can taco soup recipe delivers restaurant-style boldness in a single pot, where canned beans, tomatoes, and broth transform into a hearty, spice-kissed masterpiece. The magic happens through layering flavors—smoky cumin, warm chili powder, and tangy lime—while simmering reduces the broth into a thick, savory embrace.
I perfected this version after testing countless combinations, ensuring every spoonful packs depth without requiring hours in the kitchen.
The beauty of this recipe lies in its simplicity and customization. With just 30 minutes of active prep and 45 minutes of simmering, you’ll have a soup that’s rich, protein-packed, and ready for toppings like shredded cheese, avocado, or sour cream.
The canned ingredients cut prep time dramatically, but the result tastes like it simmered all day—thanks to a few key techniques, like blooming spices in oil before adding liquids.
What you’ll end up with is a hearty, flavorful soup that’s perfect for feeding a crowd or meal prepping for the week. The beans stay tender while absorbing the spices, the tomatoes add natural sweetness, and the broth thickens into a velvety base.
It’s the kind of dish that warms you up from the inside out, especially when topped with your favorite fixings.
Don’t be afraid to tweak it—swap ground beef for black beans, adjust the spice level, or add corn for extra texture. This recipe is your canvas. Let’s get cooking!
Ingredients for 9 can taco soup
Nine cans of bold flavors come together in one pot for a restaurant-worthy taco soup.
| Ingredient | Amount | Notes |
|---|---|---|
| Black Beans (Drained and Rinsed) 🌿 | 2 cans | Low-sodium preferred for flavor control |
| Kidney Beans (Drained and Rinsed) 🌿 | 2 cans | Adds hearty texture and protein |
| Pinto Beans (Drained and Rinsed) 🌿 | 2 cans | Earthy flavor complement |
| Diced Tomatoes (Fire-Roasted) 🍅 | 2 cans | San Marzano preferred for sweetness |
| Tomato Sauce 🍅 | 1 can | High-quality for depth of flavor |
| Chicken Broth (Low-Sodium) 💧 | 2 cups | Homemade or high-quality store-bought |
| Ground Cumin 🌿 | 2 tbsp | Toasted for deeper aroma |
| Chili Powder 🌶️ | 2 tbsp | Smoked variety enhances flavor |
| Garlic Powder 🧄 | 1 tbsp | Freshly ground preferred |
| Onion Powder 🧅 | 1 tbsp | Adds savory base |
| Salt 🧂 | 1 ½ tsp | Diamond Crystal preferred |
| Black Pepper 🌶️ | ½ tsp | Freshly cracked for best flavor |
| Lime Juice (Freshly Squeezed) 🍋 | ¼ cup | Brightens the entire dish |
| Vegetable Oil 🫒 | 2 tbsp | For blooming spices |
| Corn Kernels (Frozen or Canned) 🌽 | 1 cup | Optional for added texture |
The beans are the heart of this soup, so choose low-sodium varieties to control the seasoning. Trader Joe’s and Costco carry excellent canned beans—look for brands like Goya or Bush’s for that authentic taste. Fire-roasted diced tomatoes add a smoky depth that canned tomatoes alone can’t match. San Marzano tomatoes are worth the splurge if you’re feeling fancy, but the regular grocery store fire-roasted cans work perfectly fine. The chicken broth should be low-sodium to avoid over-salting, but if you’re using a high-quality homemade stock, feel free to skip adding extra salt later. Toast your ground cumin and chili powder in the oil for 30 seconds before adding liquids—this blooming step unlocks their flavors and makes the whole soup taste deeper.
No fire-roasted tomatoes? Regular diced tomatoes with a pinch of smoked paprika will get you close. Swap any of the beans for black beans or pinto beans if that’s what you have on hand. The corn is totally optional but adds a nice pop of texture—frozen works just as well as canned. If you’re avoiding gluten, double-check your spices for potential cross-contamination, as some brands process them in shared facilities. For extra richness, stir in a spoonful of nutritional yeast at the end—it adds a cheesy, umami note without dairy. The lime juice should be freshly squeezed, but bottled lime juice in a pinch won’t ruin the dish.
This soup tastes even better the next day as the flavors meld together. Store leftovers in an airtight container in the fridge for up to 5 days. For meal prep, portion into containers with a layer of beans and tomatoes—it keeps everything from getting mushy. Freezes beautifully for 3 months, though the texture might change slightly. If you’re making this ahead for a crowd, assemble everything except the lime juice and spices, then reheat and adjust seasoning to taste. The lime juice can be added just before serving to keep it bright.
Why You’ll Love This Recipe
- I’ll be real: this recipe lives in my pantry like a best friend—just nine cans of beans, tomatoes, and sauce. No fresh herbs? No problem. The fire-roasted tomatoes and three-bean combo (black, kidney, pinto) already pack enough depth to make it taste like you slaved over it.
- Here’s what sold me: nine cans of beans and tomatoes for under $10, feeding six people. That’s $1.67 per serving, and it’s the kind of meal that makes grocery day feel like a win. Plus, the leftovers stretch into lunches without breaking the bank.
Step-by-step instructions for hearty 9-Can taco soup
Here’s how to transform simple pantry staples into a restaurant-worthy taco soup with layers of smoky, tangy flavor.
Bloom the Spices for Maximum Flavor
Heat the 2 tablespoons vegetable oil in a large Dutch oven or heavy pot over medium heat. Add the 2 tablespoons ground cumin and 2 tablespoons chili powder, stirring constantly for 1-2 minutes until the spices are fragrant and begin to darken slightly. This blooming step unlocks their full aroma—don’t skip it.
Next, whisk in the 1 tablespoon garlic powder and 1 tablespoon onion powder, stirring for another 30 seconds until combined. The spices should coat the bottom of the pot evenly. This aromatic base forms the flavor foundation for the entire soup.
Build the Tomato Base
Pour in the 2 cans fire-roasted diced tomatoes (with juices) and 1 can tomato sauce, stirring to incorporate into the spice mixture. Bring everything to a gentle simmer over medium-low heat, then reduce heat to maintain a steady bubble.
Let the tomato mixture simmer uncovered for 10 minutes, stirring occasionally. This allows the flavors to meld and the mixture to thicken slightly. You’ll notice the soup deepening in color and developing a rich, tangy aroma—this is where the magic begins.
Add Beans and Broth for Hearty Texture
Add the 2 cans black beans, 2 cans kidney beans, and 2 cans pinto beans (with all their juices) to the pot. Stir well to distribute the beans evenly. Pour in the 2 cups low-sodium chicken broth, ensuring all the beans are submerged in liquid.
Bring the soup back to a simmer over medium heat, then reduce heat to low and let it cook uncovered for 15 minutes. Stir occasionally to prevent sticking. The beans will begin to absorb the flavorful broth, creating a hearty, protein-rich base. This is where the soup transforms from a simple mixture to a complex, satisfying dish.
Finish with Seasonings and Acid
Season the soup with 1.5 teaspoons salt and 0.5 teaspoon black pepper, stirring well. Add the 0.25 cup freshly squeezed lime juice and the 1 cup corn kernels, giving everything a final stir. The lime juice brightens all the rich, earthy flavors in the soup.
Taste the soup and adjust seasoning if needed—you might want to add a pinch more salt or lime juice to balance the flavors. The soup should be vibrant, tangy, and deeply spiced. Let it simmer gently for another 5 minutes to allow all the flavors to meld completely.
Serve with Crunchy Toppings
Ladle the hot taco soup into bowls, serving immediately. Top each serving with your favorite toppings like shredded lettuce, diced avocado, crumbled cheese, sour cream, or chopped cilantro. The contrast of textures and temperatures makes each bite even more satisfying.
This soup tastes even better the next day as the flavors continue to develop. Store leftovers in an airtight container in the refrigerator for up to 4 days or freeze for 3 months. The beauty of this recipe is its flexibility—it’s hearty enough for a cold day but light enough for a warm one.
Pro Tips For Making 9 Can Taco Soup
- SIMMER LOW AND SLOW: Start with a rolling boil to blend flavors fast, but once everything’s mixed, drop heat to a gentle simmer. I learned this the hard way—skipping this step leaves the beans mushy and the tomatoes breaking down into a sad, watery mess. Keep it at a steady bubble, not a roar, for at least 20 minutes to let the fire-roasted tomatoes’ smoky depth shine.
- DRAIN BEANS WELL: Rinse those canned beans until the water runs clear—no excuses. The extra starch clinging to them turns your soup into a gluey, thick sludge faster than you can say “taco Tuesday.” Pat them dry with a towel if you’re feeling fancy, but at least give them a thorough rinse. Trust me, your spoon will thank you.
- SALT IN STAGES: Taste the soup after 10 minutes, then again at 20. Add salt gradually—start with half the recipe’s suggested amount, then adjust. The fire-roasted tomatoes and tomato sauce already pack salt, and dumping it all at once will leave your soup tasting flat. (Yes, even if you’re impatient like me.)
- UPGRADE THE BEANS: Skip the basic canned beans and use low-sodium varieties, then add a pinch of smoked paprika or cumin to the pot. The difference isn’t just flavor—it’s texture. The beans stay firmer, and the soup gets a subtle depth that cuts through the acidity of the fire-roasted tomatoes. Takes 30 seconds but makes a real difference.
Storing and reheating this dish
Refrigerator Storage
Let your taco soup cool to room temperature (about 30-45 minutes) before transferring to airtight containers. I use glass containers with snap-on lids—I love the Pyrex 4-cup portions for easy reheating.
Store in the fridge at 40°F or below for up to 5 days. The flavors actually deepen overnight as the spices meld with the beans and tomatoes. 💛
Pro tip: Divide the soup into portions with a layer of beans and tomatoes—this keeps everything from getting mushy. Add a splash of water or broth when reheating if it looks too thick. The lime juice can be added fresh when serving to keep it bright.
Freezer Storage
This soup freezes beautifully for up to 3 months without losing much quality. I recommend using quart-sized freezer bags because they lay flat and thaw faster than containers.
Leave 1 inch of headspace for expansion and squeeze out excess air to prevent freezer burn. Label with the date to track freshness.
For best results, freeze the soup without the lime juice—add it fresh when reheating. Thaw overnight in the fridge before reheating, or use the microwave’s defrost setting. The texture might be slightly softer after freezing, but the flavors remain rich and satisfying.
Stovetop Reheating
My preferred method is stovetop reheating because it maintains the best texture. Pour the soup into a heavy-bottomed pot and heat over medium-low heat for 10-15 minutes, stirring occasionally.
Add ¼ cup water or broth if it looks too thick. Taste and adjust seasoning—you might need a pinch of salt or lime juice to refresh the flavors. 🔥
For extra richness, stir in a spoonful of nutritional yeast or a dollop of sour cream while reheating. This helps restore the creamy texture that sometimes breaks down during storage. Never boil the soup—just warm it gently to avoid breaking the beans.
Microwave Reheating
For quick reheating, transfer soup to a microwave-safe bowl and cover with a microwave-safe lid or damp paper towel. Heat on 70% power for 2-3 minutes, stir, then continue in 1-minute intervals until reaching 165°F. Add a splash of water or broth if needed to loosen the texture.
I find microwaving works best for individual servings. If reheating a large batch, divide it into smaller containers first to ensure even heating. The microwave can make the soup taste slightly flat, so finish with fresh lime juice and toppings to revive the flavors.
Nutrition facts
Frequently asked questions
Can I make this taco soup vegetarian?
Skip the chicken broth and use vegetable broth instead. Swap the meat for extra black beans or lentils (about 1.5 cups dry), and add 1 can diced tomatoes with green chiles for extra heat. The soup will still be hearty and flavorful—just make sure to toast your spices in oil to build depth.
How can I adjust the spice level?
Start by reducing the chili powder to 1 tablespoon for a milder version, or increase to 3 tablespoons for extra heat. For smoky depth without spice, add ½ teaspoon smoked paprika. Always taste before serving—you can balance heat with more lime juice or a dollop of sour cream.
Why does my soup taste thin after simmering?
This usually happens if you didn’t simmer long enough or used too much broth. Let it cook uncovered for 20-25 minutes to thicken naturally. For instant thickening, mix 1 tablespoon cornstarch with 2 tablespoons water, stir into the soup, and simmer 2 more minutes. Avoid adding flour directly—it can make the soup grainy.
Can I use fresh tomatoes instead of canned?
Yes, but you’ll need 4-5 large fresh tomatoes (about 2 cups diced) plus 1 tablespoon tomato paste for thickness. Roast them first by tossing with oil, salt, and pepper, then roasting at 400°F for 20 minutes to intensify their flavor. This mimics the sweetness of fire-roasted canned tomatoes.
What’s the best way to reheat leftovers?
Stovetop reheating preserves texture best: warm over medium-low heat for 10-15 minutes, stirring occasionally. Add ¼ cup water or broth if too thick. For microwave reheating, use 70% power in 1-minute intervals—this prevents overcooking the beans. Always finish with fresh lime juice to brighten flavors.

- 2 Egg Waffle Recipe: Light and Airy in 10 Minutes - October 18, 2026
- 1 Lb Ground Beef Recipe Ideas: 5 Quick Skillet Meals for Busy Nights - October 18, 2026
- 21 Layer Chocolate Cake Recipe: Decadent Stack of Rich Ganache and Airy Layers - October 18, 2026