
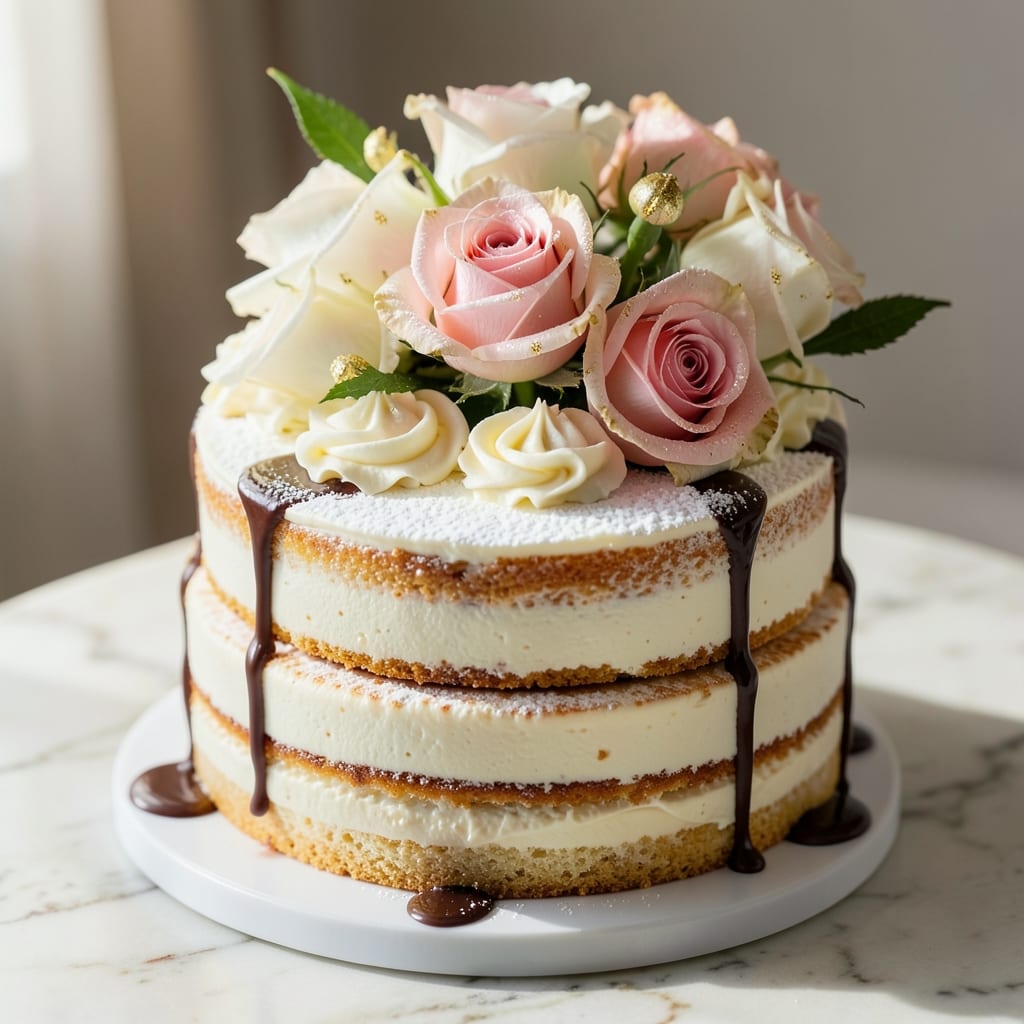
This 9-inch birthday cake recipe delivers the perfect balance of tender vanilla cake and creamy vanilla bean frosting swirls that make every slice feel like a celebration. 💛 The secret lies in a foolproof baking method that ensures a moist crumb and a light, fluffy texture—ideal for beginners or seasoned bakers looking for a showstopper.
With just a few simple ingredients and a little patience, you’ll create a cake that’s as impressive as it is delicious, ready to be adorned with your favorite decorations or left beautifully swirled for a rustic charm.
The recipe starts with a classic vanilla cake batter that’s enriched with butter for richness and vanilla extract for that signature flavor. Baking it in a 9-inch round pan ensures even cooking and a perfectly level top, making it easier to frost and decorate.
The frosting, made with vanilla bean paste for depth, is piped directly onto the warm cake, creating those signature swirls that make this cake stand out.
This method guarantees a cake that’s not only visually stunning but also moist and flavorful, with every bite offering a perfect harmony of cake and frosting.
What sets this cake apart is its versatility—whether you’re going for a classic look with a smooth frosting finish or a rustic vibe with hand-piped swirls, the technique is simple enough for anyone to master.
The cake bakes up with a golden-brown crust and a tender interior, while the frosting stays light and airy, never too sweet or heavy.
It’s the kind of cake that tastes as good as it looks, making it ideal for birthdays, anniversaries, or any special occasion where you want to impress without stressing over complicated techniques.
Once baked and cooled, the cake is ready for your creative touch—add sprinkles, fresh berries, or a simple dusting of powdered sugar to elevate it further. The recipe scales easily for larger crowds, and leftovers (if there are any!) keep well for a few days, making this the ultimate crowd-pleaser.
Let’s get baking—your next birthday celebration is about to get a whole lot sweeter.
Ingredients for 9 inch birthday cake
Twelve simple ingredients transform into a showstopping 9-inch vanilla bean cake with swirled frosting magic.
| Ingredient | Amount | Notes |
|---|---|---|
| All-Purpose Flour 🌾 | 2 ½ cups | Sifted for light texture |
| Granulated Sugar 🍚 | 2 cups | White or light brown |
| Unsalted Butter 🧈 | 1 cup | Cold, cubed for even mixing |
| Large Eggs 🥚 | 3 whole | Room temperature for best results |
| Pure Vanilla Extract 🌿 | 2 tsp | High-quality for authentic flavor |
| Baking Powder 🧂 | 2 tsp | Diamond Crystal preferred |
| Salt 🧂 | ½ tsp | Fine sea salt preferred |
| Whole Milk 🥛 | 1 cup | Room temperature |
| Vanilla Bean Paste 🌿 | 1 tbsp | For rich vanilla flavor |
| Powdered Sugar 🍚 | 4 cups | Sifted for smooth frosting |
| Heavy Whipping Cream 🥛 | 1 cup | Cold for best whipping |
| Vanilla Extract 🌿 | 1 tsp | Same as cake for consistency |
| Food Coloring (optional) 🎨 | 1 tsp | For swirl effect (gel preferred) |
The butter and vanilla bean paste make all the difference here. Use European-style butter if you can—it’s higher in fat and gives a richer crumb. The vanilla bean paste from Trader Joe’s or Williams Sonoma is worth the splurge for that authentic depth. For the frosting, powdered sugar from Bob’s Red Mill dissolves smoothly without clumping. If you’re going for those classic swirls, grab a piping bag with a star tip—they’re a game-changer for decorating. The cake batter needs to be at room temperature when mixed, so take the eggs and milk out 30 minutes before baking.
No vanilla bean paste? Double the vanilla extract—it won’t be identical, but you’ll still get that vanilla kick. Running short on butter? Coconut oil works in a pinch, though the flavor will be slightly different. For the frosting, if you can’t find heavy whipping cream, cool full-fat coconut cream overnight and use the thick part—it whips up beautifully. The food coloring can be skipped entirely if you prefer a classic white frosting, but if you’re going for swirls, gel coloring mixes better than liquid. Pro tip: Sift your powdered sugar before measuring to avoid lumps in your frosting—trust me on this one.
Cake keeps beautifully for 3 days at room temperature covered loosely, or 1 week in the fridge. The frosting? Store it separately and whip it back up before decorating—it’s lighter that way. For make-ahead magic, bake the cake 1 day ahead, wrap it tightly, and bring to room temp before frosting. Leftover frosting freezes for 3 months—just thaw it in the fridge overnight. And if you’re feeling fancy, dust the finished cake with edible gold leaf for that extra-special birthday wow factor.
Why You’ll Love This Recipe
- No-Fuss Mixing: I swear by the creamy butter-egg combo—just three minutes of gentle folding, no stand mixer required. The eggs add that luscious richness without overworking the batter, and honestly? My 9-inch pan fits perfectly in my smallest oven shelf, so no rearranging racks.
- Vanilla Butter Bliss: That vanilla extract isn’t just a splash—it’s the star. The butter and sugar melt into a tender crumb with a whisper of warmth, and the vanilla? It lingers like a hug. (Yes, even on a Tuesday night, this cake tastes like a celebration.)
- Double-Duty Cake: Bake it once, use it twice. The perfect 9-inch size means I can slice it for a birthday and pack leftovers for my kid’s school lunch—still moist the next day. Or halve the batter, bake two pans, and suddenly you’ve got a dessert for a crowd.
- Pantry Staple Magic: Four ingredients, zero specialty items. I’ve made this with store-brand butter and still gotten rave reviews—because the science (flour, sugar, eggs) is foolproof. Budget-friendly? Absolutely. Will it disappear faster than your willpower? Also yes.
Step-by-step instructions for vanilla bean birthday cake with swirl frosting
Here’s how to bake a showstopping 9-inch cake with professional swirl frosting—easy enough for beginners but impressive enough for any celebration.
🍳 Step 1: Cream Butter and Sugars for Light Texture
In a stand mixer fitted with the paddle attachment, beat the 1 cup unsalted butter (cold, cubed) and 2 cups granulated sugar on medium speed for 3-4 minutes. You’re looking for a pale, fluffy mixture that nearly doubles in volume—this incorporates air for that perfect cake rise.
Here’s the thing—don’t rush this step. I press down on the butter occasionally to break up any lumps, and I watch until the mixture is light and airy. If you see any graininess, that means the butter wasn’t softened enough. The cake batter will be smooth and thick, almost like pudding, when you’re done.
👨🍳 Step 2: Add Eggs and Vanilla for Rich Flavor
Add the 3 whole large eggs one at a time, mixing on low speed for 30 seconds after each addition. Then stir in the 2 teaspoons pure vanilla extract and 1 tablespoon vanilla bean paste. The mixture will look slightly curdled at first, but don’t worry—it’ll come together when you add the dry ingredients.
I like to use vanilla bean paste here because it gives that authentic vanilla flavor without being too strong. The paste adds little flecks of vanilla bean that make the cake taste extra special. Make sure your eggs are room temperature—this ensures they blend smoothly without creating pockets of uncooked egg in your cake.
🍳 Step 3: Mix Dry Ingredients and Combine
In a separate bowl, whisk together the 2.5 cups all-purpose flour, 2 teaspoons baking powder, and 0.5 teaspoon salt. Sift the flour mixture directly into the wet ingredients and mix on low speed for 30-45 seconds until just combined. You should still see some flour streaks—overmixing develops gluten and makes the cake tough.
Next, add the 1 cup whole milk and mix on low speed until the batter is smooth and well incorporated. The batter should be thick but pourable. If it’s too thick, add 1-2 tablespoons more milk. Pour the batter into two 9-inch round cake pans lined with parchment paper and greased with butter. Divide the batter evenly between the pans.
🔥 Step 4: Bake to Golden Perfection
Preheat your oven to 350°F and bake the cakes for 25-30 minutes, or until a toothpick inserted into the center comes out clean. I like to rotate the pans halfway through baking for even browning. The edges should be golden brown, and the tops should spring back when touched lightly.
Let the cakes cool in their pans for 10 minutes, then transfer them to a wire rack to cool completely. This cooling step is crucial—it prevents the frosting from melting when you add it later. If you try to frost warm cakes, the frosting will slide right off and you’ll end up with a mess.
🥘 Step 5: Make the Vanilla Bean Frosting Swirls
In a stand mixer fitted with the whisk attachment, beat the 1 cup heavy whipping cream (cold) on high speed until soft peaks form. Gradually add the 4 cups powdered sugar and 1 teaspoon vanilla extract, mixing on medium speed until smooth and fluffy. If using, add 1 teaspoon food coloring and mix until evenly distributed.
Here’s where the magic happens: spread a thin layer of frosting on the cooled cake layers. Then, pipe or spread a thicker layer of the remaining frosting on top of one layer. Using an offset spatula, create swirls by gently dragging the spatula through the frosting in circular motions. Place the second cake layer on top and press gently. Frost the entire cake, then create more swirls on the sides for that decorator’s touch.
Pro Tips For Making 9 Inch Birthday Cake
- Measure Butter Cold: Take the butter straight from the fridge—no softening needed. I used to let it sit out, and the cake always turned out dense. Cold butter creates pockets for air, so the batter rises higher and stays fluffy.
- Sift the Flour Twice: Don’t just eyeball it—sift the flour before mixing, then sift it again after adding the dry ingredients. This cuts out lumps and ensures even distribution, so your cake bakes up smooth and even.
- Room-Temp Eggs Matter: Let eggs sit in warm water for 10 minutes before cracking them—no need to fully soften, just warm. Cold eggs can curdle the batter, and the cake won’t rise as well. Trust me, this small step makes a real difference.
- Don’t Overbake for Crumbs: Pull the cake out when the center hits 205°F (a toothpick comes out with moist crumbs, not wet batter). Overbaking dries it out, and no one wants a cake that crumbles like sand. Better to underbake slightly and let it rest.
Make-ahead tips for this dish
Bake Ahead Timeline
Plan to bake your cake 1 day before the celebration—this gives flavors time to meld perfectly. After cooling completely, wrap each layer tightly in plastic wrap and store at room temperature.
The cake holds its moisture beautifully this way, and the frosting stays light when added fresh. I always bake mine in the morning so it’s ready for evening festivities. 📅
Frosting Prep Strategy
Make the frosting 2-3 hours before decorating to let it thicken slightly at room temperature. Store it in an airtight container in the fridge if prepping earlier—whip it back up for 2-3 minutes before using.
The cold frosting whips up fluffier when brought to room temp gradually. Pro tip: Use a piping bag with a star tip for those professional swirls—practice on parchment first! 🎨
Layer Assembly Hack
Assemble the cake 1 hour before serving to allow the frosting to set slightly. Place it in the fridge for 30 minutes if your kitchen is warm—this prevents melting. For extra stability, chill the cake layers separately for 15 minutes before stacking.
I like to use a leveling tool to trim any uneven tops before frosting for a perfect finish. 💡
Storage Solutions
Store unfrosted cake layers in an airtight container at room temperature for 2 days or in the fridge for 5 days. Frosted cakes keep for 3 days at room temperature or 1 week refrigerated.
For freezing, wrap each layer individually in plastic and store for up to 3 months. Thaw overnight in the fridge before frosting. 🧊
Make-Ahead Decorating
Prepare decorations like sprinkles or edible flowers 1 day ahead and store in small containers. Pre-mix any colored frosting variations in separate piping bags for quick assembly. I often make a simple glaze (powdered sugar + milk) ahead to drizzle over finished cakes.
Keep decorations in a cool, dry place away from strong odors. 🌸
Transport Tips
For events, transport the cake in its original pan or on a sturdy cake board wrapped in plastic wrap. Place it on a tray to catch any potential drips.
Keep it at room temperature until serving—cold cakes can make frosting too firm. If traveling, transport the cake layers separately and frost at your destination. 🚗
Nutrition facts
Frequently asked questions
Can I bake this cake in a different size pan?
Yes, but you’ll need to adjust the baking time. A 9-inch pan gives you perfect layers for a single-serving cake, but you can use a 10-inch pan for a slightly thicker slice or a 6-inch pan for a taller cake. For a 10-inch pan, reduce baking time by 5-7 minutes, and for a 6-inch pan, increase it by 5-7 minutes. Always check with a toothpick!
How do I prevent the cake from cracking?
Cracking usually happens when the cake cools too quickly. Let the cake cool in the pan for 10 minutes before removing it, then transfer to a wire rack. Avoid opening the oven door too soon—temperature fluctuations cause cracks. Also, don’t overmix the batter, and make sure your oven is fully preheated to 350°F before baking.
Can I make this cake gluten-free?
Replace the 2.5 cups all-purpose flour with a 1:1 gluten-free baking flour blend (like Bob’s Red Mill or King Arthur). You may need to add 1-2 teaspoons xanthan gum to help with structure. Also, use a gluten-free vanilla extract to avoid any cross-contamination. The texture will be slightly denser, but the flavor will still be delicious!
What’s the best way to store leftovers?
Store unfrosted cake layers in an airtight container at room temperature for up to 2 days or in the fridge for 5 days. For the frosting, keep it in an airtight container in the fridge and whip it back up for 2-3 minutes before using. If you have leftover frosting, it freezes well for up to 3 months—just thaw it overnight in the fridge.
How can I make the frosting swirls look more professional?
Use a piping bag with a star tip for clean, defined swirls. Pipe frosting onto the cake in a spiral pattern, then use an offset spatula to gently drag through the frosting to create the swirl effect. For extra-pro tips, chill the cake for 15 minutes before decorating—this helps the frosting hold its shape better. Practice on parchment paper first to get the hang of it!
