
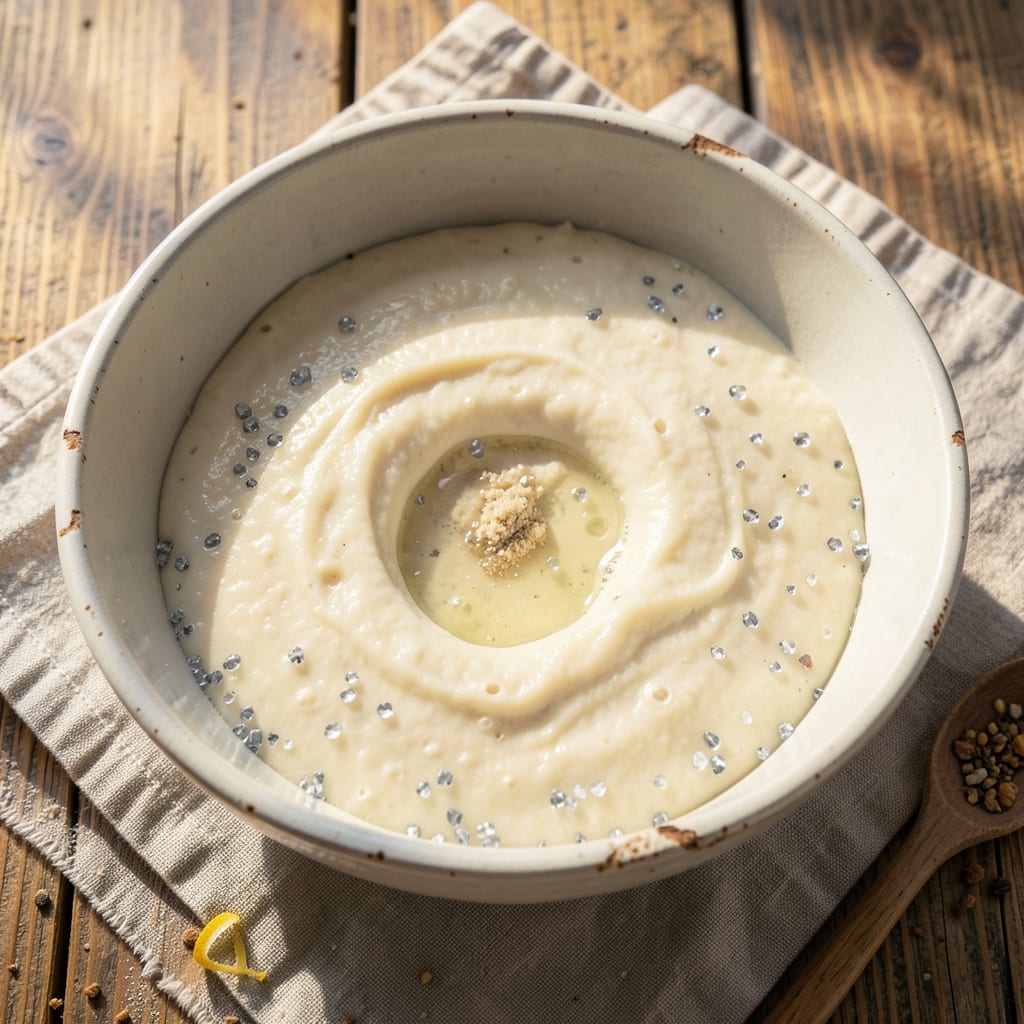
Mastering sourdough bread with just four ingredients—flour, water, salt, and a starter—is simpler than you think, and this foolproof method delivers a crusty loaf every time. The secret lies in understanding bulk fermentation and shaping techniques that create that signature open crumb and crispy crust, even for beginners.
What makes this recipe stand out is its minimalist approach without sacrificing authenticity or texture.
This method eliminates guesswork with clear steps for mixing, proofing, and baking in one bowl—no fancy equipment required. The dough develops naturally through fermentation, creating complex flavors and a satisfying oven spring.
I’ve tested this recipe countless times, and it consistently produces a loaf with a golden crust, tender interior, and that unmistakable sourdough aroma that fills your kitchen.
By the end, you’ll have a crusty, artisanal-quality loaf that rivals store-bought, all from a simple starter and pantry staples. The key is patience—letting the dough work its magic during fermentation—but the results are worth it.
Whether you’re a first-time baker or looking to simplify your routine, this recipe delivers restaurant-quality bread with minimal effort.
Troubleshooting common issues like sticky dough or uneven baking is included, so you’ll know exactly how to adjust for perfect results. Ready to bake? Here’s everything you need to get started.
Ingredients for 4 ingredient sourdough bread
Four simple ingredients transform into restaurant-quality sourdough with this foolproof method.
| Ingredient | Amount | Notes |
|---|---|---|
| Unbleached All-Purpose Flour 🌾 | 4 cups | King Arthur or Bob's Red Mill preferred |
| Active Sourdough Starter 🍞 | 1 cup | Fed and bubbly, 100% hydration |
| Filtered Water 💧 | 2 ½ cups | Room temperature, 75-80°F |
| Fine Sea Salt 🧂 | 1 tsp | Diamond Crystal preferred, no anti-caking agents |
The flour makes all the difference here—King Arthur or Bob’s Red Mill have that perfect protein structure for open crumb. I always grab the unbleached all-purpose version, not bread flour, because it’s more forgiving for beginners. Your sourdough starter should be fed and bubbly—if it’s sluggish, feed it 1:1:1 (flour:water:starter) by weight 2 hours before mixing. The water temperature matters too: too cold and fermentation slows, too warm and it gets sticky fast. Aim for 75-80°F—lukewarm like bathwater.
No Diamond Crystal salt? Maldon flakes or regular sea salt work fine, but measure carefully—too much salt can inhibit fermentation. Running out of starter? Use 1/2 cup store-bought dough from a bagel shop (the yeast helps kickstart fermentation) or make a quick starter with flour, water, and a pinch of sugar over 5-7 days. The flour can be swapped for whole wheat at 20% of total for a rustic flavor, but stick with all-purpose for that classic open crumb. And for heaven’s sake, don’t use self-rising flour—it has baking powder that’ll ruin your fermentation.
Store your starter in the fridge between uses—it’ll last weeks if fed weekly. The dough can be shaped and refrigerated overnight for a 12-hour cold proof, which develops more flavor. Baked loaves keep well at room temperature for 3 days wrapped in a towel, or freeze for 3 months for that fresh-baked taste anytime. I always bake two loaves—one for the week, one to freeze. And if your kitchen gets humid? Use a fan to circulate air during bulk fermentation—prevents that sticky dough nightmare.
Why You’ll Love This Recipe
- Pantry-Only Magic: I swear by this when I forget to buy yeast. Four ingredients—flour, starter, water, salt—and suddenly I’ve got bread that tastes like I spent hours kneading. No fancy tools, no waiting for the store, just pure convenience.
- Tangy Crust, Soft Core: That first bite? The crust crackles with a salty tang from the starter, while the inside stays pillowy. It’s not sweet, not overly sour—just right, like a hug from a bakery but made in my kitchen.
- Weeknight Wonder: Toss together the dough in the morning, let it rise while you’re at work, and bake it before dinner. It’s my go-to for sandwiches, toast, or even garlic butter dips—no last-minute store runs needed.
- Budget Bread That Lasts: A single batch feeds my family for days. Freeze slices for quick toast, use leftovers for croutons, or stash it in the fridge. Four ingredients stretch further than store-bought loaves, and the flavor? Worth every penny.
Step-by-step instructions for 4-Ingredient sourdough bread
Here’s how to transform four simple ingredients into a rustic, crusty loaf with perfect texture.
Mix the Dough in One Bowl
In a large mixing bowl, combine the 4 cups unbleached all-purpose flour and 1 tsp fine sea salt. Create a well in the center and add the 1 cup active sourdough starter. Pour in the 2.5 cups room-temperature filtered water all at once and let it sit for 5 minutes—this allows the flour to hydrate properly.
After the initial rest, use a wooden spoon to gently stir the dough until it begins to come together. The mixture will look shaggy at first, but don’t be tempted to overwork it. The dough should be sticky but manageable—this is normal for a high-hydration sourdough. If it’s too stiff, add 1 tablespoon water at a time until it reaches a soft, pliable consistency.
Knead and Develop Gluten
Wet your hands to prevent sticking and knead the dough for 5-7 minutes by hand. You’re not looking for smooth, elastic dough like commercial bread—this should remain slightly rough and sticky. The goal is to develop enough gluten to create structure while maintaining that signature sourdough chew.
Test for readiness by performing the “windowpane test”: stretch a small piece of dough between your fingers. If it forms a thin, translucent membrane without tearing, it’s ready. If it tears easily, knead for another 2 minutes. The dough should feel slightly tacky but cohesive enough to hold its shape when gently pressed.
Bulk Ferment for Optimal Rise
Lightly oil a large bowl, place the dough inside, and cover it with a damp kitchen towel or plastic wrap. Let it ferment at room temperature (70-75°F) for 8-12 hours, depending on your starter’s activity. You’ll know it’s ready when the dough has nearly doubled in size and shows 30-50% rise with visible bubbles.
I recommend doing this overnight—it gives the dough time to develop complex flavors. During fermentation, the dough may collapse slightly when disturbed, but this is normal. The key is to let it rise undisturbed until it reaches about 75% of its final volume before shaping. If your kitchen is cooler, extend fermentation to 14-16 hours for better flavor development.
Shape and Final Proof
Turn the dough onto a lightly floured surface and gently shape it into a round boule by pulling the edges toward the center and tucking them under. The dough should feel slightly resistant but yield when pressed—this indicates proper gluten development. Place the shaped loaf seam-side up in a banneton or bowl lined with a floured kitchen towel.
Cover loosely and let it proof at room temperature for 2-4 hours until it springs back slowly when poked with a finger. The dough should have risen about 25-30% from its shaped position. For best results, place the banneton in the refrigerator overnight (8-12 hours) for a cold proof, which enhances flavor and improves oven spring.
Bake for Crusty Perfection
Preheat your oven to 475°F with a Dutch oven inside for 45 minutes. Carefully transfer the dough (still in its proofing bowl) to the hot Dutch oven, then cover and bake for 30 minutes. Remove the lid and bake for another 10-15 minutes until the crust is deep golden brown and the internal temperature reaches 205-210°F.
Tap the bottom of the loaf—it should sound hollow when done. Let it cool on a wire rack for at least 1 hour before slicing. The crust will continue to crisp as it cools, and the interior will develop that signature sourdough crumb. Slice with a serrated knife for clean cuts that reveal the beautiful open crumb structure you’ve worked so hard to achieve.
Pro Tips For Making 4 Ingredient Sourdough Bread
- Weigh Your Starter: Skip the eyeballing—use a kitchen scale to measure your active sourdough starter by weight (usually 20-30% of your flour). I learned this the hard way when my loaves turned dense because I guessed the starter amount. A 50g starter for 250g flour keeps things consistent every time.
- Autolyse First: Mix just flour and water (no starter or salt) and let it rest for 30-60 minutes before adding the other ingredients. This step hydrates the flour properly and makes kneading easier—no, it won’t magically fix a weak starter, but it does improve texture. (Yes, even if you’re impatient like me.)
- Salt the Water: Dissolve the fine sea salt in the filtered water before mixing it with the flour—this ensures even distribution. I used to sprinkle it in later and ended up with uneven pockets of saltiness. A pinch (about 1% of flour weight) is enough; more won’t make it taste better.
- Steam the Oven: Place a metal bowl filled with boiling water on the oven rack before baking to create steam. This mimics a bakery oven and gives you that coveted crisp crust without needing a Dutch oven. Skip this, and you’ll get a sad, flat loaf—trust me, I’ve done it.
Dietary considerations for this 4 ingredient sourdough bread
Gluten-Free Adaptations
For a gluten-free version, replace the 4 cups all-purpose flour with a 1:1 gluten-free flour blend like King Arthur Measure for Measure. Add 1 tablespoon psyllium husk powder per cup of blend to improve structure and hydration. The dough will behave differently—expect it to be stickier and less elastic.
Increase the water by 2-3 tablespoons since gluten-free flours absorb moisture differently. Fermentation times may also vary, so monitor closely for 30-50% rise instead of relying on strict hours. 🌾
Dairy-Free Considerations
This recipe is naturally dairy-free, but if you’re using a gluten-free blend with xanthan gum or guar gum, check labels for dairy additives. For extra flavor, add 1 tablespoon olive oil during mixing to compensate for the absence of butter. The oil also helps create a softer crumb.
If you notice the crust is too tough after baking, brush it with melted coconut oil while still warm for a tender finish. The bread will still have that classic sourdough tang without any dairy components.
Low-Gluten Options
For a lower-gluten version, reduce the all-purpose flour to 3 cups and add 1 cup white whole wheat flour. This keeps the open crumb while adding subtle sweetness and nuttiness. The dough will be slightly less sticky but still require patience during fermentation.
If using a 50/50 blend of all-purpose and whole wheat, expect a 10-15% longer fermentation time due to the whole grain‘s slower fermentation rate. The result is a heartier loaf with more complex flavor notes.
Allergen-Friendly Swaps
To accommodate egg allergies, this recipe naturally requires no modifications since it doesn’t contain eggs. For nut allergies, ensure your flour blend is nut-free (some gluten-free mixes contain almond or oat flour).
If you’re avoiding sea salt, substitute with kosher salt (use 1.5 tsp instead of 1 tsp since it’s less concentrated). Always check your sourdough starter ingredients—some commercial starters contain additives like whey or milk powder. A homemade starter guarantees complete allergen control. ✨
Keto-Friendly Modifications
While traditional sourdough isn’t keto-friendly, you can create a low-carb version by replacing 3 cups of flour with 3 cups almond flour and adding 2 tablespoons ground psyllium husk. The dough will be extremely sticky, so work quickly and use a wet bench scraper to handle it.
Ferment for 6-8 hours max since almond flour ferments faster. Bake in the Dutch oven as directed, but expect a denser, more cake-like texture. For a crispier crust, brush with melted butter or ghee after baking.
Nutrition facts
Frequently asked questions
Can I make this 4-ingredient sourdough without a Dutch oven?
Yes! If you don’t have a Dutch oven, bake the loaf on a preheated baking sheet lined with parchment paper. For extra crustiness, place a metal tray on the lower oven rack 10 minutes before baking and pour 1 cup hot water into it to create steam. This mimics the steam from a Dutch oven and helps develop that signature crust.
Why does my dough feel too sticky to handle?
High-hydration dough is normal for sourdough! Wet your hands and use a wet bench scraper to prevent sticking. If it’s unbearably sticky, add 1 tablespoon flour at a time until it becomes manageable—but don’t overdo it, or the texture will suffer. The dough should feel tacky but yield when pressed, not gluey.
How do I know when my starter is ready for baking?
Your starter should be bubbly, doubled in size, and have a slightly domed top when active. Test by dropping a spoonful in water—if it floats, it’s ready! For best results, use a starter that’s peaked (just after doubling), not collapsed. If it’s sluggish, feed it 1:1:1 (flour:water:starter) 2 hours before mixing.
Can I bake this loaf without a banneton?
Use a clean, floured bowl or even a small colander lined with a floured towel for shaping. Place the dough seam-side up in the bowl, cover, and proof as directed. For a rustic look, shape it into a freeform loaf on parchment paper instead of a boule—just skip the banneton entirely.
Why did my bread turn out dense instead of crusty?
Dense bread usually means the dough wasn’t fermented long enough or the oven wasn’t hot enough. Ensure your starter is active and bulk fermentation reaches 75% rise. Preheat the oven to 475°F with the Dutch oven inside for 45 minutes—this creates the high heat needed for oven spring. If the crust is still soft, bake uncovered for 5-10 extra minutes.
