
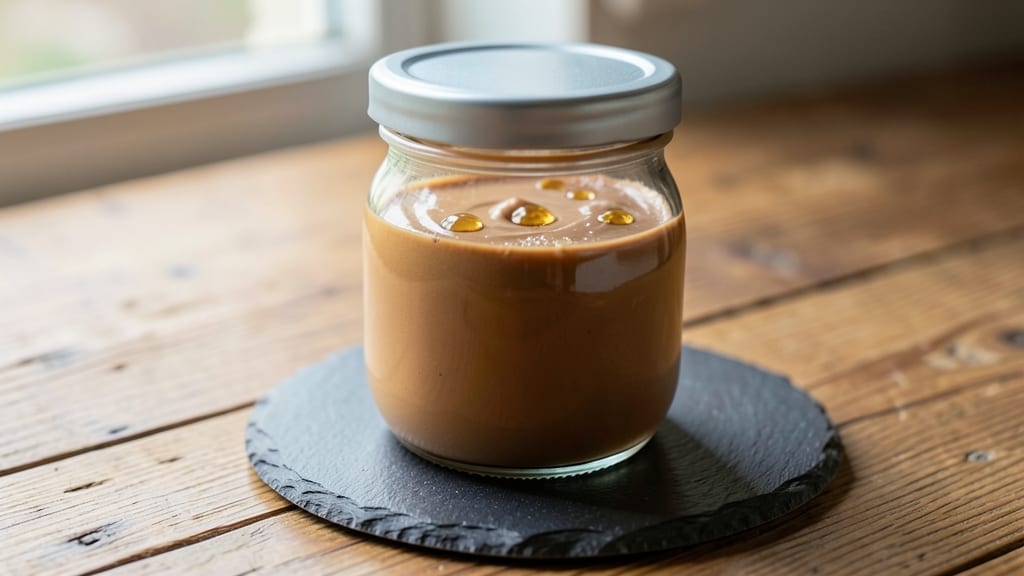
This 3 ingredient coffee creamer recipe transforms your morning brew into a velvety, restaurant-quality experience without any artificial flavors or complicated steps. The secret lies in blending simple pantry staples into a smooth, dissolvable powder that creates a rich, creamy swirl with every sip.
I developed this version after realizing most store-bought creamers contain additives I couldn’t pronounce—this one uses only clean ingredients that actually taste good.
What makes this recipe work is the perfect balance of powdered milk for creaminess, sugar for sweetness, and vanilla extract for that signature coffee shop aroma. The process takes less than 5 minutes and requires no special equipment—just a bowl and whisk.
What you’ll end up with is a creamer that dissolves instantly in hot coffee, creating that perfect swirl effect without clumping or leaving a chalky aftertaste.
This creamer delivers restaurant-quality results with just three ingredients: powdered milk, granulated sugar, and pure vanilla extract. The beauty of this recipe is its versatility—it works in black coffee, lattes, or even cold brew.
Plus, you can customize the sweetness level to your preference by adjusting the sugar ratio. The vanilla flavor is subtle but noticeable, giving you that comforting coffee shop taste without artificial flavors.
Store the finished creamer in an airtight container for up to 2 weeks, or freeze it for longer shelf life. For variations, try adding a pinch of cinnamon or a drop of almond extract for different flavor profiles.
This recipe is perfect for coffee lovers who want to avoid artificial ingredients while still enjoying that creamy, indulgent coffee experience every morning.
Ingredients for 3 ingredient coffee creamer
Three clean ingredients transform your coffee into a velvety, coffee-shop-worthy experience every morning.
| Ingredient | Amount | Notes |
|---|---|---|
| Powdered Milk 🥛 | 1 cup | Non-fat preferred for smooth texture |
| Granulated Sugar 🍚 | ½ cup | Fine grain for even dissolving |
| Pure Vanilla Extract 🌿 | 1 tbsp | High-quality, alcohol-based preferred |
The powdered milk is the foundation—Carnation or store-brand non-fat work perfectly, but avoid flavored versions. Look for a can with a recent date; powdered milk loses potency over time. The sugar should be fine granulated (like Domino or C&H), not powdered sugar or raw cane—it dissolves more smoothly. Vanilla extract? Reese’s or McCormick are reliable, but if you’re splurging, go for a bottled Madagascar vanilla for deeper flavor. Pro tip: shake the vanilla extract before measuring to ensure even distribution of the vanilla particles.
No powdered milk? Substitute with 1 cup of cornstarch for a neutral base, though the texture will be slightly different. Running low on vanilla? Almond extract at half the amount gives a similar warmth, or a pinch of cinnamon adds cozy depth. The sugar can be adjusted to taste—start with the full ½ cup for a balanced sweetness, but reduce to ⅓ cup if you prefer a lighter touch. For a cinnamon twist, add ½ teaspoon of ground cinnamon to the mix. If you’re making this for a crowd, double the recipe—just be sure to store it properly to maintain freshness.
This creamer keeps beautifully in an airtight container for up to 2 weeks at room temperature, or freeze it for up to 3 months to preserve freshness. For single servings, portion into small jars or ice cube trays—perfect for travel mugs. Once opened, use within 2 weeks for best flavor. The vanilla flavor intensifies slightly over time, so if you’re not using it all at once, store it in the fridge for an extra week. For a restaurant-quality swirl, stir vigorously when adding to hot coffee—this creates those signature creamy layers.
Why You’ll Love This Recipe
- Pantry Magic: I swear by this—no shopping lists, no last-minute ingredient hunts. Just pull powdered milk, sugar, and vanilla from your cupboard, toss them in a jar, and shake. That’s it. Zero measuring cups, zero fuss.
- Velvet Smoothness: The vanilla extract cuts through the sweetness just right, giving it that cozy, bakery-style richness without tasting artificial. Honestly, it’s the kind of creamer that makes me pause mid-sip and think, “Wait, is this store-bought?”
- Morning & Night Star: Use it in your AM coffee, but also in iced lattes, chai, or even sprinkled over vanilla ice cream. (Yes, even on a Tuesday night.) The sugar dissolves perfectly, so it works in hot and cold drinks—no clumping, no mess.
- Budget-Friendly Luxury: A single batch costs pennies but feels like a gourmet treat. Plus, it keeps for months in the pantry, so you’re never stuck buying overpriced single-serve packets again. My wallet and my taste buds thank me.
Step-by-step instructions for velvety vanilla coffee creamer
This ultra-simple method transforms basic pantry staples into luscious, swirl-worthy creamer in under five minutes.
Whisk Powdered Milk and Sugar Until Fully Dissolved
In a medium saucepan, combine the 1 cup powdered milk and 0.5 cup granulated sugar. Using a whisk, stir vigorously for 2-3 minutes until completely smooth with no visible lumps. The mixture should transform from grainy to silky—this is your foundation for creamy perfection.
I like to use a wire whisk for this step because it creates tiny air bubbles that will later give your creamer that signature velvety texture. If you notice any stubborn sugar crystals clinging to the sides, use a rubber spatula to scrape them down and incorporate them fully. This ensures even dissolving and prevents graininess in your final product.
Add Vanilla and Heat on Low
Remove the saucepan from heat and stir in the 1 tablespoon pure vanilla extract. The alcohol in high-quality vanilla will help disperse the flavor evenly. Return the pan to low heat and stir constantly for 3-4 minutes until the mixture reaches 160°F. This gentle heating helps activate the vanilla’s aromatic compounds for maximum flavor impact.
Here’s the thing—you want to heat it just enough to warm through, but not so much that it starts to scorch. The moment you see the slightest golden tint at the edges, remove it from heat immediately. This low-temperature approach preserves the delicate vanilla notes while ensuring the sugar fully integrates into the milk base.
Cool and Thicken to Pouring Consistency
Transfer the warm mixture to a heatproof bowl and let it cool to room temperature (about 20-25 minutes). As it cools, it will naturally thicken to a luxurious pouring consistency—similar to heavy cream but with none of the dairy fat. Stir occasionally during cooling to prevent skin formation on the surface.
This cooling phase is where the magic happens. The powdered milk hydrates completely, and the sugar stabilizes the mixture, creating that perfect balance between smoothness and body. If you’re impatient, you can accelerate cooling by placing the bowl in an ice bath, but stir frequently to prevent condensation from diluting your creamer.
Store and Use Your Homemade Creamer
Once cooled, transfer your creamer to a clean, airtight container. It will keep in the refrigerator for up to 2 weeks, though I find it’s best used within the first week when the flavors are freshest. The vanilla aroma will intensify as it rests, making your morning coffee even more indulgent.
To use, simply shake the container gently before each pour to redistribute any settled ingredients. This creamer works beautifully in both hot and iced coffee, and you can adjust the sweetness to taste by adding more sugar if desired. The texture should be smooth enough to pour directly from the container, with just enough body to create those beautiful swirls in your cup.
Optional Vanilla Swirl Enhancement
For that signature swirled appearance, pour your cooled creamer into a clean glass jar with a tight-fitting lid. Add an extra ½ teaspoon vanilla extract (if you have it) and swirl gently by tilting the jar back and forth. Seal tightly and refrigerate overnight—this allows the flavors to meld completely and creates those gorgeous marbled patterns when you pour.
When ready to use, give the jar a quick shake to break up any settled layers. The swirled version adds a visual wow factor to your coffee presentation while maintaining all the rich vanilla flavor. This step is purely optional but transforms your creamer from good to showstopping—perfect for when you want to impress coffee-loving guests.
Pro Tips For Making 3 Ingredient Coffee Creamer
- Sift the Powdered Milk: I learned this the hard way—dumping powdered milk directly into the mix clumps it like a stubborn snowball. Use a fine-mesh sieve or just shake it through your fingers over the bowl. This keeps the texture silky instead of grainy, and your creamer won’t settle like a sad sediment at the bottom.
- Weigh the Sugar: Spooning sugar is the fastest way to ruin the balance. Use a kitchen scale for precise measurements—1:1 powdered milk to sugar ratio is non-negotiable if you want creamer that’s sweet but not cloying. (Yes, even if you’re impatient like me.)
- Whip Before Mixing: Combine the dry ingredients first, then whisk them vigorously for 30 seconds. This aerates the powdered milk and sugar, making the final creamer lighter and easier to dissolve in coffee. Skipping this step means you’ll end up with a gritty paste that fights for every drop of liquid.
- Add Vanilla Last: Sounds weird, but it works: Mix the powdered milk and sugar first, then fold in the vanilla extract after everything else is combined. This prevents the alcohol in the vanilla from absorbing into the dry mix too early, which dulls the flavor. A few drops of warm water can help disperse it evenly if needed.
Make-ahead tips for this 3 ingredient coffee creamer
Batch Prep Strategy
Make a large batch of this creamer on Sunday mornings and store it in 4-ounce glass jars with screw tops. This gives you pre-portioned servings perfect for travel mugs—just grab one jar and go! I like to label each jar with the date so I can track freshness.
The creamer keeps beautifully in the fridge for 2 weeks, though I find it’s best used within the first week when the vanilla flavor is brightest. 💛
Freezer-Friendly Portions
For longer storage, freeze individual portions in ice cube trays. Once frozen, pop out the cubes and transfer them to a ziplock freezer bag with excess air removed. These single-serving cubes thaw in 10 minutes in warm coffee or 30 seconds in the microwave.
I keep a stash of these in my freezer for those busy mornings when I need instant creamer without any prep. Just add one cube to your coffee and stir!
Travel Mug Prep
Prep your creamer in a thermos-style travel mug (like the Stanley Classic) for on-the-go use. Fill it halfway with creamer, then add your favorite coffee beans or grounds. When you’re ready to brew, pour hot water into the mug and let it steep for 5 minutes.
The creamer will dissolve perfectly, giving you barista-quality coffee anywhere. This method works especially well for cold brew concentrate too—just mix equal parts concentrate and creamer for a sweet, creamy iced coffee. ✨
Weekly Flavor Rotation
Dedicate each day of the week to a different flavor variation while using the same base recipe. Store each flavor in separate small mason jars labeled with the day.
For example, Monday could be classic vanilla, Tuesday cinnamon, Wednesday caramel (add 1 tbsp caramel syrup), Thursday hazelnut (add ½ tsp hazelnut extract), and Friday peppermint (add ¼ tsp peppermint extract). This keeps your coffee routine exciting while saving you time from making fresh batches daily.
Gift-Worthy Packaging
Package your homemade creamer in mini mason jars (like Ball 4-ounce jars) with custom labels for thoughtful gifts. Add a handwritten note about the recipe and include a small spoon. I like to tie a ribbon around the jar and attach a recipe card with the instructions.
These make perfect hostess gifts or holiday presents for coffee lovers. Store the jars in the fridge until ready to give—recipients will love the personal touch and high-quality ingredients. 💫
Coffee Party Prep
For coffee parties, make a large batch and divide it into small ramekins or espresso cups with lids. Set out a variety of flavors (vanilla, caramel, cinnamon) with small spoons for tasting. Include a sign explaining how to use the creamer: “Add 1-2 tablespoons to your coffee and stir well.”
This presentation looks professional and lets guests customize their coffee experience. The creamer keeps well at room temperature for 3-4 hours during the party, so no refrigeration is needed for short gatherings.
Nutrition facts
Frequently asked questions
Can I make this creamer without powdered milk?
Yes! For a dairy-free version, substitute the powdered milk with 1 cup cornstarch—it creates a neutral base that still dissolves smoothly. For extra richness, add 1 tablespoon coconut cream powder (if available) to mimic the creamy texture. The flavor will be slightly different but still delicious in coffee.
Why does my creamer get grainy when added to coffee?
Graininess usually means the powdered milk and sugar didn’t fully dissolve during prep. To fix it, whisk the cooled creamer again before storing, or strain it through a fine-mesh sieve to remove any undissolved particles. For future batches, heat the mixture to 165°F (not boiling) to ensure complete integration.
How much creamer should I use per cup of coffee?
Start with 1 tablespoon per 8-ounce cup of coffee and adjust to taste. For stronger flavor, use 2 tablespoons. This creamer dissolves easily, so you won’t get that clumpy texture common with store-bought versions. If your coffee tastes too sweet, reduce the sugar in future batches by 1-2 tablespoons.
Can I make this creamer without vanilla extract?
Replace the vanilla with ½ teaspoon almond extract for a nutty twist, or add ¼ teaspoon cinnamon for warmth. For a caramel note, stir in 1 tablespoon caramel syrup during the heating step. The key is balancing flavors—start with half the amount and adjust to your preference.
Will this creamer work in cold brew or iced coffee?
Yes, it works perfectly! For cold brew, mix 1-2 tablespoons of creamer with ½ cup cold brew concentrate and top with ice. The texture remains smooth, and the flavors blend beautifully. For iced coffee, stir the creamer directly into your chilled drink—no clumping occurs. The vanilla flavor shines especially well in cold beverages!

- 6 Oz Chocolate Chip Cookie Recipe: Perfectly Balanced Crispy Edges and Chewy Hearts - September 25, 2026
- 6-Inch Coffee Cake Recipe: Vanilla Bean Swirls and Buttery Streusel Topping - September 25, 2026
- 1 Hour Soup Recipe: Velvety Richness Without the Wait - September 25, 2026