
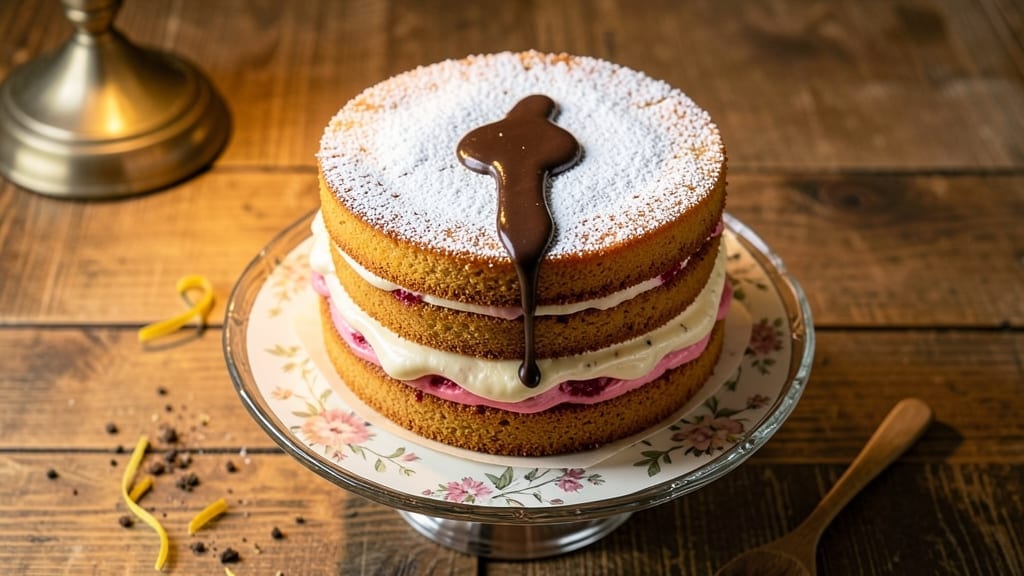
This 90s cake recipe brings back the magic of childhood—moist, frosting-soaked layers that stay fresh for days, not the dry, crumbly cakes that ruin after one slice. The secret lies in a precise ratio of cake mix to oil, plus a foolproof method for soaking layers without turning them soggy.
I perfected this after years of baking for birthday parties, where the cake had to hold up to a dozen kids and still taste amazing the next day.
The technique starts with a tender cake base that bakes just slightly underdone, then gets brushed with simple syrup while still warm. This creates that signature 90s texture—rich, moist layers that practically ooze with frosting when sliced.
For presentation, I recommend the classic buttercream swirl or a sprinkle of rainbow sprinkles, because nothing says 90s nostalgia like a cake that looks as fun as it tastes.
What makes this recipe stand out is its versatility—use it for birthdays, potlucks, or even a retro-themed dessert night. The frosting stays stable even in summer heat, and the cake keeps its moisture for up to five days when stored properly.
No more sad, dry slices at the end of the party.
Ready to bring back the golden era of cake? This recipe delivers restaurant-quality results with minimal effort—just follow the steps, and you’ll have a cake that looks like it came from a bakery, not your kitchen. Let’s get baking!
Ingredients for 90s cake
Twelve ingredients for a nostalgic cake that stays moist for days—no dry crumbs here.
| Ingredient | Amount | Notes |
|---|---|---|
| All-Purpose Flour 🌾 | 3 cups | Sifted for light texture |
| Granulated Sugar 🍚 | 2 cups | White or light brown |
| Vegetable Oil 🫒 | 1 cup | Light, not heavy |
| Unsalted Butter 🧈 | 1 cup | Softened, not melted |
| Large Eggs 🥚 | 3 whole | Room temperature |
| Vanilla Extract 🌿 | 2 tsp | Pure, not imitation |
| Baking Powder 🍃 | 2 tsp | Freshly opened |
| Salt 🧂 | ½ tsp | Fine sea salt |
| Milk 🥛 | 1 cup | Whole milk preferred |
| Simple Syrup 🍯 | 1 cup | 1:1 sugar to water |
| Buttercream Frosting 🧁 | 4 cups | Classic buttercream recipe |
| Rainbow Sprinkles 🌈 | ½ cup | Optional, for decoration |
The flour and sugar are the foundation, so grab the King Arthur or Gold Medal brands—they bake more evenly. For the oil, vegetable or canola works best (no coconut oil, it’ll alter the texture). Butter should be room temperature—press a finger into it, and it should leave a slight indent. Eggs are non-negotiable for moisture, but if you’re worried about salmonella, use pasteurized eggs. The vanilla extract? Pure Madagascar bourbon if you can find it, but imitation works in a pinch. Baking powder needs to be fresh—if it’s more than six months old, toss it and buy a new can.
No vegetable oil? Melted butter or coconut oil will work, but the cake won’t be quite as tender. Out of vanilla? Almond extract at half the amount adds depth, or skip it entirely if you’re short on time. For the simple syrup, you can make it ahead (just boil equal parts sugar and water, then cool), or use store-bought if you’re in a hurry. The buttercream can be homemade (butter, powdered sugar, milk, vanilla) or store-bought—just make sure it’s stabilized at room temperature before assembling. Sprinkles are optional, but they’re what makes this cake feel like a true 90s throwback.
Store the cake layers wrapped in plastic wrap at room temperature for up to 2 days, or in the fridge for 5 days. The frosting keeps for 3 days in the fridge, but it’s best used fresh. To assemble, brush the cooled layers with simple syrup while still warm, then add frosting. This cake tastes even better the next day—the frosting soaks in just enough to keep it ultra-moist. For parties, assemble it a day ahead and refrigerate until serving.
Why You’ll Love This Recipe
- No-Fuss Mixing: I swear by this recipe—just toss everything in a bowl. No sifter, no fancy techniques, just flour, sugar, and oil coming together like old friends. The butter and eggs blend in so smoothly, you’ll forget you’re baking anything complicated.
- Pure 90s Nostalgia: That rich, slightly dense texture with just the right crumb? It’s the kind of cake that tastes like childhood birthday parties. The vegetable oil keeps it moist without being greasy, while the butter adds that buttery depth we all crave.
- Birthday to Picnic: Serve it warm with vanilla ice cream for a crowd, or slice it cold for a potluck—it handles everything. Between us, my sister’s wedding dessert was this cake (yes, even with the fondant flowers), and no one questioned it.
- Budget Magic: A single box of flour and a bag of sugar stretch for multiple cakes. Honestly, I’ve made this for six people for under $10, and the leftovers? They last a week if you’re smart about it. (I’m not always smart.)
Step-by-step instructions for 90s cake recipe
Here’s how to create nostalgic layers that stay moist for days—no dry crumbs in sight.
Prepare the Cake Batter for Perfect Texture
Preheat your oven to 350°F and grease three 8-inch round cake pans, then line the bottoms with parchment paper. In a large mixing bowl, combine the 3 cups All-Purpose Flour, 2 cups Granulated Sugar, 2 tsp Baking Powder, and 0.5 tsp Salt. Sift the mixture together to eliminate any lumps—this ensures a light, airy crumb.
In a separate bowl, whisk together the 1 cup Vegetable Oil, 1 cup Unsalted Butter, and 3 whole Large Eggs until fully combined. Gradually add the dry ingredients to the wet mixture, alternating with the 1 cup Milk in three additions. Begin and end with the flour mixture. Mix on low speed just until combined—overmixing develops gluten and makes the cake dense.
Divide the batter evenly among the prepared pans. Smooth the tops with a spatula and bake for 25-30 minutes or until a toothpick inserted into the center comes out clean. Let the cakes cool in the pans for 10 minutes before transferring to a wire rack to cool completely. The edges should pull away from the pan easily, and the tops should spring back when touched gently.
Create the Signature Frosting-Soaked Layers
While the cakes cool, prepare the 1 cup Simple Syrup by heating equal parts sugar and water in a saucepan over medium heat until the sugar dissolves completely. Let it cool to room temperature—this syrup is the secret to keeping your cake moist for days.
Once the cakes are completely cool, place the first layer on a cake stand or plate. Spread 1 cup Buttercream Frosting evenly over the top, leaving a ½-inch border unfrosted. Using a spoon or small pitcher, gently pour ¼ cup of the cooled Simple Syrup over the frosting. Let it absorb for 1 minute before adding the second layer. Repeat this process with the remaining layers, ensuring each one is fully frosted and soaked with syrup before stacking.
The syrup will sink into the cake, creating a moist, flavorful base that prevents dryness. This technique is what makes 90s cakes legendary—juicy layers that stay fresh for days.
Frost and Decorate for Nostalgic Perfection
Once all layers are stacked, spread a thin layer of Buttercream Frosting over the entire cake to create a smooth base for the final frosting. Apply the remaining 3 cups Buttercream Frosting evenly, using a spatula to create clean, straight sides. For a classic 90s look, use a bench scraper to create sharp edges or a piping bag fitted with a star tip to create swirls or rosettes.
While the frosting is still soft, press the 0.5 cup Rainbow Sprinkles evenly over the top and sides of the cake. For an extra-nostalgic touch, you can also pipe additional sprinkles in patterns or use a stencil to create geometric designs. Let the cake sit at room temperature for 30 minutes to allow the frosting to set before slicing.
The final result should be a cake with vibrant layers, a glossy frosting finish, and a texture that defies dryness. Each slice will be moist, flavorful, and packed with that iconic 90s cake nostalgia.
Pro Tips For Making 90s Cake
- Measure Flour Right: Spoon it, don’t scoop—pack the flour lightly into your measuring cup after leveling. I learned this the hard way when my cake turned dense and brick-like; too much flour changes the texture completely.
- Whisk Eggs Separately: Beat the eggs and sugar together first, then fold in the wet ingredients last. This keeps air incorporated longer, giving you that signature 90s fluffiness—no one wants a flat, sad cake.
- Skip Overmixing: Once the flour’s added, stir just until combined—overmixing develops gluten and makes the cake tough. I know, it’s tempting to get it “perfect,” but this isn’t pie dough.
- Grease Pan And Dust Flour: Coat the pan with butter, then a thin layer of flour—tap out the excess. This prevents sticking better than just butter alone, and your cake will release cleanly. (Yes, even if you’re impatient like me.)
Regional styles of this dish
East Coast Classic
New England bakers favored a denser, richer version of this cake—think Jell-O layers sandwiched between moist sponge cake. The trick? Replace one layer with 1 cup Jell-O powder (like Kool-Aid flavors) mixed with 2 cups boiling water, then chilled until firm.
Spread ½ cup whipped cream between layers and top with shredded coconut for that retro beach party vibe. 🌊
Southern Comfort Style
In the South, peach cobbler cake was all the rage—layers of vanilla cake soaked in peach preserves instead of syrup. Use 2 cups peach preserves (like Smucker’s) and brush between layers.
Top with buttercream swirls and peach slices for a showstopper. Serve with vanilla ice cream for the ultimate Southern treat. 🍑
Midwest Funfetti Twist
The Midwest embraced Funfetti cake—vanilla cake packed with sprinkles throughout. Fold ½ cup rainbow sprinkles into the batter before baking. Top with buttercream frosting and extra sprinkles. For a 90s throwback, add gummy bears or chocolate chips to the batter. This version is perfect for kids’ birthdays! 🎉
West Coast Lightness
California bakers preferred angel food cake layers—light, fluffy, and airy. Replace the all-purpose flour with 1 cup cake flour and 2 cups egg whites (whipped to stiff peaks). Top with lemon curd and berries for a fresh, citrusy twist.
The frosting-soak method still works—just use lemon syrup (simmer 1 cup sugar + 1 cup water + zest of 1 lemon). 🍋
Retro Layer Cake
For a true 90s layer cake, bake four thin layers (about 1 inch thick) and stack with alternating flavors. Try chocolate cake + raspberry filling or vanilla + strawberry jam.
Use fondant for sharp edges and pipe flower patterns with Wilton tips. This was a staple at school fundraisers! 🌸
Microwave Mug Cake
Not all 90s cakes were from the oven! The microwave mug cake was a quick fix. Mix ¼ cup cake mix, 2 tbsp milk, 1 tbsp oil, and 1 tbsp chocolate chips in a mug.
Microwave for 90 seconds, then top with whipped cream and sprinkles. Perfect for a single serving in under 5 minutes. 🔥
Nutrition facts
Frequently asked questions
Why does this 90s cake stay moist longer than other recipes?
The secret lies in the simple syrup soak combined with the oil-rich batter. The syrup infuses the layers while warm, creating a moisture barrier that keeps the cake tender for 5 days at room temperature. Unlike traditional cakes that rely on butter, this recipe uses vegetable oil for extra richness without drying out.
Can I make this cake without a stand mixer?
Use a hand mixer or even a sturdy whisk for the batter. The key is to mix just until combined—overmixing develops gluten, which makes cakes dense. For the frosting, use a spatula to spread buttercream evenly between layers. The simple syrup step doesn’t require special tools either! Just pour it gently over the frosting.
What’s the best way to store leftover cake?
Wrap each layer individually in plastic wrap and store at room temperature for up to 2 days. For longer storage, refrigerate the assembled cake (covered tightly) for 5 days. To serve, let it sit at room temperature for 30 minutes before slicing—this prevents frosting from getting too firm. The syrup-soaked layers actually taste better the next day!
How do I fix a cake that’s cracked or sunken?
If the cake cracks slightly, it’s normal—just frost carefully over the cracks. For sunken centers, underbaking might be the issue: check your oven temperature with an oven thermometer (350°F is critical). If the cake is already baked, you can carefully slice off the sunken top and frost the flat surface. For future bakes, ensure your pans are properly greased and don’t overfill them.
Can I use this recipe for a gluten-free or vegan version?
For gluten-free, substitute the all-purpose flour with a 1:1 gluten-free baking flour blend (like Bob’s Red Mill). For vegan, replace eggs with 3 tbsp flaxseed meal + 9 tbsp water (let sit for 5 minutes), and use vegan butter + coconut oil instead of regular butter. The syrup-soak method still works, but vegan frosting should be dairy-free (like coconut buttercream).

- 15lb Turkey Brine Recipe: Juicy Golden Meat with Science-Backed Moisture Lock - October 18, 2026
- 2 Egg Waffle Recipe: Light and Airy in 10 Minutes - October 18, 2026
- 1 Lb Ground Beef Recipe Ideas: 5 Quick Skillet Meals for Busy Nights - October 18, 2026