
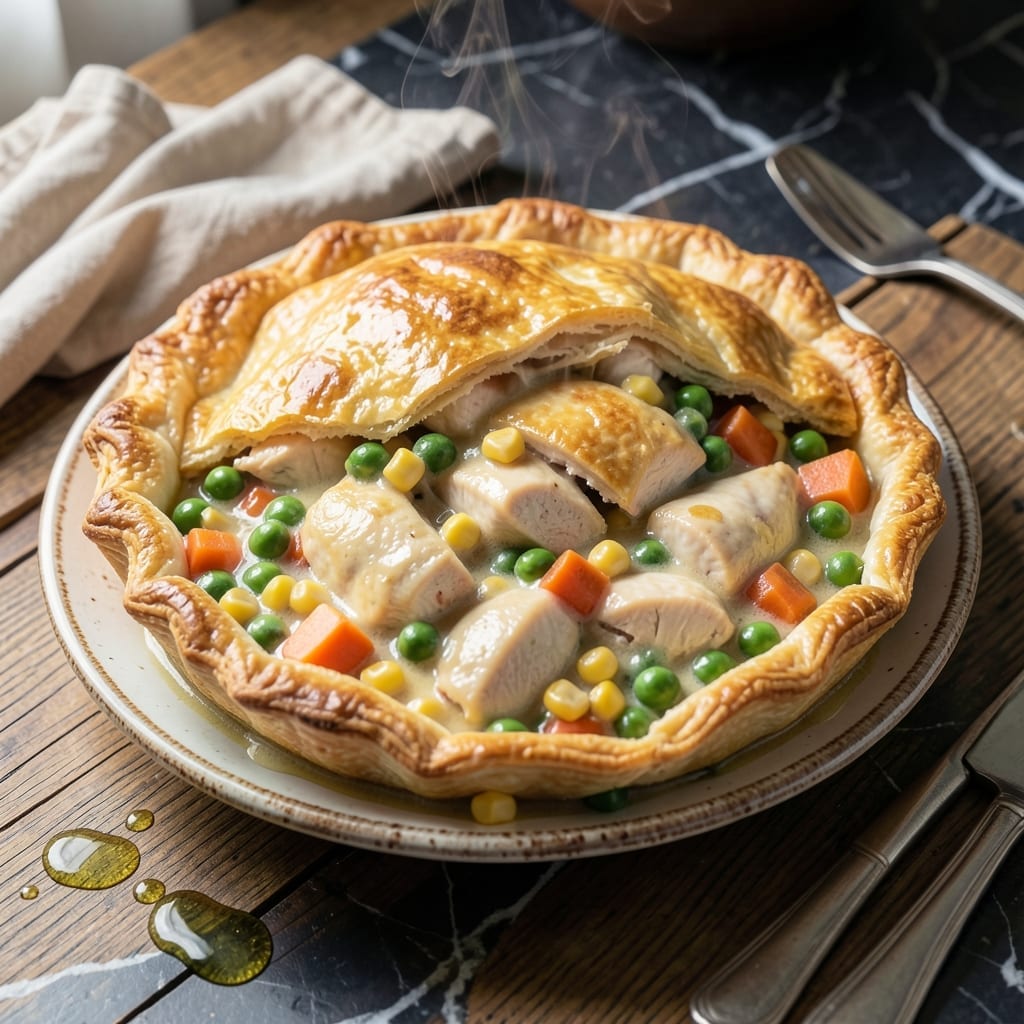
This air fryer method delivers a crisp golden crust with a rich, hearty filling that rivals oven-baked versions. The hot air circulation ensures even cooking while creating that perfect flaky texture we all love.
What makes this technique special is its efficiency—no need to preheat a large oven or wait hours for results. The filling stays moist and flavorful while the crust achieves that satisfying crunch in every bite.
You’ll get all the comfort of classic pot pie with a fraction of the effort. The individual portions cook quickly, making this ideal for weeknight dinners or personalized meals.
Serve straight from the air fryer for a meal that’s as practical as it is delicious.
Ingredients for Air Fryer Pot Pie
Pantry staples plus a rotisserie chicken shortcut make this air fryer classic effortless.
| Ingredient | Amount | Notes |
|---|---|---|
| Store-Bought Pie Crusts 🥧 | 2 sheets | Thawed if frozen, standard size |
| Boneless Skinless Chicken Breasts 🍗 | 1 lb | Diced into 1/2-inch pieces |
| Frozen Mixed Vegetables 🥕 | 1 ½ cups | Peas, carrots, corn, green beans |
| Unsalted Butter 🧈 | 4 tbsp | Divided for filling and crust |
| All-Purpose Flour 🌾 | ¼ cup | For thickening the filling |
| Chicken Broth 🥣 | 1 ¼ cups | Low-sodium preferred |
| Whole Milk 🥛 | ½ cup | For creamy filling |
| Yellow Onion 🧅 | 1 whole | Finely diced |
| Garlic Cloves 🧄 | 2 cloves | Minced fresh |
| Dried Thyme 🌿 | ½ tsp | Dried, not fresh |
| Dried Rosemary 🌿 | ½ tsp | Crushed between fingers |
| Salt 🧂 | ½ tsp | Kosher or sea salt |
| Black Pepper 🌶️ | ¼ tsp | Freshly ground preferred |
| Large Egg 🥚 | 1 whole | For egg wash on crust |
The crust is what makes or breaks this. Pillsbury refrigerated pie crusts are my go-to—consistently flaky and ready in minutes (the kind in the red box). For the filling, rotisserie chicken saves time without sacrificing flavor. Grab it from Costco or your local grocery store. The frozen veggie mix should include peas, carrots, and corn for that classic pot pie texture—Green Giant or store brand works fine.
No rotisserie chicken? Turkey or even canned chicken works in a pinch. Fresh veggies? Use half the amount since they’ll release water. Swap the milk for cream for extra richness, or use chicken stock instead of broth for deeper flavor. The herbs can be fresh if you’ve got them—triple the amount compared to dried. Don’t skip the egg wash though (that’s what gives the crust its shine).
Assemble and air fry right away, or prep the filling ahead and store it in the fridge for 2 days. The crust can stay in the fridge until you’re ready. Leftovers keep 3-4 days in the fridge—reheat in the air fryer for that just-baked crunch.
Why You’ll Love This Recipe
- Set It & Forget It: I toss in the frozen veggies and chicken, top with crust, and the air fryer does the rest—no babysitting required.
- Golden, Flaky Magic: That buttery crust gets impossibly crisp while the inside turns creamy from the flour-thickened filling.
- Weeknight Hero: Between us, I’ve served this for lazy Sundays and last-minute dinner parties—no one suspects it’s this simple.
- Leftovers? Even Better: Honestly, the filling thickens up overnight, so day-two slices hold their shape like a dream.
Step-by-Step Instructions for Air Fryer Pot Pie
Here’s the method. Straightforward, tested, works every time.
Step 1: Prepare the Filling Base
Start by dicing the 1 lb boneless skinless chicken breasts into ½-inch pieces. Finely dice the yellow onion and mince the 2 cloves garlic cloves. I like to prep all my ingredients first—it makes the cooking process smooth and stress-free.
In a skillet over medium-high heat, melt 2 tbsp unsalted butter. Add the diced onion and cook for 3-4 minutes until soft and translucent. Stir in the minced garlic and cook for another 30 seconds until fragrant. This builds the flavor foundation for your filling.
Step 2: Create the Creamy Sauce
Add the diced chicken to the skillet and cook for 5-6 minutes until no longer pink. Sprinkle the ¼ cup all-purpose flour over the mixture and stir well to coat. This flour will thicken your sauce beautifully.
Slowly pour in the 1¼ cups chicken broth and ½ cup whole milk, stirring constantly to prevent lumps. Add the 1½ cups frozen mixed vegetables, ½ tsp dried thyme, ½ tsp dried rosemary, ½ tsp salt, and ¼ tsp black pepper. Simmer for 5-7 minutes until the mixture thickens and the vegetables are tender.
Step 3: Assemble the Pot Pies
Cut the 2 sheets store-bought pie crusts into rounds large enough to fit your air fryer baskets or ramekins. I use a bowl as a guide for consistent sizing. Press one crust round into each greased ramekin, leaving some overhang.
Spoon the chicken and vegetable filling into each crust-lined ramekin, dividing it evenly. Top with another crust round, crimping the edges to seal. Cut a few small slits in the top crust to allow steam to escape during cooking.
Step 4: Air Fry to Golden Perfection
In a small bowl, beat the 1 whole large egg and brush it lightly over the top crusts. This egg wash gives your pot pies that beautiful golden-brown finish. Place the ramekins in your air fryer basket, leaving space between them for air circulation.
Air fry at 375°F for 12-15 minutes until the crusts are golden brown and the filling is bubbling. If your air fryer has hot spots, rotate the ramekins halfway through cooking for even browning. Let them cool for 5 minutes before serving—the filling will be piping hot!
Pro Tips For Making Air Fryer Pot Pie
- Pre-Cook the Chicken: Dice the chicken into small, even pieces and pre-cook them in the air fryer at 375°F for 8-10 minutes before assembling. I learned this the hard way—raw chicken in the filling leads to a soggy crust and uneven cooking.
- Thaw the Veggies: Spread the frozen mixed vegetables on a paper towel to thaw and drain excess moisture. Sounds weird, but it works: this prevents a watery filling that can make the pie crust gummy.
- Vent the Crust: Poke a few small holes in the top pie crust with a fork before air frying. After burning three batches, I finally figured out that this lets steam escape, keeping the crust flaky instead of soggy.
- Brush with Butter: Lightly brush the top crust with melted unsalted butter before air frying. My grandmother swore by this, and she was right: it gives that golden, crisp finish without overbrowning.
Pro Cooking Tips for This Recipe
Crust Perfection
Use Pillsbury refrigerated pie crusts—they’re pre-rolled and consistently flaky. For extra crispiness, brush the bottom crust with 1 tsp melted butter before adding the filling. This creates a barrier against sogginess. 💡
Even Air Flow
Leave 1 inch of space between ramekins in the air fryer basket. Overcrowding blocks hot air circulation, leading to uneven cooking. If needed, cook in batches for consistent results.
Temperature Control
Preheat your air fryer to 375°F for 3 minutes before adding the pot pies. This ensures immediate crust crisping. Check at 12 minutes—some units run hotter than others.
Venting Matters
Cut 3-4 small slits in the top crust to allow steam to escape. Without these vents, the filling can burst through the crust or become watery. Use a sharp knife for clean cuts.
Egg Wash Upgrade
Add 1 tsp water to your egg wash for a thinner consistency. This helps it spread evenly and creates a glossier finish. Brush lightly—too much can weigh down the crust.
Resting Time
Let the pot pies rest for 5 minutes after air frying. This allows the filling to thicken slightly, making it easier to serve. The crust will stay crispier too. 🔥
Nutrition Facts
Frequently Asked Questions
Can I use store-bought rotisserie chicken?
Shred 2 cups of cooked rotisserie chicken for a quick shortcut. It adds great flavor and saves cooking time. Just skip the initial chicken cooking step.
What if my crust burns before the filling cooks?
If the top browns too fast, cover loosely with foil and continue cooking. Lower the temp to 350°F and add 5-7 minutes for thorough heating without burning.
Can I make these ahead of time?
Assemble uncooked pot pies and refrigerate for up to 24 hours. Cook from cold, adding 3-5 minutes to the air frying time. Freezing isn’t recommended for best texture.
How do I prevent a soggy bottom crust?
Brush the bottom crust with 1 tsp melted butter before adding filling. Also, ensure your filling is thickened and not watery before assembling.

- 4C Bread Crumbs Meatballs Recipe: Crispy Crust and Juicy Centers - September 25, 2026
- 6 Oz Chocolate Chip Cookie Recipe: Perfectly Balanced Crispy Edges and Chewy Hearts - September 25, 2026
- 6-Inch Coffee Cake Recipe: Vanilla Bean Swirls and Buttery Streusel Topping - September 25, 2026