
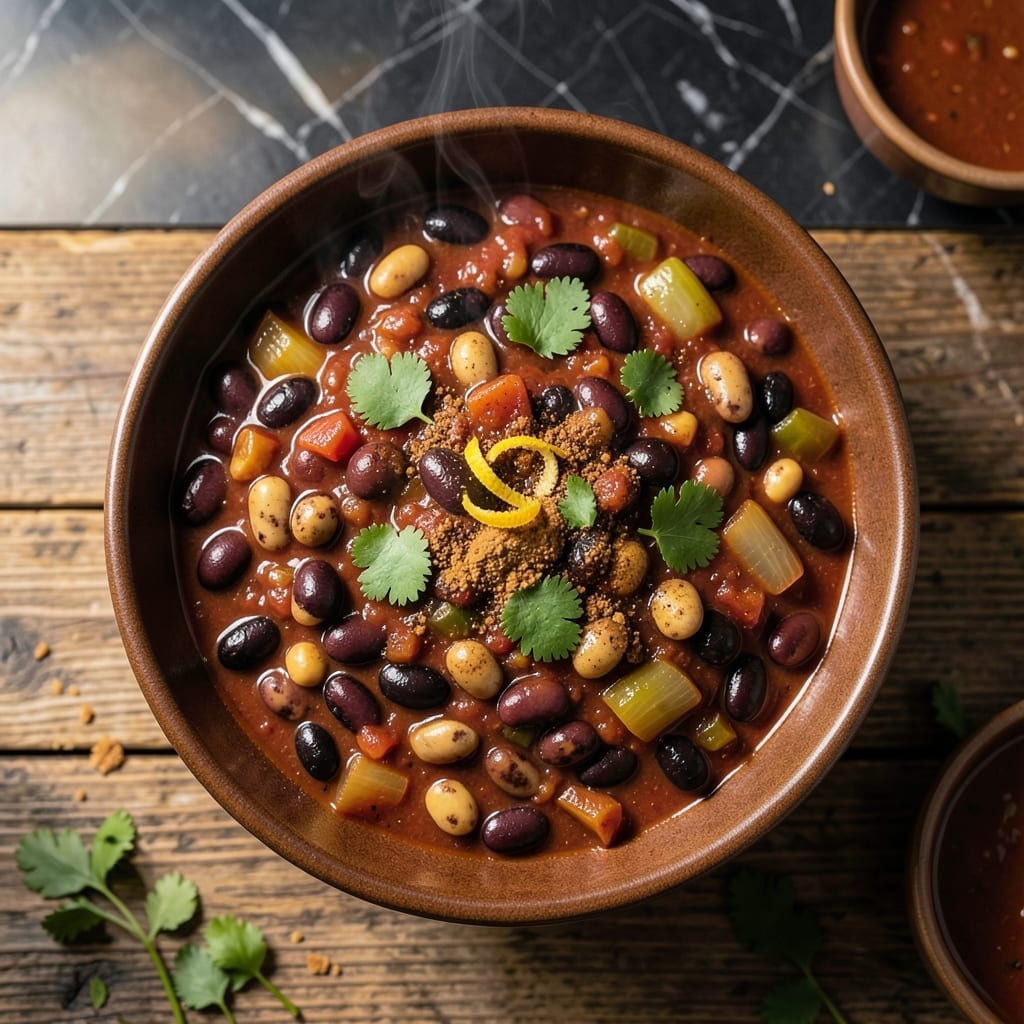
There’s something deeply satisfying about a pot of chili that’s been simmering for hours, filling your kitchen with smoky, spicy aromas. This recipe transforms simple ingredients into a hearty dish with complex flavors that improve with time.
The secret lies in the slow cooking process, allowing beans to soften and spices to meld into a rich, thick sauce. I’ve perfected the balance of heat and sweetness, creating a chili that’s both comforting and exciting.
What emerges is a bowl of tender beans in a sauce so deep and flavorful it tastes like it’s been cooking all day. The smokiness comes from a careful blend of spices and a touch of technique.
Perfect for cold evenings or game day gatherings, this chili delivers restaurant-quality results in your own kitchen. The best part? It tastes even better the next day.
Ingredients for Bean Pot Chili
Hearty beans, rich spices, and slow-simmered tomatoes create this deeply satisfying pot of chili.
| Ingredient | Amount | Notes |
|---|---|---|
| Black Beans 🫘 | 2 cups | Dried, soaked overnight |
| Kidney Beans 🫘 | 2 cups | Dried, soaked overnight |
| Pinto Beans 🫘 | 1 cup | Dried, soaked overnight |
| Vegetable Broth 🥣 | 4 cups | Low-sodium preferred |
| Crushed Tomatoes 🍅 | 28 oz | Canned, with juice |
| Tomato Paste 🍅 | 2 tbsp | For depth of flavor |
| Yellow Onion 🧅 | 1 whole | Medium, finely diced |
| Garlic Cloves 🧄 | 4 cloves | Minced for full flavor |
| Green Bell Pepper 🌶️ | 1 whole | Diced, seeds removed |
| Chili Powder 🌶️ | 2 tbsp | Blend for smokiness |
| Ground Cumin 🌿 | 1 tbsp | Toasted for warmth |
| Smoked Paprika 🌶️ | 1 tbsp | Key for smoky depth |
| Cayenne Pepper 🔥 | ¼ tsp | Adjust for heat preference |
| Olive Oil 🫒 | 2 tbsp | Extra-virgin for richness |
| Maple Syrup 🍁 | 1 tbsp | Balances heat and acidity |
The beans are the foundation here. Dried beans (black, kidney, pinto) yield the best texture—canned works in a pinch but lacks depth. Whole Foods or Trader Joe’s carry high-quality dried beans in bulk. The crushed tomatoes should be San Marzano if available; their sweetness balances the smoky spices. For the broth, Imagine or Pacific Foods offer reliable vegetable options.
No smoked paprika? Liquid smoke at half the amount (just a few drops) adds depth. Fresh out of maple syrup? Agave nectar or coconut sugar works too. The bell pepper can be swapped for poblano for extra smokiness. For a thicker chili, mash some of the beans as they cook. If you like more heat, add a diced jalapeño with the onion.
This chili tastes even better the next day. Store in the fridge for up to 5 days or freeze for 3 months. Portion into airtight containers for easy reheating. The flavors meld and deepen with time.
Why You’ll Love This Recipe
- Dump and Go: I just toss the canned beans, broth, and tomatoes in the pot—no chopping, no fuss.
- Deep, Rich Flavor: The crushed tomatoes and broth blend into this hearty, savory base that soaks into every bean.
- Feeds the Freezer: One batch makes enough for dinner tonight and two more meals I can stash away for busy nights.
- Budget Stretcher: Three types of beans bulk it up for pennies, and it still tastes like a million bucks.
Step-by-Step Instructions for Bean Pot Chili
Follow this professional method to build layers of smoky, complex flavor in every spoonful.
Step 1: Sauté the Aromatic Base
Heat the 2 tbsp Olive Oil in a large Dutch oven over medium heat. Add the Yellow Onion, Green Bell Pepper, and cook for 5-6 minutes until the vegetables soften and the onion becomes translucent.
Stir in the 4 cloves Garlic Cloves and cook for an additional 30 seconds until fragrant. This base builds the foundation for the chili’s depth. Watch carefully to prevent browning—you want the vegetables tender, not caramelized.
Step 2: Toast the Spices for Maximum Flavor
Add the 2 tbsp Chili Powder, 1 tbsp Ground Cumin, 1 tbsp Smoked Paprika, and 0.25 tsp Cayenne Pepper to the pot. Stir constantly for 1-2 minutes until the spices become deeply aromatic and slightly darker in color.
Toasted spices release their essential oils, creating a more intense flavor profile. This step transforms the chili from good to exceptional. Be mindful of the heat—if the spices start to smoke, reduce it immediately to prevent bitterness.
Step 3: Build the Chili Base with Tomatoes
Incorporate the 2 tbsp Tomato Paste and cook for 2 minutes, stirring frequently to coat the vegetables and spices. This step deepens the umami richness of the dish.
Add the 28 oz Crushed Tomatoes with their juice and the 4 cups Vegetable Broth. Stir well to combine, scraping up any browned bits from the bottom of the pot. Bring the mixture to a gentle simmer.
Step 4: Simmer with Beans for Perfect Texture
Drain and rinse the soaked 2 cups Black Beans, 2 cups Kidney Beans, and 1 cup Pinto Beans. Add them to the pot along with the 1 tbsp Maple Syrup. Stir to combine all ingredients thoroughly.
Reduce the heat to low, cover, and let the chili simmer for 1 to 1.5 hours. Stir occasionally to prevent sticking. The beans should be tender and the liquid thickened to your preferred consistency.
Step 5: Adjust Seasoning and Rest Before Serving
Taste and adjust the seasoning if needed, though the initial measurements should provide perfect balance. The Maple Syrup should subtly complement the smoky, spicy elements without overpowering them.
Remove from heat and let the chili rest for 10-15 minutes before serving. This allows the flavors to meld together completely. The final result should be thick, hearty, and deeply flavorful, with each bean absorbing the rich, smoky sauce.
Pro Tips For Making Bean Pot Chili
- Soak Dried Beans: If using dried beans, soak them overnight in plenty of water—this cuts cooking time in half and prevents that dreaded tough center.
- Bloom Your Spices: Toast your chili spices in the pot with a little oil for 30 seconds before adding liquids; it wakes up the flavors in a way that raw spices just can’t match.
- Skip the Rinse: Don’t drain and rinse canned beans too aggressively—keeping a little of that starchy liquid helps thicken the chili naturally.
- Simmer Low and Slow: Once everything’s in the pot, keep it at a gentle bubble, not a rolling boil, for at least 45 minutes so the beans absorb the broth and tomatoes fully.
Storing and Reheating This Recipe
Refrigerator Storage
Let your chili cool for no more than 2 hours before transferring to airtight containers. I use glass containers with locking lids. Store in the fridge at 40°F or below for up to 5 days. The flavors actually deepen overnight as the spices continue to meld. ❄️
Freezer Storage
This chili freezes beautifully for up to 3 months. I recommend using quart-size freezer bags—they lay flat to save space and thaw quickly. Leave 1 inch of headspace for expansion and squeeze out excess air to prevent freezer burn.
Stovetop Reheating
Transfer chili to a heavy-bottomed pot and add ¼ cup water or vegetable broth to prevent sticking. Heat over medium-low heat for 10-15 minutes, stirring occasionally. Taste and adjust seasoning—it often needs a pinch of salt after reheating. 🔥
Microwave Reheating
For quick meals, microwave individual portions covered with a damp paper towel. Heat on 70% power for 2-3 minutes, stir, then continue in 1-minute intervals until reaching 165°F. Add a splash of water if it looks dry.
Thickening After Storage
If your chili seems thin after reheating, simmer uncovered for 5-10 minutes to reduce. Alternatively, mash a few beans with a fork to naturally thicken the sauce. I find the texture improves with this simple trick.
Nutrition Facts
Frequently Asked Questions
Can I use canned beans instead of dried?
Yes, but adjust the liquid and cooking time. Use 4 cans (15 oz each), drained. Reduce broth to 2 cups and simmer for just 30-40 minutes to avoid mushy beans.
How can I make it spicier?
Add a diced jalapeño with the onion or increase cayenne to ½ tsp. For extra heat, stir in 1 tsp of chipotle powder or a pinch of cayenne at the end.
Why do I need to toast the spices?
Toasting for 1-2 minutes awakens their essential oils, creating deeper, more complex flavors. It’s what gives this chili its signature smoky, aromatic profile.
Can I make this in a slow cooker?
Sauté veggies first, then transfer everything to the slow cooker. Cook on low for 6-7 hours or high for 3-4 hours.

- 6 Oz Chocolate Chip Cookie Recipe: Perfectly Balanced Crispy Edges and Chewy Hearts - September 25, 2026
- 6-Inch Coffee Cake Recipe: Vanilla Bean Swirls and Buttery Streusel Topping - September 25, 2026
- 1 Hour Soup Recipe: Velvety Richness Without the Wait - September 25, 2026