
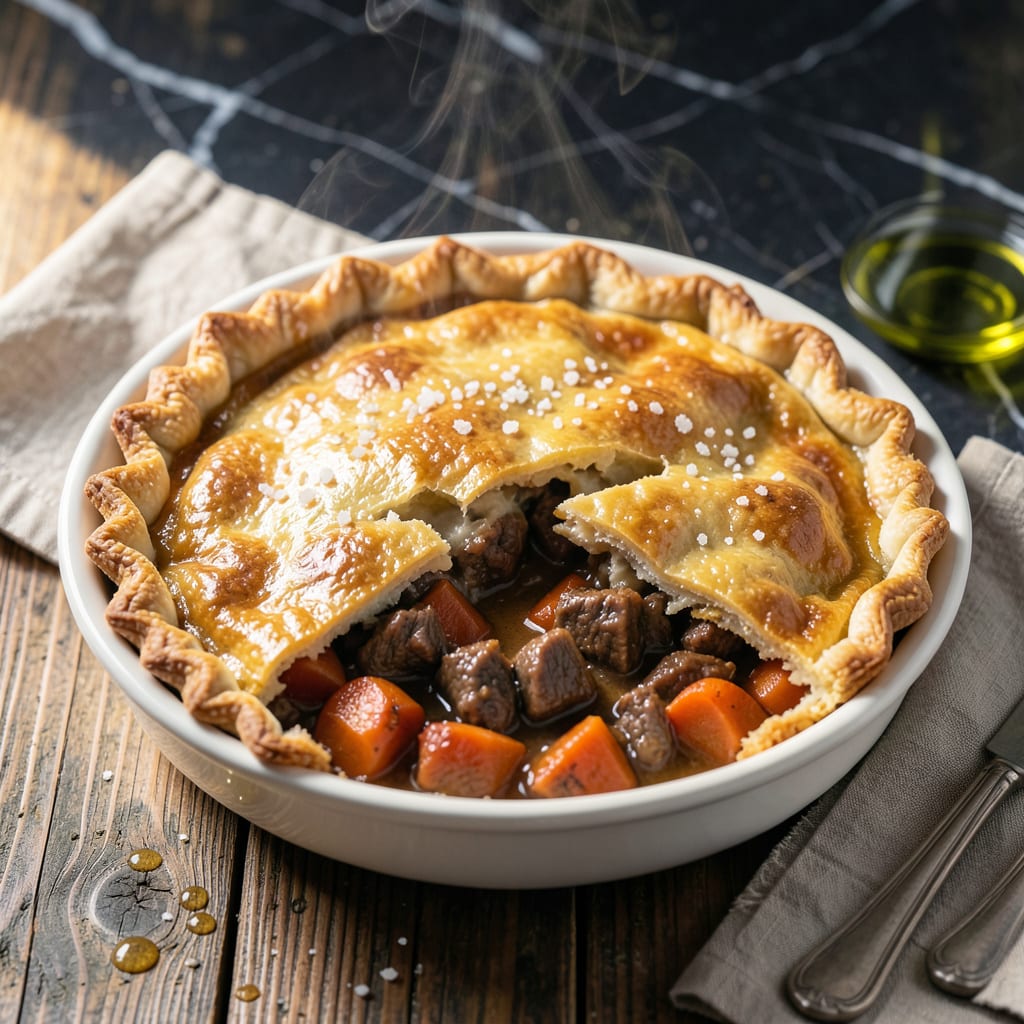
There’s nothing more satisfying than transforming leftover pot roast into a flaky, golden-crusted beef pot pie. This recipe breathes new life into yesterday’s dinner with minimal effort.
By combining tender beef with a rich vegetable filling and sealing it under a buttery crust, you create a comforting meal that tastes even better than the original. The secret is in the balance of flavors and the perfect pastry topping.
Ingredients for Beef Pot Pie Recipe with Leftover Pot Roast
Leftover pot roast gets new life with flaky pastry and rich vegetable filling.
| Ingredient | Amount | Notes |
|---|---|---|
| Leftover Pot Roast 🥩 | 3 cups | Shredded or diced |
| Unsalted Butter 🧈 | ½ cup | Cold, cubed for crust |
| All-Purpose Flour 🌾 | 2 cups | Plus extra for dusting |
| Ice Water 💧 | 6 tbsp | For pie crust |
| Salt 🧂 | 1 tsp | Divided for crust and filling |
| Carrots 🥕 | 1 cup | Diced, about 2 medium |
| Onion 🧅 | 1 whole | Medium, finely diced |
| Celery Stalks 🌿 | 2 pieces | Finely diced |
| Frozen Peas 🌱 | 1 cup | Thawed |
| Garlic Cloves 🧄 | 2 cloves | Minced |
| Beef Broth 🍲 | 1 ½ cups | Low-sodium preferred |
| Worcestershire Sauce 🫒 | 1 tbsp | For depth of flavor |
| Fresh Thyme Leaves 🍃 | 1 tbsp | Chopped, or 1 tsp dried |
| All-Purpose Flour 🌾 | ¼ cup | For thickening filling |
| Whole Milk 🥛 | ½ cup | For gravy consistency |
The crust demands cold butter and minimal handling for that promised flakiness. Use European-style butter like Plugrá for superior texture if available. For the pot roast, select pieces with good marbling—chuck or round leftovers work best. Fresh thyme is ideal, but dried works at one-third the amount (just bloom it in the broth first). Most supermarkets carry quality all-purpose flour, but King Arthur is the professional choice.
No pot roast leftovers? Shredded beef brisket or stew meat works equally well. Swap carrots for parsnips if you want a sweeter note. Out of thyme? Rosemary or sage at half the quantity maintains the earthy depth. The Worcestershire is key—Annie’s or Lea & Perrins are reliable. For a richer gravy, substitute half the milk with heavy cream.
Assembled pie freezes beautifully before baking—3 months wrapped tight. Baked pies keep 4-5 days refrigerated. Reheat individual portions in a 350°F oven for 15-20 minutes to restore the crust’s crispness (don’t microwave).
Why You’ll Love This Recipe
- No-Fuss Assembly: I just shred the leftover pot roast, mix it with a quick butter-flour crust, and it’s ready for the oven—no extra cooking required.
- Rich Comfort: The tender roast beef wrapped in that flaky, golden crust tastes like a warm hug on a chilly evening.
- Feeds the Crew: One pie serves my whole family, and I can prep it ahead for busy nights or weekend gatherings.
- Zero Waste: Honestly, it’s the best way to use up that last bit of pot roast before it goes bad—saves me money and time.
Step-by-Step Instructions for Beef Pot Pie With Leftover Pot Roast
Master the technique for a golden crust and rich filling that transforms leftovers into comfort food excellence.
Step 1: Prepare the Pie Crust
In a food processor, combine the 2 cups All-Purpose Flour with ½ tsp Salt from the total. Add the 0.5 cup Unsalted Butter, cold and cubed, and pulse until the mixture resembles coarse crumbs with pea-sized butter pieces visible.
With the processor running, drizzle in the 6 tbsp Ice Water, one tablespoon at a time, until the dough just comes together. It should hold when pressed but not be sticky. Turn the dough onto a lightly floured surface, divide into two equal portions, shape into discs, and refrigerate for 30 minutes to relax the gluten.
Step 2: Create the Savory Beef Filling
In a large skillet over medium heat, sauté the diced 1 cup Carrots, 1 whole Onion, and 2 pieces Celery Stalks until softened, about 5 minutes. Add the minced 2 cloves Garlic Cloves and cook for 30 seconds until fragrant.
Stir in the 3 cups Leftover Pot Roast, 1 cup Frozen Peas, 1.5 cups Beef Broth, 1 tbsp Worcestershire Sauce, and 1 tbsp Fresh Thyme Leaves. Bring to a simmer and cook for 5 minutes to meld the flavors.
Step 3: Thicken the Filling
Create a slurry by whisking the 0.25 cup All-Purpose Flour with 0.5 cup Whole Milk until smooth. Slowly pour this into the simmering filling while stirring constantly. Cook for an additional 3-5 minutes until the mixture thickens to a gravy-like consistency.
Season with the remaining ½ tsp Salt and adjust to taste. Remove from heat and let cool slightly while you roll out the crust.
Step 4: Assemble and Bake the Pot Pie
On a lightly floured surface, roll out one disc of dough to fit a 9-inch pie dish. Transfer to the dish, pressing gently into the bottom and sides. Pour the filling into the crust-lined dish.
Roll out the second disc and place it over the filling. Crimp the edges to seal, then cut several 1-inch slits in the top crust to allow steam to escape. Bake at 375°F for 45-50 minutes until the crust is golden brown and the filling is bubbling.
Step 5: Rest and Serve
Let the pot pie rest for 10-15 minutes after removing from the oven. This allows the filling to set slightly, making it easier to slice. The crust should be deeply golden and flaky, with a rich, thick filling visible through the steam vents.
Serve warm in wedges, ensuring each portion has a generous amount of the beef and vegetable filling encased in that buttery, flaky crust. The contrast between the tender filling and crisp pastry defines this dish.
Pro Tips For Making Beef Pot Pie Recipe With Leftover Pot Roast
- Shred the Beef Fine: Leftover pot roast can be stringy—shred it into small, even pieces so every bite of pie has tender beef instead of chewy chunks.
- Chill the Dough: After mixing the flour, butter, and ice water, let the dough rest in the fridge for at least 30 minutes—this keeps the crust flaky instead of tough.
- Skip the Soggy Bottom: I learned this the hard way: blind-bake the bottom crust for 8-10 minutes before adding the filling to avoid a gummy base.
- Boost the Flavor: The pot roast’s juices are gold—reduce them down with a splash of water or broth and pour into the filling for extra depth.
Essential Equipment for Perfect Results
Pie Dish Essentials
For perfect crust development, I use a 9-inch glass pie dish—it conducts heat evenly and lets you monitor the bottom crust browning. The Pyrex 9-inch is my go-to for its durability and non-reactive surface. Avoid dark metal pans that can overbrown the crust. 💡
Food Processor
A quality food processor makes quick work of the crust dough. I recommend the Cuisinart 7-Cup for its consistent results with pie pastry. Pulse the cold butter and flour just until pea-sized crumbs form—over-processing develops gluten, which makes the crust tough.
Rolling Pin
Invest in a French-style tapering rolling pin without handles. The J.K. Adams maple wood version gives you excellent control for rolling crusts to an even ⅛-inch thickness. Dust your surface lightly with flour to prevent sticking.
Pastry Brush
Before baking, brush the top crust with 1 egg white beaten with 1 tbsp water for a glossy finish. My OXO silicone pastry brush works beautifully without absorbing flavors between uses.
Sharp Knife
A serrated edge makes cutting steam vents effortless. I use my Wüsthof 8-inch bread knife to create decorative slits that also allow steam to escape properly. This prevents a soggy top crust.
Oven Thermometer
Oven temperatures can be inaccurate by 25-50°F. I always keep a Taylor oven thermometer in the center rack to ensure my 375°F baking temperature is precise. This small tool makes a huge difference in crust texture. 🌡️
Nutrition Facts
Frequently Asked Questions
Can I use store-bought pie crust instead?
Use 2 pre-made pie crusts to save time. Just thaw them according to package instructions before assembling.
How do I prevent a soggy bottom crust?
Blind-bake the bottom crust for 10 minutes at 375°F before adding filling. Also, ensure your filling isn’t too wet.
What if my filling is too thin?
Simmer it longer or mix 1 tbsp cornstarch with 1 tbsp cold water and stir in. Cook for 2-3 minutes until thickened.
Can I make this ahead of time?
Yes! Assemble the pie, cover tightly, and refrigerate for up to 24 hours. Bake as directed, adding 5-10 minutes if cold.

- 8-Inch Chocolate Cake Recipe: Fudgy Crust and Decadent Ganache Swirls - September 25, 2026
- 5 Star Lasagna Recipe with Ricotta Cheese: Layers of Creamy Cheese and Tender Meat - September 25, 2026
- 2lb Fruit Cake Recipe: Boozy Spice Infusion for Holiday Crowds - September 25, 2026