
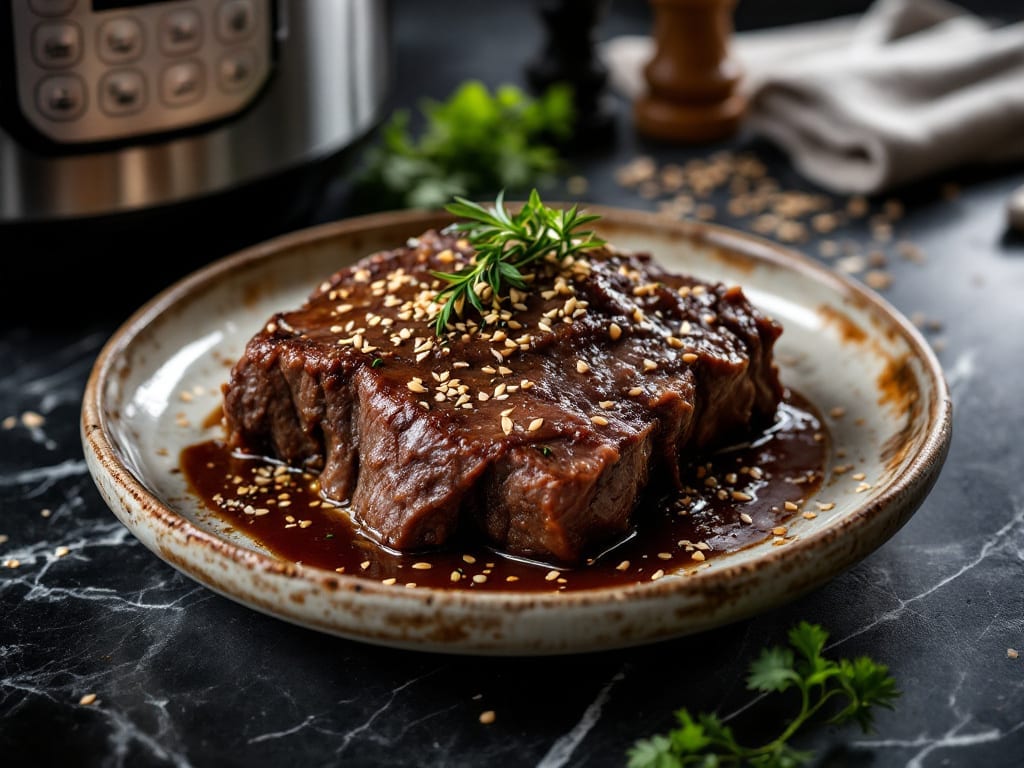
Unlock the magic of this beef shoulder Instant Pot recipe, where tough cuts melt into tender perfection in just 2 hours. This Instant Pot recipe delivers restaurant-quality results with minimal effort, perfect for busy weeknights when you crave hearty, flavorful meals without spending all day in the kitchen.
The magic happens through precise pressure cooking techniques that break down connective tissue while locking in moisture.
What makes this recipe stand out is the foolproof method that ensures perfect doneness every time. You’ll start with a simple seasoning blend—just salt, pepper, and garlic powder—but the real transformation occurs during the high-pressure cook cycle, which tenderizes even the toughest cuts.
The result is meat so tender it practically melts in your mouth, with a rich, savory flavor that pairs beautifully with classic sides.
By the end, you’ll have perfectly cooked beef shoulder that’s ready to shred or slice, creating dishes like tacos, sandwiches, or hearty stews. The 2-hour timeline includes prep and cooking, making it ideal for meal prep or last-minute dinners.
This method eliminates guesswork, ensuring you never overcook or dry out the meat again.
Pair with roasted potatoes, crusty bread, or a fresh green salad for a complete meal. The versatility of this recipe means you can use it for any occasion—from family dinners to game day spreads. Let’s get started on creating your most tender beef shoulder yet.
Ingredients for beef shoulder instant pot
Fourteen ingredients. Two hours. Meat so tender it falls apart at a touch.
| Ingredient | Amount | Notes |
|---|---|---|
| Beef Shoulder (Chuck Roast) 🥩 | 3 lb | Bone-in preferred, cut into 2-inch chunks |
| Yellow Onion 🧅 | 1 whole | Quartered, skin on for color |
| Garlic Cloves 🧄 | 6 cloves | Smashed, not minced |
| Beef Broth 💧 | 1 ½ cups | Low-sodium preferred |
| Apple Cider Vinegar 🍏 | ¼ cup | For tenderizing |
| Kosher Salt 🧂 | 1 ½ tbsp | Adjust to taste |
| Ground Black Pepper 🌶️ | 1 tbsp | Freshly cracked |
| Garlic Powder 🧄 | 1 tsp | For extra flavor |
| Dried Thyme 🌿 | 1 tsp | Or 1 tbsp fresh |
| Olive Oil 🫒 | 2 tbsp | For searing |
| Fresh Rosemary 🌿 | ½ tsp | Chopped, optional but recommended |
| Bay Leaf 🍃 | 2 whole | Remove before serving |
The beef shoulder is the star—bone-in chuck roast gives you the most flavor and tenderizes best. Grab one from the butcher section if your grocery store has it, or the meat department will have pre-cut chunks. Look for good marbling (those white streaks of fat) because that’s what melts into flavor. If you’re buying a whole roast, Costco or Sam’s Club usually have the best prices—just ask them to cut it into 2-inch chunks. No bone-in? That works too, but you’ll lose some juice during cooking. The key is to keep the pieces roughly the same size so they cook evenly.
No apple cider vinegar? Lemon juice or red wine works in a pinch—just use half the amount. Fresh thyme is ideal, but dried works at one-third the amount. If you’re short on time, Trader Joe’s frozen herb blends are a lifesaver. The beef broth matters—low-sodium is crucial so you don’t end up with salty meat. For extra richness, add a splash of heavy cream or Worcestershire sauce at the end. And if you’re feeling fancy, swap the dried rosemary for fresh sprigs—just remove them before serving.
This meat gets better the next day—honestly, 3-4 days in the fridge is perfect for meal prep. Portion into containers with some of the juices to keep it moist. Freezes beautifully for up to 3 months—just thaw in the fridge overnight. The leftovers are amazing in sandwiches, tacos, or even loaded baked potatoes. Store the broth separately if you want to use it for soups later—it’s packed with flavor.
Why You’ll Love This Recipe
- Vinegar Magic: That splash of apple cider vinegar? It’s the secret weapon—cuts through the richness of the beef shoulder while adding a bright, tangy depth. Honestly, it’s the difference between “good” and “I’ll make this again.”
- Leftovers for Days: This recipe makes way more than you’ll eat in one sitting, and the flavor only gets better after a night in the fridge. I’ve fed a crowd with the leftovers—sandwiches, tacos, you name it.
- Budget Stretch: A chuck roast is one of the most affordable cuts, and this method turns it into a meal that feels fancy without the price tag. Between us, I’ve served this at dinner parties and no one guessed it wasn’t a $50 cut.
Step-by-step instructions for pressure-cooked beef shoulder
This method delivers melt-in-your-mouth beef shoulder with minimal effort.
Sear the Beef Shoulder for Maximum Flavor
Heat the Instant Pot on “Sauté” mode using 2 tablespoons olive oil until shimmering. Pat the 3 lb beef shoulder (chuck roast) dry with paper towels and season generously with 1.5 tablespoons kosher salt, 1 tablespoon ground black pepper, 1 teaspoon garlic powder, and 1 teaspoon dried thyme. Press the seasoning into the meat so it sticks.
Place the beef shoulder in the pot and sear on all sides for 8-10 minutes total, moving it around to ensure even browning. You’re looking for a deep golden crust—this builds flavor that pressure cooking alone can’t replicate. If the oil starts smoking, reduce the heat slightly. Once seared, remove the beef shoulder and set it aside temporarily.
Build the Aromatic Base
In the same pot, add the 1 whole yellow onion (quartered, skin on) and the 6 cloves garlic (smashed). Sauté for 3-4 minutes until the onion softens and the garlic becomes fragrant. The skin-on onion adds beautiful color and subtle sweetness to the finished dish.
Pour in the 0.25 cup apple cider vinegar and let it bubble for 1 minute—this helps tenderize the meat further. Add the 1.5 cups beef broth, the 2 whole bay leaf, and the 0.5 teaspoon fresh rosemary. Stir everything together, scraping up any browned bits from the bottom of the pot. These bits are packed with flavor that will infuse into the meat.
Pressure Cook to Perfect Tenderness
Return the seared beef shoulder to the pot, placing it fat-side up if possible. Secure the lid and set the Instant Pot to “High Pressure” for 90 minutes. This long cook time breaks down the tough connective tissue, transforming the beef shoulder into fork-tender perfection.
During this time, the pressure will build, and you’ll hear the valve switch from venting to sealing. Once cooking begins, resist the urge to check on it—each time you open the lid, you release pressure and add time to the cooking process. The beef is done when the internal temperature reaches 205°F on an instant-read thermometer, which typically happens right at the end of the 90-minute cook time.
Rest and Shred for Maximum Juiciness
Once cooking is complete, allow the pressure to release naturally for 10 minutes, then perform a quick release by turning the valve to “venting.” Remove the lid carefully—steam will escape—and transfer the beef shoulder to a cutting board. Let it rest for 15 minutes before shredding.
Using two forks, shred the beef shoulder against the grain into 2-inch chunks. The meat should pull apart easily, with no resistance. If it’s not quite tender enough, return it to the pot with any accumulated juices and cook on “Sauté” mode for an additional 5-10 minutes. The result should be beef that’s so tender it nearly falls apart at the touch, with rich, deep flavor from the searing and slow cooking.
Pro Tips For Making Beef Shoulder Instant Pot
- Sear Before Pressure: Hit that beef shoulder with a hot sear in a dry skillet first—even if you’re in a hurry. The crust locks in flavor and keeps the meat from turning into mush later, and it only takes 5 minutes with a little oil and salt. (Yes, even if you’re impatient like me.)
- Dice Onions Like a Pro: Skip the messy chopping—slice onions into ¼-inch pieces instead of mincing them. They’ll soften evenly in the Instant Pot without turning to mush, and they’ll blend right into the broth without clumps. (Your future self will thank you.)
- Don’t Skimp on Vinegar: Apple cider vinegar isn’t just for tang—it tenderizes the beef over time. Add it after the meat’s seared and before liquid goes in, and let it sit for 10 minutes if you can. Less work later, better texture.
- Check Doneness at 10 Minutes: Chuck roast needs time, but don’t wait until the end to check. After the initial pressure cook, let it natural release for 10 minutes, then probe the thickest part—it should hit 165°F before it finishes. (No guessing, no overcooked rubber.)
Regional styles of this dish
Southern BBQ Style
In the South, beef shoulder becomes the star of pulled pork sandwiches and tacos. After pressure cooking, shred the meat and mix it with ½ cup BBQ sauce (I love Sweet Baby Ray’s Original) and 1 tbsp apple cider vinegar for tang.
Serve on toasted brioche buns with pickled jalapeños and red onion slices. For extra richness, top with sharp cheddar cheese and a drizzle of sriracha mayo. 🌶️
Texas-Style Smoked Flavor
Transform your Instant Pot beef into Texas-style smoked meat by adding 1 tbsp smoked paprika and 1 tsp liquid smoke to the broth. After pressure cooking, shred the meat and mix it with 2 tbsp unsalted butter and 1 tbsp chopped fresh cilantro.
Serve on tortillas with diced avocado, pickled onions, and a side of white cheddar cheese. The smoky depth makes this perfect for Tex-Mex nights.
Italian-Inspired Braised Style
For an Italian twist, deglaze the Instant Pot with ½ cup dry red wine (like Chianti) after searing. Add 1 tsp dried oregano and ½ tsp red pepper flakes to the broth.
After cooking, shred the beef and toss it with ½ cup marinara sauce and ¼ cup grated Parmesan cheese. Serve over fettuccine pasta or in ciabatta rolls with a side of roasted garlic mashed potatoes.
Mexican Carnitas Twist
Give your beef a Mexican carnitas makeover by adding 1 tsp ground cumin and ½ tsp cinnamon to the seasoning. After pressure cooking, shred the meat and crisp it in a skillet with 1 tbsp lard or bacon fat for 3-4 minutes.
Serve with warm tortillas, salsa verde, and diced pineapple for a sweet-spicy contrast. This version is perfect for breakfast tacos or a hearty dinner.
French-Inspired Pot-au-Feu
For a French-inspired approach, add 2 sprigs fresh thyme, 1 bay leaf, and 1 tsp Dijon mustard to the broth.
After cooking, shred the beef and serve it in a bowl with carrots and potatoes (cooked separately in the Instant Pot for 10 minutes on high pressure) and a drizzle of béchamel sauce. Garnish with parsley** and a sprinkle of Gruyère cheese.
This elegant version is perfect for a special dinner.
Nutrition facts
Frequently asked questions
Why does the recipe call for bone-in beef shoulder?
The bone-in cut adds incredible flavor as it infuses into the broth during cooking. The bone also helps keep the meat moist by acting as a natural insulator. If you can’t find bone-in, use a 3 lb chuck roast cut into even 2-inch chunks—just expect slightly less natural juiciness. The key is maintaining consistent piece size for even cooking.
Can I use this recipe for a slow cooker instead?
Yes! Transfer the seared beef and aromatics to a slow cooker, add the broth and vinegar, then cook on Low for 8-10 hours or High for 5-6 hours. The texture will be slightly less tender than pressure cooking, but still delicious. For best results, use the same seasoning blend and let it rest before shredding.
What if my Instant Pot doesn’t have a “High Pressure” setting?
Most Instant Pots have a single pressure setting—just use the 90-minute cook time as written. If your model has a “Less” or “More” option, choose “More” for maximum tenderness. The natural pressure release for 10 minutes is crucial to prevent the meat from drying out during the quick release.
How do I fix beef that’s still tough after cooking?
Return the meat to the Instant Pot with any accumulated juices and cook on Sauté mode for 5-10 minutes to finish tenderizing. Alternatively, shred the beef and simmer it in the cooking liquid on the stovetop for 15-20 minutes. The extra moisture from the broth helps break down remaining fibers.
Can I make this recipe ahead of time?
The meat actually tastes better the next day! Store it in an airtight container with some cooking juices for 3-4 days in the fridge. For longer storage, freeze portions for up to 3 months. Reheat gently in the Instant Pot on Sauté mode with a splash of broth to prevent drying.

- Braised Beef Short Ribs Recipe: Crock Pot Fall-Off-Bone Magic in 6 Hours - November 1, 2026
- Crock Pot Cocoa Recipe: Velvety Warmth With Hidden Spice Magic - November 1, 2026
- White Queso Crock Pot Recipe: Ultra-Smooth Melt Without the Grain - November 1, 2026