
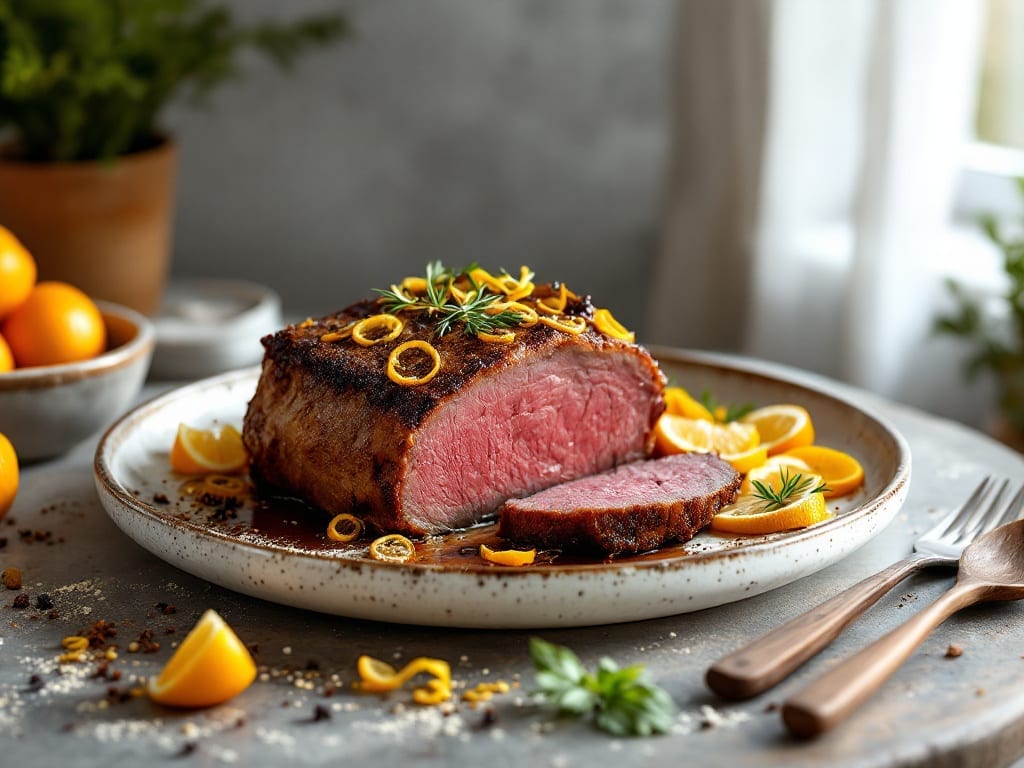
This bottom round roast pot roast recipe turns tough cuts into tender, fall-apart perfection with just a few simple steps. This method delivers restaurant-quality tenderness with deep, caramelized flavors that develop over hours of slow cooking—no expensive cuts required.
The key lies in proper seasoning and patience, turning an affordable cut into a showstopper main course.
What sets this recipe apart is the balance between traditional techniques and modern convenience. You can achieve perfect results using a Dutch oven on the stovetop or in the oven, or opt for the pressure cooker method when time is limited.
The slow cooking process breaks down tough fibers while building rich, complex flavors that infuse every bite. For maximum depth, I recommend searing the meat first to create a flavorful crust before braising.
By the time you pull this pot roast from the oven, you’ll have perfectly tender meat that practically falls apart at the touch of a fork. The aromas alone—caramelized onions, thyme-infused broth, and golden-brown crust—will have everyone gathered around the table.
Serve it with roasted vegetables or crusty bread to soak up every last drop of that flavorful juices. This is comfort food at its finest, made even better by the knowledge that you created it from scratch.
The beauty of this recipe is its versatility—it works equally well for family dinners or holiday gatherings. Leftovers reheat beautifully, making it perfect for meal prep.
Whether you’re following the classic slow-cooked method or using a pressure cooker for faster results, the outcome remains the same: tender, flavorful pot roast that will become a regular feature on your dinner table. Let’s get started on creating this timeless dish.
Ingredients for bottom round roast pot roast
Six ingredients transform tough bottom round into melt-in-your-mouth perfection through slow-cooked magic.
| Ingredient | Amount | Notes |
|---|---|---|
| Bottom Round Roast 🥩 | 3 lb | 3-4 inches thick, trimmed of excess fat |
| Yellow Onions 🧅 | 2 whole | Large, thinly sliced for caramelization |
| Garlic Cloves 🧄 | 8 cloves | Smashed for deeper flavor |
| Carrots 🥕 | 4 whole | Medium, peeled and halved lengthwise |
| Fresh Thyme 🌿 | 1 tbsp | Leaves only, stems removed |
| Fresh Rosemary 🌿 | 1 tbsp | Chopped, sprigs removed |
| Beef Broth 💧 | 3 cups | Low-sodium preferred, homemade or quality brand |
| Red Wine 🍷 | 1 cup | Dry, bold variety like Cabernet Sauvignon |
| Tomato Paste 🍅 | 2 tbsp | Smooth, not chunky |
| Olive Oil 🫒 | 2 tbsp | Extra-virgin for searing |
| Salt 🧂 | 2 tsp | Kosher or sea salt, freshly ground |
| Black Peppercorns 🌶️ | 1 tsp | Freshly cracked, coarse grind |
| Bay Leaves 🍃 | 2 whole | Dried, standard size |
| All-Purpose Flour 🌾 | 1 tbsp | For dusting meat |
The bottom round roast is the star—look for cuts 3-4 inches thick at Costco or your butcher shop, where they often trim it to your specifications. Whole Foods carries pre-trimmed roasts if you prefer convenience. Avoid cuts with excessive fat marbling, as it can make the meat greasy rather than tender. For maximum flavor, ask the butcher to trim the roast to 3-4 inches thick—this ensures even cooking. If you’re using a pressure cooker, a slightly thinner cut (2-3 inches) works better for faster results. The onions should be yellow, not red, for deeper caramelization—Reed’s or Sweet Onion varieties are ideal. Garlic should be fresh, not jarred, for authentic flavor.
No red wine? Beef broth with 1 tablespoon balsamic vinegar mimics the depth perfectly. Fresh thyme and rosemary can be swapped for 1 teaspoon each dried (use Penzeys or McCormick Gourmet for quality). The tomato paste is non-negotiable—Trader Joe’s squeeze tubes are perfect for this recipe. For the flour, King Arthur or Bob’s Red Mill brands work best. If you’re short on time, pre-sliced carrots (like Birds Eye) save chopping, though fresh always tastes better. The bay leaves should be dried, not fresh—California or Turkish varieties add subtle differences. For the pressure cooker method, reduce the beef broth to 2 cups and cooking time to 90 minutes on high pressure.
This roast reheats beautifully—350°F for 20 minutes with a splash of broth restores moisture. Store leftovers in the fridge for up to 5 days or freeze for 3 months. For meal prep, portion into individual containers with a scoop of the cooking juices. The carrots and onions can be roasted separately and stored for 4 days in the fridge. If making ahead, sear the meat and refrigerate overnight before braising—this enhances flavor development. The slow-cooked version tastes even better the next day as flavors meld.
Why You’ll Love This Recipe
- One-Pot Magic: I swear by this—just toss the roast, veggies, and herbs into a Dutch oven, add broth, and walk away. The onions caramelize right in the pot while the meat tenderizes; no extra pans, no stress.
- Thyme & Garlic Love: That fresh thyme and minced garlic? It’s the secret weapon here. The thyme brightens the rich beef, while the garlic lingers in every bite—like a cozy hug in food form.
- Leftovers That Win: Between us, the second night is often better. The roast pulls apart even easier, and the carrots soak up all that flavor. Pack it for lunch or freeze portions—no one will complain.
- Budget Beef, Big Payoff: Bottom round is affordable but delivers like a fancy cut. You get a hearty, satisfying meal without breaking the bank, and the leftovers stretch for days. My wallet and my family thank me.
Step-by-step instructions for bottom round roast pot roast
Here’s the method that transforms tough bottom round into melt-in-your-mouth perfection.
Sear the Roast for Maximum Flavor
Pat the 3 lb bottom round roast completely dry with paper towels. This step is critical – moisture prevents proper browning. Heat a Dutch oven over medium-high heat and add 2 tablespoons olive oil. Once shimmering, place the roast in the pot, fat-side down, and sear for 5 minutes without moving it. Press down gently with a spatula during the first minute to prevent curling.
Flip the roast and sear the other side for another 5 minutes. The exterior should develop a deep golden-brown crust. Remove the roast and set it aside on a plate. You’ll notice the bottom of the pot has beautiful browned bits – these contain concentrated flavor that will form the base of your sauce later. Don’t wipe them out yet.
Build the Caramelized Vegetable Base
In the same Dutch oven, add 2 tablespoons olive oil if needed. Add the 2 whole yellow onions, sliced thinly, and cook over medium heat for 8-10 minutes until they turn golden brown and caramelized. Stir occasionally but don’t rush this – caramelization develops deep sweetness that’s essential to the flavor profile.
Add the 8 cloves garlic cloves (smashed) and cook for 30 seconds until fragrant. Stir in the 4 whole carrots (halved lengthwise) and cook for another 5 minutes until they begin to soften slightly. Remove the vegetables and set them aside with the roast. This prevents overcooking while you prepare the sauce base.
Deglaze and Develop the Sauce
Return the Dutch oven to medium heat. Add 1 tablespoon all-purpose flour and stir for 1 minute to remove any raw flour taste. Slowly pour in the 1 cup red wine, scraping up all the browned bits from the bottom with a wooden spoon. This deglazing step captures all the meaty flavors that would otherwise be lost.
Add 2 tablespoons tomato paste and stir to combine. Let this mixture simmer for 2 minutes until slightly thickened. Pour in the 3 cups beef broth, then add the 2 whole bay leaves, 1 tablespoon fresh thyme leaves, and 1 tablespoon chopped fresh rosemary. Bring to a gentle simmer.
Braise Until Fork-Tender
Return the roast to the Dutch oven, placing it back in the liquid. Add the caramelized onions and carrots around the roast. Sprinkle with 2 teaspoons salt and 1 teaspoon cracked black peppercorns. The liquid should come about halfway up the sides of the roast.
Cover the pot and transfer to a preheated 325°F oven. Braise for 3 hours, then carefully flip the roast and add ½ cup additional beef broth if needed to maintain liquid level. Continue cooking for another 1-2 hours until the roast reaches 203°F internal temperature and is fork-tender with no resistance.
Rest and Serve with Sauce
Remove the roast from the pot and let it rest on a cutting board for 15 minutes. This resting period allows juices to redistribute throughout the meat, ensuring each slice remains moist. Skim any excess fat from the surface of the braising liquid and adjust seasoning if needed.
Slice the roast against the grain into ½-inch thick pieces. Spoon the rich caramelized vegetables and flavorful sauce over the top. Serve immediately with crusty bread or mashed potatoes to soak up every last bit of that velvety sauce. The result should be tender, flavorful meat with perfectly caramelized vegetables and a sauce that clings beautifully to each bite.
Pro Tips For Making Bottom Round Roast Pot Roast
- Sear the Roast Hard: Bottom round is tough—don’t treat it like a guest at a polite dinner. Get that roast screaming hot in a dry skillet for 3-4 minutes per side until it’s deep brown, almost black in spots. The crust locks in flavor and makes the slow cook melt-in-your-mouth magic happen. (Yes, it’ll smell like a butcher shop—good.)
- Cut Onions Like a Pro: Skip the quick chop and slice those yellow onions into ½-inch thick rounds first, then cut each round into wedges. They’ll caramelize faster and keep their shape instead of turning to mush. (I used to hate waiting for onions to soften—this cuts that time in half.)
- Don’t Overcrowd the Pot: If your Dutch oven looks like a science experiment after adding everything, you’ve gone too far. Start with the roast and onions, then add carrots and thyme after the meat and veggies have browned. Crowding steams instead of sears, and we’re not making soup here.
- Deglaze with Red Wine: After searing, don’t just splash in water or broth—use ½ cup red wine (even cheap stuff) to scrape up those browned bits. It adds depth the way store-bought stock never will. (Save the leftover wine for another night—this is a one-time use.)
Best sauces and condiments for this dish
Classic Red Wine Sauce
This rich, velvety sauce forms the heart of your pot roast, built from the deep flavors of red wine and beef broth.
After searing the roast and caramelizing the onions, deglaze the Dutch oven with 1 cup dry red wine (like Cabernet Sauvignon) to capture all those flavorful browned bits. Add 2 tbsp tomato paste and 3 cups beef broth, then simmer for 10 minutes to thicken.
The result is a sauce that’s perfect for spooning over each slice of tender roast. 🍷
Mustard Cream Sauce
For a tangy twist, finish your pot roast with a mustard cream sauce that cuts through the richness. Whisk together ½ cup heavy cream, 2 tbsp Dijon mustard, and 1 tbsp butter in a small saucepan.
Simmer for 3-4 minutes until slightly thickened, then stir in 1 tsp fresh thyme leaves. Drizzle this sauce over the sliced roast just before serving for a bright, herbaceous contrast. The mustard adds complexity that pairs beautifully with the deep beef flavors. 🌟
Horseradish Cream
If you want a bold kick, prepare a horseradish cream sauce that adds a spicy-sweet dimension. Mix ½ cup sour cream, 1 tbsp prepared horseradish, 1 tsp lemon juice, and a pinch of salt.
This sauce works especially well with the classic red wine reduction, offering a sharp contrast to the rich meat. Serve it on the side for guests to spoon over their portions—it’s a crowd-pleaser for those who enjoy heat. ⚡
Pan Gravy Upgrade
Don’t waste those flavorful drippings! After removing the roast, strain the braising liquid through a fine-mesh sieve to remove solids. Return it to the pot and simmer until slightly thickened. For extra richness, whisk in 1 tbsp cold butter or 2 tbsp beef tallow at the end.
This gravy is perfect for drizzling over the roast or serving in a gravy boat for dipping crusty bread. It’s the ultimate way to use every bit of flavor from your pot roast. 🥄
Sweet and Sour Glaze
For a sweet-savory finish, create a quick glaze by combining 2 tbsp balsamic vinegar, 1 tbsp honey, and 1 tsp soy sauce in a small saucepan. Simmer for 3 minutes** until slightly reduced, then brush over the sliced roast just before serving.
This glaze adds a bright, tangy contrast that enhances the meat’s natural richness. It’s especially effective when paired with the caramelized onions and carrots. 💫
Herb Butter Compound
Elevate your pot roast with a simple herb butter compound that melts beautifully onto each slice. Mix 4 tbsp softened butter with 1 tbsp chopped fresh parsley, 1 tsp chopped fresh thyme, and a pinch of salt.
Roll into a log, chill for 30 minutes, then slice and place on top of the roast just before serving. The butter melts into the meat, infusing it with fresh herb flavors. 🌿
Nutrition facts
Frequently asked questions
Why does bottom round roast need slow cooking?
Bottom round is a tough, lean cut with long muscle fibers that require 3-5 hours of moist heat to break down collagen and become tender. The slow braising process transforms these fibers into silky, fork-tender meat while developing deep, caramelized flavors. Skipping this step leaves the meat chewy rather than melt-in-your-mouth perfect.
Can I use a pressure cooker instead of oven braising?
A pressure cooker cuts cooking time to 90 minutes on high pressure while delivering the same tender results. Use the same ingredients but reduce beef broth to 2 cups and skip the initial sear (or do a quick 5-minute sear first). The pressure cooker method works especially well when you’re short on time but still want restaurant-quality tenderness.
What’s the best way to slice pot roast for maximum tenderness?
Always slice against the grain—look for the natural lines in the meat fibers and cut perpendicular to them. Use a sharp knife and cut into ½-inch thick slices. This shortens the muscle fibers, making each bite more tender. Never slice with the grain, or you’ll get tough, stringy pieces. The first few slices will be the most tender—save them for special guests!
How do I fix pot roast that’s still tough after cooking?
If your roast isn’t fork-tender, it likely didn’t cook long enough. Return it to the oven at 325°F for another 30-60 minutes with extra broth. For immediate results, slice the roast thinly against the grain and serve with extra sauce to compensate. The good news? This meat is perfect for sandwiches or tacos where thin slices work better. Never overlook the power of proper resting time (15 minutes) before slicing.
What are the best sides to serve with this pot roast?
Classic pairings include creamy mashed potatoes, buttery egg noodles, or roasted root vegetables. For a complete meal, add a crisp green salad with a tangy vinaigrette to cut through the richness. The caramelized onions and carrots from the pot roast make excellent additions to grain bowls or sandwiches. Don’t forget crusty bread for soaking up that delicious sauce!

- Baked Potatoes in Crock Pot Recipe: Buttery Interiors and Crispy Top Magic - November 1, 2026
- Braised Beef Short Ribs Recipe: Crock Pot Fall-Off-Bone Magic in 6 Hours - November 1, 2026
- Crock Pot Cocoa Recipe: Velvety Warmth With Hidden Spice Magic - November 1, 2026