
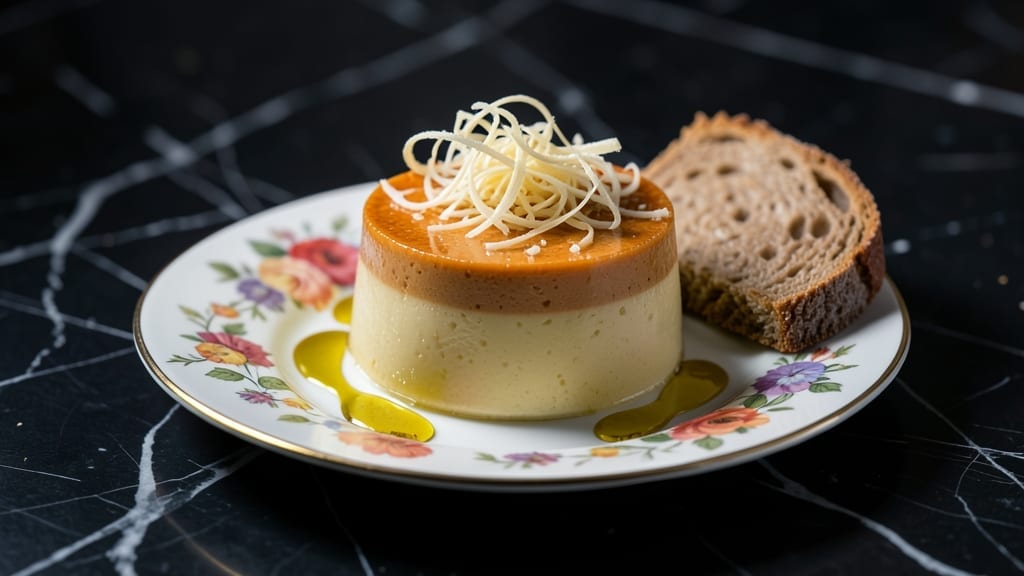
This flower pot pudding dessert recipe brings old-world charm to your kitchen with its layered vanilla-cream custard and delicate sponge cake. The rustic presentation—served in a vintage flower pot—makes it perfect for garden parties or cozy family gatherings.
I’ve perfected the balance between creamy custard and crisp sponge layers, ensuring every bite delivers that nostalgic flavor.
The secret lies in the precise layering technique: a light vanilla sponge base, rich custard filling, and a final dusting of powdered sugar for elegance. Ready in about 1 hour 30 minutes, this dessert requires minimal effort but maximum impact.
The custard stays velvety smooth while the sponge provides just the right contrast, creating a texture that’s both comforting and refined.
What makes this recipe truly special is its versatility—you can add fresh berries, a splash of sherry for depth, or even a rum-soaked sponge for extra indulgence.
The presentation transforms an ordinary dessert into a showstopper, perfect for special occasions or when you want to impress guests without spending hours in the kitchen.
Whether you’re serving it warm with a scoop of vanilla ice cream or chilled for a lighter treat, this flower pot pudding delivers restaurant-quality results with a homemade touch. Let’s create something memorable together.
Ingredients for flower pot pudding dessert
Vanilla, cream, and a touch of rustic charm—all you need for this elegant dessert.
| Ingredient | Amount | Notes |
|---|---|---|
| Vanilla Bean Paste 🌸 | 2 tbsp | High-quality for best flavor |
| All-Purpose Flour 🌾 | 2 cups | Sifted for light sponge |
| Granulated Sugar 🍚 | 1 ½ cups | Divided for layers |
| Unsalted Butter 🧈 | 1 cup | Room temperature, full-fat |
| Large Eggs 🥚 | 6 whole | Room temperature preferred |
| Whole Milk 🥛 | 2 cups | Full-fat for creaminess |
| Heavy Whipping Cream 🥛 | 1 ½ cups | Cold for best whipping |
| Cornstarch 🌾 | 2 tbsp | For custard thickness |
| Powdered Sugar 🍚 | 1 cup | For dusting and filling |
| Vanilla Extract 🌸 | 1 tsp | Pure, high-quality |
| Salt 🧂 | ½ tsp | Fine sea salt |
| Fresh Berries 🍓 | 1 ½ cups | Optional for garnish |
| Vintage Flower Pot 🌷 | 1 whole | For presentation |
The vanilla is everything here. Madagascar bourbon vanilla bean paste from Williams Sonoma or Trader Joe’s adds depth you won’t get from imitation. For the sponge, King Arthur flour is my go-to—it bakes up lighter than store brands. The butter? Plugrá or Land O’Lakes work perfectly, but avoid anything with salt added. Eggs should be at room temperature for even baking, so take them out 30 minutes before mixing. If you’re in a rush, Whole Foods sells pre-separated eggs at room temp.
No vanilla bean paste? Double the vanilla extract—just know it won’t be as rich. Short on berries? Frozen raspberries work too (thaw and drain first). Want extra indulgence? Add 1 tbsp rum or sherry to the custard mixture. The custard can be made ahead—it actually tastes better after sitting overnight. For the sponge, baking powder can replace half the cornstarch if you’re out, but the texture will be slightly denser. And if you’re feeling fancy, infuse the milk with a cinnamon stick while heating for the custard.
This dessert keeps beautifully—3 days refrigerated if covered tightly. For serving, let it sit at room temperature for 20 minutes before slicing. The custard layer can be made 1 day ahead and stored separately; assemble just before serving. To reheat, warm gently in the microwave with a damp paper towel over it—30 seconds max. The flower pot? Any ceramic pot with drainage holes works—thrift stores often have charming vintage pieces for a few dollars. Line it with parchment paper for easy removal.
Why You’ll Love This Recipe
- No Mixing Madness: I swear by this recipe—just fold the dry ingredients into the butter and eggs like you’re tucking in a blanket. No stand mixer, no overmixing, no stress. The vanilla bean paste does all the flavor work for you while you stir maybe 15 times.
- Vanilla Bomb: That little jar of vanilla bean paste? It’s the secret weapon. The swirls of real vanilla seeds melt into the custard, giving it this luxurious depth that store-bought pudding can’t touch. Honestly, it’s the kind of flavor that makes you pause mid-bite.
- Pot Luck Perfection: Between us, this dessert is my go-to for potlucks, book club gatherings, or when my in-laws show up unannounced. Serve it warm with a sprinkle of cinnamon or cold with whipped cream—it’s the chameleon of desserts that never lets you down.
- Budget-Friendly Luxe: Five ingredients, all pantry staples. The butter and eggs make it feel fancy, but the cost? Ridiculously low. I’ve made this for 12 people for under $15, and no one ever guesses how affordable it was. Leftovers? They vanish faster than I can reheat them.
Step-by-step instructions for flower pot pudding dessert recipe
Here’s how to create this elegant dessert with layers of vanilla cream and rustic charm.
Prepare the Vanilla Cream Base
In a medium saucepan, combine the 2 cups whole milk and 2 tbsp cornstarch. Whisk vigorously until the cornstarch dissolves completely—this prevents lumps that can ruin your custard. Place the saucepan over medium heat and cook, stirring constantly with a wooden spoon, until the mixture thickens to a smooth, pudding-like consistency (about 5-7 minutes).
Remove from heat and immediately stir in the 1 cup unsalted butter and 1.5 cups granulated sugar, mixing until fully incorporated. Let the mixture cool slightly, then whisk in the 6 whole large eggs, one at a time, ensuring each is fully incorporated before adding the next. This step is crucial for a silky texture—don’t rush it. Finally, stir in the 2 tbsp vanilla bean paste and 1 tsp vanilla extract for maximum flavor depth. The mixture should be smooth and slightly thicker than heavy cream.
Assemble the Pudding Layers
In a separate bowl, whip the 1.5 cups heavy whipping cream to stiff peaks using a stand mixer or hand mixer. Fold in the 1 cup powdered sugar and 0.5 tsp salt until fully combined. Set aside. This whipped cream will create the light, airy layers that make this dessert special.
Pour half of the vanilla cream base into the bottom of your vintage flower pot. Then add half of the whipped cream mixture, gently spreading it evenly. Repeat with the remaining vanilla cream and whipped cream. For a decorative touch, arrange the 1.5 cups fresh berries on top, pressing them lightly into the whipped cream layer. This not only adds visual appeal but also prevents the layers from shifting during baking.
Bake Until Golden and Set
Preheat your oven to 350°F. Place the assembled flower pot on a baking sheet lined with parchment paper to catch any potential drips. Bake for 30-35 minutes, or until the top is golden brown and the edges are set. The center should still have a slight wobble when gently shaken—this indicates it’s perfectly set but still creamy inside.
Here’s the thing—don’t overbake. The pudding will continue to set as it cools, and overbaking can make it dry. If the top browns too quickly, tent it loosely with aluminum foil to prevent over-browning while allowing it to finish baking evenly. Once baked, let it cool completely at room temperature before serving. This cooling process allows the flavors to meld and the layers to fully set.
Chill and Serve with Rustic Flair
Transfer the baked pudding to the refrigerator and chill for at least 4 hours, or preferably overnight. This chilling step is essential for developing the perfect texture—creamy yet firm enough to hold its shape when served. The longer it chills, the more pronounced the flavors become.
When ready to serve, dust the top with an additional sprinkle of powdered sugar** for a finishing touch. Serve directly from the flower pot for that charming, rustic presentation. Each slice will reveal beautiful layers of vanilla cream and whipped cream, with fresh berries adding a pop of color and natural sweetness. This dessert is perfect for special occasions or as a stunning centerpiece for any gathering.
Pro Tips For Making Flower Pot Pudding Dessert
- Whisk Eggs Cold: Crack eggs straight into the butter-sugar mix while they’re still icy from the fridge. I learned this the hard way—warm eggs scramble faster than you can blend, and suddenly your batter’s more omelet than custard. The cold shock keeps the yolks smooth and the texture silky.
- Sift That Flour: Don’t just dump the flour—sift it directly into the dry ingredients (sugar, vanilla) before adding wet. After burning three batches with lumps, I realized aerated flour blends faster and cuts down on that weird grainy bite. Yes, even if you’re impatient like me.
- Butter Must Melt Slow: Lower the heat to medium-low when melting butter—high heat browns it before the flour gets coated. I was skeptical until I tried it: the butter stays golden, not nutty, and the pudding’s flavor stays clean. (Your future self will notice the difference.)
- Test Doneness with a Skewer: The pudding’s done when the center jiggles just slightly and a skewer comes out clean—but still holds a faint sheen. Oven to table, it’ll set fully. I skip the toothpick trick now; it’s too dry. This method guarantees a creamy finish, not a dry crumb.
Creative variations of this recipe
Boozy Rum Variations
For a grown-up twist, infuse the custard with 1 tbsp dark rum—I recommend Bacardi Superior or Appleton Estate—while heating the milk. The alcohol cooks off completely, leaving behind warm, caramelized notes that deepen the vanilla flavor.
For extra decadence, soak the sponge cake layers in 2 tbsp rum before assembling, then let them dry slightly before layering. 🍹
Citrus Zest Twist
Brighten the custard by adding zest from 1 lemon or orange (about 1 tsp) along with the vanilla. The citrus cuts through the richness beautifully, especially when paired with white chocolate shavings on top.
For a tropical version, swap the berries for mango slices and add ½ tsp lime zest to the custard. The acidity balances the sweetness perfectly.
Spiced Chai Version
Transform this dessert into a cozy chai-inspired treat by infusing the milk with 1 cinnamon stick, 2 whole cloves, and 1 star anise pod while heating. Strain before mixing with cornstarch, then add ½ tsp ground cardamom to the custard.
Top with toasted almond slices and a sprinkle of cinnamon sugar for a warm, aromatic finish. This version feels like dessert meets afternoon tea. ✨
No-Bake Berry Swirl
Skip the baking entirely by assembling the layers in a chilled 8-inch springform pan and refrigerating for 6 hours.
Replace the custard with a no-bake cheesecake layer—mix 16 oz cream cheese, ½ cup powdered sugar, 1 tsp vanilla, and 1 cup whipped cream, then swirl in 1 cup mixed berry compote. Top with whipped cream and fresh berries.
Serve straight from the fridge for a lighter, summer-friendly dessert. 🍓
Chocolate-Dipped Layers
For chocolate lovers, dip the fresh berries in melted dark chocolate (I use 70% Ghirardelli) before arranging them on top. Alternatively, drizzle warm chocolate sauce over the whipped cream layer before baking.
For a molten center, add chocolate chips to the custard mixture—they’ll melt slightly during baking, creating pockets of gooey chocolate. 🍫
Seasonal Pumpkin Spice
Autumn calls for a pumpkin twist! Replace ½ cup of milk with ½ cup pumpkin puree and add 1 tsp pumpkin pie spice to the custard. Top with candied pecans and a dollop of whipped cream before serving.
The spice adds warmth that pairs beautifully with the vanilla, making this a perfect fall dessert. 🎃
Nutrition facts
Frequently asked questions
Can I make this dessert without a flower pot?
If you don’t have a vintage flower pot, use a 9-inch round cake pan or ramekin dishes for individual servings. For a rustic look, try a clay baking dish or even a pie dish. The key is choosing a heat-safe container that can go straight from oven to table.
How long can I store the assembled pudding before baking?
The assembled pudding can be refrigerated for up to 24 hours before baking. Cover it tightly with plastic wrap to prevent drying. For best results, bake within 12 hours of assembly to maintain the creaminess of the layers. If storing longer, bake immediately after assembly for optimal texture.
What’s the secret to keeping the custard layer perfectly creamy?
Three things: low and slow heat when cooking the custard, constant stirring to prevent lumps, and cooling it completely before adding eggs. Never let the milk boil, and whisk the eggs in one at a time to avoid scrambling. The custard should be lukewarm before adding eggs to prevent cooking them.
Can I substitute the vanilla sponge with store-bought cake?
While possible, it won’t give the same delicate texture. For best results, make the vanilla sponge from scratch. If you must use store-bought, choose a light vanilla cake (no chocolate or spice) and cut it into thin layers. Soak the layers briefly in warm custard mixture before assembling to help them absorb moisture.
Why did my pudding crack or sink in the middle?
This usually happens from overbaking or opening the oven door too early. The center should have a slight wobble when done. To prevent it: bake at 350°F for exactly 30-35 minutes, and avoid opening the oven during baking. If it does sink slightly, the texture will still be delicious—just serve it warm with extra whipped cream.

- Baked Potatoes in Crock Pot Recipe: Buttery Interiors and Crispy Top Magic - November 1, 2026
- Braised Beef Short Ribs Recipe: Crock Pot Fall-Off-Bone Magic in 6 Hours - November 1, 2026
- Crock Pot Cocoa Recipe: Velvety Warmth With Hidden Spice Magic - November 1, 2026