
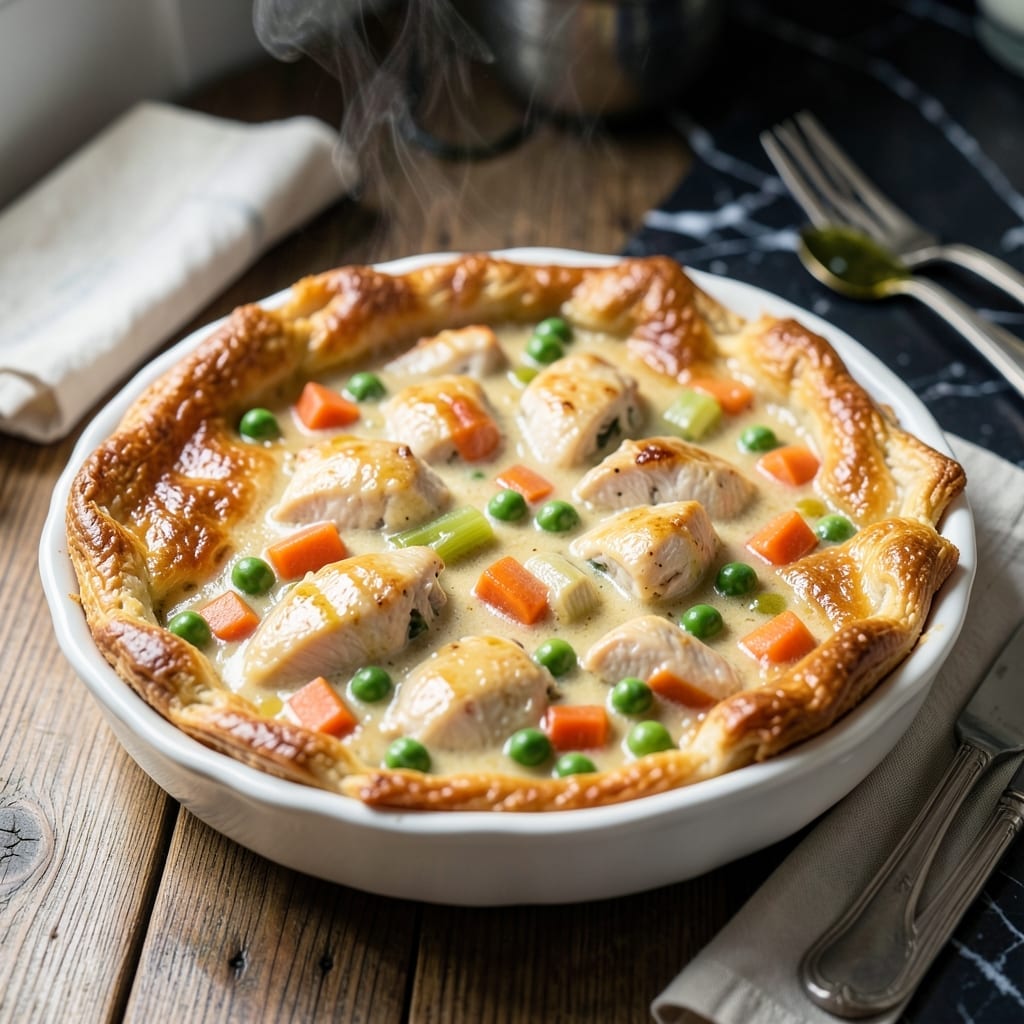
This chicken pot pie delivers creamy comfort in every bite, with a shortcut that doesn’t compromise on flavor. The Bisquick topping creates a golden, buttery biscuit layer that’s ready in minutes, no pie crust required.
The filling comes together quickly on the stovetop, combining tender chicken, vegetables, and a velvety sauce. It’s the perfect balance of hearty and comforting, with a texture that’s rich without being heavy.
Once assembled, the Bisquick topping bakes into a fluffy, golden crown that soaks up the creamy filling below. It’s a foolproof method for achieving that classic pot pie experience with minimal effort.
Serve it hot from the oven for a meal that feels like home. This dish proves that shortcuts can still deliver impressive results.
Ingredients for Chicken Pot Pie Made with Bisquick
A handful of pantry staples and fresh veggies build this comforting, creamy dish from scratch.
| Ingredient | Amount | Notes |
|---|---|---|
| Boneless Skinless Chicken Breasts 🍗 | 1 ½ lb | Diced into bite-sized pieces |
| Carrots 🥕 | 2 whole | Peeled and diced |
| Celery Stalks 🥬 | 2 whole | Diced, leaves included |
| Frozen Green Peas 🌱 | 1 cup | No need to thaw |
| Yellow Onion 🧅 | 1 whole | Finely diced |
| Garlic Cloves 🧄 | 2 cloves | Minced |
| Butter 🧈 | ½ cup | Unsalted, for sauce |
| All-Purpose Flour 🌾 | ⅓ cup | For thickening sauce |
| Chicken Broth 💧 | 1 ½ cups | Low-sodium preferred |
| Whole Milk 🥛 | ¾ cup | Full-fat for creaminess |
| Bisquick Baking Mix 🍞 | 1 ½ cups | For biscuit topping |
| Salt 🧂 | 1 tsp | Kosher or sea salt |
| Black Pepper 🌶️ | ½ tsp | Freshly ground |
| Dried Thyme 🍃 | ½ tsp | For aromatic depth |
| Bay Leaf 🌿 | 1 whole | Remove before serving |
The chicken is the foundation—boneless, skinless breasts stay tender in the creamy sauce. Costco or Sam’s Club offer great bulk options if you’re prepping for a crowd. For vegetables, fresh carrots, celery, and onion give the best texture, but frozen mixed veggies work in a pinch (just thaw and drain first). The Bisquick topping needs to be original formula for that classic buttery rise.
Short on time? Rotisserie chicken shreds beautifully into the filling—use about 3 cups. No thyme? Poultry seasoning at half the amount works well. For a richer sauce, swap whole milk for half-and-half. The broth can be vegetable in a pinch, but chicken broth gives the most authentic flavor. Always taste before seasoning—Bisquick adds a bit of salt.
Assemble and bake immediately for best rise, or refrigerate filled dish for up to 2 hours before baking. Leftovers keep 3-4 days in the fridge. Reheat covered in the oven—350°F for 15-20 minutes—to keep the topping from getting soggy.
Why You’ll Love This Recipe
- I’ll be real: it tastes even better the next day, and one batch feeds us twice with zero extra effort.
- One Bowl Wonder: I just dump the Bisquick mix, veggies, and chicken into one bowl—no extra dishes to wash, and it bakes up golden every time.
- That Creamy Bite: The chicken soaks up the savory broth with carrots and celery, and the peas pop with sweetness under that flaky, buttery crust.
- Weeknight Hero: Honestly, it’s my Tuesday lifesaver—ready before the kids start asking what’s for dinner.
Step-by-Step Instructions for Chicken Pot Pie Made With Bisquick
This efficient method ensures a creamy filling with minimal hands-on time.
Step 1: Sauté the Vegetable Base
Heat a large skillet over medium heat and melt the 0.5 cup butter. Add the finely diced yellow onion, peeled and diced carrots, and diced celery stalks. Cook for 5-6 minutes until the vegetables soften and the onion becomes translucent.
This builds a flavor foundation for the filling. Stir in the minced garlic cloves and cook for 30 seconds until fragrant. Be careful not to burn the garlic—it turns bitter quickly. The vegetables should release some moisture but not brown.
Step 2: Create the Creamy Filling
Sprinkle the 0.33 cup all-purpose flour over the vegetables and stir to coat. Cook for 1 minute to remove the raw flour taste. Slowly pour in the 1.5 cups chicken broth while whisking constantly to prevent lumps.
Add the diced boneless skinless chicken breasts, 1 cup frozen green peas, 1 tsp salt, 0.5 tsp black pepper, 0.5 tsp dried thyme, and 1 whole bay leaf. Stir well, then bring to a simmer. Reduce heat to medium-low and cook for 10-12 minutes until the chicken is cooked through and the sauce thickens.
The sauce should coat the back of a spoon when done. Remove the bay leaf before proceeding. Stir in the 0.75 cup whole milk and let the mixture simmer for 2 more minutes until it reaches a creamy consistency.
Step 3: Prepare and Add the Bisquick Topping
In a separate bowl, combine the 1.5 cups Bisquick baking mix with 1 tablespoon of water to form a soft, slightly sticky dough. The dough should hold together but not be dry. If it’s too crumbly, add another 1-2 teaspoons of water.
Drop spoonfuls of the Bisquick dough evenly over the hot chicken filling. Use about 6-8 spoonfuls to cover most of the surface, leaving small gaps for steam to escape. This ensures the topping cooks evenly without becoming soggy.
Step 4: Bake to Golden Perfection
Transfer the skillet to a preheated oven at 400°F. Bake for 15-18 minutes until the Bisquick topping is golden brown and the filling is bubbling around the edges. The topping should be firm to the touch and slightly crisp on top.
If the topping browns too quickly, tent the skillet loosely with foil. Let the pot pie rest for 5 minutes after removing from the oven. This allows the filling to set slightly, making it easier to serve.
Pro Tips For Making Chicken Pot Pie Made With Bisquick
- Precook the Chicken: Poach or simmer the chicken breasts in broth for 12-15 minutes until just done, then shred—this keeps them moist instead of drying out in the oven. I learned this the hard way after too many chewy bites.
- Sauté the Veggies: Cook the onions, carrots, and celery in butter for 5-7 minutes until soft before adding peas; raw veggies release too much moisture and make the filling watery.
- Thicken the Filling: After mixing your chicken and veggies with the sauce, let it sit for 5 minutes off the heat—it’ll thicken just enough so the Bisquick topping doesn’t sink.
- Use Cold Butter: Cut cold butter into the Bisquick topping mix until it’s pea-sized; it creates flaky layers instead of a dense, flat crust. Sounds weird, but it works.
Dietary Considerations for This Recipe
Gluten-Free Option
Swap the all-purpose flour for a 1:1 gluten-free flour blend like King Arthur Measure for Measure. Use the same amount and cooking method. For the Bisquick topping, use gluten-free Bisquick—it behaves identically to the original in this recipe. 💡
Dairy-Free Adaptation
Replace whole milk with unsweetened almond milk or oat milk for creamy results. Use dairy-free butter like Earth Balance for the sauce. The Bisquick topping can be made with dairy-free Bisquick and coconut milk instead of water.
Lower-Carb Version
Cut the Bisquick topping in half and add 1 cup cauliflower rice to the filling for bulk. Use almond flour to thicken the sauce instead of all-purpose flour. This reduces carbs while keeping the dish hearty.
Vegetarian Twist
Omit the chicken and add 1.5 cups chickpeas or diced mushrooms for protein. Use vegetable broth instead of chicken broth. The creamy sauce and Bisquick topping work perfectly with these plant-based swaps.
Sodium Considerations
Use low-sodium chicken broth and reduce the added salt by half. Skip the added salt entirely if using regular broth. The Bisquick topping contains some sodium, so taste before adding extra seasoning. 🌱
Allergen Notes
This recipe contains wheat, dairy, and egg (in Bisquick). For nut allergies, ensure your broth and milk substitutes are nut-free. Always check Bisquick packaging for allergen warnings.
Nutrition Facts
Frequently Asked Questions
Can I use pre-cooked chicken to save time?
Use 3 cups of shredded rotisserie chicken or leftover cooked chicken. Add it at the end just to warm through, reducing simmering time to 5 minutes. This keeps the meat tender and juicy.
Why is my Bisquick topping dense instead of fluffy?
Overmixing the dough develops gluten, making it tough. Stir just until combined, and ensure your oven is fully preheated to 400°F. Also, avoid pressing the dough—drop it in spoonfuls.
Can I make this ahead and bake later?
Yes! Assemble the dish, cover, and refrigerate up to 2 hours before baking. For longer storage, freeze unbaked (up to 1 month). Thaw overnight in the fridge before baking as directed.
How do I prevent a soggy topping?
Make sure the filling is bubbling hot before adding the dough. Leave small gaps between spoonfuls for steam to escape. Avoid overfilling the dish, and let it rest 5 minutes after baking.

- 6 Oz Chocolate Chip Cookie Recipe: Perfectly Balanced Crispy Edges and Chewy Hearts - September 25, 2026
- 6-Inch Coffee Cake Recipe: Vanilla Bean Swirls and Buttery Streusel Topping - September 25, 2026
- 1 Hour Soup Recipe: Velvety Richness Without the Wait - September 25, 2026