
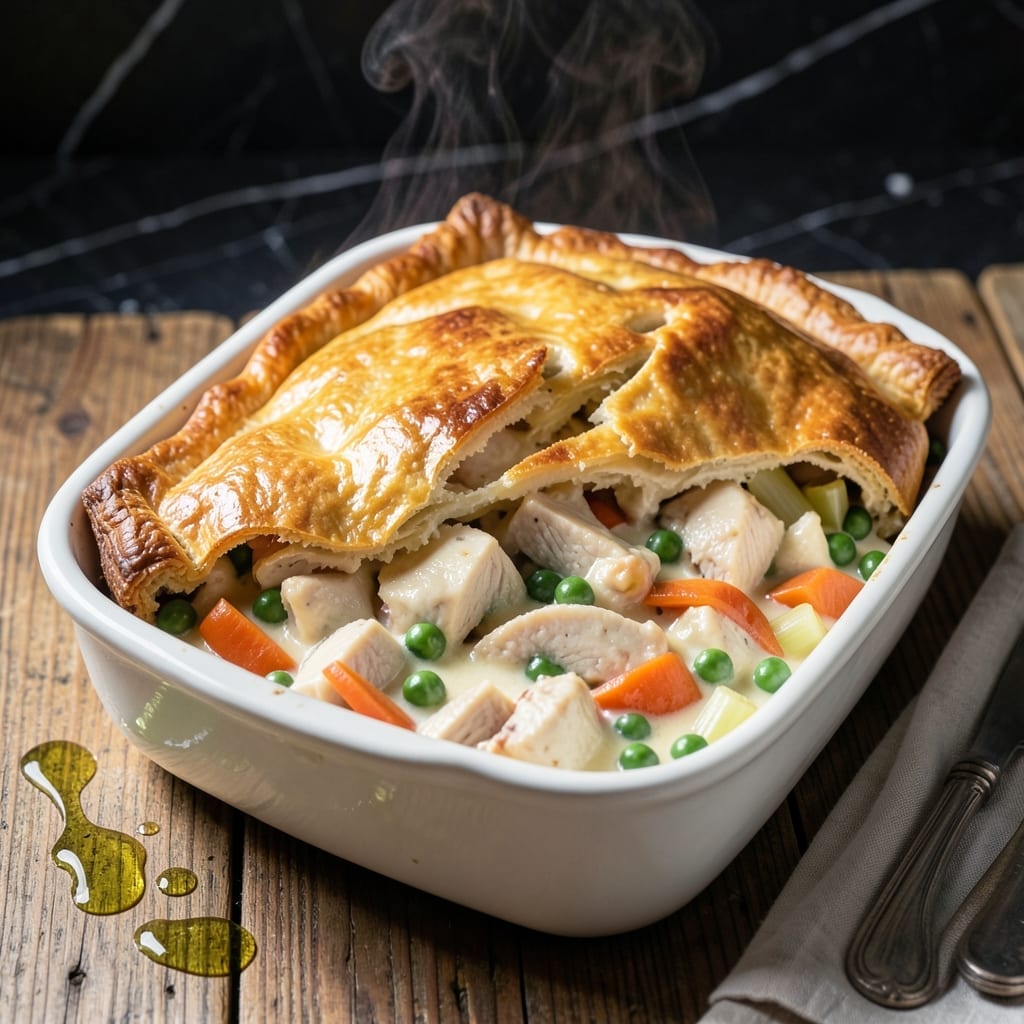
This sheet pan version transforms classic chicken pot pie into a crowd-pleasing meal that bakes to golden perfection. No individual ramekins or finicky crusts—just a single 9 x 13 pan filled with creamy, savory goodness.
The filling comes together with tender chicken, hearty vegetables, and a velvety sauce that clings to every bite. A flaky, buttery crust blankets the top, baking into a golden finish that cracks with each serving.
This is comfort food at its most practical—easy to assemble, simple to serve, and guaranteed to satisfy. The sheet pan format ensures even baking while keeping the filling rich and flavorful.
Perfect for family dinners, potlucks, or whenever you need a meal that feels like a warm embrace. Here’s how to make it.
Ingredients for Chicken Pot Pie Recipe 9 X 13 Pan
Nothing exotic here—just good stuff for a sheet pan of comfort.
| Ingredient | Amount | Notes |
|---|---|---|
| Chicken Breast 🍗 | 1 ½ lb | Boneless, skinless, diced |
| Carrots 🥕 | 2 whole | Peeled and sliced |
| Celery Ribs 🌿 | 2 whole | Diced small |
| Yellow Onion 🧅 | 1 whole | Finely chopped |
| Frozen Green Peas 🌱 | 1 cup | No need to thaw |
| Unsalted Butter 🧈 | ½ cup | For the roux |
| All-Purpose Flour 🌾 | ½ cup | For thickening sauce |
| Chicken Broth 🥣 | 2 cups | Low-sodium preferred |
| Whole Milk 🥛 | 1 cup | Full-fat for creaminess |
| Salt 🧂 | 1 tsp | Adjust to taste |
| Black Pepper 🌶️ | ½ tsp | Freshly ground |
| Garlic Powder 🧄 | 1 tsp | For depth of flavor |
| Dried Thyme 🍃 | ½ tsp | Or fresh if available |
| Puff Pastry Sheet 🥧 | 1 sheet | Thawed per package instructions |
| Large Egg 🥚 | 1 whole | For egg wash on crust |
The chicken is the foundation here. I grab boneless, skinless breasts from Costco—they’re lean but still stay juicy. Thighs work too if you prefer darker meat (more flavor, slightly less drying out). For the veggies, fresh is ideal but frozen carrots and peas save time without sacrificing much. The puff pastry? Pepperidge Farm is my go-to—always flaky, never soggy.
No chicken broth? Vegetable broth plus a bouillon cube gets you close. Out of milk? Half-and-half makes it even richer. Fresh thyme instead of dried? Use triple the amount. No puff pastry? Pie crust or biscuit dough works in a pinch. The butter can be swapped for olive oil if you’re in a bind (but the flavor won’t be quite the same).
Leftovers keep beautifully—actually taste better the next day. Store in the fridge for up to 4 days or freeze for 3 months. Reheat in the oven to keep the crust crisp (microwave works, but expect soft pastry).
Why You’ll Love This Recipe
- I’ll be real: it tastes even better the next day, and one batch fills my fridge for easy lunches.
- One Pan Wonder: I love that I can dump all the chicken, carrots, celery, and onion in one 9×13 pan and let the oven do the work.
- That Creamy Filling: The peas soak up all the rich, savory sauce—honestly, it’s the part I sneak bites of while plating.
- Feeds a Hungry Crowd: Between us, this is my go-to for Sunday dinner with the in-laws or when the kids bring friends over.
Step-by-Step Instructions for Chicken Pot Pie
This method delivers that cozy, comforting meal with a golden crust every time.
Step 1: Poach and Shred the Chicken Breast
Place the 1.5 lb chicken breast in a large pot and cover with water by about 1 inch. Bring to a gentle simmer over medium-high heat—don’t let it boil hard or the meat will toughen.
Cook for 12-15 minutes until the internal temperature reaches 165°F and the chicken is no longer pink inside. Remove from water and let cool slightly. Shred into bite-sized pieces using two forks—it should pull apart easily when done properly.
Step 2: Sauté the Vegetables Until Tender
In a large skillet, melt 2 tablespoons of the unsalted butter over medium heat. Add the yellow onion, carrots, and celery ribs. Cook for 8-10 minutes, stirring occasionally, until the vegetables soften and the onion turns translucent.
Add the frozen green peas during the last 2 minutes of cooking—they’ll thaw quickly in the hot pan. This ensures they stay bright green and don’t turn mushy. Season with salt, black pepper, garlic powder, and dried thyme.
Step 3: Make the Creamy Filling Sauce
In the same skillet, melt the remaining unsalted butter over medium heat. Whisk in the all-purpose flour to create a roux. Cook for 1-2 minutes until bubbly and golden—this removes the raw flour taste.
Gradually whisk in the chicken broth and whole milk until smooth. Bring to a simmer and cook for 3-4 minutes until the sauce thickens enough to coat the back of a spoon. Stir in the shredded chicken and vegetables, then remove from heat.
Step 4: Assemble and Bake in the 9×13 Pan
Transfer the chicken and vegetable mixture to a 9×13-inch baking dish, spreading it evenly. Unfold the puff pastry sheet and place it over the filling, trimming any excess to fit the dish. Press the edges lightly to seal.
Whisk the large egg with 1 tablespoon water and brush evenly over the pastry. Cut 4-5 small slits in the top to allow steam to escape. Bake at 375°F for 25-30 minutes until the crust is golden brown and puffed.
Step 5: Rest and Serve Warm
Let the pot pie rest for 10 minutes after removing from the oven. This allows the filling to set slightly so it doesn’t run out when you serve it. The crust should have a hollow sound when tapped lightly.
Scoop generous portions into bowls, making sure each serving gets some of that flaky, golden pastry top. The filling should be creamy and thick, with tender vegetables and chicken in every bite. Best served fresh from the oven for maximum comfort.
Pro Tips For Making Chicken Pot Pie Recipe 9 X 13 Pan
- Precook the Chicken: Poach the chicken breast in salted water for 15-18 minutes until just done, then shred it—this keeps it moist and prevents dry, rubbery bits in the filling.
- Sweat the Veggies: Cook the onion, carrots, and celery in butter for 8-10 minutes until soft but not browned; raw veggies make the filling watery and underseasoned.
- Thicken the Filling: After adding peas, simmer the filling for 3-5 minutes after thickening with a slurry—this cooks out the raw flour taste and sets the texture.
- Vent the Crust: Cut a few small slits in the top crust before baking to let steam escape; I learned this the hard way after my first pie burst open in the oven.
Flavor Customization for This Dish
Herb Infusions
Swap the dried thyme for 1 tsp rosemary or 1 tbsp fresh tarragon for a bolder herbal note. I love rosemary with chicken—it adds a piney depth that pairs beautifully with the creamy sauce. 🌿
Spicy Kick
Add ½ tsp cayenne pepper or 1 diced jalapeño to the vegetable mix for heat. A dash of hot sauce in the filling also works. I once added chipotle powder for a smoky-spicy twist my family raved about.
Creamy Upgrades
Replace whole milk with heavy cream for extra richness, or stir in 2 oz cream cheese at the end for tangy depth. A splash of white wine in the sauce adds acidity that brightens the dish.
Vegetable Swaps
Try mushrooms, diced potatoes, or asparagus in place of peas or carrots. For a heartier version, add 1 cup diced butternut squash. Just ensure all veggies are uniformly sized for even cooking.
Crust Variations
Use pie crust instead of puff pastry for a sturdier bite, or top with biscuit dough for a Southern-style twist. I’ve even used crescent roll dough in a pinch—it bakes up buttery and soft. 🥧
Cheesy Addition
Sprinkle ½ cup shredded cheddar or Gruyère over the filling before adding the crust. The cheese melts into the sauce, creating gooey pockets of flavor. Parmesan adds a salty sharpness that cuts through the creaminess.
Nutrition Facts
Frequently Asked Questions
Can I use rotisserie chicken to save time?
Shred 4 cups of rotisserie chicken and skip the poaching step. This cuts prep time by 15 minutes while keeping the flavor rich. Just adjust seasoning since rotisserie is already salted.
How do I prevent a soggy bottom crust?
Preheat the 9 x 13 pan in the oven for 5 minutes before adding the filling. Also, ensure your filling is thick and not watery before topping with pastry. This creates a crisp barrier.
Can I make this ahead and bake later?
Yes! Assemble the entire dish, cover tightly with foil, and refrigerate for up to 24 hours. Bake as directed, adding 5-10 minutes to the time if starting cold.
What’s the best way to reheat leftovers?
Cover with foil and warm at 350°F for 15-20 minutes until heated through. This keeps the crust flaky. Avoid microwaving—it makes the pastry soft.

- 6 Oz Chocolate Chip Cookie Recipe: Perfectly Balanced Crispy Edges and Chewy Hearts - September 25, 2026
- 6-Inch Coffee Cake Recipe: Vanilla Bean Swirls and Buttery Streusel Topping - September 25, 2026
- 1 Hour Soup Recipe: Velvety Richness Without the Wait - September 25, 2026