
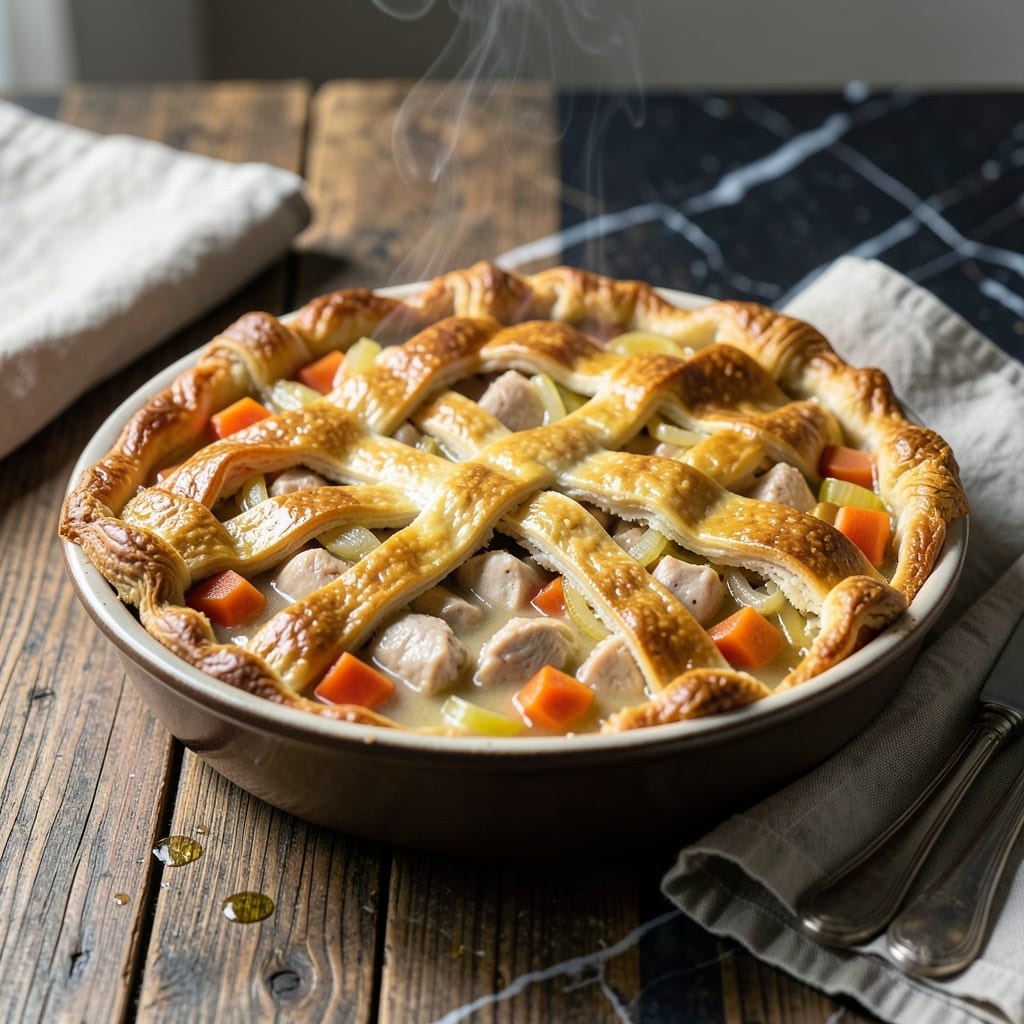
This chicken pot pie delivers a flaky crust without a drop of dairy in the filling. I developed this version after realizing many traditional recipes rely heavily on milk-based sauces.
The secret lies in using a rich chicken broth thickened with a simple roux—just flour and dairy-free butter. This creates a velvety filling that holds its own against any milk-based version.
You’ll get all the comfort of classic pot pie: tender chicken, hearty vegetables, and that signature golden crust. The dairy-free approach actually lets the chicken and veggie flavors shine through more clearly.
Perfect for those avoiding dairy or just looking for a lighter take on this classic dish. Here’s how to make it right.
Ingredients for Chicken Pot Pie Recipe No Milk
Flaky crust meets dairy-free filling with these familiar, cozy ingredients.
| Ingredient | Amount | Notes |
|---|---|---|
| All-Purpose Flour 🌾 | 2 cups | Plus extra for dusting surface |
| Dairy-Free Butter 🧈 | 1 cup | Cold, cubed for crust |
| Chicken Broth 🍲 | 3 cups | Low-sodium preferred for control |
| Boneless Chicken Breast 🍗 | 1 ½ lb | Cubed into bite-sized pieces |
| Yellow Onion 🧅 | 1 whole | Medium, finely diced |
| Carrots 🥕 | 2 whole | Peeled and diced into small cubes |
| Celery Stalks 🌿 | 2 whole | Finely diced for texture |
| Frozen Peas 🌱 | 1 cup | No need to thaw first |
| Garlic Cloves 🧄 | 3 cloves | Minced for maximum flavor |
| Fresh Thyme 🌿 | 2 tsp | Chopped, or 1 tsp dried |
| Salt 🧂 | 1 tsp | Divided use for seasoning |
| Black Pepper 🌶️ | ½ tsp | Freshly ground preferred |
| Olive Oil 🫒 | 2 tbsp | For sautéing vegetables |
| Ice Water 💧 | ½ cup | For pie crust dough |
The crust hinges on that dairy-free butter. Miyoko’s or Earth Balance brands give the best flake—avoid margarine blends with water as the first ingredient (they’ll make your dough tough). For the chicken, bone-in thighs add more flavor than breasts if you’re willing to pick meat off the bone. I grab mine from Whole Foods—their birds are consistently tender. The broth? Better Than Bouillon paste makes a rich, concentrated base.
No dairy-free butter? Coconut oil works in a pinch (keep it solid). Swap chicken for mushrooms or chickpeas to make it vegetarian—just reduce the broth by half a cup. Fresh out of thyme? Poultry seasoning at half the amount covers the gap. The peas can be fresh (blanched first) or swapped for diced green beans. If your broth is salty, skip the added salt until you taste the filling.
The crust dough keeps in the fridge for 2 days or freezes for 1 month. Cooked pie stays fresh for 3-4 days—reheat in the oven to crisp the crust. For make-ahead, assemble but don’t bake: freeze unbaked, then bake straight from frozen (add 10-15 minutes).
Why You’ll Love This Recipe
- One Pan Wonder: I love that this comes together in a single skillet—browning the chicken, sautéing the onions, and baking the crust all in one go.
- Rich & Savory: The chicken broth and dairy-free butter create a deep, comforting flavor that doesn’t skimp just because there’s no milk.
- Meal Prep Hero: I make a big batch on Sunday and reheat portions all week—it tastes just as good the third day.
- Budget Stretcher: Between us, boneless chicken breast and basic pantry staples keep this dish filling without breaking the bank.
Step-by-Step Instructions for Chicken Pot Pie No Milk
Here’s the method that delivers a golden, flaky crust with a creamy filling without a drop of dairy.
Step 1: Create the Dairy-Free Pie Crust
In a food processor, pulse the 2 cups All-Purpose Flour with ½ tsp Salt to combine. Add the 1 cup Dairy-Free Butter (cold and cubed) and pulse until the mixture resembles coarse crumbs with pea-sized butter pieces.
With the processor running, slowly drizzle in the ½ cup Ice Water through the feed tube. Stop when the dough just begins to come together—it should look shaggy, not smooth. Overworking develops gluten, which makes crust tough instead of flaky.
Turn the dough onto a lightly floured surface, divide into two portions (one slightly larger for the bottom), shape into discs, wrap in plastic, and refrigerate for 30 minutes. Chilling relaxes the gluten and firms the butter for easier rolling.
Step 2: Prepare the Filling Base
Heat the 2 tbsp Olive Oil in a large pot over medium heat. Add the 1 whole Yellow Onion (finely diced), 2 whole Carrots (peeled and diced), and 2 whole Celery Stalks (finely diced). Cook for 8-10 minutes until the vegetables soften and the onion becomes translucent.
Stir in the 3 cloves Garlic Cloves (minced) and 2 tsp Fresh Thyme (chopped), cooking for 1 minute until fragrant. These aromatics build the flavor foundation for your filling.
Add the 1.5 lb Boneless Chicken Breast (cubed) and cook for 6-8 minutes until the pieces are no longer pink in the center. The chicken should be just cooked through to prevent dryness in the final dish.
Step 3: Thicken the Filling to Perfection
Sprinkle ¼ cup of the All-Purpose Flour (reserved from the crust ingredients) over the chicken and vegetables, stirring to coat evenly. This creates a roux that will thicken the filling beautifully without dairy.
Pour in the 3 cups Chicken Broth (low-sodium preferred) and bring to a gentle simmer. Cook for 5-7 minutes, stirring frequently, until the mixture thickens enough to coat the back of a spoon. The consistency should be creamy but not gluey.
Stir in the 1 cup Frozen Peas, ½ tsp Black Pepper, and remaining ¾ tsp Salt. Simmer for 2-3 minutes to heat the peas through. Taste and adjust seasoning if needed—the filling should taste well-seasoned before baking.
Step 4: Assemble and Bake to Golden Perfection
On a lightly floured surface, roll out the larger dough disc to fit a 9-inch pie dish. Transfer to the dish, pressing gently into the bottom and up the sides. Trim any excess, leaving a ½-inch overhang.
Pour the warm filling into the crust. Roll out the second dough disc to create the top crust. Place it over the filling, trim excess, and crimp the edges to seal. Cut several 1-inch slits in the top to allow steam to escape.
Bake at 375°F for 45-50 minutes until the crust is deep golden brown and the filling is bubbling. If the edges brown too quickly, tent them with foil. Let rest for 10 minutes before serving to allow the filling to set.
Pro Tips For Making Chicken Pot Pie Recipe No Milk
- Chill the Dough: After making the crust with all-purpose flour and dairy-free butter, let it rest in the fridge for at least 30 minutes—I learned this the hard way when my first few pies turned out tough and shrunk in the pan.
- Shred the Chicken: Once the boneless chicken breast is cooked in the broth, shred it into bite-sized pieces instead of cubing. It distributes better in the filling and soaks up more flavor.
- Thicken the Broth: Before adding the chicken back in, simmer the broth for an extra 5 minutes to reduce slightly—this prevents a watery filling that can make the crust soggy.
- Vent the Top: Cut a few small slits in the top crust before baking. Sounds simple, but it actually changes the outcome by letting steam escape so the pie doesn’t burst or get gummy underneath.
Make-Ahead Tips for Leftovers
Prep the Crust Ahead
The dough can be made up to 2 days in advance. Wrap the discs tightly in plastic and refrigerate. I often prep mine the night before to save time on baking day. This also allows the gluten to relax fully for easier rolling. 💡
Assemble Unbaked Pies
You can fully assemble the pies (filling and all) up to 1 day ahead. Cover tightly with plastic wrap and refrigerate. This is perfect for busy schedules—just bake when ready. The crust stays flaky and the filling doesn’t absorb too much liquid.
Freeze for Later
For longer storage, assemble the pies but don’t bake. Wrap tightly in plastic wrap and aluminum foil, then freeze for up to 2 months. Bake directly from frozen, adding 10-15 minutes to the baking time. ❄️
Bake and Store
Once baked, the pie keeps well at room temperature for 2 hours if wrapped loosely in foil. For longer storage, refrigerate for up to 3-4 days. The crust softens slightly but reheats beautifully.
Reheating Tips
To revive, warm individual slices in the oven at 350°F for 10-12 minutes. This restores the crust’s crispness. Avoid the microwave—it makes the crust soggy. Cover with foil if the top browns too quickly.
Nutrition Facts
Frequently Asked Questions
What can I use instead of milk for the filling?
Chicken broth thickened with a roux works perfectly. Use 3 cups low-sodium broth with ¼ cup flour to create a creamy, dairy-free base. The broth enhances the chicken flavor beautifully.
Can I use store-bought pie crust?
Yes, but check the label for dairy. Most store-bought crusts contain milk or butter. Look for brands like Wholly Wholesome that offer dairy-free options to save time.
Why did my filling turn out thin?
Likely the roux didn’t cook long enough. Simmer the flour and broth mixture for 5-7 minutes until it coats the back of a spoon. Patience ensures a thick, velvety consistency.
How do I prevent a soggy bottom crust?
Blind-bake the bottom crust for 10 minutes before adding filling. Also, let the filling cool slightly before assembling to reduce moisture. This keeps it crisp!

- 6 Oz Chocolate Chip Cookie Recipe: Perfectly Balanced Crispy Edges and Chewy Hearts - September 25, 2026
- 6-Inch Coffee Cake Recipe: Vanilla Bean Swirls and Buttery Streusel Topping - September 25, 2026
- 1 Hour Soup Recipe: Velvety Richness Without the Wait - September 25, 2026