
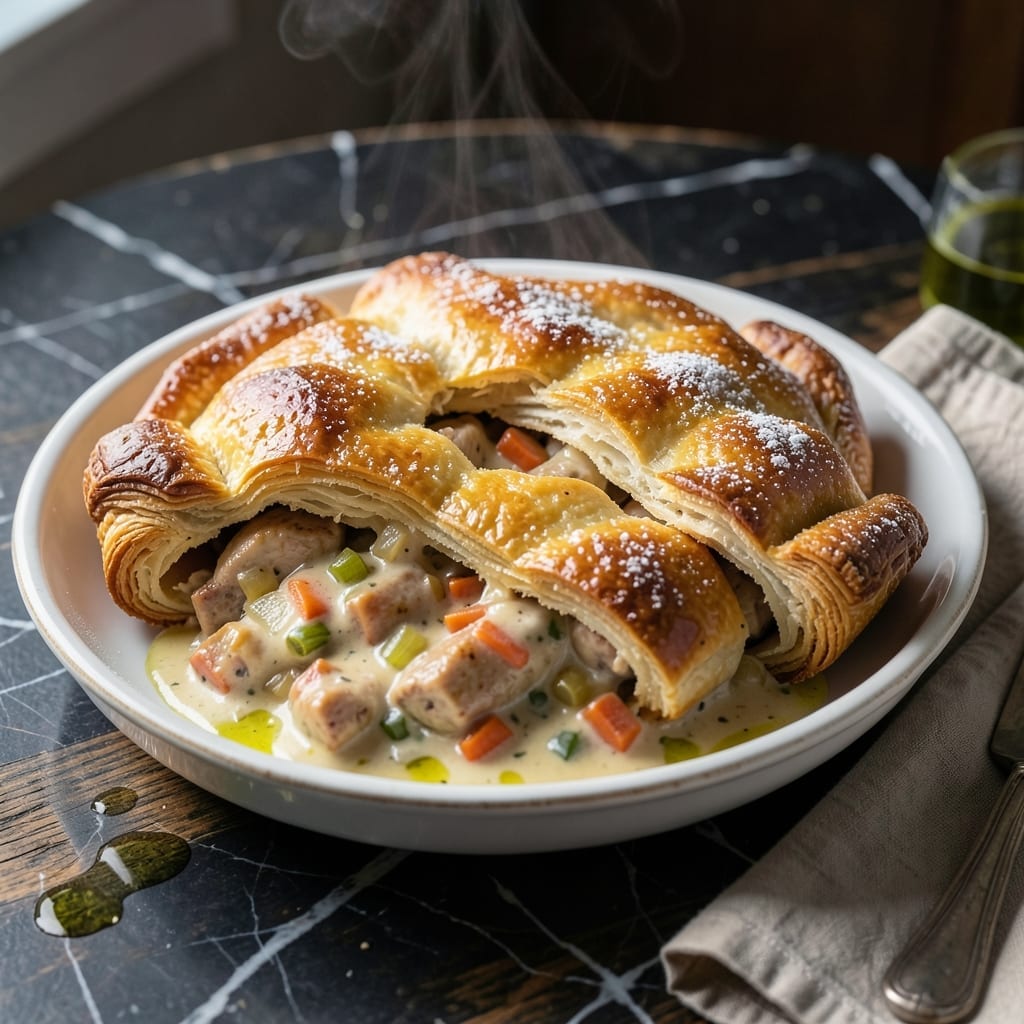
There’s nothing quite like a homemade chicken pot pie with its flaky golden crust enveloping a rich, hearty filling. I’ve perfected this version using chicken thighs for their superior flavor and tenderness, creating a dish that’s as comforting as it is impressive.
The secret lies in the balance of a buttery crust and a velvety gravy that clings to each piece of chicken and vegetable. This isn’t your average pot pie—it’s a restaurant-quality creation made in your own kitchen with simple ingredients and careful technique.
You’ll achieve layers of flaky pastry that shatter at the touch, revealing a creamy filling packed with tender chicken, carrots, peas, and potatoes. The aroma alone will have everyone gathering around the table in anticipation.
Perfect for family dinners or special occasions, this recipe delivers consistent results every time. The process is straightforward, with clear steps for building the perfect crust and filling.
Ingredients for Chicken Pot Pie Recipe with Chicken Thighs
Pantry staples and a few fresh picks. Nothing exotic, just good comfort food ingredients.
| Ingredient | Amount | Notes |
|---|---|---|
| Chicken Thighs 🍗 | 1 ½ lb | Boneless, skinless, cut into 1-inch pieces |
| All-Purpose Flour 🌾 | 2 ½ cups | Divided for filling and crust |
| Unsalted Butter 🧈 | 1 cup | Cold, cubed for crust and filling |
| Yellow Onion 🧅 | 1 whole | Medium-sized, finely diced |
| Carrots 🥕 | 2 whole | Medium-sized, peeled and diced |
| Celery Stalks 🌿 | 2 whole | Diced for the filling |
| Russet Potatoes 🥔 | 2 whole | Medium-sized, peeled and diced |
| Frozen Peas 🌱 | 1 cup | No need to thaw |
| Chicken Broth 🥣 | 1 ½ cups | Low-sodium preferred |
| Heavy Cream 🥛 | ½ cup | Full-fat for richness |
| Garlic Cloves 🧄 | 3 cloves | Minced for the filling |
| Fresh Thyme 🍃 | 1 tbsp | Chopped, or 1 tsp dried |
| Salt 🧂 | 1 tsp | Kosher or sea salt |
| Black Pepper 🌶️ | ½ tsp | Freshly ground preferred |
| Egg 🥚 | 1 whole | For egg wash on crust |
The chicken thighs are key here—they stay juicy even after cooking in the filling. Look for skinless, boneless at the store to save time. I grab mine at Costco for bulk savings, but any grocery store works. The butter needs to be cold for that flaky crust, so don’t skip chilling it. For the veggies, fresh is ideal, but frozen carrots and peas (the good kind, not mushy) work in a pinch.
No chicken thighs? Chicken breasts work too, but they’re less forgiving—don’t overcook. Swap the heavy cream for half-and-half or whole milk if that’s what you’ve got. Fresh thyme is great, but dried at one-third the amount is fine. No fresh garlic? Garlic powder at half a teaspoon gets the job done. The crust can be store-bought puff pastry if you’re short on time.
The filling tastes even better the next day—3-4 days in the fridge max. Freeze the whole pie (unbaked) for up to 2 months. Thaw overnight before baking. Leftovers reheat like a dream, but that crust is best fresh out of the oven.
Why You’ll Love This Recipe
- One Pot Magic: I love that this comes together in a single skillet—brown the chicken thighs, sauté the onions and carrots, then top with the flour-butter crust.
- Rich and Hearty: The chicken thighs stay juicy and pair perfectly with the sweet carrots and buttery crust.
- Feeds the Crew: This pot pie is my go-to for family dinners, potlucks, or even meal prep—it reheats beautifully.
- Budget Friendly: Honestly, chicken thighs are cheaper than breasts, and this recipe stretches them into a filling meal with pantry staples.
Step-by-Step Instructions for Chicken Pot Pie With Chicken Thighs
This method delivers a golden crust and creamy filling that’s worth every minute of effort.
Step 1: Prepare and Cook the Chicken and Vegetables
Start by seasoning the 1.5 lb Chicken Thighs with 1 tsp Salt and 0.5 tsp Black Pepper. Cut them into 1-inch pieces and set aside. In a large pot, melt 2 tablespoons of the 1 cup Unsalted Butter over medium heat.
Add the diced Yellow Onion, 2 Carrots, and 2 Celery Stalks. Cook for 5 minutes until the onion softens. Stir in the minced 3 cloves Garlic Cloves and 1 tbsp Fresh Thyme, cooking for 30 seconds until fragrant. This builds a flavor base that makes the filling rich and aromatic.
Push the vegetables to one side and add the chicken. Cook for 6-8 minutes until the chicken is no longer pink. This ensures the meat is fully cooked before the filling comes together.
Step 2: Create the Creamy Filling
Sprinkle ½ cup of the 2.5 cups All-Purpose Flour over the chicken and vegetables. Stir well to coat everything evenly. This step thickens the filling and prevents lumps.
Slowly pour in the 1.5 cups Chicken Broth and 0.5 cup Heavy Cream, stirring constantly. Add the diced 2 Russet Potatoes and 1 cup Frozen Peas. Bring the mixture to a simmer, then reduce the heat to low.
Let it cook for 10-12 minutes until the potatoes are tender and the filling thickens to a gravy-like consistency. You’ll know it’s ready when the sauce coats the back of a spoon and the potatoes are fork-tender.
Step 3: Prepare and Assemble the Crust
For the crust, combine the remaining 2 cups All-Purpose Flour with the remaining butter (cold and cubed) in a food processor. Pulse until the mixture resembles coarse crumbs. This ensures a flaky texture.
Add 3-4 tablespoons of ice water, one at a time, pulsing just until the dough comes together. Divide the dough into two equal portions, roll each into a disc, and chill for 30 minutes.
Roll out one disc of dough to fit a 9-inch pie dish. Transfer the filling into the crust, then roll out the second disc to cover the top. Crimp the edges to seal, and cut a few slits in the top crust to allow steam to escape. Brush the top with a beaten 1 whole Egg for a golden finish.
Step 4: Bake to Perfection
Preheat your oven to 375°F. Place the pie on a baking sheet to catch any drips. Bake for 30-35 minutes until the crust is golden brown and the filling is bubbling.
If the edges begin to brown too quickly, cover them with foil. Let the pie rest for 10 minutes before slicing. This allows the filling to set slightly, making it easier to serve neat portions.
Pro Tips For Making Chicken Pot Pie Recipe With Chicken Thighs
- Brown the Thighs: Sear the chicken thighs in batches in hot butter until deeply browned—about 4-5 minutes per side. This builds flavor and keeps the filling from turning gray.
- Slice Carrots Thin: Cut the carrots into ¼-inch rounds so they soften in the same time as the onions. I learned this the hard way after pulling out a pot pie with crunchy carrots.
- Thicken Before Baking: Simmer the filling until it coats the back of a spoon before adding it to the crust. Sounds obvious, but I used to skip this and ended up with a soupy mess.
- Use Cold Butter: Keep your unsalted butter ice cold when cutting it into the flour for the crust. It makes a real difference in getting those flaky layers.
Make-Ahead Tips for This Dish
Prep Ahead Strategy
I always start by cooking the chicken and making the filling 1 day ahead. Let it cool completely, then store in an airtight container in the fridge. This saves 45 minutes on baking day and actually improves the flavors as they meld overnight. 💡
Crust Prep Tips
You can prepare the crust dough up to 2 days in advance and keep it wrapped in plastic in the fridge. Alternatively, make and roll out the crust, then freeze it in the pie dish for up to 1 month. Just thaw overnight before using.
Assembly Shortcut
Assemble the entire pie (filling + crust) but don’t bake it. Cover tightly with plastic wrap and refrigerate for up to 24 hours. When ready, bake as directed, adding 5-10 minutes to the cooking time since it starts cold.
Freezing Unbaked Pie
For longer storage, assemble the pie and freeze it unbaked. Wrap tightly in heavy-duty foil and freeze for up to 2 months. Bake from frozen, adding 15-20 minutes to the baking time, and cover edges with foil to prevent over-browning. ❄️
Reheating Leftovers
Leftover slices reheat beautifully in a 350°F oven for 10-15 minutes until warmed through. For a crispier crust, place slices on a baking sheet. Avoid the microwave—it makes the crust soggy.
Make-Ahead Timeline
Here’s my ideal schedule: Day 1 – cook filling. Day 2 – make crust. Day 3 – assemble and bake. This breaks the work into manageable chunks while maintaining peak freshness.
Nutrition Facts
Frequently Asked Questions
Why use chicken thighs instead of breasts?
Thighs stay juicier and have more flavor than breasts. Their higher fat content keeps the meat tender during cooking, even in the long baking process.
Can I make the crust ahead of time?
Yes! Prepare the dough, wrap tightly, and refrigerate for up to 2 days or freeze for 1 month. Thaw overnight before rolling out.
How do I prevent a soggy bottom crust?
Pre-bake the bottom crust for 10 minutes before adding filling. Also, ensure your filling is thick enough to avoid excess moisture.
What if my filling is too thin?
Simmer it longer before baking. If already assembled, bake at 375°F uncovered for 10-15 minutes to evaporate excess liquid.

- 5 Star Chili Con Carne Recipe: Deep-Roasted Beef and Spice Intensity - September 25, 2026
- 3 Chocolate Fudge Recipe: Rich, Fudgy Squares With Perfect Snap - September 25, 2026
- 5 Star Tomato Sauce Recipe: Umami-Packed Depth Without the Canned Taste - September 25, 2026