
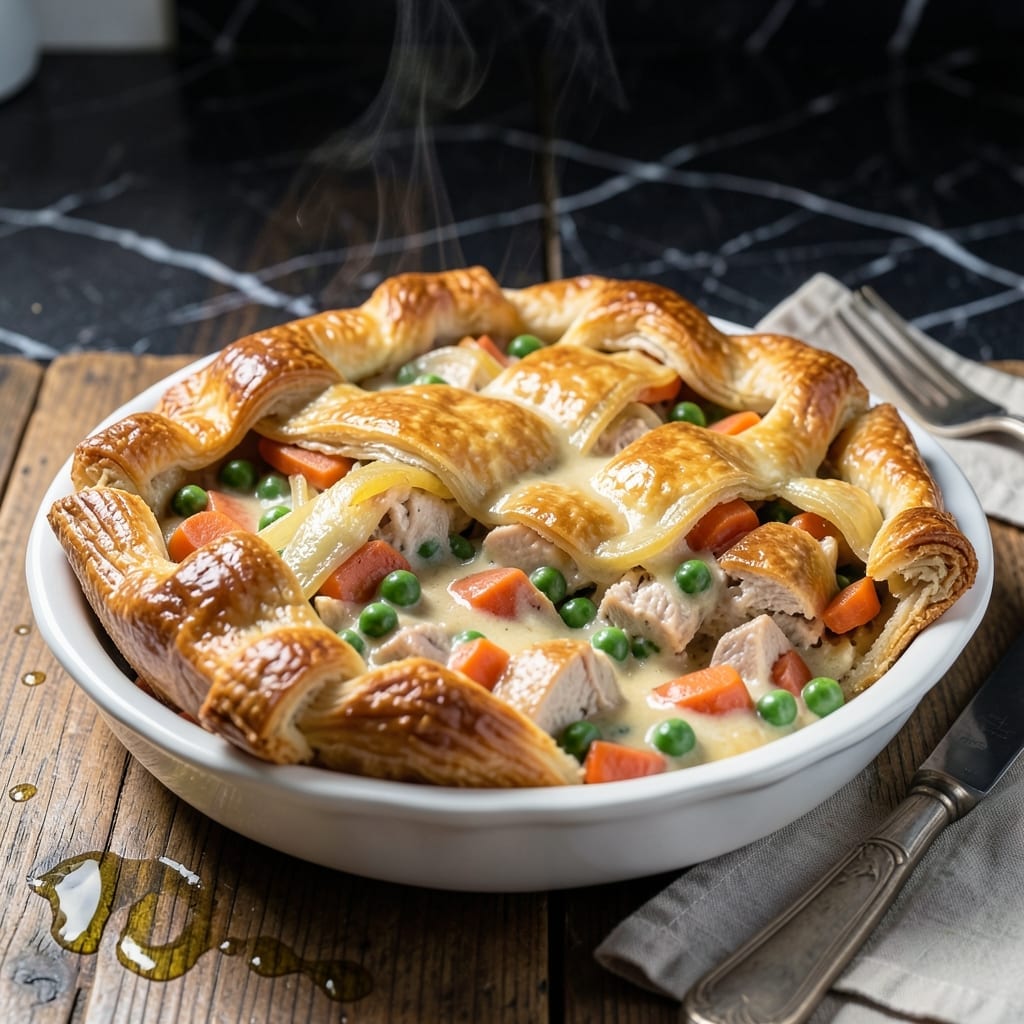
There’s nothing quite like a homemade chicken pot pie to bring warmth to your table. This recipe delivers that classic comfort with tender chicken, vibrant peas and carrots, all wrapped in a flaky crust.
I developed this version to capture the essence of traditional pot pie without unnecessary complexity. The filling is rich and creamy, while the crust bakes to golden perfection. It’s the kind of dish that feels like a hug in food form.
The process is straightforward: make the filling, prepare the crust, and bake until bubbling. Each step builds layers of flavor that make this dish truly satisfying. The result is a meal that’s as rewarding to make as it is to eat.
Perfect for family dinners or cozy weekends, this recipe proves that homemade can be both delicious and achievable.
Ingredients for Chicken Pot Pie Recipe Youtube
Nothing fancy here—just good stuff for a cozy, homemade classic.
| Ingredient | Amount | Notes |
|---|---|---|
| Chicken Breast 🍗 | 1 ½ lb | Boneless, skinless, diced |
| All-Purpose Flour 🌾 | ½ cup | For thickening filling |
| Unsalted Butter 🧈 | ½ cup | For roux and crust |
| Yellow Onion 🧅 | 1 whole | Medium, finely diced |
| Carrots 🥕 | 2 whole | Peeled, diced into small cubes |
| Frozen Peas 🌱 | 1 cup | No need to thaw |
| Garlic Cloves 🧄 | 3 cloves | Minced for filling |
| Chicken Broth 💧 | 2 cups | Low-sodium preferred |
| Heavy Cream 🥛 | ½ cup | For creamy filling |
| Dried Thyme 🌿 | 1 tsp | Or 1 tbsp fresh |
| Salt 🧂 | 1 tsp | Kosher or sea salt |
| Black Pepper 🌶️ | ½ tsp | Freshly ground preferred |
| Pie Crust 🥧 | 2 sheets | Store-bought or homemade |
| Large Egg 🥚 | 1 whole | For egg wash on crust |
The chicken is key here. Boneless, skinless breasts stay tender, but thighs work too (more flavor, slightly darker meat). I grab mine from Whole Foods or Costco—both have reliable quality. For the crust, Pillsbury pie dough saves time and still bakes up flaky. If you’re making your own, just keep everything ice-cold. The butter for the roux should be unsalted so you can control the seasoning.
No heavy cream? Whole milk plus 2 tbsp flour gets you close. Out of thyme? Poultry seasoning at half the amount works in a pinch. Frozen peas and carrots mix is fine (don’t thaw first), though fresh carrots have better texture. Want extra richness? Stir in 2 oz cream cheese at the end. The broth can be swapped for vegetable if you’re avoiding meat, but chicken broth gives that classic pot pie depth.
The filling thickens as it cools, so don’t stress if it looks soupy when you pour it in. Leftovers? 3-4 days in the fridge, 2 months frozen. Reheat covered to keep the crust crisp. I always make two—one for dinner, one for the freezer. Nothing beats pulling out a pot pie on a lazy night.
Why You’ll Love This Recipe
- One Bowl Wonder: I can mix the buttery crust and filling in the same bowl—no extra dishes, just easy cleanup.
- That Golden Crust: The butter and flour create this flaky, rich top that cracks just right over the creamy chicken and carrot filling.
- Feeds the Freezer: I double the batch, bake one now, and freeze the other for those no-time-to-cook nights.
- Budget Stretcher: Chicken breast and basic pantry staples mean I’m serving a hearty meal without breaking the bank.
Step-by-Step Instructions for Chicken Pot Pie With Peas and Carrots
This method delivers that classic comfort food with a golden crust and rich, creamy filling.
Step 1: Cook the Chicken and Vegetables
Heat a large skillet over medium-high heat. Add the 1.5 lb chicken breast (diced into bite-sized pieces) and cook for 5-7 minutes until no longer pink inside. Remove the chicken and set aside.
In the same skillet, add the 1 whole yellow onion (finely diced), 2 whole carrots (peeled and diced), and 1 cup frozen peas. Cook for 5 minutes until the vegetables start to soften. Add the 3 cloves garlic cloves (minced) and cook for 1 minute until fragrant.
Step 2: Make the Creamy Filling
Reduce heat to medium and stir in the 0.5 cup unsalted butter until melted. Sprinkle the 0.5 cup all-purpose flour over the mixture and stir constantly for 2 minutes to cook the flour and remove any raw taste.
Gradually pour in the 2 cups chicken broth and 0.5 cup heavy cream, whisking continuously to avoid lumps. Stir in the 1 tsp dried thyme, 1 tsp salt, and 0.5 tsp black pepper. Cook for 5-7 minutes until the mixture thickens and bubbles.
Return the cooked chicken to the skillet and stir to combine. Remove from heat and let the filling cool slightly while you prepare the crust.
Step 3: Assemble the Pot Pie
Preheat your oven to 375°F. Unroll the 2 sheets pie crust and place one sheet in a 9-inch pie dish, pressing it gently into the bottom and up the sides. Trim any excess dough hanging over the edge.
Pour the chicken and vegetable filling into the crust-lined dish. Top with the second sheet of pie crust, sealing the edges by crimping with a fork. Cut a few small slits in the top crust to allow steam to escape.
Step 4: Bake to Golden Perfection
In a small bowl, beat the 1 whole large egg and brush it lightly over the top crust. This egg wash will give your pot pie that beautiful golden-brown finish.
Bake for 30-35 minutes until the crust is deep golden brown and the filling is bubbling. If the edges start to brown too quickly, cover them with aluminum foil or a pie shield.
Let the pot pie rest for 10 minutes before serving. This allows the filling to set slightly, making it easier to slice and serve.
Pro Tips For Making Chicken Pot Pie Recipe Youtube
- Chill the Dough: After mixing your flour and butter for the crust, refrigerate it for at least 30 minutes—I learned this the hard way after my first few pot pies turned out tough and flat.
- Pre-Cook the Chicken: Poach or sear the chicken breast before adding it to the filling to guarantee it stays tender, not rubbery; about 165°F internal temp does the trick.
- Sweat the Onions: Cook your yellow onions low and slow in that unsalted butter for 8-10 minutes until translucent—rushing this step leaves them crunchy and raw-tasting in the final pie.
- Use Cold Butter: Cut your unsalted butter into small cubes and keep it ice-cold when making the crust; this creates flaky layers instead of a dense, bread-like texture—Sounds weird, but it works.
Pro Cooking Tips for Perfect Results
Perfect Roux Technique
Cook your 0.5 cup flour and 0.5 cup butter for exactly 2 minutes over medium heat to eliminate any raw flour taste. I whisk constantly with a flat-bottom wooden spoon for even cooking. The mixture should turn a light golden color, not brown.
Filling Consistency
Your filling needs to be thick enough to hold its shape when sliced. If it’s too thin after 5-7 minutes of simmering, mix 1 tbsp cornstarch with 1 tbsp cold water and stir in. Cook for an additional 2 minutes to activate the starch. 💡
Crust Sealing
Press the top and bottom crusts together firmly with your fingertips before crimping with a fork. I also brush a thin layer of water between the crusts for better adhesion. This prevents the filling from leaking out during baking.
Venting Strategy
Cut 4-5 small slits in the top crust in a star pattern. This allows steam to escape evenly while baking. I use a sharp paring knife for clean cuts. Without proper venting, your crust might become soggy.
Egg Wash Secret
For extra shine, add 1 tbsp water or 1 tbsp milk to your beaten egg before brushing. This thins the mixture for more even coverage. I use a pastry brush for precise application along the crust edges. 🔥
Preventing Soggy Bottom
To avoid a soggy bottom crust, brush the first crust layer with a thin coat of beaten egg before adding the filling. This creates a moisture barrier. Baking on the lower oven rack for the first 15 minutes also helps crisp the bottom.
Nutrition Facts
Frequently Asked Questions
Can I use rotisserie chicken instead?
Yes! Shred 2 cups of cooked rotisserie chicken to replace the raw breast. Skip the initial cooking step and add it directly to the finished filling. This saves 10-15 minutes of prep time.
Why did my crust turn out soggy?
This usually happens when the filling is too wet. Simmer your filling for the full 5-7 minutes until thick. Also, bake on the lower oven rack for the first 15 minutes to crisp the bottom.
Can I make this ahead of time?
Assemble the pie, cover tightly with foil, and refrigerate for up to 24 hours. Add 5-10 minutes to the baking time when cooking from cold.

- 3 Onion Dip Mix Recipe: Bold, Savory Blend for Game Day Crowds - September 25, 2026
- 7 Eleven Buffalo Chicken Rollers Recipe: Spicy Kick and Creamy Twist in 20 Minutes - September 25, 2026
- 4 Banana Bread Recipe Healthy: Moist Whole-Grain Loaf Without Refined Sugar - September 25, 2026