
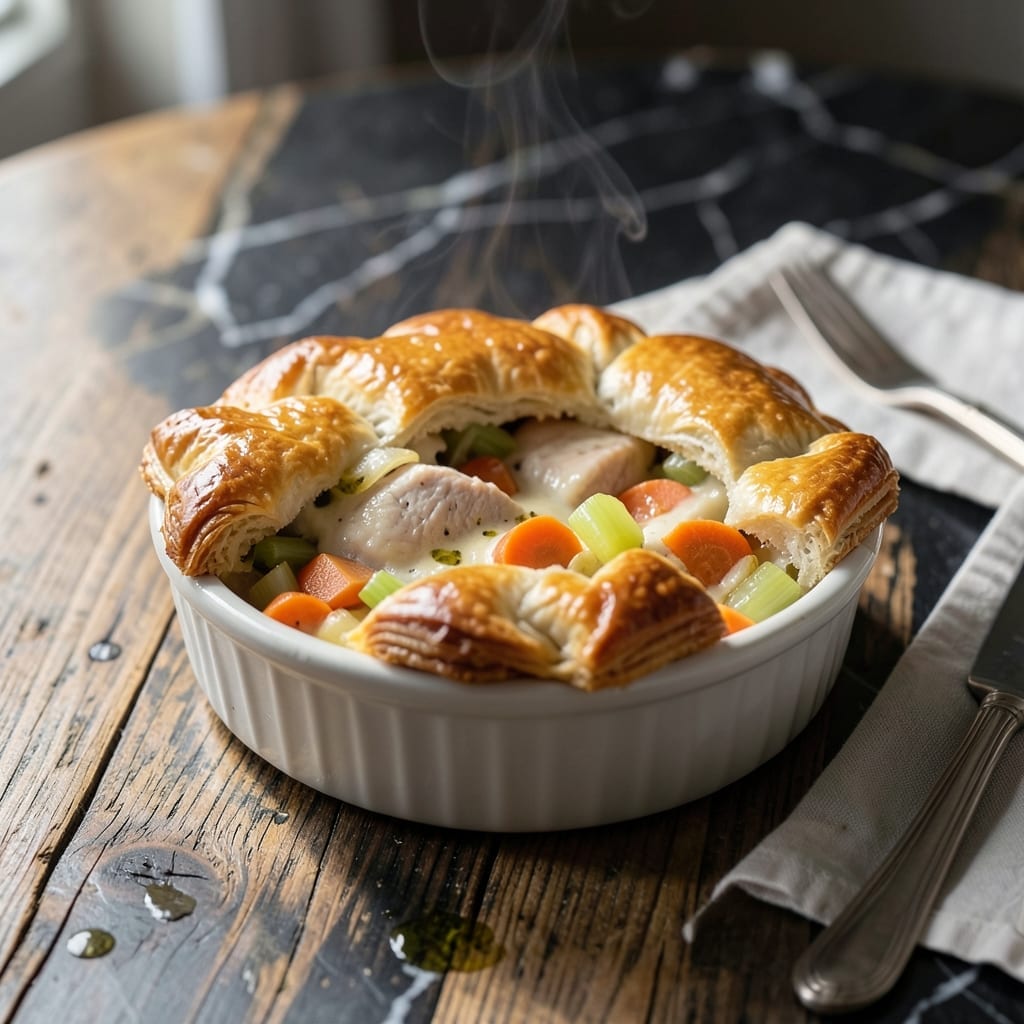
There’s nothing quite like the warmth of personal-sized chicken pot pie straight from the oven. This recipe delivers all the comfort of the classic, scaled down for individual servings with a flaky, golden crust.
Each portion features a rich, creamy filling packed with tender chicken, vegetables, and herbs, all encased in a buttery pastry. The individual size ensures every bite has the perfect ratio of crust to filling.
Baking them in ramekins creates a crisp top while keeping the edges soft and delicate. The result is a meal that feels both nostalgic and special, ideal for cozy dinners or impressing guests.
The process is straightforward, with steps for preparing the filling, assembling the pies, and achieving that signature flaky texture. Ready to make comfort food personal?
Ingredients for Chicken Pot Pie Recipe Individual Servings
Quality ingredients build that nostalgic, flaky-crusted comfort in every personal portion.
| Ingredient | Amount | Notes |
|---|---|---|
| Boneless, Skinless Chicken Breast 🍗 | 1 ½ lb | Diced into 1/2-inch pieces |
| Unsalted Butter 🧈 | 6 tbsp | Divided for filling and crust |
| All-Purpose Flour 🌾 | ½ cup | For roux, plus extra for dusting |
| Yellow Onion 🧅 | 1 whole | Finely diced for filling |
| Carrots 🥕 | 2 whole | Peeled and diced small |
| Celery Stalks 🥬 | 2 whole | Finely diced for flavor |
| Garlic Cloves 🧄 | 3 cloves | Minced for depth of flavor |
| Chicken Broth 🥣 | 1 ½ cups | Low-sodium preferred for control |
| Whole Milk 🥛 | ½ cup | Full-fat for creaminess |
| Frozen Peas 🌱 | ¾ cup | No need to thaw first |
| Fresh Thyme Leaves 🌿 | 1 tbsp | Chopped, or 1 tsp dried |
| Fresh Flat-Leaf Parsley 🍃 | 2 tbsp | Chopped, for garnish and filling |
| Diamond Crystal Kosher Salt 🧂 | 1 tsp | Plus more to taste |
| Freshly Ground Black Pepper 🌶️ | ½ tsp | Plus more as needed |
| Store-Bought Pie Crust 🥧 | 2 sheets | Thawed if frozen, all-butter preferred |
The chicken is non-negotiable for texture—boneless, skinless breasts stay tender without drying out. For the crust, all-butter pie dough delivers that signature flake (Pillsbury works, but homemade is superior). Whole Foods or Trader Joe’s carry reliable pre-made options. The carrots and celery should be fresh, firm, and vibrant in color. If buying pre-diced (mirepoix mix), check the date—old veggies lose their snap.
No thyme? Rosemary at half the amount works, but it’s stronger. Swap milk for half-and-half for extra richness, or use unsweetened almond milk in a pinch. Chicken broth can be vegetable broth if needed (add a pinch of poultry seasoning). The peas are flexible—frozen corn or diced green beans substitute easily. Always taste the filling before baking; the seasoning should be bold enough to stand up to the crust.
Assemble the pies just before baking for the flakiest crust. Leftovers keep 3-4 days refrigerated—reheat in the oven (not microwave) to preserve texture. The filling thickens as it cools, so if it seems thin going in, it’s fine. Freeze unbaked pies for up to 2 months; add 10 minutes to baking time.
Why You’ll Love This Recipe
- One Pan Magic: I toss the chicken, carrots, and onions in one dish, top with flour-butter crust, and bake—minimal mess, maximum flavor.
- Buttery Crust Love: That golden, flaky butter crust over the creamy chicken and veggie filling? I make extra just to sneak bites.
- Portion Perfection: Individual servings mean I can bake a few for tonight and freeze the rest for lazy days. No waste, no fuss.
- Budget Stretcher: Boneless chicken breasts and basic pantry staples keep this cozy dish cheap, but it tastes like a million bucks. Honestly, my wallet thanks me.
Step-by-Step Instructions for Chicken Pot Pie Individual Servings
This method ensures a flaky crust and rich filling in every personal portion.
Step 1: Prepare the Filling Base
In a large skillet, melt 4 tbsp unsalted butter over medium heat. Add the diced yellow onion, carrots, and celery stalks, cooking for 5-6 minutes until the vegetables soften and the onion becomes translucent.
Stir in the minced garlic cloves and chopped fresh thyme leaves, cooking for an additional 30 seconds until fragrant. This builds the aromatic foundation for your filling.
Add the diced boneless, skinless chicken breast and cook until just opaque, about 5 minutes. Season with 1 tsp diamond crystal kosher salt and 0.5 tsp freshly ground black pepper.
Step 2: Create the Creamy Roux
Sprinkle the 0.5 cup all-purpose flour evenly over the chicken and vegetables. Stir well to coat everything in the flour, cooking for 1-2 minutes to remove the raw flour taste.
Gradually pour in the 1.5 cups chicken broth and 0.5 cup whole milk, whisking constantly to prevent lumps. Bring the mixture to a simmer and cook for 3-4 minutes until it thickens to a velvety consistency.
Stir in the 0.75 cup frozen peas and 1 tbsp fresh flat-leaf parsley. Remove from heat and let the filling cool slightly—this prevents a soggy bottom crust.
Step 3: Assemble the Individual Pies
Preheat your oven to 375°F. Roll out the 2 sheets store-bought pie crust on a lightly floured surface. Using a 4-inch round cutter, cut out 8 circles (4 for bottoms, 4 for tops).
Press 4 crust circles into the wells of a standard muffin tin, leaving a slight overhang. Divide the filling evenly among the crust-lined wells, mounding slightly in the center.
Top each with a remaining crust circle, pressing the edges to seal. Trim excess dough and crimp the edges with a fork. Cut a small slit in the top of each pie to allow steam to escape.
Step 4: Bake to Golden Perfection
Brush the tops with the remaining 2 tbsp unsalted butter, melted. Bake in the preheated oven for 30-35 minutes until the crusts are golden brown and the filling is bubbling.
You’ll know they’re done when the crust is deeply golden and flaky, and the filling is thick and bubbling through the steam vents. The aroma will be irresistible—rich, buttery, and comforting.
Let the pies cool in the pan for 5 minutes before carefully removing them to a wire rack. This brief rest allows the filling to set slightly, making them easier to handle.
Pro Tips For Making Chicken Pot Pie Recipe Individual Servings
- Pre-Cook the Chicken: Poach or sauté the chicken breast first, then shred or cube it—I learned this the hard way after biting into undercooked pieces hidden in the filling.
- Chill the Dough: Give your individual pie crusts 15 minutes in the fridge before baking, or they’ll slump in the ramekins.
- Sauté the Onions: Cook the yellow onion until golden and sweet before adding flour, about 5-7 minutes; raw onion makes the filling taste harsh.
- Use Frozen Carrots: Skip the peeling and chopping—frozen diced carrots work just as well and save a ton of time, especially for small portions.
Make-Ahead Tips for This chicken pot pie recipe individual servings
Prep Ahead Filling
The filling can be made 1-2 days in advance and stored in an airtight container in the fridge. This actually improves the flavors as they meld together. Just give it a good stir before using, as it will thicken slightly when chilled. 💡
Assemble and Freeze
You can assemble the entire pies up to 2 months ahead and freeze them unbaked. Wrap each one tightly in plastic wrap then place in a freezer bag. When ready to bake, add 10 minutes to the cooking time, baking straight from frozen.
Crust Preparation
If using homemade dough, prepare and refrigerate it up to 2 days ahead. For store-bought, keep it in the fridge until you’re ready to assemble. Cold dough is easier to work with and results in a flakier crust.
Day-Of Shortcuts
Chop all your vegetables the night before and store them in the fridge. This saves valuable time on baking day. I like to keep my onion, carrots, and celery in separate containers to maintain freshness.
Reheating Leftovers
Baked pies keep well in the fridge for 3-4 days. Reheat in a 350°F oven for 10-12 minutes to restore the crust’s crispness. Avoid the microwave, as it will make the crust soggy. ❄️
Make-Ahead Tip
For the best texture, assemble the pies just before baking. If you must prep them ahead, keep the filling and crust separate until baking day. This prevents the crust from becoming soggy from the moist filling.
Nutrition Facts
Frequently Asked Questions
Can I make these without a muffin tin?
Yes! Use 6-ounce ramekins or oven-safe bowls instead. The baking time may increase by 5-10 minutes due to the deeper filling. Just watch for a golden crust and bubbling center.
How do I prevent a soggy bottom crust?
Blind-bake the bottom crust for 8-10 minutes before adding filling. Also, ensure the filling is slightly cooled before assembling to avoid steaming the pastry.
What’s the best way to seal the edges?
Use a fork to crimp the top and bottom crusts together tightly. For extra security, brush the edges with a bit of water before pressing. This creates a strong seal to prevent filling leaks.
Can I use puff pastry instead of pie crust?
Puff pastry makes an even flakier top. Roll it slightly thinner than pie crust and bake as directed. The result will be lighter and more delicate.

- 6 Oz Chocolate Chip Cookie Recipe: Perfectly Balanced Crispy Edges and Chewy Hearts - September 25, 2026
- 6-Inch Coffee Cake Recipe: Vanilla Bean Swirls and Buttery Streusel Topping - September 25, 2026
- 1 Hour Soup Recipe: Velvety Richness Without the Wait - September 25, 2026